How to Extrude in SketchUp

SketchUp is one of the CAD (computer-aided design) industry giants, used by professionals and hobbyists. You can use SketchUp’s software to create 3D models easily and efficiently but with no loss in detail. Whether you are designing landscapes, buildings, or even furniture, SketchUp has the right combination of tools to help you throughout the lifecycle of your design process. 


We have provided you with a comprehensive guide on ‘how to extrude in SketchUp’, guiding you through the basics, moving on to more advanced techniques such as using plugins, creating complex shapes, and extruding along a path.

What is extrusion?

Extrusion is the process of creating a 3D shape by pulling or stretching a previously drawn 2D shape along a straight line. Extrusion is a key tool that designers need to create anything from furniture models, roofs on houses, or even highly detailed ornaments. 

Whether you are a beginner or an experienced professional, we have a whole host of tips and tricks to build up your extrusion knowledge giving you mastery over your future designs.

Getting Started: Basic Extrusions

Before throwing you off the deep end, let’s go over some of the basic techniques of extrusion. Here’s how to create a simple extrusion in SketchUp: 

  1. Start with a simple 2D shape, you should create this shape in SketchUp. You can choose a circle, a rectangle, a triangle, or any other shape that takes your fancy. 
  2. Navigate to the toolbar on the left-hand side of the screen and select the Push/Pull tool. 
  3. Go back to your previously drawn shape and click on its face and then drag the cursor either up or down. Your shape will then start to extrude along with your cursor in the direction you are pulling in. 
  4. Once you are satisfied with your shape’s height, release your cursor. You now have a 3D model of your shape! 

Congratulations! You can now extrude 2D shapes to create a 3D version. 

Now you have mastered this skill, let’s move on to some more advanced techniques.

Advanced Extrusion Techniques

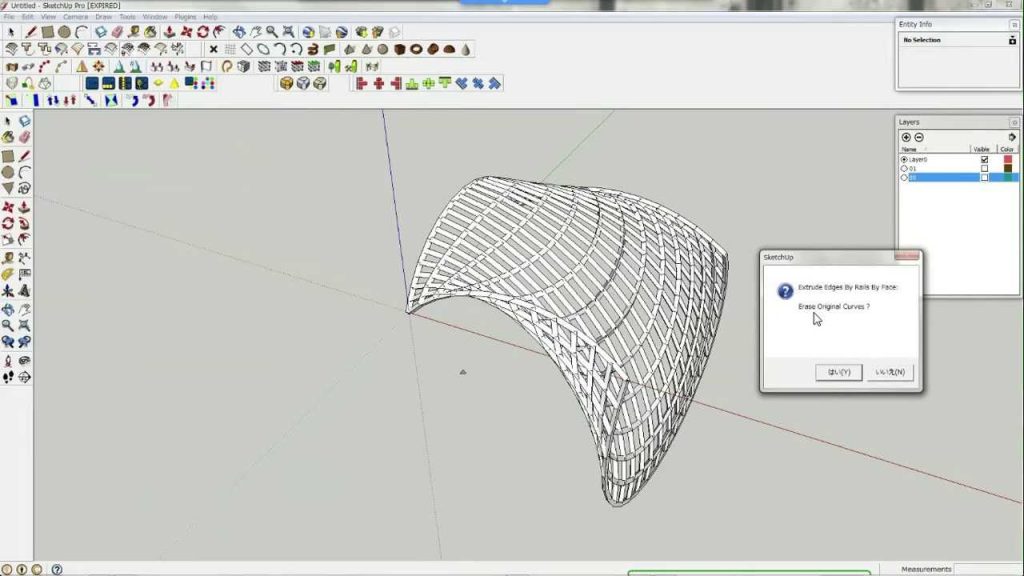
Extruding Along a Path

You now know how to extrude a basic shape from a flat line. But, what happens if you want to extrude your shape using a curved or angled path? Well, SketchUp makes this easy. Follow the instructions below to learn this technique:


  1. Firstly, think about the shape of the path that you want to follow, whether it is a curve, multiple connecting lines, or an angular line. 
  2. Next, create the 2D shape that you want to extrude. Make sure it is roughly the same size as the path you created in the previous step. 
  3. Select both your shape and your path. 
  4. Right-click, and in the options box select ‘Follow Me’. 
  5. Sit back and watch as your shape extrudes along the path you created. 

Creating Complex Shapes

Extruding can be a creative and fun process, allowing you to create complex shapes to fit your desired outcome. To extrude more complex shapes follow the instructions below: 

  1. Draw a simple shape, such as a rectangle, or even a triangle. 
  2. Much like the basic extrusion, select the Push/Pull tool from the left-hand toolbar.
  3. Use the Push/Pull tool to extrude the shape in different directions, creating organic curves and complex lines. 
  4. You can move the tool to adjust different positions of the shape. Keep going until you have the shape that you want. 

Using Plugins

SketchUp benefits from its dynamic community of developers who create plugins that can help you to extrude shapes, as well as enhance other 3D modelling techniques. There are a number of them that you can check out: 

  • ExtrudeTools: This one is particularly useful for extruding along a curve as well as extruding to a point. Plus, it adds a variety of new tools to your SketchUp toolbar.
  • JointPushPull: With this plugin you can simultaneously extrude multiple faces, allowing you to create complex shapes with ease. 
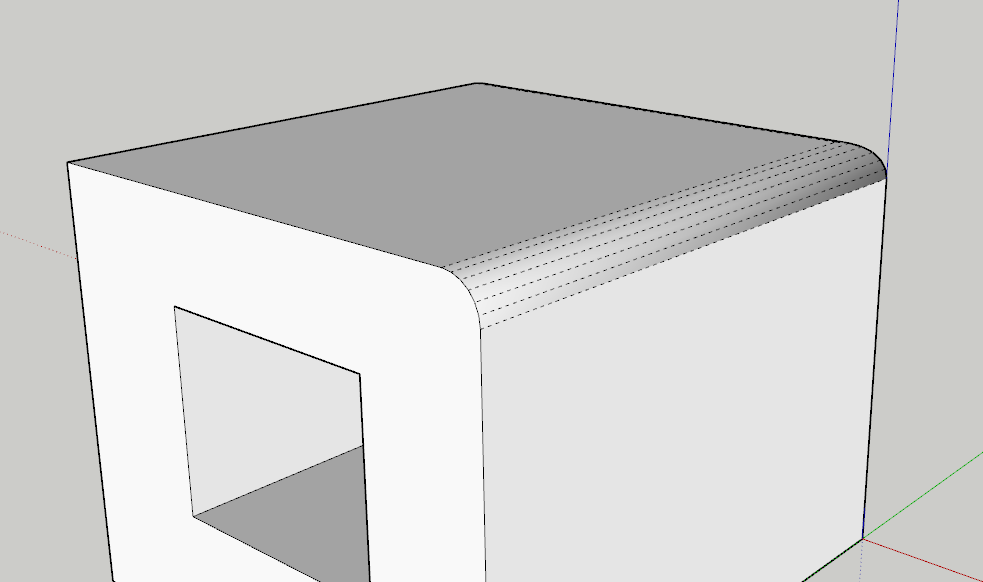
  • RoundCorner: If you are struggling with sharp corners on your design, this plugin creates rounded corners and edges on your extruded shapes.

FAQs

Is SketchUp easy to learn?

Yes, SketchUp is known for its easy-to-use design software. Its user-friendly interface and intuitive tools make it easy for beginners to pick up. Plus, you can always check out the online tutorials and resources to help you master any skill.

Can I import my own 2D shapes to extrude in SketchUp?

SketchUp makes it simple to import a variety of file types, including 2D shapes. Head over to File > Import and select the file you want to import.

Can I animate my extrusions in SketchUp?

Animating your extrusions with SketchUp is simple. All you need to do is create a series of scenes with different camera angles and movements. SketchUp will then generate a smooth animation for you.

Extruding is an essential skill for any designer, whether they are an architect, landscaper, interior designer or even a hobbyist. Learning how to extrude with SketchUp allows you to create in-depth 3D models of your designs, bringing your vision to life.

With our guide, you should now be able to extrude simple and complex shapes, including extruding along a curved or even angled path. You have the power to create even the most complex shapes. SketchUp can assist you on your design journey through either its free or premium version of the software. 

Don’t be afraid to experiment and explore the possibilities of your vision, and don’t worry, our online community and team of developers are here to help you push the boundaries of your 3D modelling journey. 

Exterior Designing & Rendering Tips with V-Ray for SketchUp

In this article, we will discuss additional design and rendering tips, with a focus on the V-Ray SketchUp exterior lighting tutorial to help manage ambience.

Master the Art of Exterior Design and Rendering

The impact of spatial organisation around a building can’t be overstated.


Luckily, SketchUp and V-Ray can help drastically. SketchUp utilises the strength of V-Ray to help you elevate your exterior design projects with streamlined workflow, intuitive camera settings, and adaptive learning techniques.


With V-Ray SketchUp exterior rendering settings you can explore faster rendering, AI denoiser, and automatic exposure. Focusing on key elements like proportions, colour palette, or landscaping becomes easy.

SketchUp’s exterior lighting tutorial helps you explore global illumination, lighting controls, and rendering optimisations. Now, you can introduce real-life lighting setups for captivating atmospheres and bring your renders to life or incorporate textures and materials such as PBR metallic reflections, wood, or concrete into your designs.

Optimising Workflow for Efficient Exterior Designing

We start by arranging four essential V-Ray toolbars for easier access:

  1. The first toolbar is packed with commonly used buttons for changing assets, rendering settings, and content library.
  2. The V-Ray lights toolbar is your go-to for natural and artificial light settings.
  3. The V-Ray objects toolbar contains V-Ray geometries.
  4. The V-Ray utility toolbar has all the tools you need to explore the project and map the textures.

Open the Asset editor to configure V-Ray SketchUp exterior rendering settings. If you wish to add a new level of realism to the imagery, head over to Chaos Cosmos – an extensive library of materials and 3D assets.

Now it’s time to explore the tools for precise modelling:

  • The Tape measure tool measures distances and sets guide points.
  • The Protractor tool will help you measure angles
  • The Measurement box will show you all the numbers you should know
  • Line lets you connect segments
  • The Erasers tool fixes errors
  • Rectangle introduces rigid forms to the scene
  • The Push/Pull feature lets you easily manage surfaces
  • The Follow Me tool will extrude a shape along a connected line
  • The Offset tool helps you manipulate what you made

The tool also gives you control over the rendering process. Use Image sampling tools to produce high-quality and accurate rendering scenes with the optimal usage of time and resources. 

As you finalise your rendering, check out the Interactive Rendering button and the V-Ray frame buffer to observe and adjust the final appearance of your render via Adjustment layers.

If you work with complex exterior projects, you might face some challenges. Luckily, SketchUp can help you with layer management and object grouping. Start by clearly defining the scope of your project and utilise the software to:

  • Import reference images
  • Focus on components, structures, and landscape elements
  • Group elements 
  • Organise elements via SketchUp’s Groups and Components feature
  • Properly name Groups and Components
  • Assign each element to the appropriate layer depending on function, visibility, or rendering phase
  • Turn off unnecessary layers to avoid confusion
  • Apply Tags to groups of components to easily navigate your view

Once you are done with your rendering, you’ll likely share it with other architects, designers, or clients. The SketchUp tutorials show an easy way of creating an animation of your exterior scene. You can export it in two ways, one for fast views and the second one for final production:

  1. Set up the camera and animation setting
  2. Enable the Animation slider in the Asset editor
  3. Open V-Ray Vision for the preview
  4. Head to Export settings to select a video or export each frame separately
  5. Define a file type
  6. Select the resolution mode from the project
  7. Use any third-party software for presentation

Chaos Cloud is also a great platform to share your work, receive feedback and improve collaboration. It allows pinned comments and speeds up the review process.

Advanced Tips for Realistic Exterior Rendering

Realistic exterior rendering means you should focus on several aspects of imagery, such as:

  • Light (HDRI lighting or sunlight for shadows and mood)
  • Materials and textures (a selection of options and customisations for realistic surfaces)
  • Selecting the viewpoint via Position Camera (for a better sense of the space, focal point, and perspective)

Now, it’s time to play with V-Ray SketchUp exterior rendering settings to set the rendering speed which depends on several factors:

  • The engine you use (CPU, RTX, or CUDA)
  • Quality of the render
  • Global illumination (where the Brute force option takes longer and the Irradiance map does not)

The CPU rendering is usually the fastest. Disable Interactive and Progressive render, set the Quality to Medium+, and use the V-Ray Denoiser. Move onto Render output, set the Safe frame, image size, and select the desired Aspect ratio. If you wish to know how light affects your design, head over to V-Ray SketchUp exterior lighting tutorial page.

You can also elevate exterior renderings with various tools in Adobe Photoshop.

Now that you’re done with rendering and have your visualisations saved, it’s time to share them with others or include them in your portfolio. Use SketchUp and Enscape, Mood Boards, or even Virtual Reality to present the final concept.

V-Ray SketchUp Exterior Lighting Tutorial

The lighting plays a crucial role in the visual appeal of the design, realism, and mood. Setting up artificial light, daytime, or nighttime can drastically change the appearance and ambience. The tutorial can point you in the right direction regarding Sun and Sky Systems. 

Start by creating a darker, evening scene, then move to Chaos Cosmos Browser to select HDRI and set the proper light. Do all the rest from the Lighting toolbar – simulate light or increase its intensity. From there, you can also adjust the colours to balance the cold and warm tones in the image for a more realistic scene.

If you wish to change the Shadow settings, head over to the Shadows tray and set a specific time for your scene. Consult the tutorial for more options. The detailed V-Ray SketchUp exterior lighting tutorial also shows you how to change the size of the sun. There, you’ll find useful tips and tricks on how to adjust exposure settings and use Dome light to make your scenes vivid.

Use Colour and Intensity to change the hue of the sunlight. The Filter mode will give you a warmer tone, compared to the Override mode, which is cooler. Then there’s Intensity, which determines how strong the light is. 

Remember to optimise render settings for improved efficiency and fast rendering. Decrease the noise, increase the time limit, and set the Quality slider to optimal. If you still struggle to get optimal results with your V-Ray SketchUp exterior rendering settings, go back to the V-Ray SketchUp exterior lighting tutorial and compare SketchUp Free and Pro to see which features work together.

Elevate Your Exterior Designing with V-Ray for SketchUp

V-Ray, SketchUp, and Chaos Cloud give you a playground filled with skies, powerful real-time rendering, and 3D content. Combine proper V-Ray SketchUp exterior rendering settings and explore V-Ray SketchUp exterior lighting tutorial to level up your exterior design, get faster outputs, and enjoy the powerful lighting features for beautiful and realistic scenes.


You can get all this and more on Elmtec. Elmtec has been here for more than a quarter of a century as a leading distributor of professional software and hardware. Reach out to Elmtec on their site to explore free trial options, purchasing, and an in-depth V-Ray SketchUp exterior lighting tutorial.

How to Smooth and Round Edges in SketchUp Projects

Smooth and rounded edges enhance the attractiveness and realism of your designs. If you are wondering how to smooth edges in SketchUp, or how to convert a series of edges into a curve, know that you have various tools to pick from and introduce flow to your work.

Understanding the Importance of Smooth and Rounded Edges

Smooth edges will elevate the imagery and bring a sense of realism and refinement to your render. Learning how to smooth edges in SketchUp will eliminate the jagged appearance of your 3D models and enhance their realistic features. 


Exploring how to curve edges in SketchUp helps you soften the look of objects and mimic the natural lines. Converting a series of edges into a curve will also bring an organic feel to your furniture or architectural designs.

Curved and rounded edges also impact the behaviour of lights and shadows. Sharp edges create a distinct boundary. They are crisp, defined, and geometric, and their shadows behave the same. But smooth edges bring transitions – by curving edges in SketchUp, your items will embrace the light and create soft and gradual shadows.

Sharp edges are formal, strict, and bold, ideal if you wish to present a powerful yet stable dynamic in your render. Smooth edges are inviting and comforting, often elegant. That’s why you’ll want to convert a series of edges into a curve and use that softness in your design.

Utilising SketchUp's Native Tools for Edge Smoothing

Wondering how to smooth edges in SketchUp? The answer lies in two native SketchUp features:


  1. Soften Edges – used to manipulate edges in a 3D model
  2. Smoove – allows you to “deform” geometry


Use the Smooth Edges feature and enhance the visual appeal of a 3D model, such as a sitting area. Smoove is your best ally if you wish to add curvature or convert a series of edges into a curve for a terrain.


Remember, when you smooth and curve edges in SketchUp, they will remain visible but the faces will look smooth. These are the steps you’ll want to follow:


  • Select the edges
  • Open Soften Edges
  • Drag the Angle Between Normals slider to set the number of angles


To employ the Smoove tool:


  • Select the item
  • Head over to Tools – Sandbox – Smoove
  • The Smoove cursor will appear


Now, you can proceed to curve edges in SketchUp with a radius. Type in your desired number and press Enter (Windows) or Return (Mac). Set a centre point and type in a value to specify how far to offset the section.


Use Ctrl+Z (Windows) or Command+Z (Mac) to revert to the previous step. Spacebar will help you select sections, E is for Eraser, Q shortcut rotates objects, while A is for Arc.

Advanced Techniques for Edge Smoothing

If you explore more options about how to smooth edges in SketchUp, here are two other extensions to help you smooth and convert a series of edges into a curve in SketchUp and gain enhanced control:


  1. BezierSpline, which helps you draw Polylines, Bezier and Spline curves in 3D
  2. RoundCorner, which offers three advanced modes for rounding edges


To install BezierSpline and curve edges in SketchUp faster:


  • Download the .rbz file, change its extension to .zip
  • Open the Archive
  • Select All
  • Extract into the SketchUp Plugin Directory
  • Answer Yes to overwrite existing files


You can also install it via the SCF Plugin Store tool. Your installation must finalise with the “BezierSpline Footprint.png” footprint.


To successfully install and run the RoundCorner plugin, get LibFredo6 or above. Now you can:


  • Download the .rbz file
  • Install it via the SketchUp Extension Manager
  • Restart SketchUp to get RoundCorner to load


Alternatively, auto-install it with a one-click method via the Sketchucation ExtensionStore.


To play around and learn how to curve edges in SketchUp, start by designing a lounge room. Utilise BezierSpline to draw curves for chairs and then move to RoundCorner to soften the edges.


Focus on simple shapes and utilise layers and scenes for improved visibility. See tutorials on how to convert a series of edges into a curve in SketchUp if you get stuck in your work.

Achieving Rounded Edges for a Realistic Look

Apart from the RoundCorner extension, you can use other tools too:


  • The Arc tool – draws an arc around a centre point
  • The Follow Me tool – creates rounded edges along a path
  • The BezierSpline extension – offers smooth curves with control points

When applying these tools to round edges in SketchUp, select your edges strategically and focus on adjusting the radius. Note the transition between edges and faces when using the Follow Me tool; go with softer connections.

Remember, converting a series of edges into a curve in SketchUp enhances the aesthetics of organic forms like vases or handheld devices and brings a flowing, curvy design that improves their believability.

Applying Edge Smoothing and Rounded Edges to Design Project

Changi Airport is an architectural marvel that successfully combines curves with straight, strict lines to offer a sense of futuristic yet organic appeal. Both architecture and live elements (gardens) have flow and motion, with the HSBC Rain Vortex being the most magnificent aspect of the airport.


Changi is the perfect example that learning how to curve and how to smooth edges in SketchUp introduces realism to designs.


Imagine a building that consists only of sharp edges. Such an appearance would certainly be impressive, yet too cold and uninviting. Now think about the same model, but consider its key elements rounded. That design is more organic, fluent, and sophisticated.

With SketchUp’s tools and tutorials for converting a series of edges into a curve, you too can explore your creative possibilities and make your designs realistic.

Elevating Your SketchUp Projects with Smooth and Rounded Edges

Incorporating smooth and curved edges in SketchUp designs will balance, elevate, and add realism to your architecture, product designs, and interior renders. Mastering how to smooth edges in SketchUp and converting a series of edges into a curve with SketchUp’s native tools, BezierSpline or RoundCorner will, thus, elevate the quality and realism of your work.


Elmtec can be your trusted partner and follow you through all the steps of your design. The company has been around since 2010, offering extensive support to the digital design community. With Elmtec, you can explore free and pro versions of SketchUp, together with extensions which can make your renders stand out.

Tips and Plugins for Creating Terrain and Topography in SketchUp

SketchUp terrain plugins are your essential tools for creating terrain in SketchUp and will elevate your scenery and introduce realism in your designs.

Understanding the Importance of Terrain and Topography in SketchUp

Creating an accurate representation of terrain in SketchUp enables you to create visually appealing designs. With natural contours, slopes, and land features, your architectural wonder harmonises with the environment. Terrain and topography in SketchUp also play a crucial role in site analysis, spatial planning, and environmental integration. 


Learning how to model realistic terrain in SketchUp with SketchUp terrain plugins improves your visualisation of the object. Terrain also helps with shadow studies. Ultimately, creating terrain in SketchUp improves client relationships, as they’ll have a deeper understanding of how their objects interfere with their surroundings.

Utilising SketchUp's Native Tools for Terrain Creation

SketchUp terrain plugins are simple to use:


  • Sandbox Tools (contains Smoove tool) – creates terrain and topography in SketchUp or helps you import it
  • From Contours – imports or lets you draw contour lines
  • From Scratch – draws a grid for the terrain design
  • Stamp – helps you place objects on terrain
  • Drape – creates a flat surface, such as roads
  • Follow Me tools – creates 3D shapes along a path


Once you are ready to do topography in SketchUp, start with the Sandbox Tool- you can then use From Contours to manipulate valleys and hills. The Smoove tool is among the most powerful SketchUp terrain plugins, ideal for adding texture to materials and managing terrain edges. Select the section of terrain, then head over to the Sandbox tool, select the Smoove tool, and set the right radius. 

Next, click on the geometry to ensure your proportions are correct, so you can present visual coherence in the design. Remember, SketchUp offers a great set of textures and materials you can use to accurately model terrain in SketchUp. Access this in the Material Picker section.

Essential Plugins for Advanced Terrain Creation

If you need more options, SketchUp supports various plugins that offer advanced functionality, including:

  • Artisan
  • SUbD
  • FredoScale

Artisan is a powerful organic modelling tool that supports creating terrain in SketchUp with: 

  • Subdivision modelling is ideal for creating sculptures
  • Soft transformation is perfect for managing terrain edges
  • Sculpt brush allows the overall terrain management
  • Paintbrush adds textures to any surface
  • Polygon reduction

Now, the SUbD plugin is your best friend if you want to subdivide and smooth a mesh to start managing topography in SketchUp.You can also manipulate boundary corners and edge visibility.

Finally, there’s FredoScale – a magnificent set of tools for geometry manipulation. It offers better scaling, tapering, stretching, twisting, bending, and more, so you can properly model terrain from all angles.

To start using plugins, download the .rbz files and install and manage them via SketchUp Extension Manager. If you face issues, try restarting the software, checking plugin compatibility, updating to the latest version, clearing the cache, and adjusting SketchUp’s settings. Sometimes you may experience lags due to model complexity, so try reducing it. 

Techniques for Importing and Integrating GIS Data

Importing Geographic Information System (GIS) data gives you accurate terrain representation, with all its contour lines, elevation info, and geographical data you need to create terrain in SketchUp. 

Use the Modelur feature to import GIS and start modelling terrain in SketchUp. Visit File, then Geo-location to set the geolocation data. Modelur supports GeoJSON (.geojson) or Shapefiles (.shp) files, saved in the WGS84 (EPSG:4326) coordinate system.

Open your current model in SketchUp, then move to the File – GIS Data Import window. Select the file, determine the offset, and import files as one of three available options. Set the mapping parameters and scale, and import the GIS Layer for an accurate representation of terrain and topography. 

Remember to select reliable GIS data sources for accurate terrain and object representation, so you model the right way. Ensure the coordinates of the data you import match the ones you used in SketchUp to avoid scaling and alignment problems. 

Then, align GIS layers before you import data for a proper representation of the landscape. If the GIS information didn’t load up to scale, use the Tape Measure tool to check the distances and adjust. 

With GIS, you’ve saved time on manual terrain creation and got an accurate representation of real-world objects. If you need additional help, visit SketchUp’s tutorials and learn how to do topography in SketchUp easily.

Enhancing Terrain with Vegetation and Water Features

Once you’ve learned how to model terrain in SketchUp, it’s time to play with vegetation and water features. Use Skatter and Laubwerk tools to render huge amounts of vegetation and quickly populate scenes. These offer authentic 3D plants and scattering tools to help you model terrain in SketchUp.

To introduce various water bodies in your topography SketchUp, use the Sandbox From Contours and the Flowify extensions. VRay is there for a photorealistic water scene. Include surrounding objects which will reflect on the surface and render the imagery for high-quality results.

Remember, selecting the right vegetation while creating terrain in SketchUp can be tricky. Research to learn more about the flora in certain areas and consider the site conditions, climate and seasonal changes of the region.

When you focus on doing topography in SketchUp, remember that not all plants thrive in every terrain. Focus on realistic scaling and form a balance of plant clusters. Mix the plant species and types of water elements for a harmonious scene.

Elevating Your SketchUp Projects with Realistic Terrain and Topography

Creating terrain in SketchUp improves the visual impact of the scene and introduces realism. Additionally, these elements show you how your models will behave in the real world.


Mastering how to do topography in SketchUp, import GIS and use the Artisan, SUbD, or Follow Me tools will give you all you need to experiment with diverse terrains. Now you are ready to transform a bland scene into an immersive, hyper-realistic and contextually accurate design setting.


Visit the Elmtec site to explore free trial options, SketchUp’s native tools, and additional plugins to elevate your design projects to new heights.

Using Layers in SketchUp

SketchUp offers a variety of helpful tools. Layers in SketchUp is one of them. 

Using layers, you can organise a variety of model components. There are some key things to learn, however.  

We’ve created this layers in SketchUp guide to walk you through the concept of layers and how to manage and organise different layers – including how to use them to optimise your design workflow. 

Understanding the Concept of Layers in SketchUp

At its core, the premise of layers in SketchUp is to control and manage the visibility of entities.


Similar to custom attributes, you assign layers to objects in SketchUp and group related objects to bring a design workflow together effectively. From there, you can toggle different layers on and off to alter the visibility of each. This is helpful when you want to zone in on certain design elements in your project. 


To use layers effectively, there are some best practices to follow. These include layer organisation techniques such as specific (and memorable) naming conventions and managing layer visibility correctly.

Creating and Managing Layers in SketchUp

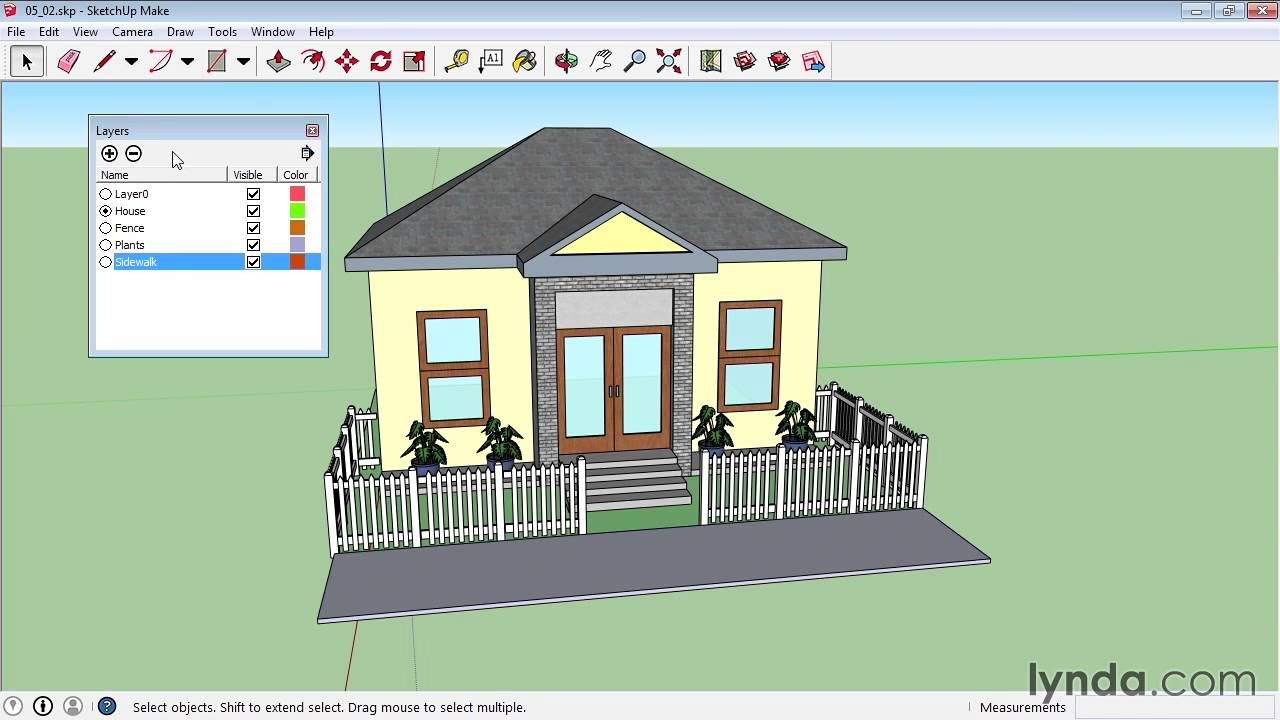
Head to the Layers panel to begin creating and managing layers. The Layers panel is located by choosing Window > Layers.


The default layer is called Layer 0. It’s important to remember this detail, as it’s the layer that should remain active at all times. The red pencil icon next to the layer shows you which one is active. 


Creating new layers: 


  1. Select Add Layer at the bottom of the Layers panel (shown as the + icon).
  2. Rename the new layer by double-clicking it – then press Enter.


Note: Use a descriptive name that makes sense with the object types you plan to assign to the layer. For example, you might name a layer containing headings – Headings.

  1. To delete a layer, select the layer in the Layers panel and click the Delete Selected Layer icon (the – sign).

To assign an object to a layer:

  1. Select the layer that you want to contain an object in the Layers panel.
  2. Using the Select tool, choose the object you want to assign to the layer (a dot will appear next to the selected object’s current layer) by selecting it. 
  3. Go ahead and choose the layer you want to assign the selected object to. 

To change layer properties:

  1. Locate the layer you want to change in the Layers panel.
  2. Click the eye icon next to the layer name to change the visibility of the layer.
  3. Click the pencil icon next to the eye icon to change the selectability of the layer.
  4. Click the colour box next to the layer name to change the colour of a layer.

To organise layers in a hierarchical structure:

  1. Right-click in the Layers panel.
  2. Select Add Layer Folder.
  3. Name the folder.
  4. Drag and drop existing layers into the folder to organise them. 

Note: You can also choose to nest folders within folders for a deeper hierarchy level of organisation.

Let’s now turn to the different layers in SketchUp, and what they do. 

Controlling visibility

The main function of layers is to control the visibility of objects assigned to them. Show or hide the objects assigned to that layer by toggling the visibility of a layer on or off. 

Locking

By locking a layer, you stop any accidental changes to the objects on that layer. For example, you may choose to lock layers with background elements that you don’t want to move in error while you’re working on other elements of your model. When a layer is locked, the closed padlock icon is displayed. 

Colour

You can change the colour of a layer, and it doesn’t affect the appearance of the contained objects. What it does is help you to visually differentiate layers for categorisation. Choose to assign colours to layers by importance or function, for example. 


To efficiently manage your layers in SketchUp, you can change a setting for multiple layers at once. To do this, select all the layers you want to change, and shift-click to select a range of adjacent layers.

For more in-depth information, check out the SketchUp tutorials


Using Layers for Efficient Workflows and Design Flexibility

Now we’ve covered the basics, it’s time to get efficient. 

If you want to create different design options, layers make it easy. Create various design versions within the same model. For example, create variants of a room layout on separate layers. Doing this allows you to compare different design options without generating many distinct models.

To make your workflows more efficient with layers, best practice is to:

  • Set your project’s aims, plans, and deliverables.
  • Collate all your assets and tools before you start your project.
  • Create a logical asset file system using names that make sense to you for easy access.
  • Establish a standard set of templates for various types of projects – such as styles, layers, and pre-set settings.
  • Be sure to toggle visibility on certain components and switch layers on and off to compare design differences.
  • Consider assigning layers to different team members for easy collaboration. 

When you’re in presenting mode, using layers in SketchUp makes your projects simple to understand. Show only the relevant parts of your design as you’re talking through them to ensure your audience focuses on the specific elements. 

Iterations are quicker, too. You don’t need to make amends to the entire design, just modify the layers you want based on the feedback you receive.

Conclusion: Optimising Design Workflow with Layers in SketchUp

This article shows how you can master using layers in SketchUp and significantly simplify and improve your design process. 


Go forth and implement the tips and best practices to optimise your design workflows in SketchUp. By effectively using layers, you improve design flexibility, simplify collaboration, and boost your overall efficiency. 


Get started with SketchUp with Elmtec. As your trusted digital distribution partner, we have more than a quarter of a century’s experience serving the digital design community, and we’re known and loved for being one of the leading distributors of professional hardware and software.


Compare the free vs pro versions of SketchUp here.

Find what you need – faster – with the latest 3D Warehouse updates

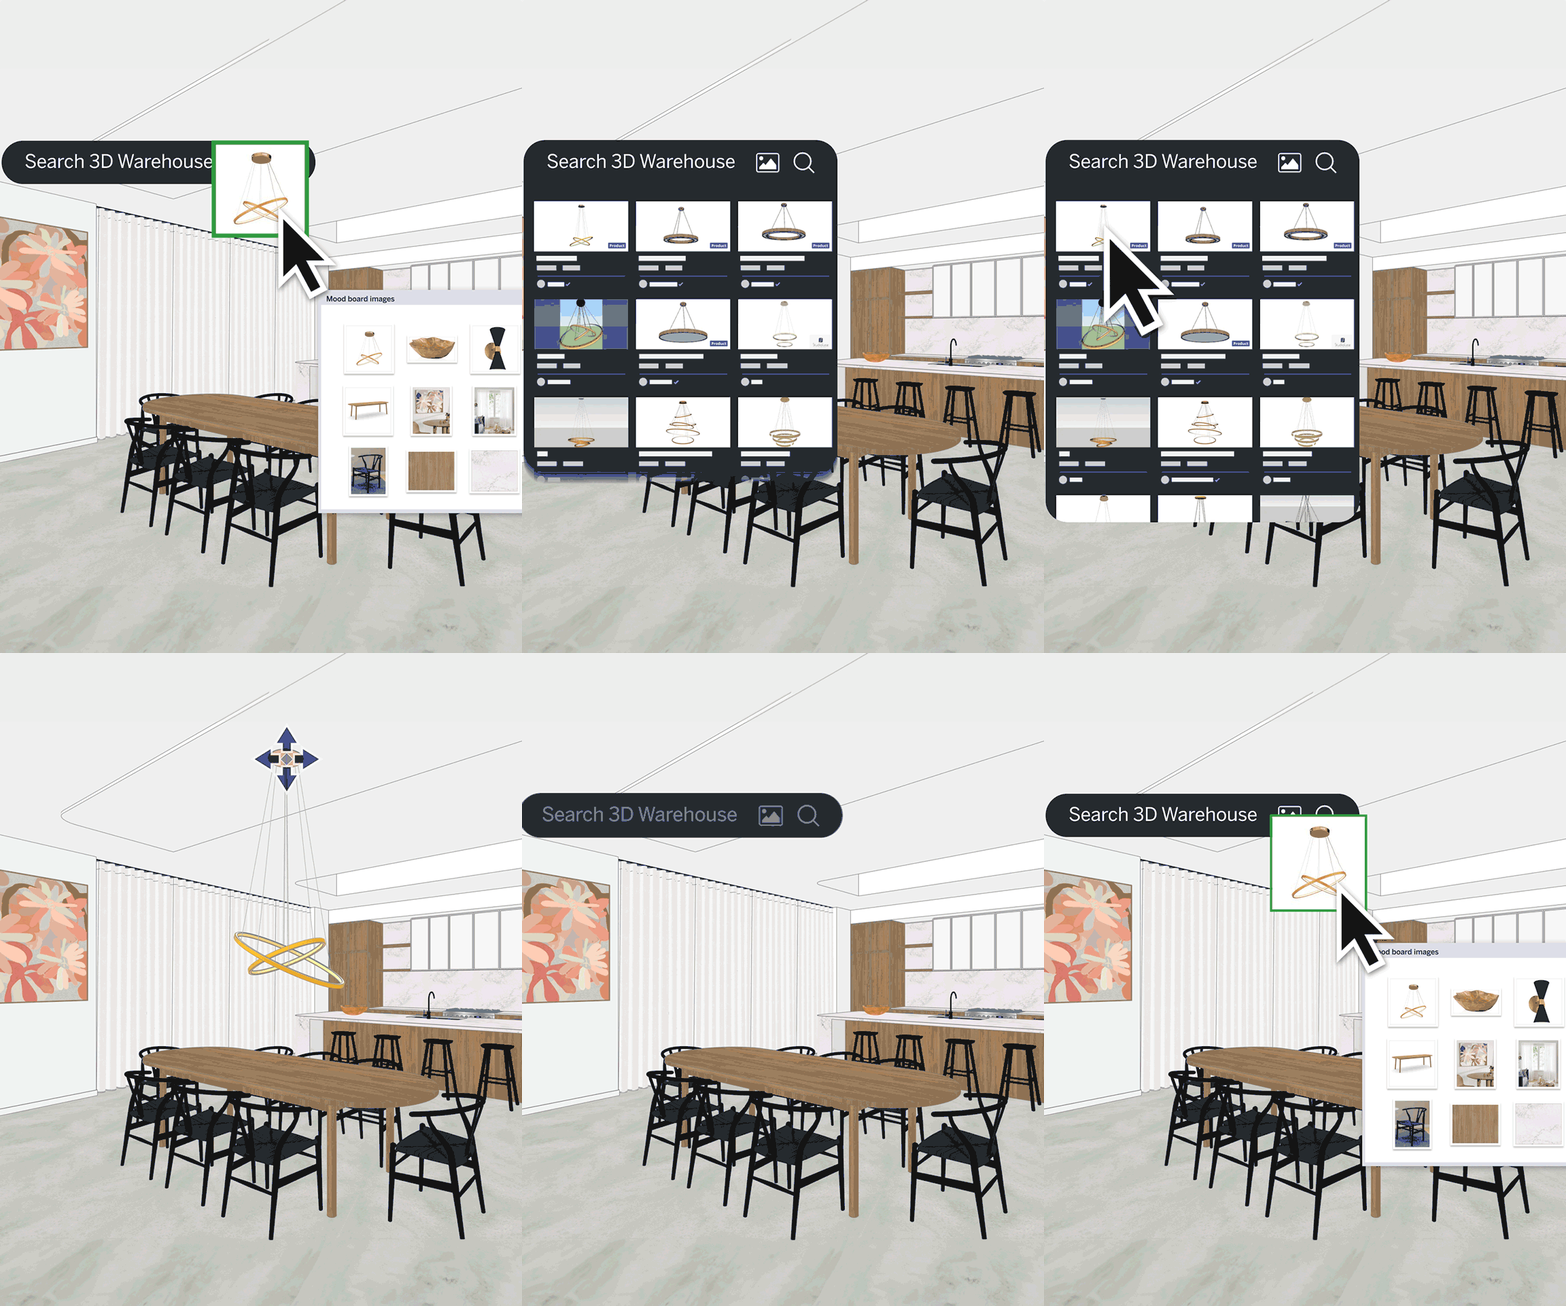
Discover 3D models in 3D Warehouse quicker by leveraging SketchUp’s new AI-powered image search, and easily find, filter, and download materials to help you communicate your true design intent;  plus, the latest update makes the user interface easy on the eyes.

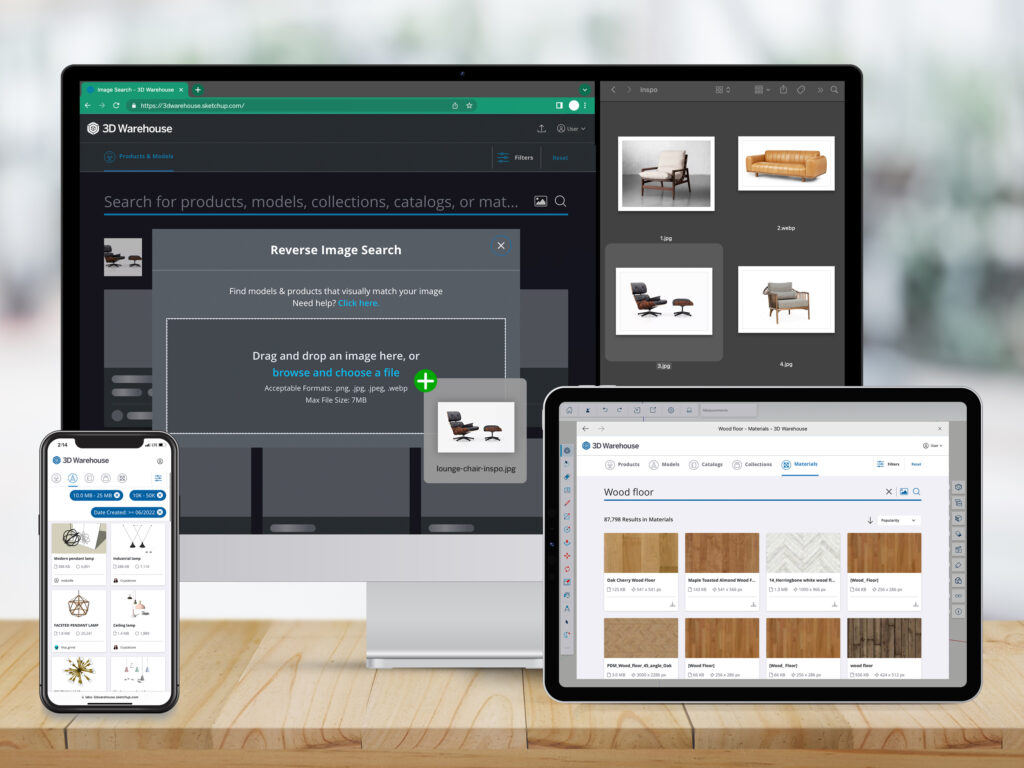
Welcome to the next generation of 3D Warehouse, the largest free 3D model library in the world, now featuring a fresh, unified desktop, mobile, and web interface with light and dark modes, plus a brand-new AI-driven feature to speed up your sourcing workflow like never before. Get design hours – or years – back with 3D Warehouse Image Search. Snap a photo, drag and drop an image, or upload an existing image on your device, drop it into 3D Warehouse’s search bar, and let SketchUp’s powerful AI search engine do the rest. Adding real-world textures and ready-to-go objects to your SketchUp design has never been as swift or intuitive until now.

Rapidly discover 3D models

Streamline your design process by searching for 3D models with images versus text in 3D Warehouse’s search bar. Take a photo of a chair from a showroom floor or a mood board and drop your inspiration into SketchUp’s powerful search engine. Sit back and let AI quickly hunt through millions of pre-built models to pinpoint ideal matches. 


Get from client approval to specification to a materials list faster—3D Warehouse searches include manufacturers’ products. Keep an eye out for Live Components that can be parametrically customized to fit your design requirements. Plus, you’re not limited to searching with just text-based keywords; image searching leaps over language barriers to shortlist the best models from every corner of the world.


See what others are saying:


“This really is a game-changer! Most of the time, I give a customer the advice to look for some nice IKEA furniture because of the large quantities of models in the 3D Warehouse. With this update, I can just import a Pinterest picture and look for the most similar model!”

– Mauri Prosch, Virtual Reality Visualizer at Imagineering


 “My design clients request furniture to be included using a single picture and no other information. This image search feature, which I have internally been wishing for, for years, will add years to my life – in a good way!” 

– Mike Bell, Freelance 3D Designer 


“One of the most challenging things about having a very large library of objects to search from in 3D Warehouse is finding exactly what options you have and doing that quickly,” says Anthony Frausto-Robledo, AIA, LEED AP, Editor-in-Chief, Architosh. “Trimble has beautifully attacked this pain point using new AI technology with its new image search option.”

SketchUp didn’t limit the love to just searching for 3D models – materials are now searchable, filterable, and directly downloadable under the Materials tab in 3D Warehouse. You can now easily source material and texture swatches for use in SketchUp using keyword search. Simply type the name of the material into the search bar, and click the Materials tab. 

Access your favorites wherever work’s happening

Easily access your favorite products, models, catalogs, and collections across desktop, mobile, and web when you log in with your Trimble ID. When you launch 3D Warehouse from within a SketchUp project, all your curated content will be accessible for use right in your model, speeding up your workflow. 

In case you missed it

Here are two existing but powerful features you may have missed in 3D Warehouse: 

  • Check out augmented reality viewing of lightweight models under 10MB and 200,000 polygons. 3D Warehouse automatically converts your creations into USD and GLB format and provides a shareable QR code. Help your audience experience your work using AR viewing on Android or iOS. No hyper-tech devices or model exports required.
  • Filter product and model search results by file size, polygon count, and file type and tick specialty filters to zoom in on Dynamic Components, Live Components, or Geolocated models

Get started

Speed up your design process by discovering exactly what your project needs with the new 3D Warehouse, and cut out the confusion by communicating your true design intent to clients.

  • 2+ GHz processor.
  • 8+ GB RAM.
  • 700MB of available hard-disk space.
  • 3D class video card with 1 GB of memory or higher and support for hardware acceleration. Please ensure that the video card driver supports OpenGL 3.1 or higher and is up to date.
  • 3-button, scroll-wheel mouse.

How to Orbit in SketchUp

SketchUp allows you to explore your 3D models in granular detail, but to do so, you must learn how to Orbit in SketchUp. 


This important skill gives you multiple design angles and adds depth to your models. 


In this article, we’ll look at how to Orbit in SketchUp effectively and bring your projects to life. 

Understanding the Orbit Tool in SketchUp

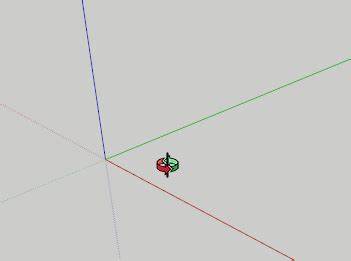
The Orbit tool in SketchUp enables you to rotate, tilt, and pan the camera view within the SketchUp workspace. 

This flexibility delivers a much more interactive and immersive experience, which helps your viewers understand the overall composition of your design and the spatial element arrangements. 

You can use a mouse, on-screen controls, or keyboard shortcuts to activate and control the Orbit tool. Have a play around with the different methods to see which feels the most natural to you. 

Mouse

The most intuitive way to activate the Orbit tool is by clicking and dragging your mouse. Click and hold the middle mouse button (the scroll wheel) while moving your mouse. The camera view will rotate as you drag.

Keyboard shortcuts

Use the “Orbit” shortcut key ‘O’ to instantly activate the Orbit tool.

You can also temporarily switch to the Orbit tool by holding down the Ctrl (Cmd) key on your keyboard; releasing the key when you want to return to your previous tool.

On-screen controls

The “Orbit” icon is located on the toolbar at the top of the SketchUp interface. 

Navigating and Manipulating 3D Views with Orbit

To navigate around 3D views using the Orbit tool in SketchUp, you need to orbit around the specific points of interest in your models. 

Once you’ve activated the Orbit tool via your chosen method, click on the object or point you want to orbit around – this is your pivot point. Try out different angles as you orbit by circling around your pivot point to view it from all sides. Use the scroll wheel to zoom in and out of the point for a closer look or a wider view. This method gives you a seamless way to move about in the 3D environment. 

Choosing to switch your pivot point while orbiting is simple – just click on a new point of interest to look at the different elements in your design. If you need to look at an object in more detail, simply adjust the orbit speed by dragging your mouse more slowly. A slow movement provides a gradual rotation – and a quicker one equals a quicker orbit. 

To gain greater accuracy, use the Shift key while using the mouse scroll wheel on your keyboard for vertical orbiting. Hold the Alt key down with the middle mouse button to both orbit and pan at the same time. This trick lets you adjust your view whilst keeping your pivot point intact. 

Here are some more ways to explore the various orbiting techniques:

Orbiting along specific axes

Experiment with orbiting around individual axes to gain a targeted view of your model.

Arcing orbits

  • Arcing up and down: Gain an arching effect by combining both vertical and horizontal orbits to demonstrate curved structures.

Custom camera views

  1. Orbit to your desired angle
  2. Select “Camera” > “Standard Views” > “Add Scene.” 

Revisit this saved scene whenever you like. 

Advanced Orbit Techniques for Enhanced Workflow

Time for some more advanced Orbit techniques. These will help you improve your design workflows for more flexibility. 

Using Orbit for walkthroughs 

Produce a virtual tour of your designs – especially useful if you need to present concepts like interior spaces. Add animations by combining orbiting with scene transitions to showcase the various design viewpoints. Your designs will instantly become interactive and more compelling for your audience. Experiment with arcing orbits to uncover design elements during interesting presentations. 

Complex designs

To zoom in on complex design elements, use slow and steady orbits to focus closely on small details. Use the Orbit tool with the “Focus on Selection” feature by selecting an object, right-clicking, and selecting “Focus on Selection.” Your view will centre on the chosen element for further exploration. 

Creating custom camera views

Switch between viewpoints to look at different perspectives by creating custom camera views. This is ideal for presenting different design options or showcasing specific design details to clients or collaborators.

To do this:

  1. Use Orbit, Pan, and Zoom tools to navigate to your desired viewpoint.
  2. Frame your scene.
  3. Choose “Camera”> “Standard Views” > “Add Scene” from the top toolbar.
  4. Add a descriptive name for your custom view in the “Add Scene” box > “Ok”.

Access your custom views via the “Scenes” panel. Select the name of your custom view to switch to a different specific camera perspective.

The Orbit tool has a variety of use cases. From residence redesigns and machinery prototypes to landscape architecture, the tool can capture the atmosphere of each situation. 

Looking at the machinery prototype example, by using the Focus on Selection feature together with precise orbits, engineers can isolate certain elements for detailed examination. Closely inspecting intricate parts enables them to check for correct alignment – resulting in optimisation of machine designs and improved component integrations.

Deploying custom camera views help architects to explain contextual scenarios such as landscape architecture. Immersive 3D presentations with different angles paint the scene much better than a static model and allow audiences to understand how the intended architecture will fit into the existing environment. 

Take the time to experiment with these advanced techniques, and when you’re confident, look to gradually incorporate them into your workflow. Mastering orbiting techniques is beneficial in many ways –  increased productivity, improved design iterations, and enhanced client communications.  

Optimising Performance for Smooth Orbiting

To ensure you’re optimising your orbiting performance, check out the following best practices:

Adjusting model complexity

You can experience lag if you’re handling large models, as these cause computer resource strain. To eliminate this, reduce unnecessary detail for walkthroughs and presentations if you can.


Simplifying geometry

Complex geometry such as excessive horizontals can cause lag, glitching, and presentation delays. Avoid this by converting curved surfaces into basic polygons to reduce the number of segments. 


Hiding unnecessary components 

If some components are not required for your task, you can temporarily hide them. This enhances the performance by reducing the load on your computer. 


Remember – efficient modelling always helps you to provide a smoother experience. Minimise the use of components where you can and regularly “Purge Unused” elements to reduce file sizes. 

Hardware specifications and system requirements also play an essential role in achieving optimal orbiting performance. Upgrading computer hardware, such as increasing RAM capacity, utilising graphics cards with better performance, or using solid-state drives (SSDs) enables faster data access.

You can also optimise SketchUp settings to improve orbiting performance. Reviewing settings such as anti-aliasing settings and graphics card drivers, as well as enabling hardware acceleration helps with smoother navigation and reduces lag. 

Be sure to regularly review and optimise your SketchUp settings and hardware configuration to ensure peak performance. A well-optimised system delivers a more enjoyable and productive SketchUp design experience.

SketchUp is best explored with Elmtec. As your trusted digital distribution partner, we have more than a quarter of a century’s experience serving the digital design community, and we’re known and loved for being one of the leading distributors of professional hardware and software.


Compare the free vs pro versions of SketchUp here.

Best Animation Plugins for SketchUp

Understanding Animation in SketchUp

Static 3D models are okay, but designs that come to life with animations are even better.


That’s where SketchUp animation plugins come in. Animation allows you to demonstrate the functionality, movement, and dynamic aspects of your designs, which promotes a more immersive and realistic experience.


The SketchUp animation best plugins include walkthroughs, flyovers, object animations, and scene transitions for a comprehensive view of your designs. Animations help you to effectively convey your models in presentations and improve design communication. It’s also much easier to understand spatial relationships and design flow with SketchUp animations. 


Each animation sequence helps clients see how the various design components connect, move, and transform. Animation removes complex technical drawing requirements and provides a flexible and easy method of viewing different design options. 

SketchUp animation plugins are the bridge to more realistic models and projects. Let’s explore how animation plugins take your models from simple to spectacular.

Top Animation Plugins for SketchUp

What follows are some of the top SketchUp animation plugins. This curated list gives you a range of capabilities to suit your animation design needs. 


  • Animation Supervisor


Animation Supervisor is an intuitive plugin that works to create and manage animations seamlessly. This means you can add movement, dictate camera angles, and effortlessly handle transitions in your SketchUp designs. 


A good use for Animation Supervisor is in a shopping centre project. Demonstrating the scope of a large project like this needs immersive animations to understand how the units would look and how pathways fit together. 


  • Keyframe Animation


Keyframe Animation is ideal for light motion capture.


This versatile plugin gives you access to realistic and fluid animations. Advanced features include path animation. Use this tool for defining specific motion paths for cameras or objects. Object grouping capabilities allow you to synchronise various elements’ animations. 


For example, you can create the concept of a housing complex by guiding stakeholders through different layouts and units. Specific path animations show the project’s features for clients to easily visualise how their dream home could look. 


  • Twilight Render Animation


Twilight Render Animation integrates with the Twilight Render plugin to provide animations that are photorealistic. 


For instance, breathe life into a new flagship store concept project with realistic lighting and spatial arrangements. Compelling visual narratives through the medium of animation helps create experiences that nearly feel real. 


  • Animator


Animator is your go-to plugin for creating complex animations in SketchUp. 


Use Animator’s motion path functionality to see how vehicles, public transport, and pedestrians navigate a transportation redevelopment project. Setting keyframes allows you to visualise elements such as green spaces and energy-efficient features.


Specific use cases for Animator include construction sequence illustration, education training models, and architectural walkthroughs. 


  • SimLab Composer


SimLab Composer allows you to create immersive and interactive walkthroughs, hands-on presentations, 3D animations, and virtual reality (VR) experiences. 


Implement elements such as navigation and VR compatibility with this plugin to provide an engaging experience to your audience. Say there was a need for a manufacturing business to train employees on a new assembly process machine. A non-interactive and traditional training method isn’t effective – by navigating the steps through animation and interacting, employees can see the assembly process in VR. 


This tech-forward approach promotes a deeper understanding of new ideas, minimising time to value and eliminating labour-intensive training techniques. 


Tips for Creating Engaging Animations in SketchUp

To create the most engaging animations in SketchUp, follow these best practice tips:

  • Setting the animation’s purpose

Decide what your end goal is. Are you looking to explain a design concept or unpick a complex procedure? Defining your animation’s purpose helps you get across your design intent to your audience and stakeholders. 

  • Planning camera movements 

Try different camera angles, paths, perspectives, and paths to determine the best camera movements to make the viewer’s experience as immersive as possible. For example, if you plan to evoke excitement, try using a quick zoom camera angle. 

  • Starting and ending points

It’s important to decide where your animation begins and ends, so set the initial camera position and angle to begin a scene. Your endpoint should illustrate an appropriate conclusion to your scene. 

  • Adjusting timings 

Different timings offer a variety of options – such as slowing down the animation to enable viewers to appreciate crucial steps. Work your timings strategically to match your design narrative.

  • Incorporating additional elements

Realistic lighting, textures, and different materials all provide emphasis to your scenes. You can introduce the Twilight Render plugin to help you to achieve these effects. 

  • Considering file sizes

Your file size and rendering time greatly impact your animations. Think about reducing file sizes to make it easier to share your animations across various online mediums – such as email or via cloud-based platforms.  

  • Incorporating feedback

When you’re ready, be sure to share your animations with others to garner feedback. It’s crucial to have outside opinions on your designs for ongoing iterations. 

Conclusion: Elevating Design Communication with Animation in SketchUp

So, when you’re ready for the next level, check out the best animation SketchUp plugins. 


The right plugins will help you promote your designs, create compelling experiences, and allow you to quickly iterate for improved workflows. Animation plugins expand SketchUp’s functionalities with robust tools to streamline the animation process. 


Embrace animation as an important part of your design workflow, so be sure to look at what SketchUp animation plugins can offer you. As a starting point, why not begin with a plugin like Animation Supervisor? With an easy-to-understand interface, you can explore animations at your own pace and start to create a walkthrough in SketchUp. 


SketchUp and Elmtec – as a trusted digital distribution partner, we have more than a quarter of a century’s experience serving the digital design community. We’re one of the leading distributors of professional hardware and software.

Compare the free vs pro versions of SketchUp here.

Designing with Water using V-Ray for SketchUp

Water features bring life and fluidity to design. They evoke a strong emotional response and lure people into the scenery you created. Incorporating water is easy with SketchUp and V-Ray and today you’ll explore a V-Ray water tutorial which will make renders a breeze.

The Art of Water Design in SketchUp

Some of the most prominent designs in the world include water; Bellagio Fountain (Paradise, Nevada), Fallingwater (Mill Run, Pennsylvania), and The Dubai Fountain (Dubai, United Arab Emirates) demonstrate the transformative power of water in design. Today, we will explore how to apply water transparency and more with V-Ray and SketchUp tools.

Mastering Water Rendering Techniques in V-Ray for SketchUp

Once you’re ready to render water with SketchUp and V-Ray, launch the software, ensure all the menus are there and proceed to:

  1. Import scene
  2. Apply water material from the V-Ray Asset Editor
  3. Use Texture Placement to manipulate the position
  4. Adjust the Reflection and Refraction parameters
  5. Adjust Environment
  6. Adjust the depth, colour, and opacity for a convincing water effect

Use the Caustics simulation feature for water transparency, reflection, refraction, and other water properties. 

Experiment with camera angles and note that the absorption distance parameters change how light interacts with water. Use the Displacement map from the Asset Editor to generate detailed, realistic water textures.

Pay attention to the surroundings when you apply water reflection in V-Ray. Set up proper lighting setups, time of the day, and weather to enhance realism and create the desired atmosphere. Furthermore, add landscape and architectural elements to improve the balance of your design.

Creating Realistic Water Environments with V-Ray for SketchUp

Some techniques for designing realistic water in SketchUp using V-Ray include the use of proxies and displacement maps. Proxies are low-polygon replicas of original models that speed up the rendering process yet still show complex geometry.

Displacement maps help you add intricate details to water by actually changing its surface as you design it. These are ideal for creating ripples, foam, splashes, and waves.

Alternatively, V-Ray’s Material editor can help you make water material and fine-tune reflections, colour, and glossiness. You will also have control over how light penetrates the water. 

On the other hand, the Refraction tab lets you add water reflection in SketchUp. With it, you can alter the Index of Refraction, and adjust refraction colours. For a more realistic effect, there’s the Displacement tab with a noise map that simulates surface tension and ripples.

SketchUp and V-Ray features can help you design a modern urban plaza, combining architectural details with a fountain as the visual focal point. Or, you can work on a coastal resort landscape, which successfully pairs natural elements like water and trees, with the resort’s design, to achieve harmony and enhance the visual impact of the designs.

Adding Water Motion and Animation in SketchUp

SketchUp and V-Ray water tools help you animate water elements to create spectacular visual effects and enhance the dynamic nature of the design. You can either use a water texture map or Asset Editor to create realistic water from scratch and animate it with: 


  • A displacement map
  • Caustics effect
  • V-Ray wind options


Animating scenes in SketchUp is simple. Once you’ve created and organised frames, you can play them in two ways:


  1. Context-click the scene tab and select Play Animation
  2. Via Scene Manager, then View – Animation – Play


You can also use the Animator plugin, which controls the movement of objects in a specified timeline. Comprehensive materials and water setting in V-Ray for SketchUp combined with movement will bring water to life and create immersive and engaging scenery.

Adjust the texture animation speed, explore particle settings and Displacement map, intensity and colour for stunning water animations.

Try to create a seamless loop to maintain fluidity – match starting and ending frames to avoid abrupt transitions. Finally, synchronise water with surrounding elements. Bring in light, shadows, and objects that will reflect on the surface for increased realism.

Test your skills by creating hotel resorts or water theme park projects to enhance the overall design narrative and learn more in the SketchUp and V-Ray water tutorial.

Elevating Designs with Water and V-Ray in SketchUp

There’s nothing like a calming water feature to improve aesthetics and atmosphere in your designs. Bringing water into your scene will evoke emotions in viewers, harmonise sharp architecture with the natural world, and create memorable experiences.


Utilising intuitive tools and rendering capabilities of V-Ray and SketchUp, you too, can achieve realistic and lively water representations. Whether a still water surface in one image or water ripples in an animation video, SketchUp and V-Ray water features give you all you need to achieve lifelike water representations. Explore displacement maps, caustics effect, and V-Ray wind for endless possibilities to create stunning water elements. 


Next time you feel something is missing from your design, try including a water element to elevate your render, bring your creativity to a higher level, and leave a lasting impact on viewers. Elmtec is here to help uplift your designs with more than 25 years of industry experience. Head over to their site to explore free trial options and pro versions of SketchUp.


How to Create a Walkthrough in SketchUp

Imagine taking clients on a tour of your newly designed architectural wonder before it is even built in the real world. With SketchUp, you can. Today, you will learn how to create a walkthrough in SketchUp, which extensions to use for animation and how to share your designs.

Understanding the Power of Walkthroughs in SketchUp

The SketchUp walkthrough feature gives a virtual tour to viewers, providing a realistic sense of scenery, space, and design flow. Now, your clients, stakeholders, and team members can become even more immersed and engaged with your project by seeing what you do up close and fostering communication that helps clients visualise the outcome.

Walkthroughs are key for architectural designs, urban or facility planning, or museum settings as they help viewers better understand how the concepts will behave in the real world.

Step-by-Step Guide to Creating a Walkthrough in SketchUp

Here’s how to organise a walkthrough of a SketchUp model:

  • Click the Position Camera tool 
  • Set viewing height at eye level (type the height value on the keyboard)
  • Place the Camera, focus on a specific point
  • Wait for the Look Around to activate
  • Move the camera with the Look Around tool 
  • Use the Walk tool to move the Camera in different directions (click and drag the cursor)

All the tools you need to create a walkthrough in SketchUp are clustered in the Camera menu, Camera toolbar (Windows) or Navigation Tools (Mac) and Large tool set. 

Walkthroughs work best when the Camera has a wide field of view. To change it, select the Zoom tool, press the Z key or go to Camera – Field of view in the Menu bar. Type a value in degrees and millimetres; “deg” will set a degree field and “mm” will set the focal length of the camera.

The Measurement box is automatically set to accept height value, so you can just type it in. The Camera will be oriented toward the north (top of the screen) by default, so you’ll want to click and hold the mouse where you want to position it. Once you’re in the Walk mode, you can switch to Look around by clicking and holding the scroll wheel.

Refine your SketchUp walkthrough even more with scene transitions, annotations, and text which will guide the viewers. Find the scene transitions in the View – Animation – Settings section. If you’re looking for a smooth animation, set the scene delay to 0 seconds.

Add text to your scenes by creating a layer for each scene and adding the comment to a layer you’ll show. Alternatively, group comments and use the Outliner tool to control their visibility.

Enhancing Your Walkthroughs with Captivating Visual Elements

While creating a walkthrough in SketchUp, make sure to include tactile textures and materials (glass, metal, carpets), lighting, reflections, realistic shadows, or weather. Captivating foreground and background elements like other buildings or vehicles will create depth and visual impact, while interactive elements will increase engagement and improve experience. 


Animated elements, like fountains or fireplaces, will add a sense of movement and a hyper-realistic environment. Place these elements strategically, and pay attention to clusters and groups and how they flow. Simulate natural movement with repetition or variation of objects. 


Utilise some of the best walkthrough plugins for SketchUp such as Animator or Keyframe Animation plugins. Animator is a powerful tool that lets you create moving objects, camera animation, and more. Keyframe extension helps you animate individual objects with interpolated keyframes. This tool is ideal for animating realistic vegetation and weather effects. 


Alternatively, there’s an SU Animate extension you can use to create scenes that play as animations when you need your objects to move along a path. All these tools offer an array of options to help you transform the walkthrough experience by introducing lively objects.

Presenting and Sharing Your Walkthroughs in SketchUp

Once you’re done with your design, it’s time to show it to others. There are various ways to present your work:


  • Video export for direct walkthrough showcase
  • Image export that you can compile into a slideshow via external software
  • SketchUp online viewer for sharing 3D models
  • Third-party cloud-based solutions and other platforms (Unity, UnrealEngine)
  • SketchUp VR Export
  • Other VR platforms (Oculus, HTC Vive)
  • Enscape plugin for real-time rendering

Video files can be exported as:

  • .mp4 – a compressed but the most supported video file type
  • .avi – gives a large video file for all devices
  • .webm – works with web browsers or VLC
  • .ogv – also works with web browsers of VLC

To export on Windows:

  • Go to File – Export – Animation – Video
  • Choose where to save it
  • Name the file
  • Select the format from the Save As Type
  • Check Options for resolution, aspect ratio, frame size, frame rate
  • Click OK once you’re done
  • Click Export

To download on Mac:

  • Go to File – Export – Animation
  • Repeat the steps above

Virtual reality applications and video hosting platforms are especially beneficial for the walkthrough of a SketchUp model, as they provide a more immersive experience. You can also include music and sound effects, which will bring out the maximum in your design.

By sharing walkthroughs via these platforms, you improve client communication and allow for better feedback. Finally, walkthroughs act as robust marketing materials that bring realistic experiences to clients and stakeholders, which is why they should be incorporated into client presentations and websites.

Mastering Walkthroughs to Bring Designs to Life in SketchUp

SketchUp walkthroughs have immense significance when it comes to accurately presenting your work. They bring designs to life, facilitate decision-making, and boost the engagement of the stakeholders, positively affecting the success of the project and client satisfaction. 

Luckily, creating a walkthrough in SketchUp takes just a few clicks, pointing the Camera, and utilising the Look Around and Walk tools. Utilise Animator or Keyframe Animation to make elements move and bring another layer of realism. Include music or sounds to further immerse the viewers into the scene, show design intent and push the boundaries of design communication.

Elmtech has over 20 years of experience and all the tools you need to start using walkthroughs as a tool to enhance design presentations and captivate clients and stakeholders. Compare what SketchUp Free and Pro can do for your projects today and explore tutorials to learn more.

About Elmtec

Elmtec have been the UK distribution partner for SketchUp since 2010, and service a network of UK and Irish resellers. We have over 22 years’ experience within the digital design community.

Contact Us

T: 01844 263 750
E: sales@elmtec.co.uk
W: www.elmtec.co.uk/sketchup