Many SketchUp customers are using our tools alongside other BIM and CAD software. Overtime we have received multiple requests for improving the interoperability workflows between SketchUp and these other tools, especially Revit, so that transitioning from one tool to another becomes frictionless. 

We therefore decided to investigate some potential solutions starting with looking at ways to improve how Revit files are imported inside SketchUp. We are pleased to announce that we now have a Revit Importer as part of Studio subscription.

Main Features

Import a Revit file from local drive

Once you have completed the installation of SketchUp 2023 and the Revit Importer you can launch SketchUp Pro and import a .rvt file by following one of the options below:


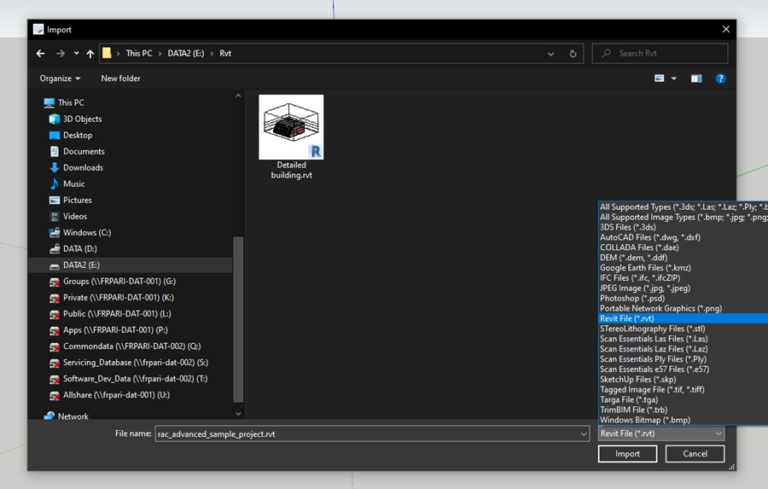
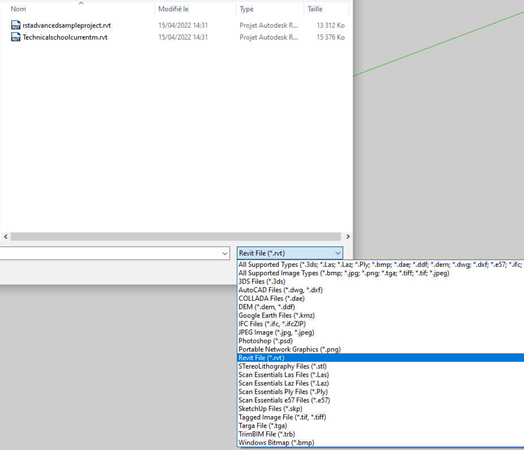
OPTION A: Click on  File > Import and you will find the additional ‘Revit File (*.rvt)’ option in the list of supported file formats. Simply select a .rvt file from your local disk, and click Import.

OPTION B: With SketchUp Pro open, simply drag and drop any .rvt file from Windows Explorer directly inside the SketchUp Pro viewport.

Import a Revit file from Trimble Connect

The  Revit Importer also allows you to import .rvt files that are published in Trimble Connect inside SketchUp Pro using the native Trimble Connect Extension.

STEP 1 – Upload a .rvt file in a Trimble Connect project

  1. If you already have a Trimble Connect project with at least one published .rvt file skip to STEP 2.
  2. Create a new Project in Trimble Connect (see instructions for TC Browser or TC Windows).
  3. Add a new folder in your Trimble Connect Project (see instructions for TC Browser or TC Windows).
  4. Upload a .rvt file in the new folder (see instructions for TC Browser or TC Windows).
  5.  For information about how to publish .rvt files in Trimble Connect from inside Revit, click here.

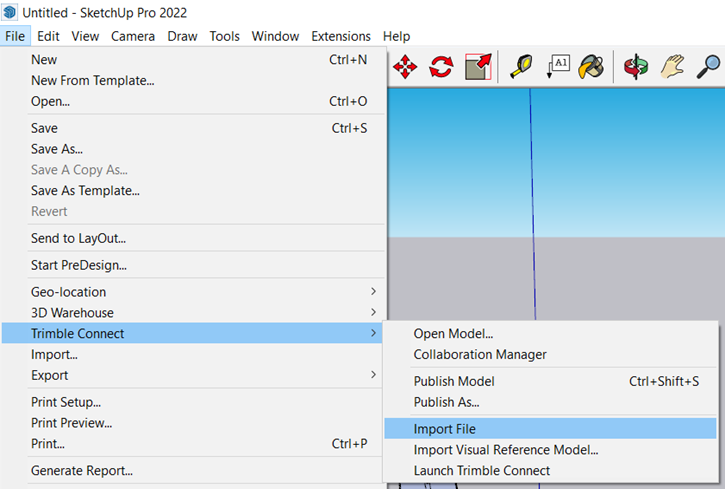
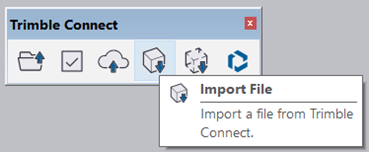
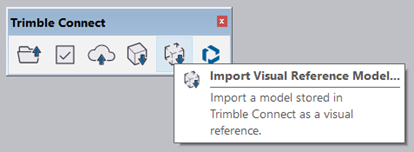
STEP 2 – Import or reference a .rvt file in SketchUp from Trimble Connect

OPTION A – via the Trimble Connect File Menu

  1. Click on File > Trimble Connect > Import File or Import Visual Reference Model.
  2. Navigate to the appropriate Project and Project folder and select a .rvt file.

OPTION B – via the Trimble Connect toolbar.

  1. Right click on the empty space of the vertical gray toolbar on the top of your SketchUp Pro application.
  2. Select Trimble Connect from the drop down list.
  3. Click on the Import File or Import Reference Model button.
  4. Navigate to the appropriate Project and Project folder and select a .rvt file.

Creation of SketchUp Components

The Revit Importer automatically:

  • Converts all Revit families into SketchUp Components.
  • Converts identical Revit objects to identical SketchUp Components.
  • Names SketchUp components after the Revit Family name + instance UUID or Revit Family name + Revit Family type + instance UUID

Creation of SketchUp Tags

The Revit Importer Tags all Revit Families under automatically-generated SketchUp Tags named after the equivalent Revit categories.

Creation of SketchUp Sections

  • SketchUp Sections are created from Revit Levels. 
  • Sections point downwards and are placed 4ft above Revit levels.

Geometry optimization

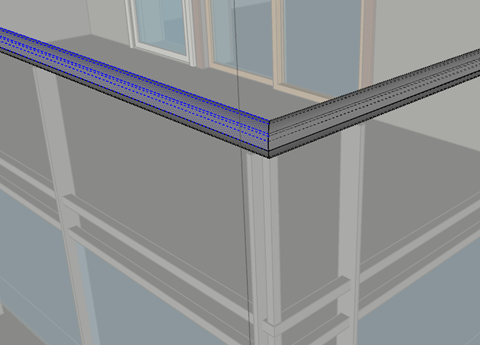
The Revit Importer optimizes redundant triangulation (merge coplanar faces) and lowers the segment count on curves. 

Creation of SketchUp Materials

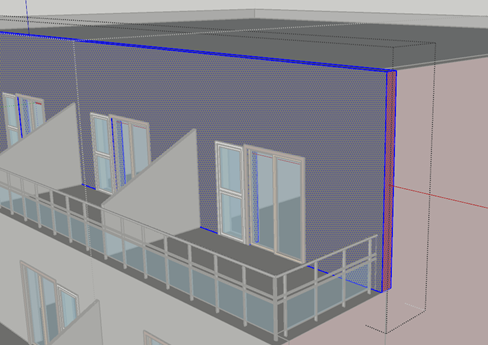
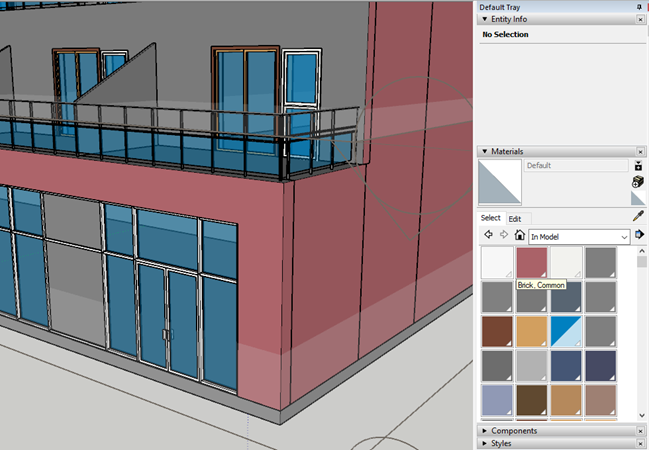
  • SketchUp materials are created from Revit Materials. 

  • SketchUp Materials take the appearance of Revit materials rendered with the “Consistent Colors” option.

  • Transparent materials are supported.

Open the Main RVT project in SketchUp :

File/Import/Revit File (*.rvt)

  1. Open Rstadvancedsampleproject.rvt
  2. A new Component is created for the entire RVT project:


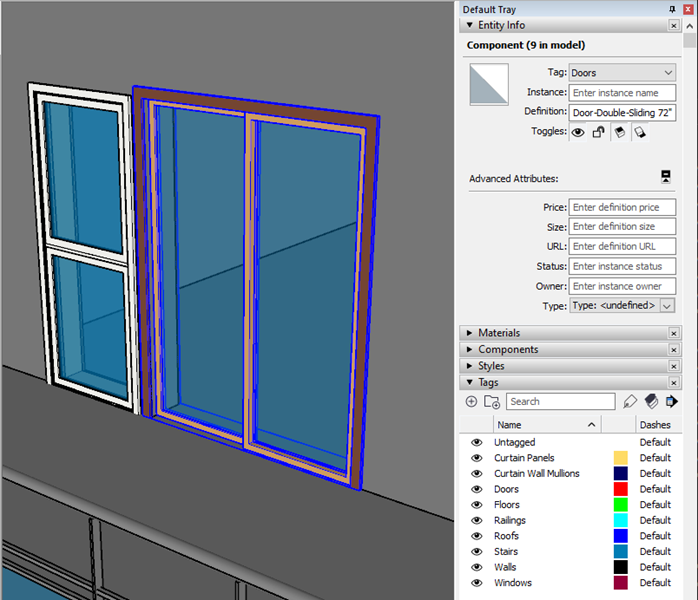
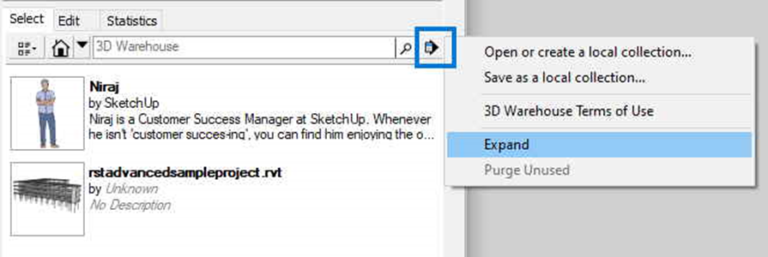
Note : All objects from Revit have been grouped in one main component upon import. In the Components tray, you can use the “expand” option to list all sub-components imported from Revit families and categories.

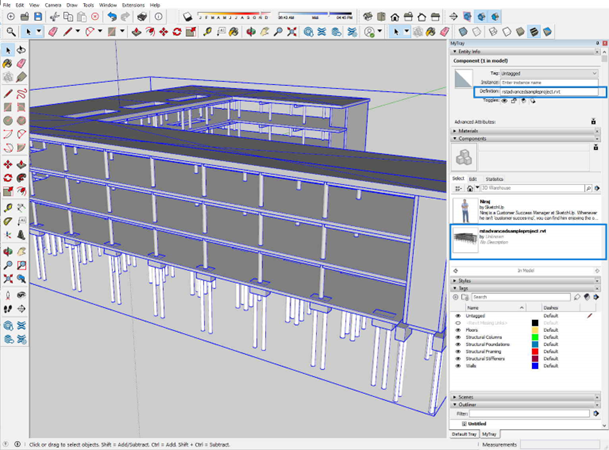
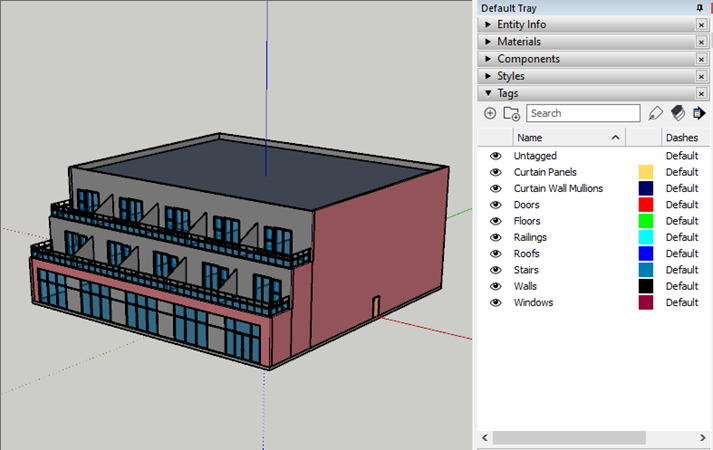
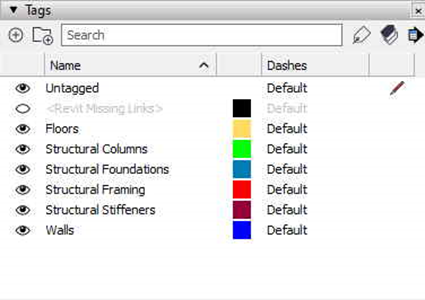
After the import, Tags are created in SketchUp to reflect the various families of objects existing in the Revit project :

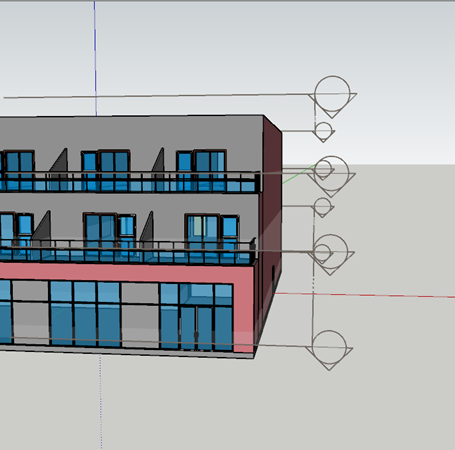
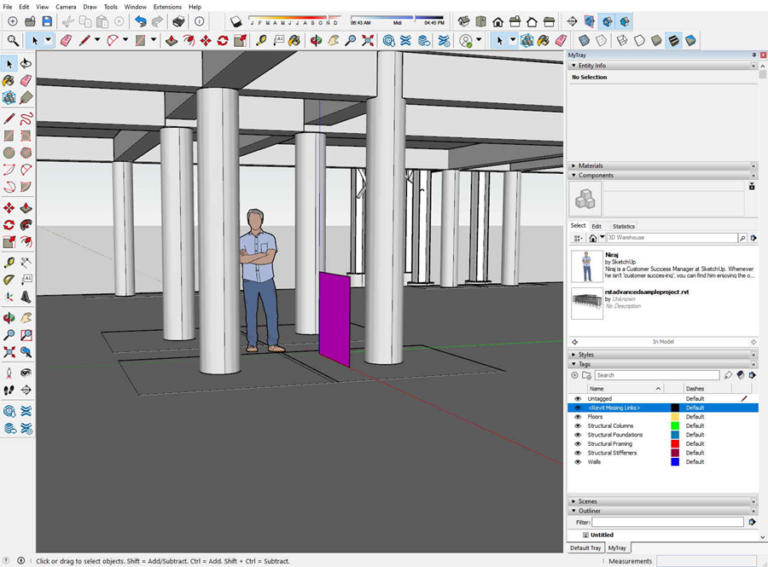
Within these Tags list, you will find one named <Revit Missing Links>.

If applicable, this tag will contain a “Proxy” object for each instance of a linked RVT project to the imported one. In this case, only one linked project is existing, which means that the Tag will contain only one proxy object, as follow :

  1. Display Tag <Revit Missing Links>
  2. Navigate the model to find a Purple Square component with the name of the linked RVT file.

At this point, we propose two workflows in order to add this missing link to the main project :

WORKFLOW 1

  • Phase 1 –  Create the main SKP project from the main RVT project


  1. Import the main RVT project “Rstadvancedsampleproject.rvt” using : File/Import/Revit File (*.rvt)
  2. Save “Rstadvancedsampleproject.skp”


  • Phase 2 – Create the secondary SKP project from the linked RVT project
  1. Open a new empty SU project
  2. Import: “Technicalschoolcurrentm.rvt” using : File/Import/Revit File (*.rvt)
  3. Save the new project as “Technicalschoolcurrentm.skp”


  • Phase 3 – Create the full SKP project
  1. Close “Technicalschoolcurrentm.skp”
  2. Open back “Rstadvancedsampleproject.skp” 
  3. Display the Tag <Revit Missing Links>
  4. Select in the model the component named rstadvancedsampleproject.rvt and double-click to enter that main component
  5. Navigate to find and select the component named Technical_school-current_m.rvt (Purple square) which is located at the origin of the SU project.
  6. Right-click that component and choose “Reload…” from the contextual menu : it opens an “Open…” window

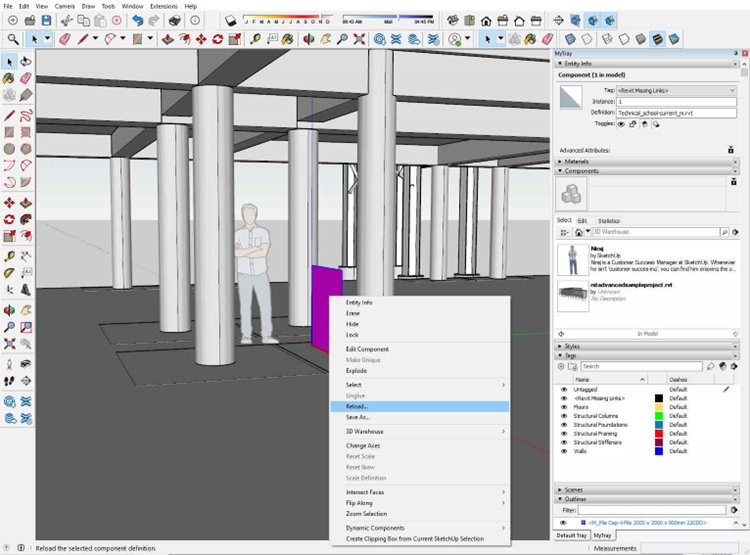
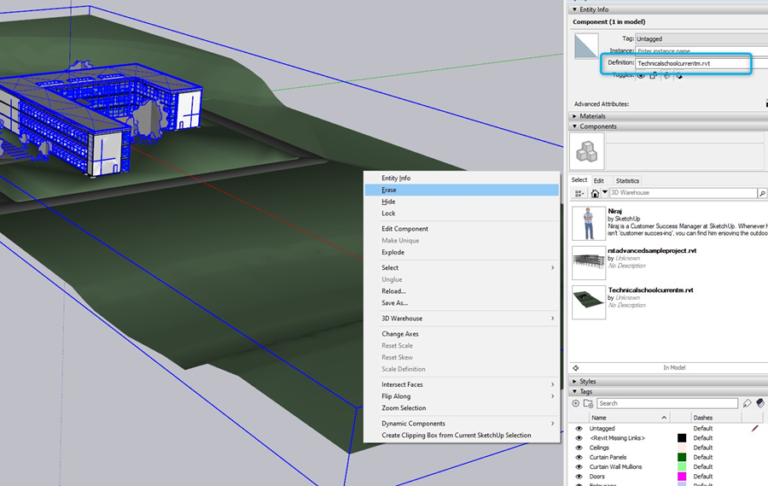
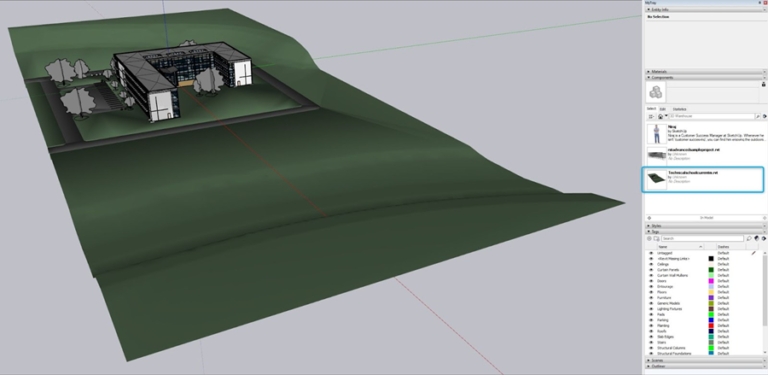
7. Browse to the “Technicalschoolcurrentm.skp” SU project

8. Select and click “Open”: The proxy component (purple square) has been replaced by the secondary SU project

Note : Make sure to enter the main component and select only the Proxy object prior to “reload”. You could by mistake select the main component and replace it by the linked project, instead of adding it.

WORKFLOW 2


Things to know :

On the Revit side, each project is created in its own coordinate system. It means that we can face 2 options.


First, both the main RVT project and a linked RVT project can actually share the same coordinate system, meaning they have been created (even separately) using the same absolute coordinates. In that case, importing both projects in SU one after the other will just place the linked project at the right place according to the main one : That will be the first option for workflow 2.


Second, the linked RVT project has been created in its own local coordinate system, which is different from the main RVT project. This means that they don’t share the same absolute coordinates and that the linked project has a position relative to the main project, which is different from its local coordinate system. In that case, importing both projects in SU one after the other will place the linked RVT at a wrong position according to the main one, and we will have a few more manipulations to place it at the right position : That will be the second option for workflow 2.


Tip : Once the main RVT project is imported within SU, the position of the proxy object (purple square) may give the information about “is the linked project in the same coordinate system ?”

Basically, if the proxy (purple square) is located at the origin of the SU project, it means it shares the same coordinate system as the main project. If the proxy is located somewhere else in the 3D, it means it was in a different coordinate system and its position in the SU project reflects its real relative position according to the main project.


  • Option 1 – This workflow is applicable to the sample files we are using here, as the RVT projects are in the same coordinate system.


  1. Import the main RVT project “Rstadvancedsampleproject.rvt” using : File/Import/Revit File (*.rvt)
  2. Keep the project open in SU
  3. Import the main linked RVT project “Technicalschoolcurrentm.rvt” using : File/Import/Revit File (*.rvt)


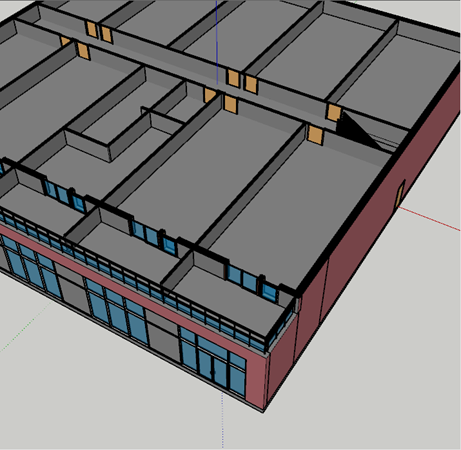
A new component has been added in the project, and created in the 3D at the right position according to the main one. A couple of new tags have been created too, for all the new families coming from the second RVT imported.


  • Option 2 – This workflow is applicable to any RVT projects having linked projects in a different coordinate system. It can be simulated with the sample projects we are using here. Of course, using this specific data, the linked project will not be created at the wrong position, but you can still follow the steps in order to practice. Using another data of your own could definitely be more relevant.


  1. Import the main RVT project “Rstadvancedsampleproject.rvt” using : File/Import/Revit File (*.rvt)
  2. Keep the project open in SU
  3. Import the main linked RVT project “Technicalschoolcurrentm.rvt” using : File/Import/Revit File (*.rvt)

At this point, a new component (related to the linked RVT project) is added to the project and is also created in the 3D but at the wrong position according to the main component (from the main RVT project). Still, a Proxy component (purple square) exists and reflects the real relative position of the linked project to the main one.

  1. Delete the component that has been automatically added in the 3D view (at the wrong position).
  2. Display the Tag <Revit Missing Links>
  3. Select, in the SU 3D, the component named rstadvancedsampleproject.rvt and double-click to enter that main component
  4. Navigate to find and select the Proxy component (purple square) to replace

In the “Components” tray : Right-click the imported linked component then use “Replace selection”

Other features

  • The active 3D view is exported by default (It can be changed in Revit). If no 3D view is active, the first 3D view containing {3D} or 3D or 3D in its name is exported. If the Revit project does not contain any 3D view, a temporary view is created and populated with available visible geometries.
  • Respects the Revit model origin.
  • Imports the highest level of details.
  • Imports the primary design option.

About Elmtec

Elmtec have been the UK distribution partner for SketchUp since 2010, and service a network of UK and Irish resellers. We have over 22 years’ experience within the digital design community.

Contact Us

T: 01844 263 750
E: sales@elmtec.co.uk
W: www.elmtec.co.uk/sketchup