Interior & Renovating Specialist Bringing Designs To Life With 3D Modelling & Rendering
About Alexandru:
Today, we are joined by Alexandru, Owner and Director Of Heartwood Carpentry London, an interior design specialist who, over the last few years, has helped dozens of people convert unused space into professional, spacious areas within their family home.
Alexandru has been kind enough to share his journey with us today, more specifically, how he uses SketchUp in his work, his challenges and how he turns designs into real life pieces of art using 3D modelling and Visual Rendering.
Posting on behalf of my sister who’s not on social media. She is so delighted with all the work carried out on her home. So professional and a true craftsman who takes so much pride in his work. Would highly recommend this company
So pleased with the work we've had done, the new space we have is incredible.
The team are so helpful, they created a vision for us and completed it better than we ever imagined.
Amazing transformations delivered with great vision and skill.
So, Alexandru tell us about how you got into Interior Design & Carpentry…
Sure, I have always loved woodwork, and I now have a small business based in Kingston, London specialising in interior design & carpentry, supporting my customers and turning their houses into spacious family homes.
I started using SketchUp around 3 years ago when I decided I needed a better way to showcase my ideas to customers, and an easier way to plan and design once I had an initial conversation with them. Now, I can’t imagine my life without it.
I had never used any other software similar to SketchUp before so I was totally new to it, personally I wouldn’t change anything, I was really happy with how easy and simple it was to use as a beginner and a busy business owner. I am now using SketchUp Pro and wouldn’t look back, it’s doing wonders for my customer designs and the time it takes to put those designs together gives me time back to spend on the parts of the business I truly love.
Great thanks Alexandru, so why SketchUp?
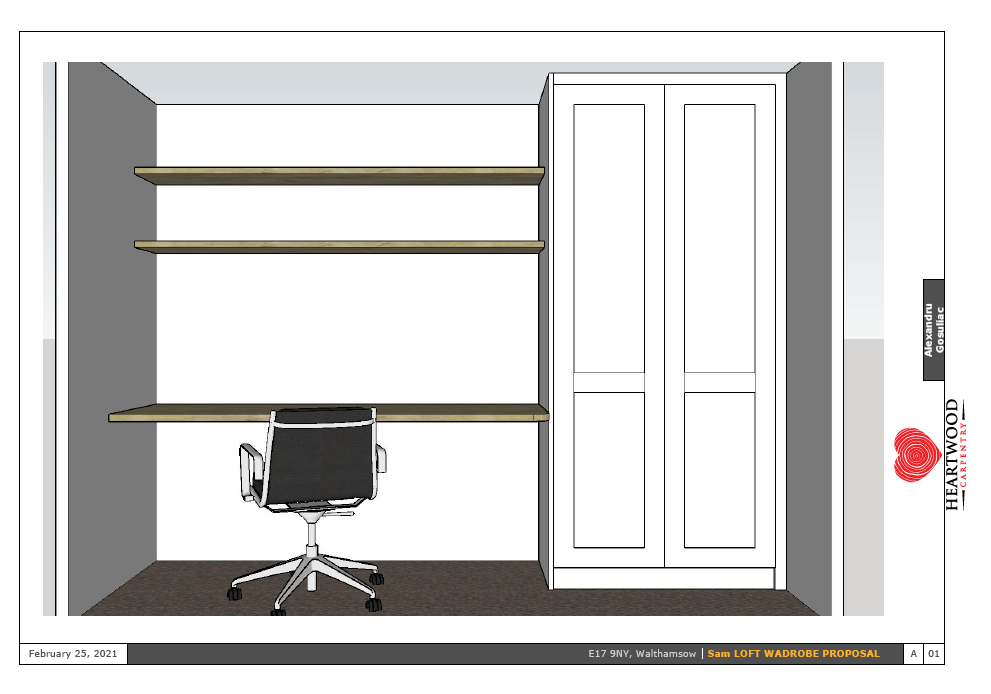
After years in the trade and hundreds of customers with new, space efficient furniture and room layouts they love, I decided to start using an online rendering software (specifically SketchUp Layout) to present my initial designs to clients, allow them to see how the final product would look, and blow them away with the realistic images, colours and scenes of their space, online. This has helped me relate to clients, design more accurately and have dozens more very happy customers!
SketchUp integrates perfectly into my workflow, when I first speak to, meet (or e-meet with COV-ID!) clients I take all measurements needed and have a chat with the client, why they reached out to me and what their ideal finished product would look like.
Next, I will still do a rough sketch with them on paper so we are both on the same page and I understand what the customer is looking to achieve. Once this is completed, I will then head off and spend 2-3 hours building their design in SketchUp using the Layout tool to bring it to life.
Once this is complete, I will send the design over to the customer with some options. If there are any changes the customer requires, I am able to do this instantaneously, previous to using SketchUp, I would have to re-do the design, typically taking a couple of hours at a time. Finally I’ll send a final design to a customer and start building actual furniture.
Love it! What project over the years have you been most proud of?
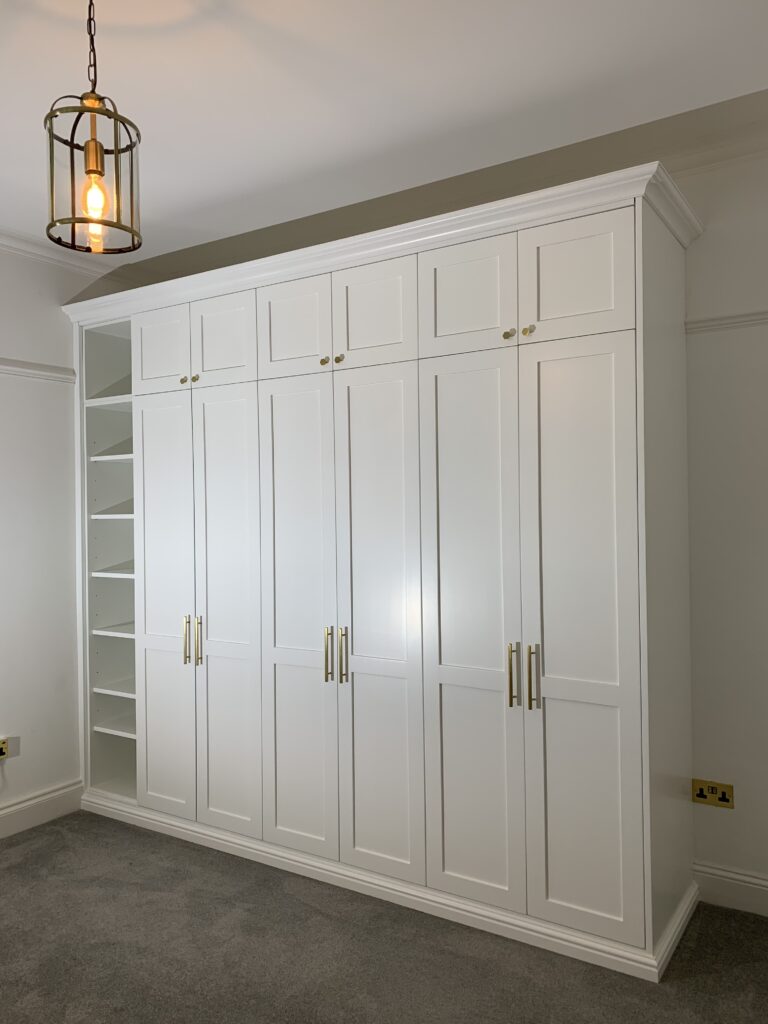
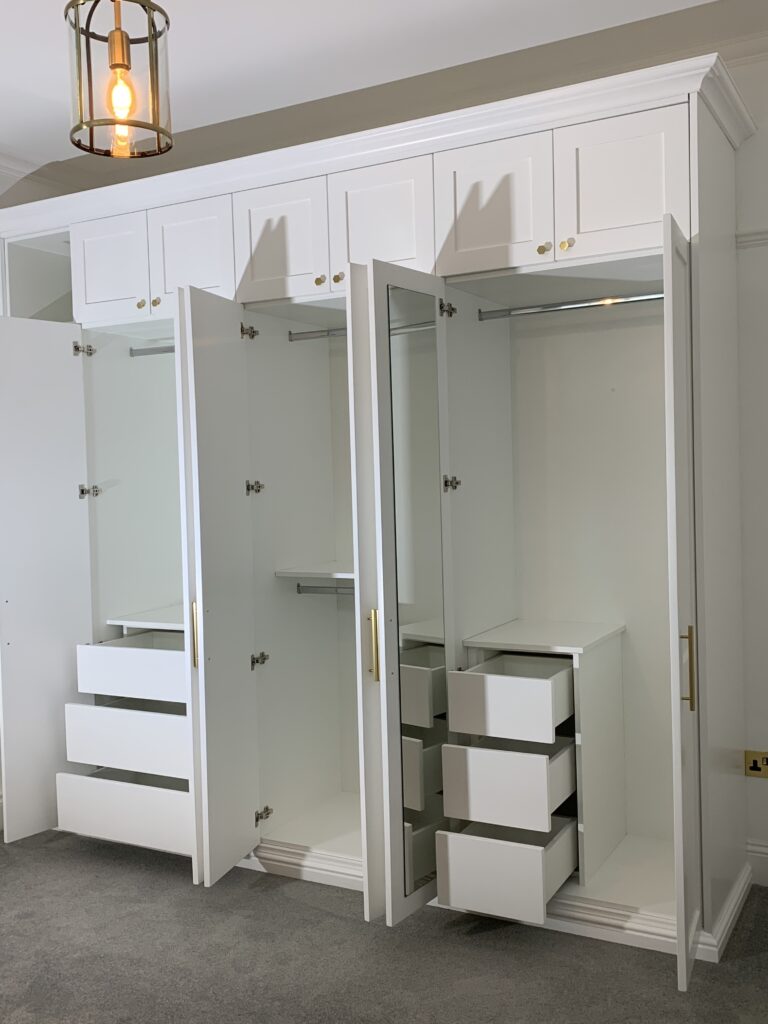
I am really proud of one project in particular I completed last year, I created and fitted a loft wardrobe in Wimbleon, using SketchUp for this design made it simple and easy for me to create a realistic blueprint and make tweaks and changes were needed. It saves hours for a busy small business owner like myself!
How to make a sloping roof in Sketchup? It’s easy. Maybe you want to know how to make a pitched roof in Sketchup, or find out how to make a hip roof in Sketchup? Perhaps you’re trying to pin down how to make a slanted roof in Sketchup. When you want to draw a realistic, accurate roof in Sketchup, it’s good to know that all you need is a great little roof Sketchup plugin and you’re well on the way to success.
If you want to know how to draw a roof in Sketchup without a plugin or extension you need an easy to understand, clear explanation in plain language. This article reveals exactly how to make a roof in Sketchup, and you’ll find it surprisingly simple. We also take a good look at roofing materials and types. Read on to become a top classSketchup roof pro!
Different Roof Types in Sketchup
How to do a roof in Sketchup? It’s really easy. Did you know Sketchup can be used to model an exciting variety of roof types and designs? Better still, did you realise you can create accurate, attractive roofs in Sketchup without any support from plugins?
The list of potential roof styles is extensive. It’s also possible to create even more variety, making roof designs that are completely unique to you. When there’s such a huge choice of useful and unusual textures and materials available, including masses of different roof tiles, Sketchup means there’s no limit to your creativity.
Draw the perfect open gable roof with ease
Create beautiful box gables in no time
Hip gables are no problem at all
Hip and valley roofs are as easy as pie
Gambrel roofs and mansard roofs are at your fingertips, hassle-free
Dutch gables are problem-free to achieve
Hexagonal gazebos might be complex, but Sketchup makes them simple
Sloping and slanted roofs are never an issue
It’s easy to create roofs in Sketchup without a plugin. But you also have the opportunity to pick and choose from a vast number of very cool plugins to use for roof design and modeling. They’re a great way to speed up the process, allowing you to deliver roof brilliance time after time, in no time at all. This is particularly handy when you’re considering complex designs. You might choose a Sketchup roof tiles plugin to create unique tiles to thrill your clients – the world is your oyster with Sketchup.
How to Create a Basic Roof in Sketchup
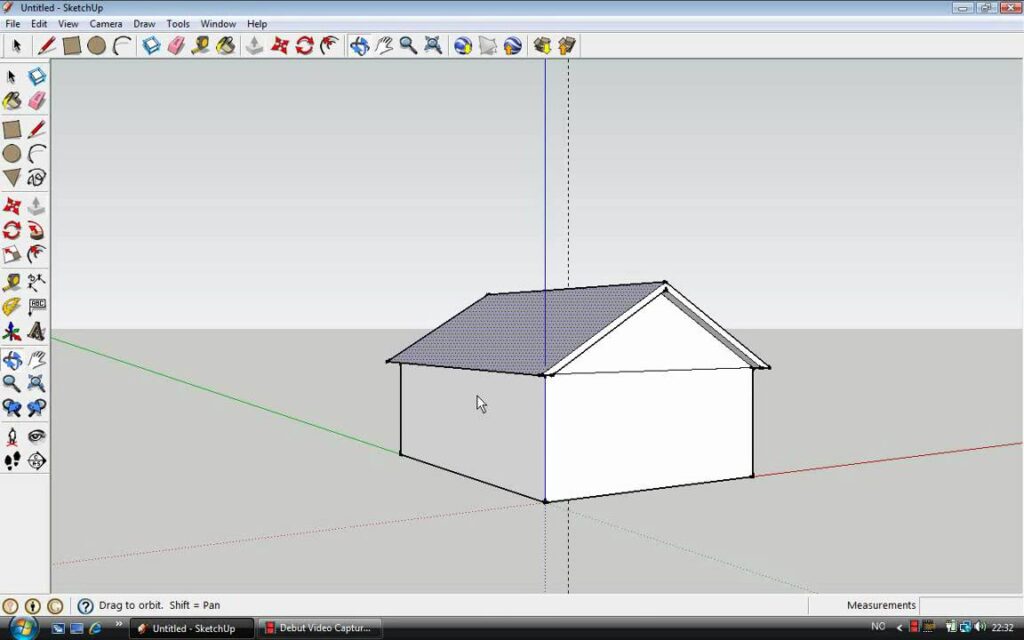
Here’s how you create the basics of a Sketchup curved roof, a sloping roof in Sketchup, or any other kind of roof. Your starting point is always the same. It’s good to know that creating a basic roof in Sketchup is actually very simple. It’s a great idea to have a go yourself to discover how easy it is. Here are some basic steps, which reveal its simplicity:
Start off with a basic box drawing of the building
At one end of the building, draw lines outward to represent the roof’s eaves. This dictates how far the roof extends out from the edge of the building to keep the rain and weather out
Define the vertical that’ll create the roof slope you want to make. Slopes are defined horizontally via the x axis and vertically via the y axis. A 4/12 pitched roof, for example, rises 4 inches on the y axis for every 12 inches along the x axis
Now you’ve drawn lines to represent the eaves, draw more lines to define the roof slope to make your first gable end
Draw central lines across the building’s box top to show where the roof will be, creating a path
Select the central line or lines and pick the ‘follow me’ tool
Click on the gable end and you’ll see it follows the path of your chosen central line to create the roof
Select ‘reverse faces’ to produce the slope of the roof, and adjust it if necessary
See – isn’t it a fantastic way to create complexity with just a few clicks? Now you can really start to get creative, adding textures and materials and changing the roof tiles until you’re happy with the finished effect, look and style.
How to Use a Plugin to Create a Roof in Sketchup
There’s a great choice of excellent extensions and plugins for Sketchup that can be used to create roofs.
One that’s widely acknowledged as excellent is called‘Roof’, created by TIG. You’ll find it in the Sketchucation plugin store, and it’s free. Developer donations are encouraged, though, and it’s always nice to contribute what you can to its ongoing success.
This particular plugin contains a bunch of seriously handy roof creation tools. To create roofs all you do is create your building as a block, then choose a face of the building – which has a flat roof for now. Choose ‘roof’ from the extensions menu, then select the type of roof you want to draw. From there you simply add in the parameters you need, including the slope of the roof, the materials it’s made from, the eaves, the size of the fascia, the soffit size and more.
As you’ll see when you experiment with it – which is something we strongly recommend – this amazing roof extension creates all sorts of magic including hipped, mansard or sprocket, gable ended and pyramid roofs. There’s a really good ‘help’ file to accompany your voyage of discovery too, which you’ll need to download separately. It’s full of useful hints and tips.
How to Add Realism to a Rooftop with Materials
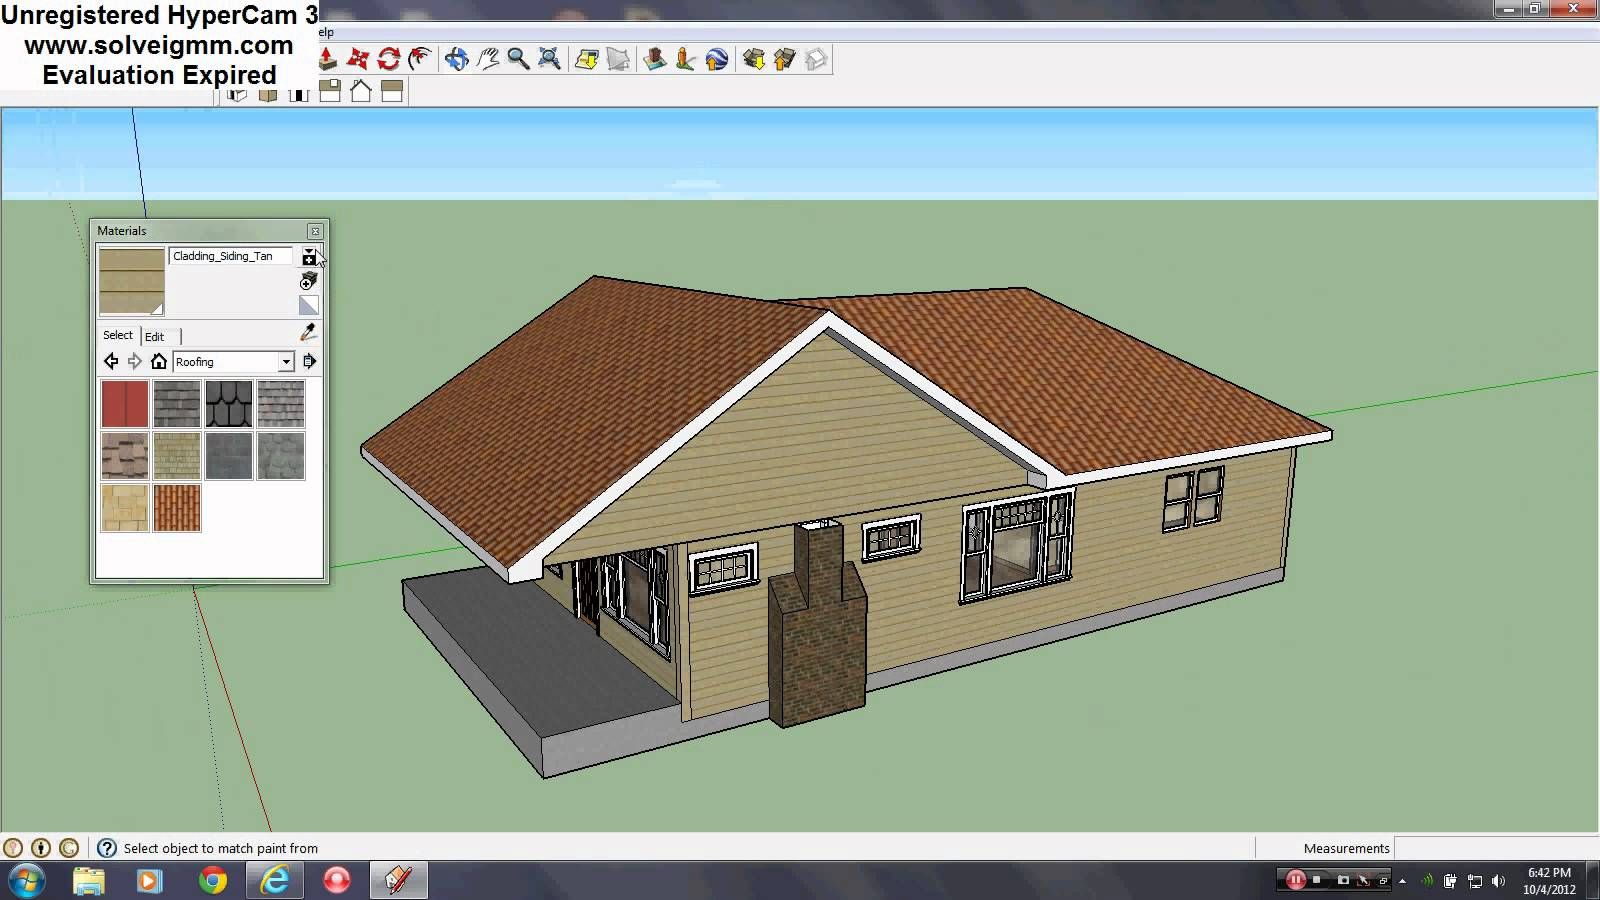
Realism matters in roof design, particularly when you’re designing with innovative, new or unusual materials. You want your clients to ‘get’ what you’re saying in your design instantly, understand where you’re coming from, and enjoy an accurate representation of what the final roof will look like. This is where Sketchup materials come in, and they’re amazing.
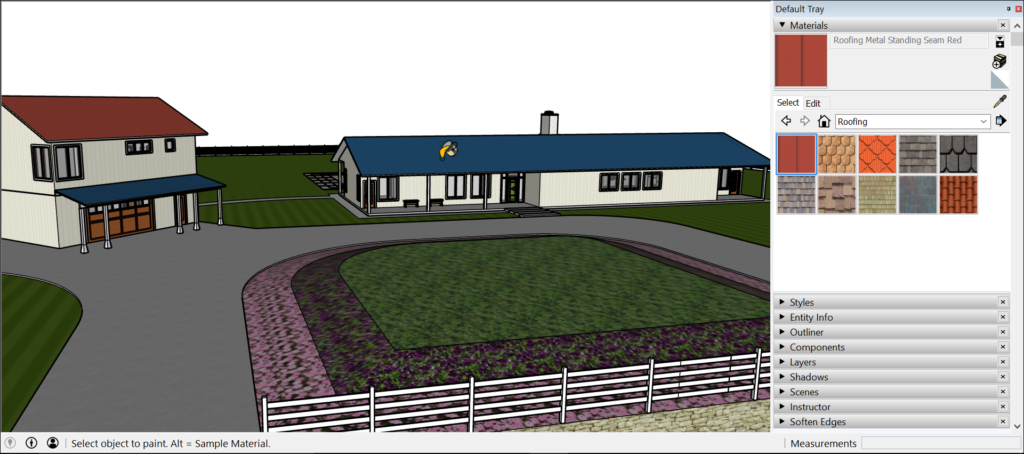
Materials are used to add realism to roof models in Sketchup. You actually paint different materials on faces, materials being painted with a colour plus an optional texture, both defined in an image file. You can instantly replace one roofing material with another, perhaps changing your original shingles to a metal roof or even a thatched roof. Because the colour and texture are separate, you can change one or both.
It’s just as easy to play with the opacity of a material, making it opaque, transparent, or anything in between. As long as you’ve built an accurate model in the first place, the software can even figure out exactly how much of a given material you need to build the roof in real life. Here’s how to apply materials to your roof model:
Select the face or faces where you want to apply a material
Pick the paint bucket tool
Click ‘select’ in the materials panel
Choose a materials collection from the drop down list and pick the one you want to use – remember you can edit 3D materials really easily, which gives you a more or less infinite variety of choices
The Sketchup 3D warehouse is stacked high with exciting extra roofing materials as well as a wide variety of roof components like roof vents and roofing corners, roof panels and roof-mounted AC units, ridge cap cleats, roof insulation, rafters, ceiling waves, roof sheeting and so much more.
Get Started with SketchUp
Now you know all about digital roof material, Sketchup is your first stop for roof drawing excellence. You know exactly how to build a roof in Sketchup, choose unusual and revolutionary roof materials, and manipulate them to create something unique. And you understand how the possibilities for different roof tile Sketchup texture is infinite.
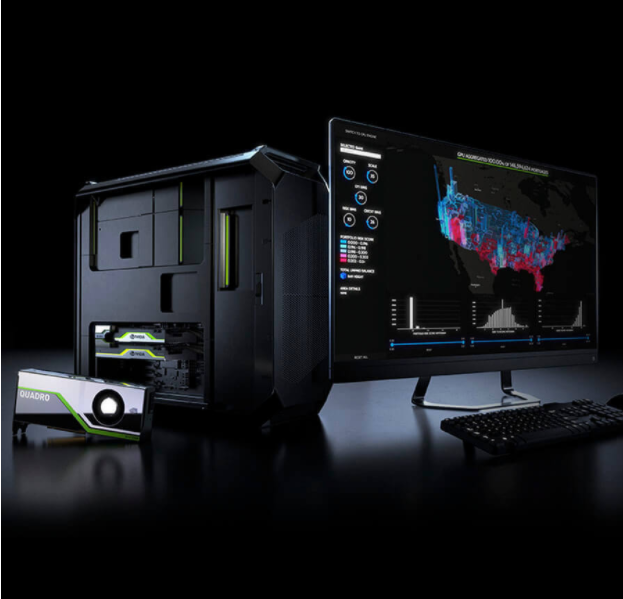
The term “professional workstation” implies many things to many people. However, it usually translates to expectations of high quality, excellent reliability, responsive support, and high performance. Not to mention leading-edge technology—although not at the expense of quality and reliability. These expectations exist because workstation users have specific goals in mind— goals that are ultimately critical to success.
The goal may be designing a revolutionary car or spacecraft, or it may be creating key animated scenes in the next blockbuster film. Each goal has a level of investment and expectation of success. The quality, reliability, support, and performance that define a workstation ensure this success.
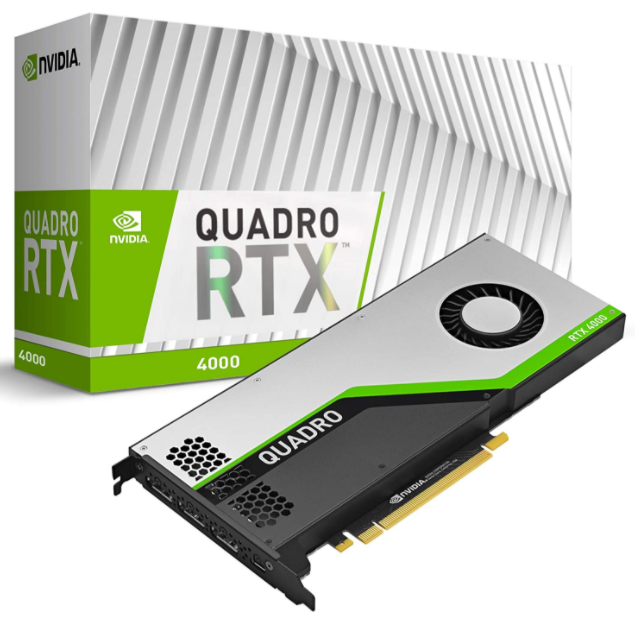
The Nvidia professional series of Quadro, Tesla and Grid boards are built to provide this high level of quality and reliability. Below “Quadro” is used as synonym for the Nvidia professional series.
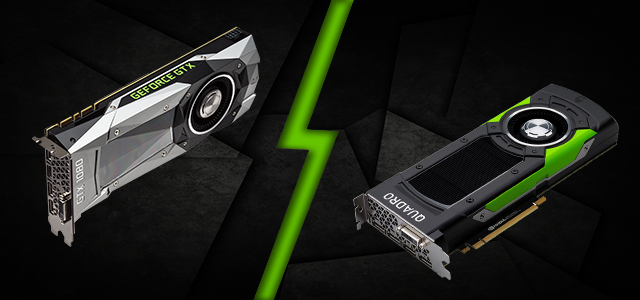
Professional Series – Hardware
Quadro boards are built by Nvidia while GeForce boards are built by many different manufacturers who bought only the GPU from Nvidia. You therefore get always the same high quality whether the model is bought at the beginning or end of its intended 3 years lifetime while lifetime of GeForce boards is much lower, only 3 to 6 month. Only Quadro boards are built and tested to be used in a 24/7 environment, resulting in moderate clock rates. GeForce cards usually use the highest clock rates possible
Hardware advantages:
Models and datasets are getting larger and larger. The Large memory on Quadro boards allows working with big models, textures and huge datasets without losing performance.
Better electrical integrity due to thicker gold plating on the PCIe connector.
Quadro boards use 30 micro-inches of gold while GeForce boards often are below half of it.
Board extenders are available for high-end boards.
Board extenders allow to improve the mechanical integrity and stability and are usually needed and used in Servers.
Carefully selected components to provide high reliability.
To ensure high reliability and long life components on Quadro boards, such as the fan, are carefully selected.
Long lifecycles allows replacing of boards with completely compatible boards without the need to change the driver or the system image.
The typical lifecycle of Quadro boards is min. 2 years while 3 years are intended and compatibility is granted through the complete lifetime. Typical life time of GeForce boards is 3 to 6 months.
Hardware accelerated Antialiased Points and Lines.
Many workstation applications, particularly in the CAD market, offer the option of using antialiased points and lines (sometimes called “wireframe”). With this option turned on, component edges can be viewed as precisely as possible without encountering the aliasing artefacts that are associated with lines displayed on a rasterized display.
Hardware accelerated Clip Regions.
During a typical workflow, workstation applications pop up many windows for menus or alternative views of components or scenes. Unlike consumer applications such as games, these applications often occupy the full screen, so the result is many overlapping windows. Depending on how they are handled by the graphics hardware, overlapping windows may noticeably affect visual quality and graphics performance.
Quadro boards software
The memory demand for Workstation applications is different than for games. While GeForce boards are optimized to get the highest FPS in full screen games, Quadro boards are optimized to handle multiple accelerated windows.
The Quadro driver automatically detects the application and uses the best settings for it. NVIDIA works closely with all workstation application developers, including Adobe, Ansys, Autodesk, Avid, Bentley, Dassault, Newtek, Paradigm , PTC, RTT and Siemens.
Quadro Software advantages:
Certifies drivers for more than 150 professional applications.
NVIDIA Quadro® optimized drivers provide excellent performance with professional software applications from leading software manufacturers. Through joint development with the applications providers and rigorous in-house testing, Quadro and Professional Products are certified on all industry leading applications.
nView Desktop Manager
nView Desktop Manager is a user-level application that focuses on making you more productive when working on your Windows desktop. Desktop Manager was originally created for multi- display graphics cards but has grown to enhance single-display user desktops as well. Desktop Manager supports both single-display and multi-display configurations running with single-display, multi-display, or multiple graphics cards based on NVIDIA GPUs.
Mosaic Mode
The system views multiple displays as a single unified desktop environment. You can easily span any application across up to 16 high-resolution panels or projectors from a single workstation, without sacrificing performance or power with advanced features like bezel correction, projector overlap and task bar spanning.
Quad-Buffered Stereo
Many professional applications let users view models or scenes in three dimensions, using a stereoscopic display. The application generates separate images from the left and right eye perspective and both are alternately displayed. The preferred way to implement stereo in professional applications is through OpenGL quad-buffered stereo.
Enterprise Tools
NVIDIA Enterprise Management Toolkit (NVWMI) is a graphics/display management and control technology that interfaces with Microsoft’s Windows Management Instrumentation infrastructure, specific to NVIDIA professional graphics solutions. NVWMI allows scripts and programs to be created that configure specific graphics & display related settings, perform automated tasks (e.g. save a profile and use it for an unattended setup; systems will then start up with this profile), and retrieve and display a range of information associated with the professional graphics solution.
Multi-GPU support
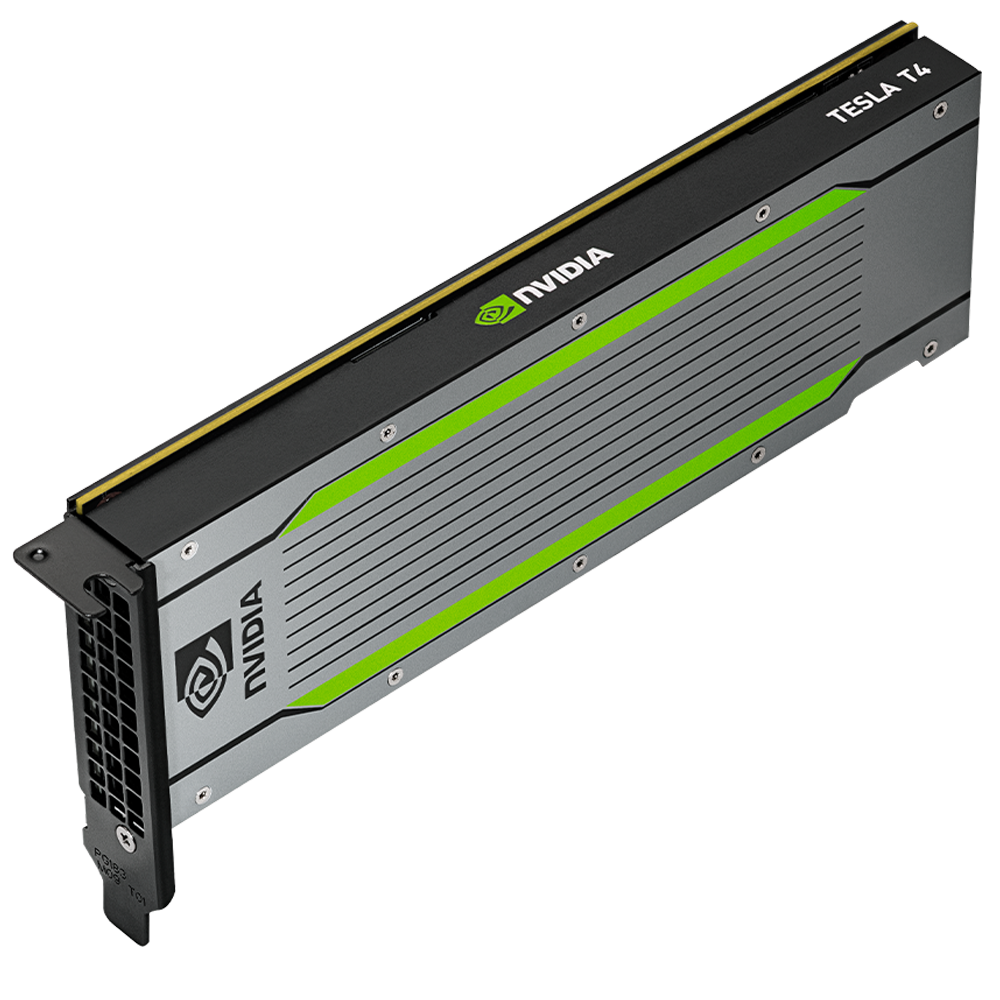
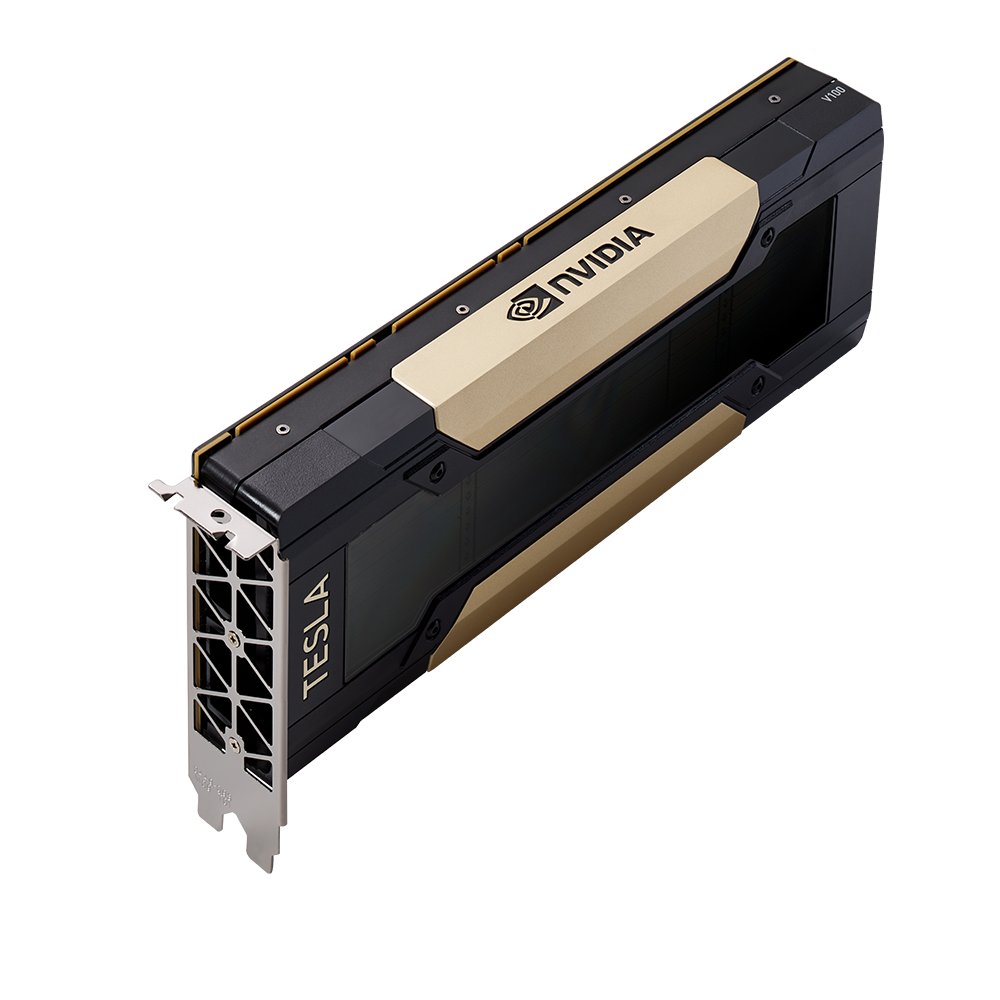
Quadro boards allow combining the boards to perform different tasks. E.g. while the graphics cards is used to work in Maya, one or more Tesla cards could be used to render the image you are working on without disturbing the workflow while rendering and working on a single graphics board is not possible due to performance impact.
So, What's the conclusion?
The workstation market space has specific requirements that are driven by the needs of professional applications and mission criticality of user environments.
This document described the features offered by the NVIDIA Quadro workstation GPU family (vs GeForce GPU family) which meet these workstation requirements. These features usually have a greater influence on the Total Cost of Ownership than only considering the price when selecting a graphics solution.
Quadro boards from PNY are offered with a 3 year warranty and are delivered always with a complete set of accessories. With PNYs Warranty Extension Service you could extend the warranty to 5 years, plus Advanced Replacement Service.
DWG to SketchUp. It’s a thing, and it’s important. If you want to understand how to import a SketchUp DWG file, this article reveals exactly how to import a DWG file into SketchUp, so you can confidently use it inside SketchUp and speed up your workflow. Read on for a clear explanation of everything to do with SketchUp DWG converters and SketchUp DWG import.
What are DWG Files?
What, exactly, are DWG files? And does SketchUp open DWG files?A file with a .DWG extension is simply an AutoCAD Drawing Database file. These files store metadata and 2D / 3D vector images for use in CAD programs, compatible with a wide range of 3D drawing and CAD programs including SketchUp. These files make it really easy to transfer drawings between programs, giving you the opportunity to make detailed models from simple CAD floor plans and build your own wireframes.
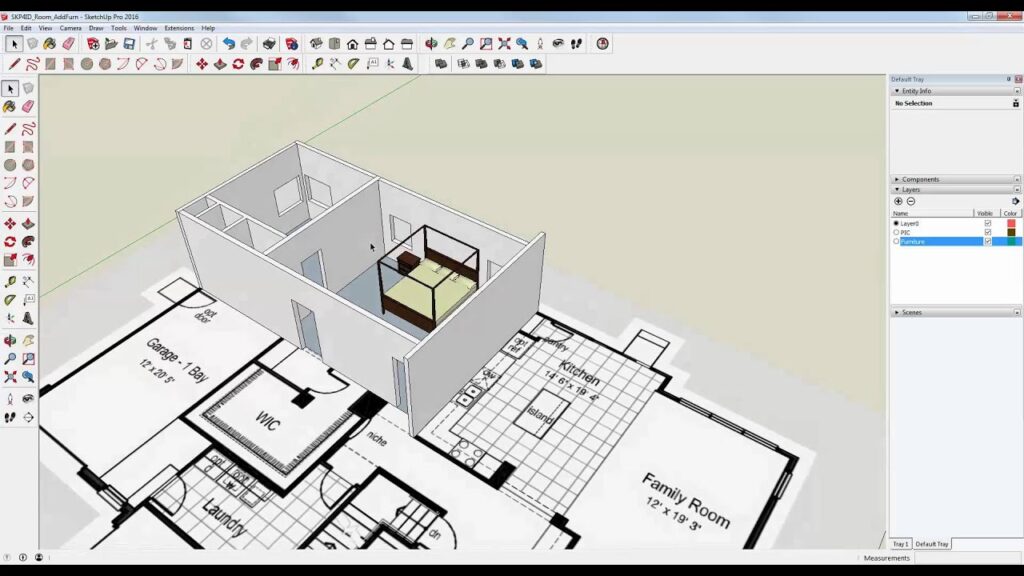
Importing CAD Files into SketchUp
First of all, let’s look at the CAD entities that SketchUp can and can’t import.
When you import CAD files into SketchUp you might encounter a couple of issues. First, your size / scale might not import correctly, especially when you’re not sure which measurements were used to make the original CAD file, Two, the lines in a CAD file might not connect to make SketchUp faces, leaving you with lots of little gaps to fix.
You can’t import hatching, text, dimensions, XREFs and Proprietary ADT or ARX objects. The CAD elements that can be imported via a DWG file are:
Arcs and circles
Objects that have a thickness
Raster image
Faces and 3D faces
Layers
AutoCAD region
Spline
Lines and supported Line Styles
Nested blocks
Materials
Point
Ellipse
Polyline-based solid objects
Here’s how to prepare a CAD file for modelling in SketchUp:
Check the size of the CAD geometry you’ve imported – you can check using an entity whose measurement you know, then use the tape measure tool to check it. If it’s wrong you can use the Tape Measure tool to scale the whole model correctly.
Ensure your CAD geometry is a single group. If the SketchUp model includes geometry before import, it groups your imported CAD geometry automatically.
Line up your floor plan with the SketchUp drawing axes using the Rotate or Axes tool.
Delete any extra layers and put your CAD group on a fresh.
Context click the group to lock it. This is your reference for making your SketchUp model.
Change the edge styles according to your taste, or turn off profiles in the Styles browser to keep all your lines the same width.
Make scenes to toggle your layer visibility. Make a couple of scenes with visibility as the only attribute you save per scene. In scene 1 make the CAD group layer visible. In the second scene, hide it.
Next, we’ll look at getting .DWG files into SketchUp.
Open SketchUp, then open the SketchUp model you want to import your .dwg or .dxf file into.
Choose Select File – Import to see the import box.
Go to your CAD file on your hard drive.
Chose AutoCAD Files (*.dwg, *.dxf) from the drop-down list and pick the file to import.
Click Options to see the Import AutoCAD DWG/DXF Options box.
Click OK and Import to begin the importing process.
There are also some optional things you choose to do, or not. You carry these out after step 5 above, and before step 6:
In the Geometry area, you can choose a variety of preferences. When you choose Merge Coplanar Faces it tells SketchUp to take out triangulated lines from planes automatically. Choose Orient Faces Consistently and SketchUp will analyze the direction of your imported faces and make them all face in the same direction.
You can choose Preserve Drawing Origin via a check box to put your imported geometry at the origin defined in the .dwg or .dxf file. When you don’t select the box, you place the imported geometry near to SketchUp’s origin.
When you want to import your geometry at the right scale, something that’s often vital, select the unit used in the CAD file via the Units drop-down, then pick Model Units, Inches, Feet, Yards, Miles, Millimeters, Centimeters, Meters or Kilometers.
It’s good to know you can also drag and drop your files into your drawing area in SketchUp. The import box appears automatically once you’ve dropped the item.
How to Import DWG Files without SketchUp Pro
Does SketchUp open DWG files? Yes, it does. DWG import is a feature of SketchUp Pro. But there’s a cool little work-around for importing .DWGs without SketchUp Pro, in older iterations of the free version, for example, the free version of SketchUp 7. Here’s what you do:
File-import
Choose the ACAD (.dwg) file type from the dropdown menu
Select the .dwg file you want to import
Click ‘close’ when you get the import results message
File-save as, saving your file under the name you want as a SketchUp .skp file
Open the file in SketchUp – bear in mind once you save your file as a .skp you won’t be able to open it in an older version of SketchUp. You’ll see a warning box to remind you about this.
SketchUp Import Plugins
There’s a variety of SketchUp plugins/extensions supporting a number of import operations. The SketchUp DWG plugin from TECLA Software, calledTECLAsoftware Import DWG, depends on the Teigha File Converter for importing DWGs, and theA1 Hart Convert DWG Layer Names to Materials SketchUp DWG plugin cleverly converts DWG file layer names to materials in SketchUp.
Get Started with SketchUp
Now you know how to achieve SketchUp import DWG in a number of different ways. Did you know you candownload the free version of SketchUp Pro here, and test-drive the magic for yourself on a FREE 7 day trial basis? You can also tap into a huge collection oftutorials andlearning resources to help you on the journey.
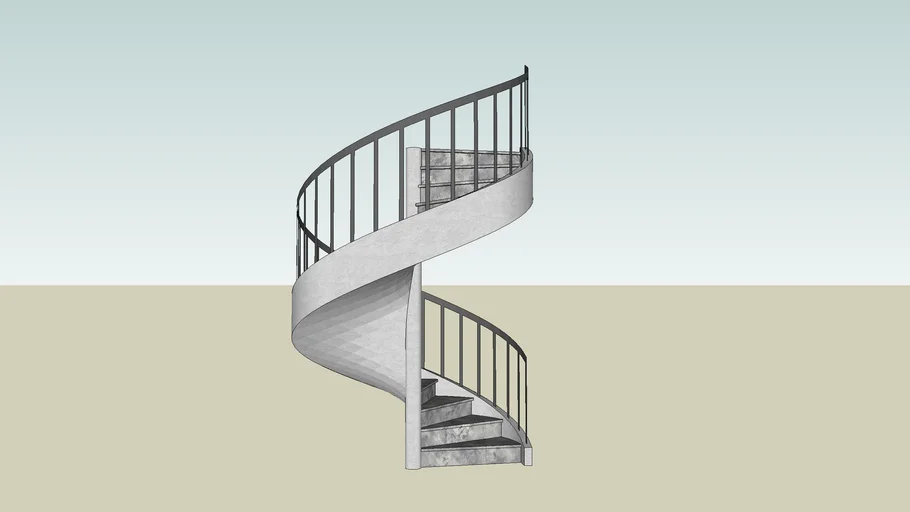
Spiral staircases are beautiful as well as practical, but they’re also very complex structures. Are you researching how to draw a SketchUp spiral staircase? Here’s everything you need to create a beautiful spiral staircase in SketchUp in a number of ways, made simple to inspire you. Read on to become fluent in the creation of spiral staircase drawings.
Creating a Spiral Staircase in SketchUp
There are several ways of drawing a spiral staircase in SketchUp. The simplest of all is to head over to the brilliant SketchUp 3D Warehouse and pick out a ready-made design. There are a number of spiral staircase choices for you, including one with a full transparent handrail, one with no handrail at all, and one with a full opaque handrail. But what if you want to get creative and draw something unique? Next, we’ll look at the other spiral staircase techniques you might like to get under your belt.
Drawing a Spiral Staircase in SketchUp Step by Step
Here’s a step-by-step guide to the basic process of drawing a spiral staircase in SketchUp:
Create a circle.
Choose the number of sides your circle should have, which simply defines the number of steps you need.
Bear in mind that in this case, the radius is the width of the stairs.
Create a segment with lines leading to two points on the radius.
Delete all of the circle except this segment you’ve made, which represents one step on your staircase.
Give this wedge shape depth to represent the thickness of the steps.
Make this into a SketchUp Component.
For a 12 step spiral, create a series of 11 copies of your wedge. For staircases with different numbers of steps, adjust the number of copy wedges you make.
Now, move and copy the wedge to recreate the layer 11 times.
Shift-click to select each steps in the spiral staircase.
Hold ‘Shift’ and drag a box around the whole stack of wedges to deselect your previously selected wedges and select the remainder, the unwanted ones.
Hit delete and all but the steps you want disappear, leaving you with a set of basic spiral steps.
You can go back through the process to retrace your actions, adjusting things like the spacing between each step, the number of steps, their dimensions and so on.
Because you created a defined component early on, it’s a simple matter to add a handrail.
Spiral Staircase with a Central Void
It’s just as easy to adapt these basic steps and create spiral stairs around a circular central void, and the process you go through is much the same:
Start by creating two nested circles around the same centre.
The outer circle represents the full diameter of your spiral and the inner circle is the diameter of the central void.
As before, make wedge shapes and delete all of them except the shape you want to keep.
Turn your finished wedge into a SketchUp component and copy it until you’ve got the number of steps you want.
Copy and stack the layers to make the steps then select the actual steps in the stack.
Select the whole design, which deselects the required steps.
Press delete to remove all the steps except the ones you want
Spiral Staircase Using ‘Memory Copy’ Extension
How about using the Memory Copy extension to make a spiral staircase in SketchUp? Bear in mind the memory copy extension is simply used to repeat copy operations. The process is much the same as the step by step method we’ve showed you:
Create your SketchUp component for one step.
Carry out one copy operation.
Click ‘play it again’ to repeat the copy operation for each step.
All you’re doing is repeating the operation performed on this step component. And as before, since your steps are components, it’s really easy to add handrails.
Spiral Staircase Using ‘1001Bit Tools’ Extension
If you want to draw spiral stairs super-simply, you’ll enjoy the 1001Bit Tools extension. It’s basically a SketchUp spiral staircase plugin that includes a built-in spiral staircase option. All you do is Select ‘Create Spiral Staircase’, then enter the details and it does all the work for you. That’s it! The spiral staircase plugin extension supports a variety of common spiral staircase designs, so it’s extremely flexible as well as fast.
Today we at SketchUp and Elmtec (SketchUp’s UK + IE Distribution partner) would like to wish the inspiring legend himself Jean-Louis Deniot a very happy birthday, and celebrate what an incredible designer he is…
*Brings out a 57 Story Building 3D rendered cake with 46 candles to blow out*
While celebrating Jean-Louis’ birthday and wonderful creations, we have also been following his secrets and have pulled together some legendary advice he’s given…
So, in the birthday spirit, it’s time to share those with you…
In this 8-minute digital read, we are going to show you how Jean-Louis has remained so incredibly successful, and how to future-proof your design business as the world begins to change…
The world is changing; people are moving 3x more in their lifetime compared to 20 years ago, so the need for designers to adapt their designs and ideas to this ideology has never been more important.
As the birthday boy says:
“Populations are going to move and live in the future in many different locations, many different countries, moving systematically in smaller spaces to benefit from spending money mostly on restaurants, trips, fashion, and fewer collector home goods.
So interior design needs to adapt and ease this transition: the practicality of moving fast without dragging tons of personal things… The Future is in the editing!
Fewer pieces, with a personalised design to make it your own, and easy to pack, so that the move does not become an obstacle because of all the pieces one has”.
With that interpretation, it is apparent every designer, artist and architect must adapt their awareness in order to preserve the industry and make it grow!
So, in order to not be left behind like a lost sheep, and follow the trends set by a multi-award-winning designer…
You’ll need to consider and gather information on these 3 elements of your client’s vision…
Location:
Every place in the world is unique, and therefore, needs its own style and design, Jean-Louis has projects all over the world, creating an individual masterpiece, perfectly fitted for every location.
Person:
Jean-Louis is not a minimalist, neither does he go overboard, but with a finely developed balance of osmosis between refinement, comfort and openness, he is able to complete a design based on the person he is designing for, a spirit design of the client. Reflecting their vision, personality and needs, all wrapped into one.
Purpose/Time:
The objective of the design must meet the end product, Why do they want to do it? What will it be used for?
By encompassing these elements, a designer can be well on their way to achieving greatness like Jean-Louis, designing private homes in Beverly Hills, country homes in Moscow or 57 story residential towers in Miami…
Giving people the blow away design they wanted, exceeding expectations, going above and beyond.
So, if we could potentially support you in bringing these designs to life in a flexible and user-friendly setting, would it be unreasonable to give you some more information on it?
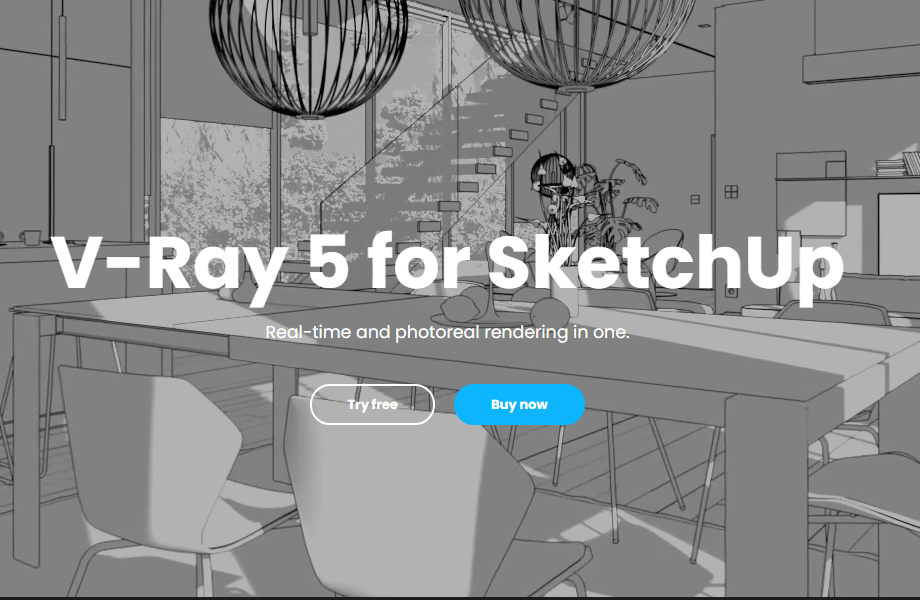
V-ray – a fantastic rendering extension, is a simple to use, flexible plugin for SketchUp Pro, which will transform materials and hard to explain surfaces into photorealistic renders…
Enabling every designer to communicate their out of this world designs and create their very own labour of love masterpieces to blow every client away with…
If Jean-Louis’ legacy has resonated with you today, you can book a free V-Ray Design Start Up Session with one of our team to see if the future fit design software can support you in achieving your goals like Jean-Louis is doing, making thousands of people’s dreams come to life.
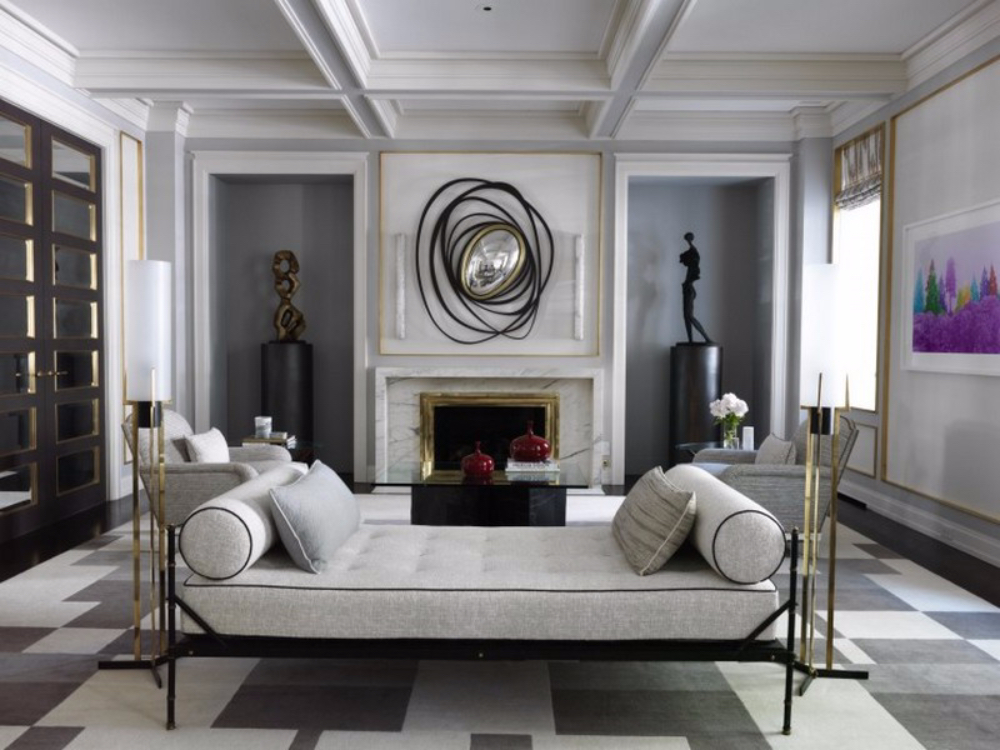
You want to enrich your models with extra detail and realism, to help your clients understand and get inspired by your work. SketchUp lets you easily paint a huge variety of different materials on the faces of objects. These materials behave a lot like paints, with a colour and optional texture all defined in a simple image file. You might want to choose red roof tiles or a metallic roof, an oatmeal coloured carpet or slate tiles. This guide reveals everything you need to know about adding materials in SketchUp.
What are SketchUp Materials?
How to use materials in SketchUp? It’s genuinely exciting, adding so much extra interest to a design and making it unique. After you’ve applied various materials to your model, there’s so much more you can do.
You can easily replace one material with another, for example replacing grass with pebbles in no time, in just a few clicks. You can edit the materials if you like, creating something nobody else uses. The colour and texture code is separate, which means you can change the colour and leave the texture as it is, change the texture but leave the colour alone, or change them both. The resulting materials can be more or less infinite in variety.
It’s also easy to play with the opacity of the material, from completely see-through to totally opaque. SketchUp even calculates exactly how much of a chosen material you’d need in real life to actually build the model. It reveals the area of the roof or siding to match your precise model perfectly. You’ll find an enormous SketchUp materials collection waiting for you in the SketchUp materials warehouse. All you do is add imagination and stir in some creativity.
Where to Find SketchUp Materials.
Where are SketchUp textures stored? You’ll find them in the SketchUp 3D Warehouse, an inspirational resource that adds so much extra potential to your modeling. Instead of having to download an entire bulky component,all you do is download the material itself. Here’s how:
Open the model material’s Details page
Find the Stats panel
Click the Materials link for a list of materials, each with a short description
Click the Download link
If you arrived in the 3D Warehouse from SketchUp 2017 itself, the system will automatically retrieve your Material and activate the paint bucket tool ready for you to use
If you arrived at the 3D Warehouse via a browser, an .SKM file downloads automatically, which you simply add to the relevant local content folder
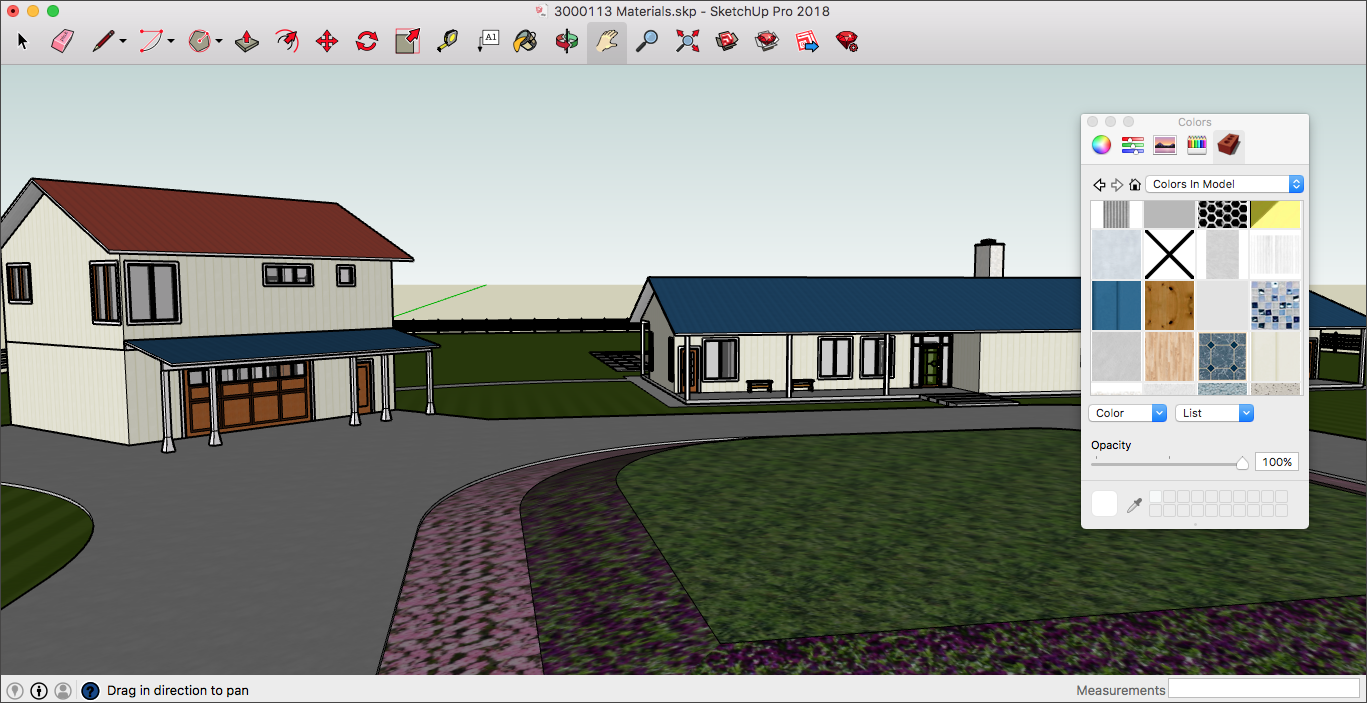
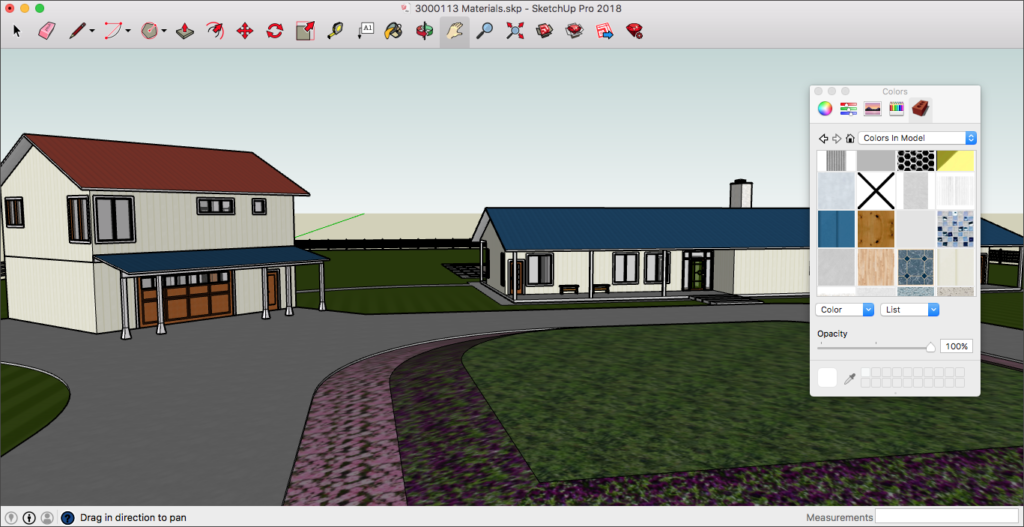
So how are materials used in SketchUp? You can achieve the exact same amazing effects in Windows and in MacOS. The SketchUp interface lets you model materials using the Paint Bucket tool and Materials panel if you’re using Windows. On a Mac it’s the Colors panel. The Materials or Colors panel also lets you view, manage, and organize your materials as you wish, and it even lets you keep track of the materials in your model. This is the place where you make your own custom materials.
Some people like to switch between Windows and Mac machines. If that’s you, bear in mind the Materials and Colors panel interfaces are different on each operating system.
So how do you download more materials for SketchUp? Again, it’s a simple process. Open the details page of the model where you want to download material from. Click ‘Materials’ in the Stats panel. Find the material you want then click ‘download.
Once you’ve done that it’s incredibly easy to apply materials to your model using the paint bucket tool.
On a Windows PC: Find the paint bucket tool either in the Getting Started, Large Tool Set, or Principal toolbar, or in the menu bar under tools-paint bucket. Select the tool. Open the materials panel, then choose a collection of materials and click on the material you want to use
On a Mac: Find the paint bucket tool in the Large Tool Set toolbar, the tool palette, or in tools-paint bucket. Select the paint bucket and a colors panel appears. Choose a colour using one of four colour picker tabs or use the materials collections. Choose the materials collection you want to use, then click the particular material you want to apply to your model
You can click and drag material swatches around your design, applying it to faces, and it’s also really easy to swap one material for another.
SketchUp Architectural Materials
SketchUp materials have a huge positive impact in the context of architectural design. There’s a vast choice of building materials available including handrails and wooden doors, lighting, elevators and staircases, furniture for every imaginable room, roofing and flooring materials, grasses and plants, flowers and trees. All of these make it so much easier for your clients to visualise your models clearly in a way that’s as inspiring as it is accurate and realistic.
Material textures really bring architectural designs to life, too. Choose from a vast range of brick textures, stone, concrete, glass and more, all high resolution and superb quality. You can even add fine detailing like peeling paint, moss and ivy, adding atmosphere and personality as well as making your models look like they’re worn by time and weather.
It’s super-easy to create lush colours as well, easily changing the colour of a material. Click the Paint Bucket tool, choose the colour, then click to paint the face. You can double click on the colour and change it in an external editor if you like, saving the new image before importing it. To change all instances of a colour, double click on the colour to bring it up in a colour window. From here you can use a slider, a colour wheel and various other tools to change the darkness without restoring to the paint bucket.
All this and more is easily available for you to manipulate, change, and play with to create your own unique look. The SketchUp materials list includes wood, glass, tiles, stone and many others, all designed to make the architectural design process easier, faster, and a whole lot more creative.
SketchUp determines how much of a specific material you need to build the design in real life accurately, but obviously, you need to make sure your model is 100% accurate in the first place, created to the correct scale. This is another big benefit for the architectural design process. One of the simplest ways is to right click on a material in the model browser then pick ‘area’ to get the total area of a specific material in the model.You can also use an extension like CutList to make a report including both the quantities and the total length of any components, or select a component, use Entity Info to provide the total number of instances of the material, and manually multiply that by the component length.
Do you use a certain SketchUp tool or set of tools regularly? Whether you use thefree or pro version, you can look up the relevant SketchUp shortcut keys andget where you want to be much faster. You can even add and edit keyboard shortcuts of your own. This guide reveals everything about shortcuts in SketchUp, from why they’re a good idea to how to create and edit them. We’ve even included a SketchUp shortcut list for Mac and the same for a PC, with specific SketchUp shortcuts for Windows. By the end of this guide you’ll be comfortable using SketchUp keyboard shortcuts fluently. Read on for essential insight.
What are SketchUp shortcut keys?
SketchUp does a lot of the work for you, thanks to its predefined list of default keyboard shortcuts. Shift-Z, for example, takes you directly to Zoom Extends, S is Scale, and E is the Eraser. SketchUp also lets you create custom shortcuts as well as edit the existing ones. This means you can easily configure the software in exactly the way you want it. The magic happens inside the LayOut Preferences dialogue box, it takesjust a few simple steps to set a new one up, and they’re equally easy to edit.
Why use SketchUp shortcuts?
It is so much faster to work in SketchUp using SketchUp tool shortcuts, which are also called hotkeys, quick keys or commands. Shortcuts in SketchUp make your user interface cleaner, giving you a lot more screen space to work in. Use your SketchUp shortcut keys as they were intended, achieving full efficiency, and you can do cool time-saving things like avoiding toolbars and menus altogether, diving directly to the place you need to be.
The more fluent in SketchUp tool shortcuts you become, the less you’ll need to rely on the standard menu, only using it to drive any plugins that can’t easily be allied to a shortcut. When you make your own custom shortcuts you can shave even more time off modeling projects, bringing your bright ideas to reality faster and more efficiently than ever. If you’d like to double your speed, this is exactly how to do it.
How to Create and Edit SketchUp Keyboard Shortcut Keys
So we know SketchUp enables hotkeys to be edited as well as created from scratch. How does it work? To create your own SketchUp shortcuts list takes just a few simple steps:
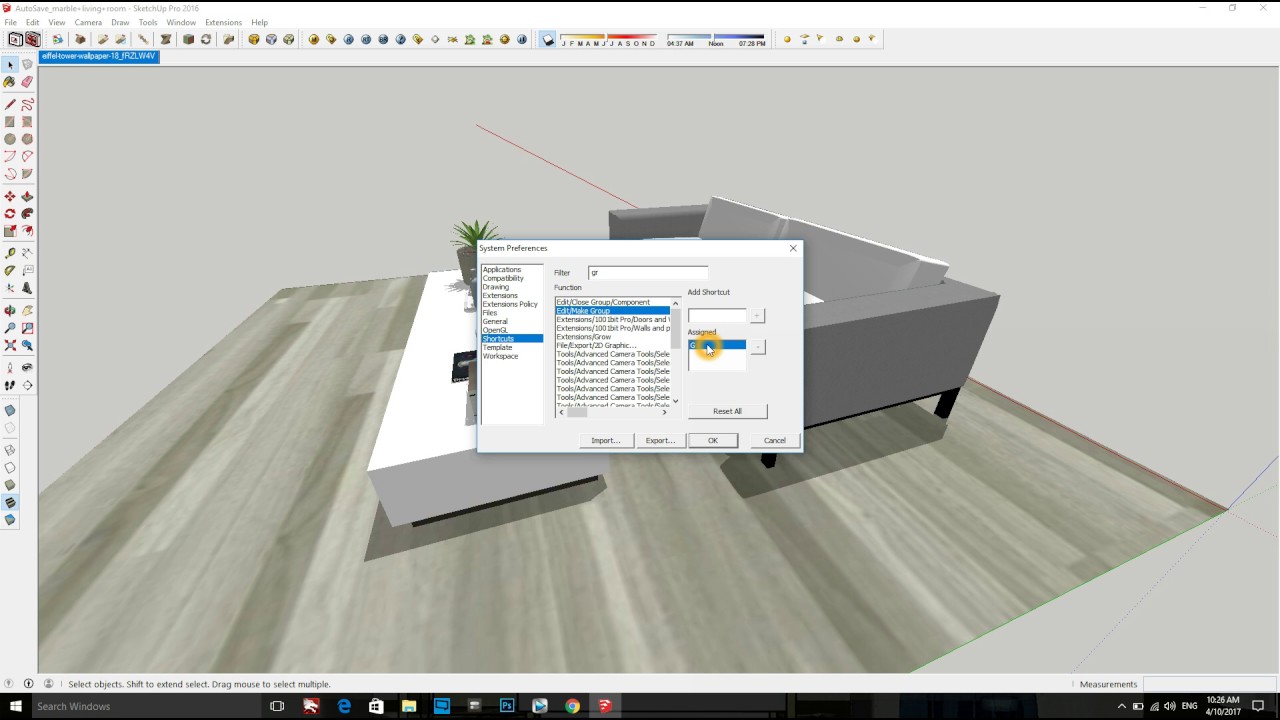
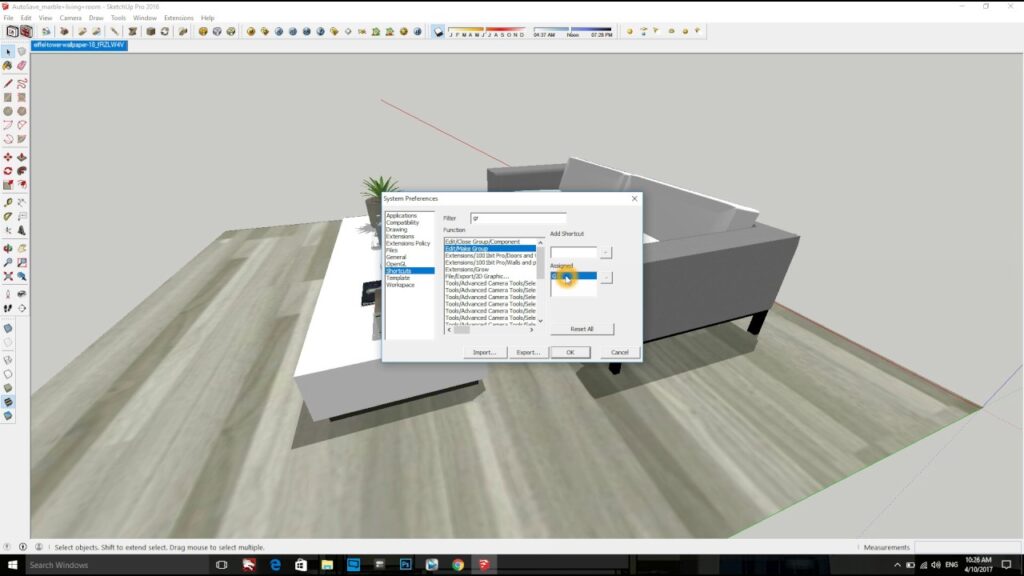
Choose Edit > Preferences in Windows or LayOut > Preferences on a Mac to surface the LayOut Preferences dialog box.
Click ‘Shortcuts’ in the sidebar to your left.
Type the command you want into the Filter box at the top of the dialog box. You can also explore the whole list via the main list box.
Use the list box to choose the command you want to assign a shortcut to.
Find the text box below the list of commands and click the shortcut you want to assign to it. On a Mac you’ll see your new shortcut in the Key column of the list box. Now you can move on to step 7. For Microsoft Windows, go to Step 6. Don’t click on ‘enter’ or you’ll lose the value you specified.
Click the + button to create your new keyboard shortcut, which appears in your Shortcuts column in the list box. Click ‘close’ when you’ve finished assigning new shortcuts. To remove one, select it and hit the – key in Windows, or delete it from the text box if you’re using a Mac .
Defining your own custom shortcut keys puts you in total control of the unique way you work, giving you a super-fast way to carry out the actions you make frequently. They’re easy to remember. You won’t have to keep moving your cursor away from the thing you’re drawing all the time, and you don’t have to stop work to remember where your most popular tools are.
MacOS SketchUp Shortcut Keys
It’s great to know that SketchUp comes with a bunch of brilliant predefined, built in, default shortcuts designed specifically for a Mac. This is a list of the most frequently-used SketchUp shortcuts for Mac:
2 point arc tool
Circle tool
Circle tool – lock current inferences
Eraser tool
Eraser tool – soften or smooth (use on edges to make adjacent faces appear curved)
Eraser tool – hide
Eraser tool – unsoften or unsmooth
Line tool
Line tool – lock in current inference direction
Line tool – lock direction
Move tool
Move tool – move a copy
Move tool – hold down to lock in current inference direction
Move tool – auto-fold (allow move even if it means adding extra edges and faces)
Move tool – lock direction
Offset tool
Orbit tool
Orbit tool – disable ‘gravity-weighted’ orbiting
Orbit tool – activate pan tool
Paint bucket tool
Paint bucket tool – fill material, paint all matching adjacent faces
Paint bucket tool – replace material, paint all matching faces in the model
Paint bucket tool – replace material on object, paint all matching faces on same object
Paint bucket tool – sample material
Push and pull tool
Push and pull tool – push or pull a copy of the face, leaving original in place
Rectangle tool
Rectangle tool – start drawing from center
Rotate tool
Rotate tool – rotate a copy
Scale tool
Scale tool – scale about center
Scale tool – scale uniformly, don’t distort
Select tool
Select tool – add to selection
Select tool – add or subtract from selection
Select tool – subtract from selection
Tape measure tool
Tape measure tool – toggle create guide or measure only
Tape measure tool – lock direction
Zoom tool
Zoom tool – combine with click-drag mouse to change field of view
A
C
Shift + C
E
Alt+E
Shift+E
Alt+Shift+E
L
Shift+L
(Arrows)+L
M
Alt+M
Shift+M
Cmd+M
(arrows)+M
F
O
Alt+O
Shift+O
B
Alt+B
Shift+B
Alt+Shift+B
Cmd+B
P
Alt+P
R
Alt+R
Q
Alt+Q
S
Alt+S
Shift+S
Space
Alt +Space
Shift
Alt+Shift+Space
T
Alt+T
(Arrows)+T
Z
Shift+Z
These are the most-used SketchUp keyboard shortcuts for a Mac, but when you create and assign your own, you really take things to the next level.
Windows SketchUp Shortcut Keys
SketchUp also comes with a long and exciting default list of Windows shortcuts. Here are the most commonly used SketchUp shortcuts for Windows:
2 point arc tool
Circle tool
Circle tool – lock current inferences
Eraser tool
Eraser tool – soften or smooth (use on edges to make adjacent faces appear curved)
Eraser tool – hide
Eraser tool – unsoften or unsmooth
Line tool
Line tool – lock in current inference direction
Line tool – lock direction
Move tool
Move tool – move a copy
Move tool – hold down to lock in current inference direction
Move tool – auto-fold (allow move even if it means adding extra edges and faces)
Move tool – lock direction
Offset tool
Orbit tool
Orbit tool – disable ‘gravity-weighted’ orbiting
Orbit tool – activate pan tool
Paint bucket tool
Paint bucket tool – fill material, paint all matching adjacent faces
Paint bucket tool – replace material, paint all matching faces in the model
Paint bucket tool – replace material on object, paint all matching faces on same object
Paint bucket tool – sample material
Push and pull tool
Push and pull tool – push or pull a copy of the face, leaving original in place
Rectangle tool
Rectangle tool – start drawing from center
Rotate tool
Rotate tool – rotate a copy
Scale tool
Scale tool – scale about center
Scale tool – scale uniformly, don’t distort
Select tool
Select tool – add to selection
Select tool – add or subtract from selection
Select tool – subtract from selection
Tape measure tool
Tape measure tool – toggle create guide or measure only
Tape measure tool – lock direction
Zoom tool
Zoom tool – combine with click-drag mouse to change field of view
A
C
Shift+C
E
Alt+E
Shift+E
Alt+Shift+E
L
Shift+L
(arrows)+L
M
Alt+M
Shift+M
Ctrl+M
(arrows)+M
F
O
Alt+O
Shift+O
B
Alt+B
Shift+B
Alt+Shift+B
Ctrl+B
P
Alt+P
R
Alt+R
Q
Alt+Q
S
Alt+S
Shift+S
Space
Alt+Space
Shift
Alt+Shift+Space
T
Alt+T
(Arrows)+T
Z
Shift+Z
Get started with SketchUp
SketchUp shortcut keys make it so much easier and faster to create sheer brilliance!Click here to download a free trial version of SketchUp and give it a go for yourself and enjoy a full 7 days using the world’s best visualisation and modelling tool. There are also masses of top class learning resources available, including tutorials to help you get familiar with the software in record time,here.
SketchUp is one of the simplest and most effective 3D modeling software tools on the planet, and SketchUp plugins are designed to let you do more exciting things even faster and easier. They’re used for everything from making an instant roof to adding beautiful, realistic trees to your design, and there’s a vast collection to tap into. Here are some of the most popular SketchUp plugins, free download treats, and paid-for tools designed to help you create ‘extraordinary’.
What are Sketchup Plugins?
SketchUp is one of the world’s most popular 3D modeling tools, with its user-friendly interface and intuitive processes, its free and pro versions. Once you’ve mastered the basics, you might want to start exploring ways to boost your SketchUp skills. And that’s where plugins and SketchUp extensions come in, created by users to make life even simpler. They enhance the software’s already excellent default tools to deliver faster, better results and save you plenty of valuable time, especially on those basic repetitive tasks you find yourself doing again and again. All you do is enter the data for a SketchUp plugin to do its magic.
So what is the difference between SketchUp plugins and extensions? Extensions are registered plugins, containing extra code to let you to turn them on and off under ‘Preferences’ inside the Extensions menu. A plugin doesn’t need to be approved to become an extension, it just needs to comply with internal requirements.
You’ll find a treasure trove of brilliant SketchUp plugins at the SketchUp Extension Warehouse. In the meantime, let’s take a look at 15 of the best SketchUp extensions.
How to Use Sketchup Extensions
The Extension Warehouse and SketchUp work together seamlessly. Most of the time, all you do to add an extension to your local version of SketchUp is click the install button on the extension details page. There are a couple of things to remember. One, you need to access the Extension Warehouse from SketchUp rather than via your browser, and two the extension needs to be free. Many extensions in the Warehouse are free but some developers charge for their work. Look out for an ‘Install Trial’ button or a button to press to purchase. Either way it’s as easy as pie. Once you’ve installed your extension or plugin, you can use it directly from SketchUp.
Best SketchUp Plugins for Architects
Here are some of the best SketchUp plugins for architects, just a small selection from a huge collection of exciting, life-changing tools to take your work to the next level.
Curviloft
The Curviloft extension is dedicated to lofts and skinning, quickly generating surfaces from contours. The Loft by Spline element joins separate contours, either open or closed, using smooth splines. The Loft along Path tool joins contours together along a given rail curve. And Skinning creates superb surfaces with boundaries made up of 3 or 4 contours next to each other. Because there are so many complex solutions needed to calculate Loft and Skinning geometries, Curviloft SketchUp gives you the choices you need to adjust the parameters according to the configuration of your contours, generating a total of nine essential modeling options from a basic set of curved lines.
1001Bit Tools
The 1001Bit Tools extension helps you to create amazing 3D staircases, escalators, walls, doors and windows, even self-generated roof rafters. All you do is use a few mouse clicks to deliver them in perfect 3D. This makes analysing the shadows from a building, the exposure to the sky, and how long a point remains in shadow really easy and quick. Each tool simply involves putting your parameters and dimensions into custom designed dialogues for excellent dimensional flexibility, supported by a .txt database for calling up proprietary and standard model profiles and settings.
Artisan
The Artisan extension is packed with powerful architect modeling tools designed to let you create all sorts of accurate images in 3D, including the terrain itself, furniture, people, sculptures, fabric, rocks and plants.
3D Tree Maker
The 3D Tree Maker speaks for itself, allowing you to add extremely convincing greenery to your work. You’ll find it simple to make 3D trees and include them in your model, and there are lots of predefined trees and plants to choose from. You can create grass and flower beds, using fully customisable parameters to make changes via the configuration window. You use skeleton proxies – also called ghosts – to reduce the tree size while you’re working on other aspects of the design, then switch to high poly 3D for your final render. It’s easy to generate random new trees and save your parameters as handy new tree templates.
Instant Roof
Instant Roof does exactly what it says, creating beautiful roofs in an instant. Whatever you want to add, it happens in a few clicks, whether it’s full framing, beam ends, corbels, Greek returns, various rafter styles, all sorts of different shingles, tiles, take-offs and more, potentially saving you a great deal of time. The results are extraordinarily good.
[h2] Sketchup Plugins for Modelling
At its heart Sketchup Pro is all about top class 3D modelling. There are countless really good plugins or extensions that enhance Sketchup 3D’s already remarkable modeling capabilities. Let’s take a look at some of the most popular and widely used 3D modeling plugins.
Joint Push/Pull
The Joint Push/Pull plugin gives you a wealth of exciting options for extruding surfaces, one of the most popular being extruding multiple surfaces in parallel. It’s a simple matter to make complex shapes fast, and the extension also contains push-pull tools like Round Push/Pull, Vector Push/Pull, and more.
Fredoscale
What can be achieved with the Fredoscale extension? FredoScale is actually a set of tools used to deform geometry in a variety of ways. You benefit from better scaling, tapering and stretching. You can also twist and bend like a pro, shear, stretch, and radially bend objects with ease and confidence.
Shape Bender
So much can be achieved with the Shape Bender SketchUp extension. In a nutshell, it takes any 3D object from your model and bends or stretches it along a path you’ve pre-drawn then selected. It’s unbelievably powerful, letting you create and bend linear objects into beautiful, curving shapes in just a few clicks.
Laubwerk
Laubwerk SketchUp offers another wonderfully intuitive method for creating 3D landscapes, gardens and exteriors, a great way to make unusually realistic plants. You can easily adjust the shape, age, season and level of detail of each plant. There’s a choice of kits containing 10 different plants, each with 36 different variations for endless variety. The images are of superb quality thanks to the high-poly leaf photographs used to create the tool.
Clothworks
The Clothworks SketchUp extension does what you’d expect from the name – it lets you make outstanding cloth simulations to drape across objects in your design, including table cloths and curtains, bedding and flags, all uncannily lifelike. The tool realistically simulates the way cloth works and interacts with 3D objects.
Best Free SketchUp Plugins
Many of the plugins available for SketchUp are free or have free versions for you to play with, including Shape Bender. Next, we’re going to highlight a handful of the best free SketchUp plugins.
Round Corner Tool
The Round Corner Tool extension carries out a task that has, in the past, been surprisingly challenging. It performs the rounding of the edges and corners of 3D shapes for you, along a 2D profile, in 3 modes, either round corners, sharp corners or bevelled corners. Your corners can have 3 or more edges. It can also create concave corners, which are always rendered as round.
Front Face Tool
The Front Face Tool extension accurately reverses faces so they’re orientated without affecting your forward facing faces, designed to save you a lot of valuable time. Imagine a face is facing backwards. Usually, you’d need to select it, right click, and pick ‘reverse faces’. This can take ages when your object is complicated, involving multiple polygons, but this tool makes easy work of it.
Solid Inspector
The Solid Inspector extension tool lets you inspect modelled or imported objects for errors, the kind of mistakes that end up lagging, crashing or corrupting your SketchUp file. It cleverly mends what can be mended then tells you what you need to do to fix the rest.
Mirror
The Mirror extension replaces all the copying, rotating, shifting, and flipping you’d otherwise need to do when creating a mirror. Thanks to this tool you can make perfect mirrors in no time, every time.
Keyshot
The exceptional Keyshot rendering extension lets you make photorealistic images of 3D models. All you do is import your data into KeyShot, assign the materials, change the lighting and move the camera to render. This is widely recognised as the world’s best rendering software and comes complete with real-time ray-tracing, drag and drop materials, procedurals, textures, interactive labelling, HDRI lighting and physical lighting, a wealth of colours, part and camera animation, focused caustics, an HDR editor, import 40+ 3D formats and its own 3D modeling plugins.
Best Essential SketchUp Plugins and Extensions
This article has covered just a few of the zillions of fantastic SketchUp plugins and extensions available to users, a bank of remarkable tools to help you create excellence every step of the way. Why not take a look at SketchUp’s wide choice ofresources and tutorials? You can explore the magic of SketchUp Pro here.
In your world, as an architect, 3D architectural visualisation software can make all the difference between a project that’s approved quickly and ticks all the boxes and potentially expensive, time-consuming client rejections. In your context, the SketchUp architectural visualiser delivers all the functionality, tools and extras you could possibly need to create outstanding drawings… and more, thanks to a huge, constantly growing library of wonderful extensions and plugins. Here’s what you need to know about brilliant interior and exterior visualisation the SketchUp way.
What is Architectural Visualisation?
What is 3D architectural visualisation? This style of visualisation is vital for every successful interior designer 3d visualiser and everyone who wants to make a great job of property 3d visualisation. Architectural visualisation software involves the process of creating digital models of structures, buildings, and spaces clearly and accurately, with a creative edge, in a way that lets clients and colleagues instantly understand what’s going on. The resulting 3D renders are used for everything from virtual reality property tours to the extremely accurate verifiable views often used for planning applications. High quality architectural visualisation software tools allow all this to happen smoothly, quickly and simply, making it an essential tool in every architect’s box.
3D Architectural Visualisation
Building visualisation for architects demands top class 3D architectural design and visualisation capabilities, and that’s exactly what SketchUp is all about. It makes visualisation surprisingly easy, for a start, and that means you save time and money. It presents a reliably brilliant way to create engaging animations and beautiful, realistic walk-throughs. Whether it’s schematic design or construction documentation, the results are always inspiring.
This is 3d architectural visualisation software at its finest. You can draw anything you like quickly and efficiently, and the design-build process includes help every step of the way to support problem shooting, getting your project to the construction stage fast without issues. It creates fabulous 2D output as well as 3D output, and the output is always reliably accurate. And it helps you impress clients with AR, VR architectural visualisation, extremely high-quality images, and video content that reveals every single variation, every single fine detail.
Architectural Visualisation Process with SketchUp
You should find the entire architectural visualisation process intuitive, a pleasure to use from end to end and endlessly flexible. SketchUp’s legendary architectural visualisation techniques let you factor in a wealth of detail from the start, including drawings, sketches, 3D models, the number of images needed, the delivery date and more. There are masses of useful plugins and extensions too, designed to make your life even easier and the creative process even more enjoyable.
You can pin down the point of view, fixing viewpoints with the client using a collection of low-resolution images. You can specify and confirm the materials, the lighting and even the atmosphere, using renders to quickly make decisions with previews included in the process. The final rendering, in high resolution, is perfect for clients, seamlessly representing everything they’ve specified and agreed in an easy-to-understand and extremely attractive way.
Building Visualisation with SketchUp
SketchUp’s 3D design and visualisation capabilities are invaluable when used to design buildings, supporting you from the idea stage right through to the build. You visualise quickly and intuitively. You communicate your vision in sophisticated ways that drive faster, better client buy-in, with fewer issues to iron out. The documents created are colourful, accessible, and wonderfully collaborative. No re-drawing of plans, just a beautiful 3D model that you can transform to 2D in seconds thanks to LayOut. Plans and elevations, sections and build details, it’s all there, all clear and easy to understand. And if your model changes, so do the construction documents.
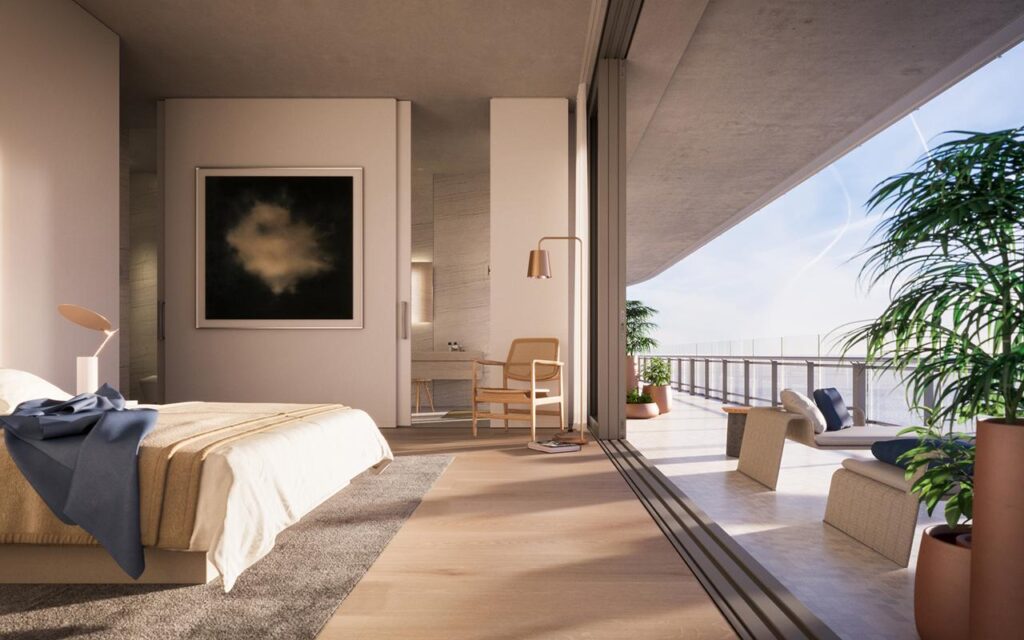
SketchUp is a winner where interior design and visualisation is concerned too, an amazing way to bring your ideas to stunning life. There’s no need to model from scratch thanks to hundreds of thousands of 3D models of real products, free from the SketchUp 3D Warehouse, many from household-name manufacturers and brands. The software produces truly beautiful renderings and supports powerful sales and marketing. No wonder it’s used to 3D model absolutely anything that could possibly be needed for a great architectural design, from shapes and objects to building features, bowls, spheres, cones and polyhedrons, the list goes on.
Exterior Visualisation with SketchUp
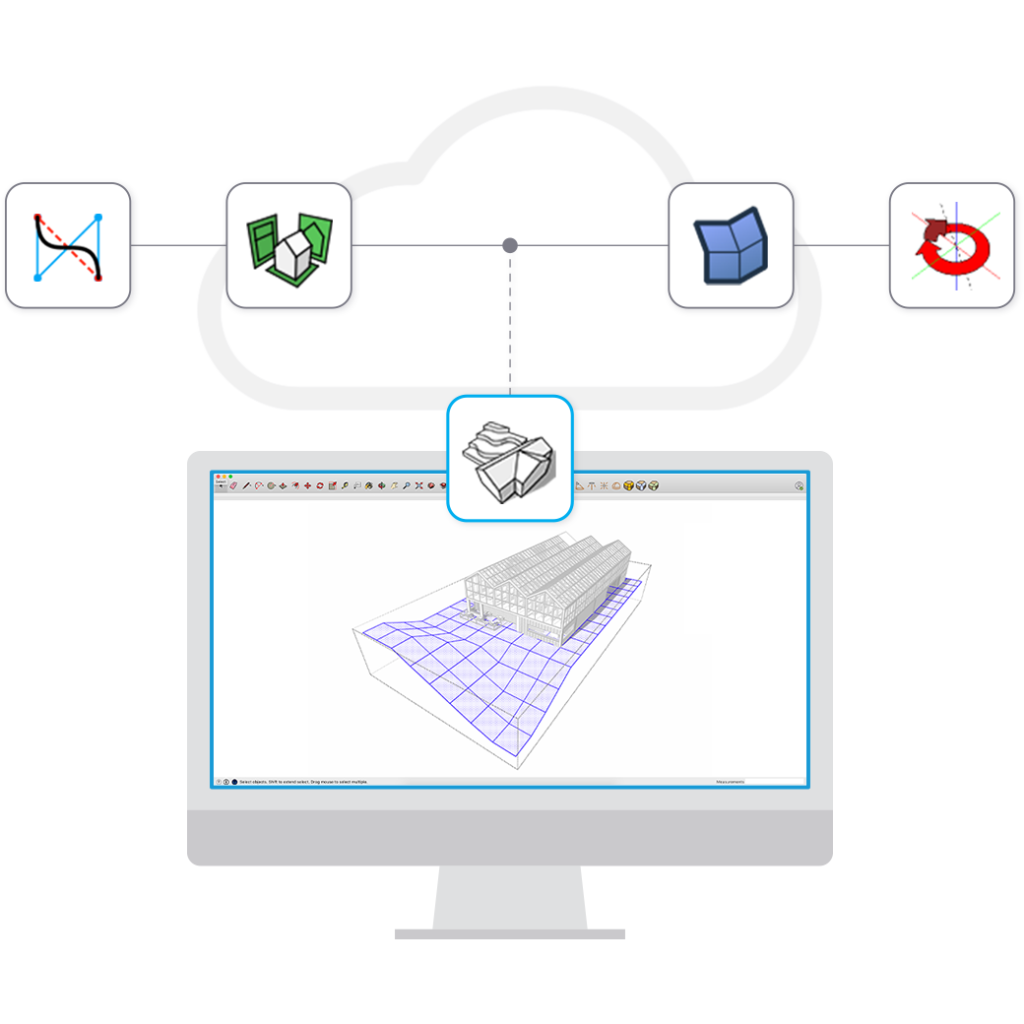
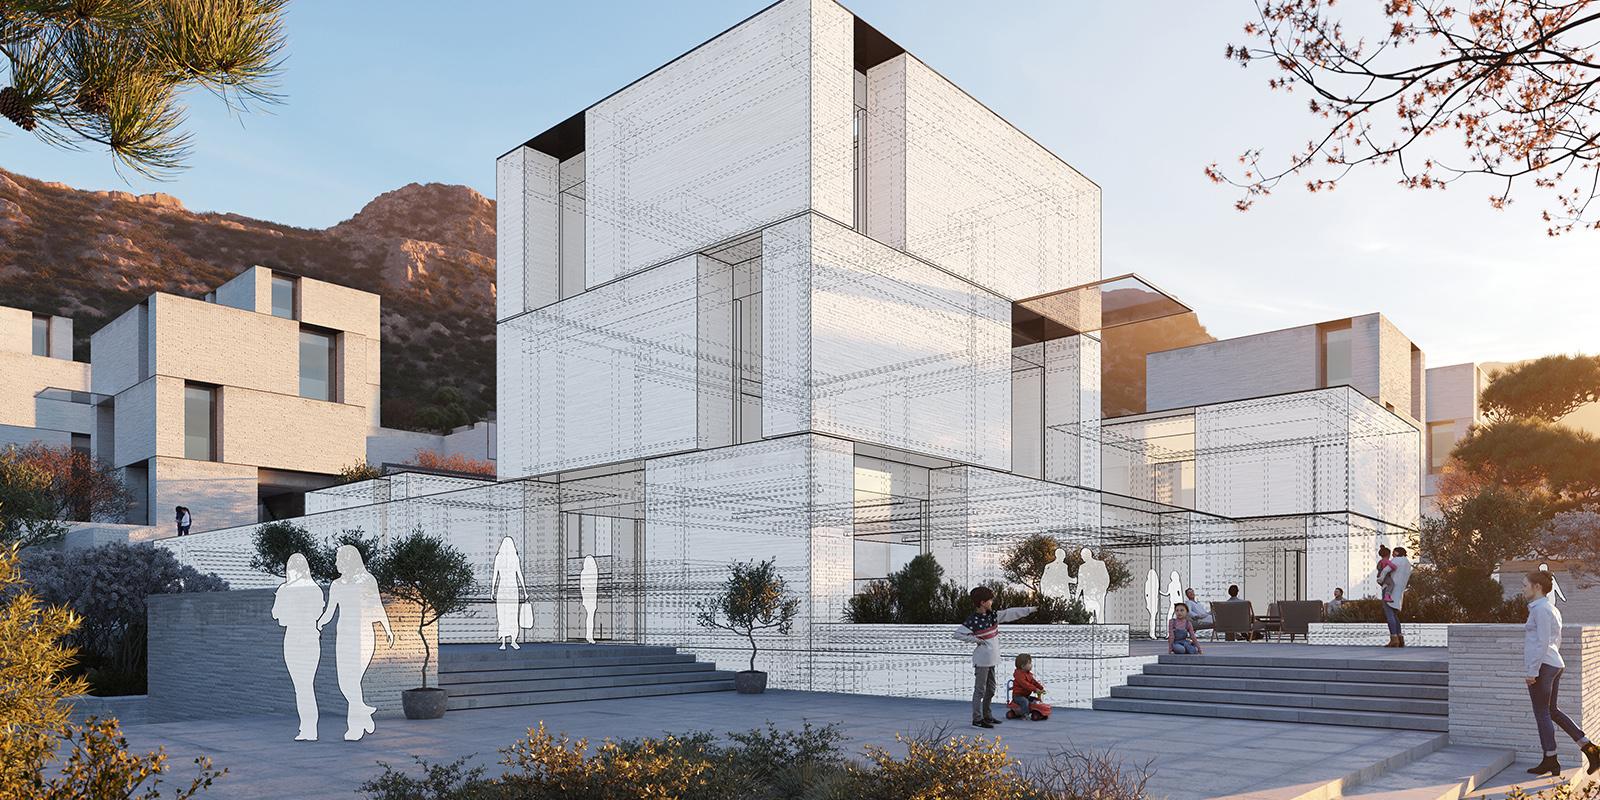
You can create photorealistic exterior visualisations from SketchUp as well. A model in SketchUp looks like a simple drawing revealing shadow, colour, and the textures of the materials used. But it doesn’t process reflections, lighting or shadows, the things that add true realism to a drawing. When you want your models to look photoreal, you need rendering software to make amazing 3D designs to include realistic lighting, shadows and reflections.
SketchUp, in combination with popular extensions like VRay and Lumion, provides remarkable exterior visualisations that are extremely powerful and attractive. You can create impressively realistic scenes using different lighting, materials and cameras, for example. It’s all about transforming spatial ideas into consumable visual content. Once you’ve learned the basics of rendering a SketchUp architectural model using an extension like V-Ray you’ll understand how to create brilliance by editing V-Ray materials, positioning the camera creatively to make scenes, and using exciting techniques to light your scenes artificially or naturally.
Learn Architectural Visualisation with SketchUp
Do you want to learn architectural visualisation? It’s just as easy to learn SketchUp as it is to make stunningly real-looking models using it, thanks to a wealth of excellent online resources, architectural visualisation tutorials and free learning opportunities for architectural visualisation using Sketchup. They come from SketchUp itself as well as from other people and organisations who rate the software highly. The SketchUcation pages are a great place to start, as is the popular SketchUp tutorials resource. And don’t forget there’s a choice of SketchUp free and SketchUp Pro – you might like to explore the benefits of them both before making your decision.
We use cookies for ads personalisation and to ensure we give you the best experience on our website. If you continue to use our site we will assume that you are happy with it.