How to Make Glass in V-Ray: A Comprehensive Guide for 3D Artists

Realism is everything in 3D design. It brings your creations to vibrant life, leaves stakeholders feeling they understand your ideas clearly and makes presenting everything a dream. And that includes glass, a material that plays a starring role in so many buildings and other designs. So how, exactly, do you represent glass in SketchUp? You need V-Ray, one of the most popular SketchUp extensions and your route to visual brilliance. Read on to find out exactly how to create glass material in V-Ray, from start to finish, along with some handy FAQs.  

Setting up Your Scene

Now here’s a thing – virtual glass created in V-Ray behaves exactly like real-life glass. This means there are some crucial aspects of your work to get right before you go ahead and add glass. It’s all about setting up the scene properly in the first place. Here’s the first stage in how to make glass in V-Ray.

  •         First, your lighting. As you know, glass reflects. In fact, it’s extremely reflective and refractive, reflecting and refracting the light in your scene. To show off these realistic properties, you’ll need to ensure the lighting in your scene is set up right.
  •         Second, your camera. Think hard about the camera’s angle and position, since the camera’s position profoundly affects glass refraction and reflection. Experiment first, and once it’s right you know for sure you’ll get the effects you want.  

·         Third, object placement. Where will your glass object look best in the scene? You’ll find putting it on a windowsill gives you a completely different effect than you get by standing it on a table in the room’s centre – just as it does in real life.

Adjusting Material Properties

Now your scene is perfectly set to showcase glass at its best advantage. Now you can play with the material’s properties, which involves four key things: The index of refraction, reflections, refraction itself, and absorption, all of which contribute to creating realistic glass in V-Ray.

  •         First, your Index of Refraction or IOR. This drives how much the glass object will bend light as the light shines through it. As you can imagine, different types of glass come with their own IOR values. They’ll be different for frosted glass, clear glass, thick glass, thin glass, coloured and plain glass, and so on. So pin down the type of glass you’re trying to make first, then move on to the next step.  
  •         Reflection matters too. Because glass is so reflective, you’ll need to figure out the best reflection properties for the look you want. You can play with the reflection colour and glossiness to make the kind of effect you’re thinking about.
  •         Refraction is what makes glass transparent. You change the refraction colour and glossiness to make a glassy fine surface that light passes through.
  •         Finally, absorption. You can play with the glass’s colour and density until you get the perfect absorption level. For this stage, bear in mind the material’s thickness and density both affect the colour.

Tips and Tricks

It may take you a few goes and some experimentation to get there, but once you do you’ll be delighted. These tips will help you get where you want to be faster.

  •         A high-resolution texture map helps you create a more realistic glassy surface
  •         The Fresnel effect is adjustable too, again giving you a more realistic look because it drives the way the glass reflects and refracts light at different angles
  •         A slight bump map gives you a subtler subtle texture to add even more realism to your glass materials and objects

Introducing Elmtec  

So now you know how to make glass in V-Ray with SketchUp. Get it right and the results are mind-blowingly good, contributing to dazzling presentations, faster customer approval of your ideas, and designs that are more than practical, they’re also beautiful and realistic. Like all things SketchUp, the V-Ray extension is fun to use and a delight to play with. Once you’ve got glass creation under your belt, your designs become even more exciting, inspiring, and professional.  

Are you ready to give it a go? Elmtec is your trusted digital distribution partner. We have more than a quarter of a century’s experience serving the digital design community, and we’re known and loved for being one of the leading distributors of professional hardware and software. Your purchase is backed by highly qualified specialists whose product knowledge, industry experience and support are second to none. Take a look at the free vs pro versions of SketchUp here.

How to Install SketchUp Studio for Mac

Welcome to the world of Elmtec. As a trusted UK-based distribution partner for SketchUp we’ve been helping people like you out since 2010, servicing a huge network of resellers across the UK and Ireland. Thanks to over 22 years of digital design community experience, we’re perfectly placed to support you with SketchUp Studio installation. Read on to discover the simple step-by-step process to install SketchUp Studio on your Mac, giving you the opportunity to create sheer design magic with this exciting design tool. Here’s how to install SketchUp Studio for Mac. 

Preparing for Installation

First, you need to confirm your machine has the right system requirements for SketchUp studio for Mac. We’ll take you through the steps to verify your Mac’s compatibility and essential specifications around the operating system version and the capabilities of the hardware. We’ll also give you the insight you need on crucial updates and preparations before installing SketchUp Studio, including software updates and the disk space available.

Downloading and Installing SketchUp Studio

To get started with SketchUp Studio, you need a Mac installer. We’ll cover the different ways of getting hold of Studio, including direct download from the official SketchUp website.

We’ll give you detailed instructions, clarified using screenshots, covering vital steps like running the installer, accepting the licence agreement, and choosing the right install preferences. We’ll also explore the most common issues people run across and provide troubleshooting tips, everything from fixing installation mistakes to dealing with conflicts in compatibility.

Activating SketchUp Studio Licence

Once you’ve installed SketchUp Studio, you’ll want to activate your licence. We’ll take you through the activation process in detail, so you know for sure you’re entering the right licence information. If you have any problems we’ll troubleshoot them for you, so you can fix them fast. It’s our job to deliver a smooth, seamless licence activation experience for everyone. We’ll also reveal the many benefits of activating a SketchUp Studio licence, which unlocks premium features, delivers product updates, and gives you access to a wealth of brilliant learning and support resources.

Exploring SketchUp Studio Features

SketchUp Studio is incredibly feature-rich, offering exceptional tools to revolutionise your digital design life and speed up your workflow. We will provide an overview of these features, while highlighting their many exciting benefits. We’ll explore SketchUp Studio’s advanced 3D modelling, stunning visualisation tools and more, revealing how the professionals bring their ideas to life, along with real-life examples and case studies showing exactly how the tool will enhance your designs. Last but never least we’ll dive in to show you how to achieve seamless plugin and extension integration to customise your designs in thrilling ways.

Tips for Optimising SketchUp Studio Performance

Finally, we’ll dive into smooth performance, efficient utilisation and optimal settings so you can make the most of SketchUp Studio on your Mac, everything from adjusting settings to using  hardware resources effectively. Thanks to our expert insight you’ll be able to maximise productivity and minimise problems. We’ll talk about updates, discuss bug fixes, mention security patches, and explain new features as well as helping you maintain top Mac performance, understand best practice, and make the most of the SketchUp Studio magic.

Are you ready for SketchUp studio for Mac?

Follow our detailed installation guide to install SketchUp Studio for Mac confidently. The Elmtec team takes great pride in being a trusted, respected distribution partner for SketchUp, dedicated to supporting your digital design adventure every step of the way. Next, it’s time to reach out to Elmtec to explore the free trial options and paid-for versions of SketchUp Studio. Enjoy! 

Key Benefits of SketchUp Studio

Welcome to our world! We’re Elmtec, a trusted UK and Ireland distribution partner for SketchUp Studio since 2010. More than 20 years of experience in the digital design side of life means we’re perfectly placed to talk about the magic of SketchUp in all its variations. 

This article will discuss the brilliant SketchUp Studio, a premier subscription-based tool providing all the functionality you need to design brilliance into every project, using the power of SketchUp Pro with loads of extra features to boost your workflow. So why is SketchUp Studio such a game-changer for designers and architects? Read on to find out.

Enhanced 3D Modelling Capabilities

SketchUp Studio provides a host of advanced 3D modelling tools and features to empower lifelike, exciting designs high in precision and rich in creativity. The software lets you make complicated models with ease, generate accurate measurements just as easily and quickly, and add remarkably realistic renderings. It’s all down to a comprehensive set of modelling tools together with a truly intuitive interface, making using the software a real pleasure as well as enhancing your professional life.


The software’s clever push-pull technology means you can manipulate complex 3D geometry simply and quickly while using Studio’s intelligent inferencing system to achieve accuracy and efficiency throughout the design process, from start to finish. There’s also a huge library of dynamic components, textures, and materials to tap into, giving designers even more capabilities and adding extra versatility.

Seamless Collaboration and Communication

SketchUp Studio comes with collaboration at its heart. It’s also big on communication, half the battle when you’re dealing with design teams, clients, and a variety of different stakeholders.

Because the software is cloud-based, integral collaboration tools are perfect for real-time collaboration. So multiple people can work on the same project at the same time, with instant feedback and comments to keep the flow flowing.  


Various cool built-in features include shared view links and model viewing capabilities, letting you share your work easily with anyone who needs to be involved, at any stage. The resulting quality of communication and decision-making means projects run smoothly, efficiently, and fast.


Because SketchUp Studio integrates with all sorts of popular external project management and communication tools, including Trimble Connect, you can also achieve seamless cross-platform collaboration and a speedy workflow, both of which contribute to efficiency.

Collaboration and Communication Tools

SketchUp Studio is more than a design tool. It also delivers the features you need for seamless, integrated collaboration and communication, both of which can make all the difference between a smooth, efficient project and one that takes more time and effort than you expected.  The tools enable the perfect level of collaboration with everyone involved, from team members and clients to every other stakeholder along the way.

 This level of highly effective communication means the workflow is beautifully streamlined. Real-time collaboration, instant feedback, cloud storage, and shared view links make everything super-easy, giving users the level of quality project coordination needed for a successful and enjoyable design project every time.

Extensive Asset Library

You’re going to love this. A real stand-out feature, SketchUp Studio comes with an excellent and far-ranging asset library, packed with everything from desirable pre-built 3D models to materials and textures. Another big time-saver, this feature means you won’t always need to start from scratch and build them yourself. Choose from ready-made furniture, architectural elements, plants, trees, wall coverings, landscape features and more, all designed to help you move the needle forward even faster.


The Trimble 3D Warehouse forms an integral part of SketchUp Studio, acting as a community-driven repository of high-quality 3D models. The user-generated content it contains is constantly updated with fresh designs created by the community. It also contains an equally large collection of plugins and extensions, created to extend SketchUp Studio’s capabilities and help you customise your workflow with impressive results. And, of course, there’s a multitude of free tutorials to help you learn even faster.

Advanced Visualisation and Presentation Tools

Choose SketchUp Studio to delve deep into an exciting collection of advanced visualisation and presentation tools, another way the software enhances your work. Hyper-realistic visualisations are yours thanks to popular photorealistic rendering plugins like V-Ray, adding light and life to projects to make the designs you create immersive.

You’ll also enjoy the thrills of SketchUp Studio’s animation features, a fast and easy way to make stunning walk-throughs and fly-overs, creating an inspiring narrative that makes it even easier for stakeholders to understand and approve your work. Then there’s VR. You can use virtual reality to take presentations to the next level, letting clients experience and engage with your designs in a fully immersive and powerfully influential way.

Time and Cost Efficiency

Because SketchUp Studio has such powerful features and an intuitive interface, you make useful time and cost savings that you can pass on to clients. Beautifully simple modelling tools and streamlined workflows make design iterations and refinement an easy matter, cutting down the overall design time.


100% accurate measurements and real-time visual feedback mean it’s hard to make mistakes but if you do, errors are easy to fix and revisions just as easy to make. This means even more time savings and even better cost efficiencies. Taking this into account, along with the tool’s famously good collaborative features, means you’ll spend less time in meetings and sending long emails, and more time creating ‘fantastic’. The improved client satisfaction and potential for better profitability all this brings make SketchUp Studio even more desirable.

To conclude, the many key benefits of SketchUp Studio empower designers to do more things, do them better, and delight clients more. No wonder we’re so proud to be involved as a trusted distribution partner for SketchUp Studio and pleased to be able to give support and expertise to the digital design community as a whole.

Would you like to discover more about the software’s superb 3D modelling capabilities, seamless collaboration tools, extensive asset library, advanced visualisation features, time and cost efficiencies, and awesome design potential? Give Studio a go – it’ll change your design life.  

What Does SketchUp Studio Include?

Welcome to Elmtec. We’re proud to be the leading distribution partner for SketchUp Studio in the UK and Ireland, a responsibility we take seriously. This article takes a detailed look at the comprehensive features and tools provided by SketchUp Studio, a fantastic resource that gives designers and architects all sorts of capabilities, exciting features, and a suite of comprehensive design benefits to make your working life easier.

This popular software is packed with exciting, extensive capabilities, making SketchUp Studio a top choice for designers across a multitude of fields, from garden design to architecture and everything in between. So what Does SketchUp Studio include? Read on to find out all about the magic behind one of the world’s best-loved 3D design software tools.

Comprehensive 3D Modelling Tools

As a designer, it’s your aim to bring your creative ideas to life in a way that’ll inspire your clients and impress stakeholders. SketchUp Studio does exactly that, delivering a comprehensive set of 3D modelling tools to bring your ideas to sparkling, realistic life. The engines driving all this are the software’s intuitive push-pull technology and its advanced inferencing system, plus an exciting range of features created to simplify the 3D modelling process therefore save time, effort and money.

The tools include a suite of flexible modelling tools, a huge component library, and brilliant solid modelling capabilities. These fabulous features let you design complex models, generate accurate measurements, output perfect cut lists, and add extremely realistic renderings to your designs.

Realistic Rendering and Visualisation

The amazing renderings you get in SketchUp Studio are powerfully influential, a designer’s dream for making stunning visualisations that look remarkably real. Using popular extensions and plugins like V-Ray, you’ll be able to add hyper-real lighting effects to your designs, real enough to help convince clients and delight everyone else involved in the project. The same goes for hyper-real-looking materials and textures. The many exciting rendering options and settings inside SketchUp Studio make a strong contribution to success, enhancing the visual quality and impact of designs to make them extra-inspiring.

Collaboration and Communication Tools

SketchUp Studio is more than a design tool. It also delivers the features you need for seamless, integrated collaboration and communication, both of which can make all the difference between a smooth, efficient project and one that takes more time and effort than you expected.  The tools enable the perfect level of collaboration with everyone involved, from team members and clients to every other stakeholder along the way.

 This level of highly effective communication means the workflow is beautifully streamlined. Real-time collaboration, instant feedback, cloud storage, and shared view links make everything super-easy, giving users the level of quality project coordination needed for a successful and enjoyable design project every time.

Extensive Asset Library

SketchUp Studio comes with loads of cool assets. The extensive asset library gives designers the chance to use pre-made 3D models, materials, and textures to enhance their work, saving time and effort in generating objects and effects themselves. The library’s ready-made components can be easily incorporated into your projects. It’s a rich and diverse collection that’ll help you speed up the design process and enhance your creative capabilities.

You can contribute your own pre-built objects and so on to the collection too, since it’s a community-driven repository, your way to help out your fellow designers. Before making your own object, texture or material,  check the collection out to see if there’s a high-quality 3D model already made by someone else. And keep coming back to check new models uploaded by thousands of keen, dedicated members of the SketchUp community.

Last but not least, to support better learning, there are a host of excellent tutorials and resources to help you get to grips with SketchUp Studio even faster.

Customisation with Plugins and Extensions

Think plugins and extensions for a particularly exciting design life. SketchUp Studio offers a massive collection of them, all created to make your design life even easier via fast and simple customisation. Use integrated plugins to extend the already-impressive functionality of SketchUp Studio, catering for the unique needs and desires of designers and clients.


SketchUp Studio extensions give you a choice of fantastic specialist modelling tools along with advanced rendering engines and more. They empower designers to tailor SketchUp Studio to their unique needs, workflows, styles, client briefs and more. There are material browsers to import local textures to use in SketchUp, plugins to create and edit seamless textures, bump maps and hatches, and tools to render enormous amounts of vegetation, draw crowds of people, and populate city blocks in no time. V-Ray adds hyper-real lighting effects to your designs, MAJ column makes perfect concrete columns, and that’s just the tip of the iceberg. The list goes on and on.

In conclusion, SketchUp Studio is your top choice when you want to make the very best of the software’s famously good capabilities. It comes with a large and comprehensive suite of tools and features to address the needs of all kinds of designers, in every sector, including architects, interior designers, garden designers, builders and more.

As the trusted distribution partner for SketchUp Studio in the UK and Ireland, we hope we’ve answered your question about what does SketchUp Studio include. But that’s not the end of the adventure, it’s just the start. We’re pleased to provide quality ongoing support and expertise to the digital design community. To discover the differences between SketchUp Free and Pro, click here.

Architecture Software for Beginners: A Guide to Getting Started

So you’re searching for the best basic architecture software?  You’ve hit gold! At Elmtec we provide the best 3d architecture software for beginners, simple, inspiring and fast ways to intuitively create stunning images that look wonderfully realistic. 

The results are ideal for convincing clients, delighting stakeholders and providing fully-accurate, fully-detailed drawings that you can transform into glorious hyper-real images and animations. If that sounds good, read on to find out about our paid for and free architectural design software for beginners.  By the end of it you’ll know all about it – and you’ll be keen to get started on your first project.

Benefits of Architecture Software

First, let’s look at how 3d architecture software for beginners will help people like you. This kind of specialised architecture software is an excellent platform for bringing creative ideas to life. It lets you make realistic, accurate 2D drawings and 3D models, along with convincing walkthroughs. All this makes it much easier to visualise and test your ideas before the construction stage begins, and just as easy to spot and remedy mistakes. You can sometimes even create 100% accurate materials lists and cut lists to save money and hassle. 

It’s also a team thing. Architecture software makes close collaboration simple even when you’re working remotely from one another. You collaborate with other team members, your fellow  architects, your clients, engineers, builders, project managers and more. Because it facilitates teamwork naturally, everything runs smoothly. 

While the traditional way of drawing out ideas is great, and has worked perfectly well for centuries, software comes with many advantages over the old-school way of designing buildings and their surroundings. Hand-design and drafting takes so much longer. It’s hard to achieve the same excellent levels of detail and precision by hand, when it isn’t supported by software that doesn’t just create designs but also reveals issues and problems with your work so you can fix them fast and easily.  

All this means beginners can work much more efficiently,  accurately and confidently, enjoying a lot more control over the entire design process. You’ll be more flexible, more creative, and more adaptable. 

At Elmtec we provide a choice of brilliant basic architecture software for beginners along with pro tools, each with its own advantages. Take SketchUp, for example, a famously user-friendly 3D modeling tool that takes no time to grasp, is fun to use, is perfect for beginners and has a large, friendly community of users to support you and learn from. 

Top Architecture Software for Beginners

While SketchUp is a hugely popular choice of 3d architecture software for beginners there’s also AutoCAD, Revit, and Rhino to choose from. AutoCAD is a 2D drafting tool used across the architecture sector to make reliable technical drawings and plans. Revit is a BIM or Building Information Modeling tool for creating highly detailed 3D models of buildings and other structures. And Rhino is a 3D modeling tool popular in the industrial design and architecture sectors, great for making complex geometries and fluid organic shapes.

Because they all have their own special features and benefits, as a beginner it makes a lot of sense to carefully explore your own needs and preferences before making the choice. So what should you think about? 

Look for software that’s easy to learn and use, with a user-friendly interface plus great support and lots of handy learning and training resources. Then you’ll stay keen, stay excited, and won’t get discouraged. The price matters too, and while some of the options  can cost a lot others are free to experiment with. At Elmtec we have great architecture software available at different price points to suit various circumstances.

Tips for Getting Started with Architecture Software

Next, let’s take a look at how to set up and install the software. As a beginner you’ll want to carefully follow the instructions from the software source to get it right first time. Luckily it’s usually a simple process, one you’ll have followed before when installing tools to your computer. The Elmtec team provides support and resources to help you successfully install and set up the software we provide. You can rely on us. 


There are some best practices to follow around learning 3d architecture software for beginners, to help you make the most of the opportunity. Start simple to grow your confidence fast. Begin with the most basic tutorials then practice what you’ve learned and how to do it until you’re fully fluent. Then you’ll be ready to take your knowledge to the next stage without getting frustrated or lost. 


Don’t forget to save your work frequently and back up your files so you can’t lose it. And take full advantage of every opportunity to collaborate with people who already use the software, since collaboration and communication are key to success – and to making the whole thing more enjoyable. 


Choose software that includes plenty of resources for learning and improving your skills and you’ll have even more fun while getting to grips with it. We can help with that too, since Elmtec provides such a huge collection of resources for learning including online tutorials, training courses, and friendly user forums. We also recommend books, manuals, and workshops.

Common Challenges for Beginners and How to Overcome Them

Will you face challenges along the way? Probably – but that’s all part of the learning experience, and there are ways to keep the challenges positive rather than frustrating. 

Common issues beginners face when learning architecture software include the steep learning curve involved in some tools. You might encounter technical issues and software bugs, which can take time and effort to resolve. In that case it’s good to have a community of users to help you solve your problems, one of your key strategies for overcoming challenges and boosting your skills. In a nutshell, the more time you spend playing and experimenting with the software, and the more people you bring to the experience, the better. 

Can the Elmtec team help you in any way? Perhaps you’d like to test-drive the options for yourself?  In some cases you can try out the software for free, using free architectural design software for beginners supported by learning resources and communities to help you get where you want to be faster and easier. If so, feel free to get in touch. As a beginner in the field, this is an exciting time. We’d love to help you along your journey. 

Importing 3d Buildings from Google Earth to SketchUp

Google Earth is amazing. It gives you a pinpoint-accurate satellite view of our planet in full colour, in all its glory, making it an excellent tool for SketchUp. This article takes a look at how to export 3D buildings from Google Earth to SketchUp. 

So, why would you export Google Earth to SketchUp? Because it gives you a real-life image of the world we live in, which means the drawings you base on it will be accurate as well. Read on to learn about how to import Google Earth into SketchUp and add a new, exciting dimension to your ideas, designs and drawings.

Overview of 3D Buildings from Google Earth to SketchUp

Take a look at Google Earth. Maybe find the place you’re at right now. As you’ll see, the 3D buildings in Google Earth give you 100% accurate digital representations of the real world in every detail. SketchUp does much the same thing, creating hyper-real designs using computer-aided design or CAD software. 

Google Earth lets you view and explore 3D buildings and other structures from a bird’s-eye view, from far above. SketchUp lets you create and modify 3D models in great detail, giving you finer detail than Google Earth. As you can imagine they’re a great match. Together they give you everything you need for attractive, inspiring designs.  


There are many cool benefits to using Google Earth to find 3D building models. There’s easy access to a vast library of 3D models from around the world. You can view buildings from countless different angles and perspectives. And you get the opportunity to explore them, and the fine details involved, via a flexible virtual environment. 


There’s more. Bring 3d buildings from Google Earth to SketchUp and you’ll find SketchUp enhances 3D models from Google Earth by adding more detail and realism. You can add exciting textures and materials, and modify or customise models to suit a specific design project or satisfy your creative curiosity. When you combine models you can draw complicated multi-building designs quickly, beautifully, and convincingly. 


All this means you effectively spend less time doing more, and the results are stunning. This in turn makes it easier to get your ideas across, convince stakeholders, and get sign-off on your designs. 


Next, how to import Google Earth into SketchUp.  

Exporting 3D Buildings from Google Earth to SketchUp

So how do you export 3d buildings from Google Earth to SketchUp? Luckily it’s a simple process with just a few steps. Here’s a super-simple bulleted guide to exporting 3D models from Google Earth to work on, play with, and create from:


  • Open Google Earth

  • Find the 3D building you want to export into SketchUp 

  • Click on the File menu 

  • Select ‘Save Place As’

  • Choose the .kmz file format, the official Google Earth file extension 

  • Save the file to your computer

  • Open SketchUp

  • Click on the File menu

  • Choose ‘Import’ and pick your saved KMZ file

  • Follow the instructions to import the 3D model into SketchUp

How can you tell which are the best models to export? Go for models with a high level of detail, so you know for sure you get everything you need. Reject models with too much texture or loads of random detail you don’t need. And find a model offering accurate proportions and dimensions.

Is there anything to avoid? It’s best to steer clear of these when exporting from Google Earth to SketchUp. Don’t export models with missing or wrong textures. Reject complicated models that’ll be a challenge to work with. And avoid models whose dimensions or scale are wrong. 

Importing 3D Buildings from Google Earth into SketchUp

SketchUp is brilliant at importing 3D models from Google Earth, very useful when designing for a real-world location because it is so accurate. It gives you such a good 3D representation of buildings and the things surrounding them. The building itself is correct, as is the size and shape of the land it sits on, the terrain, trees, roads and everything else. 

Next, here’s a handy step-by-step guide to importing 3D models into SketchUp:

  • Open Google Earth 
  • Find the building you want to import into SketchUp
  • Use the navigation tools to place the camera so you’ve got a really good view of the building
  • Go to the menu bar then File > Save > Save Place As
  • Choose the file format.kmz
  • Save the file 
  • Open SketchUp 
  • Go to File > Import
  • Choose the .kmz file extension from the drop-down menu of file types 
  • Choose your saved .kmz file 
  • Click Import
  • Your imported 3D model is inside SketchUp, ready to work with 

Next in our guide about how to export Google Earth to SketchUp, how do you use imported models in your SketchUp projects? 

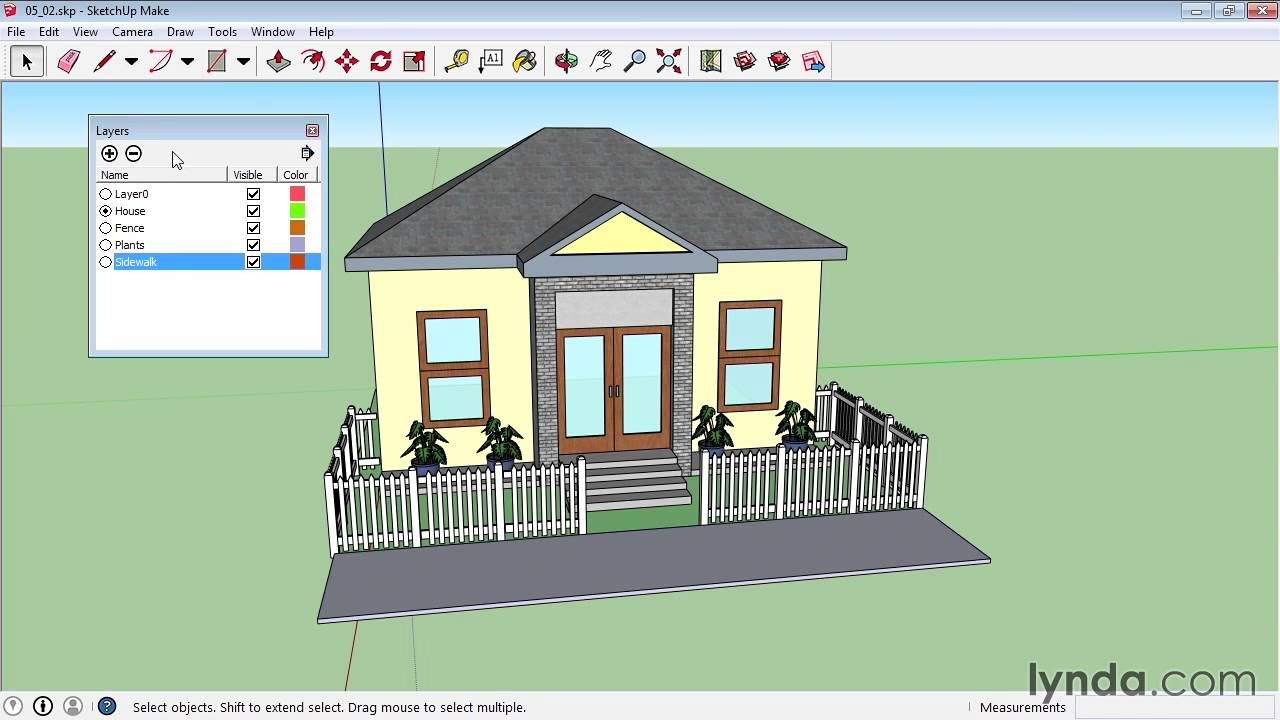
SketchUp puts the imported image on a layer of its own, which means it’s easy to turn on and off. You might want to scale it up or down for your project using the scale tool. It’s a simple task. 

Now you can use the imported model as a realistic reference to make your own 3D model of the building or simply use it as an inspiring starting point for creativity. As you can tell it’s a great way to save time and effort making things from scratch. 

There are some best practices to get to grips with when working with imported models in SketchUp. Always keep the imported model on a separate layer of its own, so you can turn it on and off easily. The scale tool is the simplest way to resize the model to suit your project. You can make the model simpler therefore easier to work on by stripping out all the unnecessary elements. This reduces the file size. It’s a good idea to group the imported model to make it easier to work with, splitting it into components. And you can have fun using materials and textures, both of which will make your work unique and add excitement to the finished design.

Tips and Tricks for Working with 3D Buildings in SketchUp

If you’ll be playing with 3D buildings in SketchUp, we have some expert tips to help you make the most of the tool. For a start, you’ve got a suite of top-class tools, all easy to use, which’ll help you modify it to suit your goals. 

You can use the Move tool to move, rotate, and scale your model in seconds. The Push/Pull tool is the best way to extrude or depress parts of your model in just a few clicks. The Eraser tool rubs out parts of the model you don’t want. And the Paint Bucket tool applies your colours and textures. 

We also have some amazing plugins for enhancing 3D models, taken from the enormous library of plugins designed to support SketchUp excellence. CleanUp3 identifies and removes any stray geometry you don’t need, delivering faster performance and smaller file sizes. The SketchUp plugin applies textures accurately even when your 3D surface is very complex. And Profile Builder 2 makes fantastic custom doors, windows, and other architectural elements in no time. 

How about our tips for Optimizing 3D Models for Rendering and Visualization? You can play with the Materials panel to add inspiring textures and colours. The Shadows panel cleverly changes the angle and intensity of sunlight for accurate shadows and shade. The Styles panel lets you make your own custom styles, and the Layers function is all about organising models, making them a lot easier to work on. 

Let’s get going!

So now you know how to export Google Earth to SketchUp. It makes the whole design experience faster, more enjoyable and more flexible, and enhances your creative life in so many ways. 

Take a look at the tutorials you can tap into to learn more and know how to do everything better, faster, and easier. 

If you’re not using it already, take a look at our guidance about SketchUp free versus SketchUp Pro. Which will suit you best? The Elmtec team has been supplying people like you with professional hardware and software for more than 25 years. We’re your one-stop shop for everything to do with SketchUp, including a huge store of knowledge, all the experience you can need, plus top-class support.   

What is 3D Rendering Software

A render is a digital version of a 2D or 3D model created by computer software. The resulting image can be hyper-realistic or not, depending on what you’ll be using it for. Real-Time Rendering is used for interactive graphics and gaming and creates images fast. Pre-Rendering is best when speed isn’t so important, usually best for photorealistic animation and visual effects. The images can be viewed by anyone without special hardware or software. 

How does 3D rendering software work? Modelling means making a computer model of an object. Layout involves placing objects in a scene.  And 3D rendering makes complex computer calculations based on light, surfaces and more to generate a stunning image in a process called rasterizing. 

3D graphics software was born in 1978 with a product called 3D Art Graphics, a set of 3D effects coded by Kazumasa Miyazawa for Apple. Today’s computers are so much more powerful, with  the processing power for exceptionally complex rendering. Here’s what you need to know about 3D rendering.  

Overview of 3D Buildings from Google Earth to SketchUp

A render is a digital version of a 2D or 3D model created by computer software. The resulting image can be hyper-realistic or not, depending on what you’ll be using it for. Real-Time Rendering is used for interactive graphics and gaming and creates images fast. Pre-Rendering is best when speed isn’t so important, usually best for photorealistic animation and visual effects. The images can be viewed by anyone without special hardware or software. 

How does 3D rendering software work? Modelling means making a computer model of an object. Layout involves placing objects in a scene.  And 3D rendering makes complex computer calculations based on light, surfaces and more to generate a stunning image in a process called rasterizing. 

3D graphics software was born in 1978 with a product called 3D Art Graphics, a set of 3D effects coded by Kazumasa Miyazawa for Apple. Today’s computers are so much more powerful, with  the processing power for exceptionally complex rendering. Here’s what you need to know about 3D rendering.   

Benefits of 3D Rendering Software for Your Business

So why is rendering software such a good idea? For a start, it makes visualisation so much more exciting, simply because the images you render are so perfect. They’re super-clear, lit realistically and incredibly life-like. Your clients and colleagues will know exactly where you’re coming from instantly because rendering makes it so much easier to get ideas across accurately in a way that inspires people.  

Rendering software saves time because you can quickly test different designs, making swift changes in real-time and showcasing the results so beautifully that there’s no risk of misunderstandings. It’s ideal for making fast virtual prototypes and test builds too, minimising the number of revisions you need to make along the way. And it’s great for automating the repetitive things you don’t want to spend time on: variations on the same design, generating multiple views of the same thing, setting how the natural light falls.   

The software also gives you enhanced design quality and accuracy. It makes intricate, precise designs and challenging ideas a lot easier to achieve, and faster. You’ll be able to design very high-quality products and deliver exceptional services, which means you’ll enjoy your work more.  And of course, saving all this time and effort ultimately saves money. 

Make every presentation an excellent one. Convince stakeholders faster. Improve your turnaround times. Be more competitive. It all happens when you’re doing a dazzlingly good job with 3D rendering tools. 

Use rendering software to simulate an infinite number of lighting conditions, bring every kind of environment to life, and make any material look real. The results are gasp-out-loud good, loved by everyone from animators to gaming designers, architects to landscape designers, and construction companies to engineers.  

Types of 3D Rendering Software

Is there more than one kind of photorealistic rendering software? It’s a yes. There are three sorts of 3d rendering tools to choose from, each with its own focus.    

Photorealistic rendering software gives you extremely realistic images and animations. Simulating real-world lighting and materials to perfection, this kind of rendering is mostly used by architects, product designers, and advertising agencies. 

Non-photorealistic rendering software is the best choice when you want to be more artistic, is used by designers working in animation, gaming and film. Paint with it, draw with it and much more – it lets you use all sorts of expressive styles.  

Real-time rendering software is perfect for making interactive and immersive visualisations in real time. Think video games, virtual and augmented reality, and the impressive walk-throughs used by architects. 

How to Choose the Right 3D Rendering Software for Your Business

It’s an exciting choice but how, exactly, do you make it? Like any business buying decision, you’ll begin by exploring your wants, needs and goals. What level of realism are you aiming for? What sort of projects do you work on at the moment? Will that change? If so, when? 

What do your clients and prospects expect? What are your closest competitors doing? Where do you want to be in five years’ time? What are your financial projections? And finally, what’s your budget? 


Next, find out as much as you can about your options. What are the features, benefits, capabilities and limits of the software you’re thinking about? Is there support for enough file types, how many rendering choices do you get, how easy is it to use, is there support and if so how good is it? Is there anything crucial you really need to do that it doesn’t do? 


It’s good to factor learning resources in as well. Does the software come with tutorials, videos, courses, documentation, and customer support? Will the provider help you get started? What sort of license will suit you best?   


Once you’ve bottomed all this out you’ll be in the perfect position to make the right decision: photoreal, non-photoreal, or real-time 3D animation.   

Inspired? Let’s go

Now you know what 3d rendering software is. It’ll save you time and money, and give you and your clients an inspiring way to explore designs, ideas, prototypes and creations. There’s a version to suit every kind of 3D design project. You design better and love the results more. 

If that sounds good, why not test-drive 3D rendering software for your business? Go to a provider you can trust and you’ll get so much more than a download. At Elmtec we have the SketchUp expertise you need to get up to speed fast, and we give you the support you need in getting the most out of the 3D rendering software you choose.

How to Save Image in V-ray in SketchUp

V-Ray is a popular plugin for 3D computer graphics software applications. It gives you one of the most exciting ways to render perfect visualisations of 2D and 3D models fast, in full photorealistic detail. Do you want to know how to save image in v-ray in SketchUp? Read on to find out the basics of V-Ray image saving, a step-by-step guide to saving images in V-Ray, and useful insight into the power of the V-Ray community. 

Understanding the Basics of V-Ray Image Saving

First, before you begin saving images in V-Ray, let’s explore the basics behind the software. V-Ray is a powerful rendering engine providing beautiful photorealistic results. Behind the scenes, the code harnesses various illumination algorithms like path tracing, photon mapping, irradiance mapping and directly computed global illumination to create real-feeling pictures and animations. 

Before you can save an image you’ll have to set up the scene, included the right level and type of lighting, choose your materials, and picked the perfect camera settings for the project. You can choose natural light or man-made light to create an infinite variety of lighting effects.

The tool displays the different scenarios you try as thumbnails, making it easy to apply them to your scene and decide which is the most suitable. Once all that’s in place and the render looks perfect, you simply save the image. To create an animation you join the separate frames created by the software together later to make an animated clip.

Step-by-Step Tutorial for Saving Images in V-Ray

What steps do you go through to save images in V-Ray in SketchUp? It’s nice and easy. ‘Save Image’ lets you set or change the File Path, and ‘File Path’ lets you choose the file location and type to save your V-Ray rendered image. The file types are png, bmp, tga, hdr, sgi, jpg, exr, pic, tif, and vrimg, letting you save the image in different formats. Bear in mind the File Type option is only available once you’ve set a valid File Path. 

How do you set up the scene and adjust the settings?  Scenes let you save different views of a model and switch between them. Import a SketchUp model into LayOut and the scenes you’ve created are ready for you to use, good news when you want to show the views in a LayOut document. To change the view to a scene from a model, select the SketchUp model in the drawing area, open it, select the scene name from the drop-down list in the Viewport area, and choose a scene name from the Scenes drop-down list. 

Adjust your perspective and scale in Perspective view, where the model isn’t to scale. Switch to Parallel Projection view, displaying something called an ‘orthographic view’. This is where you set a scale for your model, inside LayOut. Choose your model entity from the drawing area. Open SketchUp’s Model panel. Click the Ortho button or context-click the entity and de-select the Perspective option from the context menu. Once your model entity view is orthographic, you can choose your scale options. Choose or type in the scale you want, or add your own custom scale to the pre-set choices. 

When you need the model to stay at a constant size, choose ‘Preserve Scale’ in the Resize checkbox. Simply re-select it to resize the model to your bounding box.

Next, some handy tips and tricks. First, think about your model’s orientation, which affects how realistic your lighting will look. Models need to be properly aligned, and you’ll also need to make sure you’ve chosen the right light source.

The fine details matter a lot. Spend time pinning them all down. Gaps between boards, for example, can cause havoc because V-Ray is so powerful it renders absolutely everything, even the smallest details. Remove anything unnecessary but keep important detailing. 

Tidy and clean things up with model optimisation before using V-Ray. This removes any unnecessary details that’ll otherwise slow the render process down. If an element of your design doesn’t serve a genuine purpose, take it out. 

Name your materials in SketchUp so you’ll remember them. Otherwise assigning materials to a design can get pretty confusing. Be specific and name them in a way that means you can’t get them mixed up. ‘1’, ’2’ and ‘3’ are a lot less memorable than ‘green tiles’, ‘grey slates’ and ‘blue mosaic’, for example. 

Join the Community: V-Ray Forum and Videos

Other users are one of your best V-Ray resources. And that means the V-Ray forum and V-Ray videos are excellent destinations. The forum is a large and enthusiastic community of users who share their experiences and knowledge about how they use V-Ray. You can ask questions, share your designs, and request feedback from other people who use the tool. There are also plenty of clear video tutorials to tap into, easy to follow and fun to discover, plus expert tips for making the most of V-Ray. 

At Elmtec we have more than a quarter of a century’s experience, making us one of the best-loved distributors of hardware and software for professionals across a wide variety of sectors. You can trust us, as your digital distribution partner, to do the right thing in every circumstance, so come to us for your V-Ray and SketchUp downloads. 

Our specialist team is made up of highly qualified people, perfect when you want the best product knowledge, the widest industry experience, and the best support.  

Now you know how to use V-Ray for SketchUp...

If you’ve been inspired by this article, it’s time to have a go at V-Ray for yourself.  If you haven’t even tried SketchUp itself yet, you’re in for a real treat. You can either start with a free trial of SketchUp or dive right in and go for SketchUp Pro, packed with brilliant functionality to bring your design ideas to sparkling life.

What Software Do You Need for 3D Printing: A Guide to Choosing the Right Tools

3D printing gives designers an inspiring way to make quick prototypes, improve their designs, make exceptional presentations, and create beautiful and useful objects.  To make the most of the 3d revolution, it’s good to know how it works. So how do you get the software to 3d print? What is 3d printing software? And what CAD software for 3d printing should you choose? This guide reveals all about the software you need to make ‘amazing’ happen. By the end of it, you’ll know what’s what, and you’ll be empowered to make the best decisions. 

What Software Do You Need for 3D Printing?

First, how do you get the software to 3d print?  There are three different tools to take into account to get started with 3D printing. For a start, you’ll need 3D modelling software to design a printable 3D model of the object you want to make. There are plenty of choices and the top choices are Autodesk Fusion 360, SketchUp, Tinkercad, and Blender.

You’ll also need some good slicing software, which digitally slices up your object into incredibly thin layers for the 3D printer. It outputs clear instructions for the printer to follow, printing out the object layer by layer. The most popular are Cura, PrusaSlicer, Simplify3D, and Slic3r.


Printer control software is the third part of the equation, the thing that controls your 3D print machine and its settings. You use it to upload sliced print-ready files, change the print settings, and keep an eye on the job’s progress. You might want to take a look at Repetier-Host, OctoPrint, or Pronterface, all popular options. 

3D Modeling Software for 3D Printing

There are some choices to make around 3D modelling software, so let’s look at a few of the best.

Autodesk Fusion 360

Created for professionals, Autodesk Fusion 360 is just as good for beginners. A feature-rich quality tool, it includes the varied features you need for designing printable 3D models. You’ll be able to use parametric design, sculpting, mesh editing and more to get great results. The software is free for startups making less than $100,000 a year and free for individuals.

SketchUp

SketchUp is a famously user-friendly and very popular 3D modelling software tool. Because it’s so easy to learn it’s a top choice for beginners as well as widely used by professionals, particularly in architecture, interior design, and garden design. The software comes with excellent 3D printing capabilities and a free version so you can experience it for yourself. The Pro version takes the imagination to new levels with more advanced features.

Tinkercad

Tinkercad is another freebie, a popular 3D modelling software loved by beginners. As well as being simple to use, it offers a suite of essential tools for creating basic 3D models. While it’s not as feature-rich as some it’ll make your first 3D modelling and printing experiments nice and easy, a good place to start.  

Blender

Blender is a free 3d modelling tool. Designed for more experienced users and packed with features, this one is a particular favourite with designers in the animation and special effects sectors. It comes with excellent advanced 3D printing capabilities, making it ideal for designing and printing complicated 3D models.

Slicing Software for 3D Printing

Now you’ve made your 3D model, it’s time to virtually slice it into thin layers for the print machine to output one by one. Here are some of the best-loved tools for the job.

PrusaSlicer

PrusaSlicer is open-source and free for everyone to use. It’s designed specially to suit Prusa 3D printers so if yours isn’t a Prusa, it might not be the best choice. It provides you with advanced features to tailor the print settings to your project, supporting several extruders as well as advanced support structures.

Simplify3D

Simplify3D is a premium choice loved by 3D printing fans. This slicing software comes with cool advanced features for custom print settings and optimising the results, supporting a variety of extruders and custom support structures. Simplify’s detailed print previews are great. 

Slic3r

Slic3r is a simple free tool with a variety of features for customising print settings. Supporting a choice of extruders and advanced support structures, beginners find it easy, and quick to learn. 

Printer Control Software for 3D Printing

How do you control your 3D printer and manage printing tasks? What is 3d printing software? It’s all about printer control, and we’re happy to recommend these. 

OctoPrint

OctoPrint is free and designed to work with a variety of 3D print machines. You can upload sliced files, monitor print projects and change the print settings remotely, a handy option when you’re working on the move. 

Repetier-Host

Repetier-Host is free as well, designed to work with a range of machines. With all the functions you need, it’s particularly good for people wanting a simple, easy-to-use tool.  

Pronterface

Pronterface is also free, works with multiple machines, and lets you do all the 3D printing essentials. It’s particularly popular with people wanting clear, simple printer control. 

Frequently Asked Questions:

Do I need to use all three types of software for 3D printing?

Yes. Every 3D print project involves making a 3D model, slicing the finished model up for printing, and then managing the print process itself.

Can I use different software for each step of the process?

Yes. As long as they’re compatible with each other and work together without any problems, it’s fine to use different software for each 3D printing step.

Can I use free software for 3D printing?

A: Yes, and there’s a choice of tools for the three stages of the job: great 3D modelling software tools, slicing tools, and 3D printer control software.

Time to give it a go

Now you know what’s what. Whatever you’re printing you need a design tool to design the item, a slicer that prepares it and tells the printer what to do, and a way to control the printer and print settings. What CAD software for 3d printing you use is your choice. You might want to test drive a few of them to see which feels best and most suits your skill level. Your final task? To design, prepare and print a brilliant 3D object from start to finish. You’re going to love it! 

Why upgrade from SketchUp Pro > SketchUp Studio?

SketchUp is a 3D modelling software that is widely used by architects, engineers, designers, and hobbyists. SketchUp Pro has been the go-to version of the software for many years, but recently it has upgraded its deluxe version called SketchUp Studio. In this blog post, we will discuss the benefits of upgrading from SketchUp Pro to SketchUp Studio.

Enhanced Features and Tools

SketchUp Studio offers a wide range of enhanced features and tools that are not available in SketchUp Pro. For example, Studio includes the ability to generate reports, import and export data in various formats, and collaborate in real-time with other users. It also includes the Trimble Connect extension, which allows users to access cloud-based storage and collaborate with other users in real-time.

More Plugins and Extensions

SketchUp Studio also comes with more plugins and extensions than SketchUp Pro. The Studio version includes a suite of extensions that are designed to help users streamline their workflow and increase productivity. For example, Scan Essentials provides the ability to import, view and interact with point cloud data in the SketchUp modelling environment, while the V-Ray plugin can be used to create photorealistic renderings.

Improved Customer Support

SketchUp Studio users also benefit from improved customer support. Users can access a dedicated support team that is available to answer questions and provide assistance with the software. This can be particularly helpful for users who are new to the software or who need help troubleshooting issues.

More Cost-Effective

While SketchUp Studio is more expensive than SketchUp Pro, it is still a more cost-effective option for users who need access to the additional features and tools that come with the Studio version. For example, purchasing a SketchUp Pro licence and several extensions can be more expensive than purchasing a SketchUp Studio licence, which includes all of these features and tools.

Future-Proof

Finally, upgrading to SketchUp Studio is a future-proof investment. As technology continues to evolve, software updates and new features will be introduced. By upgrading to SketchUp Studio, users can ensure that they have access to the latest and greatest features and tools as they become available.

In conclusion, upgrading from SketchUp Pro to SketchUp Studio offers many benefits for users who require enhanced features, improved customer support, and a more cost-effective solution. With access to more plugins and extensions, real-time collaboration features, and a dedicated support team, SketchUp Studio is the ideal choice for users who want to take their 3D modelling to the next level.

About Elmtec

Elmtec have been the UK distribution partner for SketchUp since 2010, and service a network of UK and Irish resellers. We have over 22 years’ experience within the digital design community.

Contact Us

T: 01844 263 750
E: sales@elmtec.co.uk
W: www.elmtec.co.uk/sketchup