Not sure if you’ve noticed but the England team have only gone and broken the penalty curse and will face Sweden this Saturday. We’re beyond excited at SketchUp UK HQ and in order to make it look as though we’ve been working hard since Wednesday, whilst also feeding our football obsession, we’ve created an England World Cup themed SketchUp tutorial for the ‘Face Me’ scaled component. Yes, you too can change your SketchUp figure to Harry Kane, Bobby Moore or, indeed, anyone you like. Here’s our step-by-step instructions. Have fun!
1. Select a photo from the internet. A full length forward facing one works best. Go on, Harry!
2. Delete the existing scale figure on SketchUp. Make way for Harry. Go to File -> Import -> All Image Type Selected. Then ‘Use Image As’ and make sure the ‘Image’ box is selected.
3. There’s your image of Harry in SketchUp. Place the image on the origin of the left axis then drag the image out and use the Orbit tool to make the image front-facing.
4. Draw a line from the top of the head straight down to the foot.
5. This is when you scale your figure. Use the Tape Measure tool to go over the line you just drew from head to foot. Find out the height of your model. Harry is 6ft 2inches so, in the bottom right hand box which says ‘length’, enter that number. Click ‘yes’ to ‘do you want to resize?’ The image is now scaled, you can delete the original line that you drew now.
6. Use the Rotate tool and rotate the image 90 degrees. You need it flat and vertical. Now we’re all set to start drawing the lines for your figure.
7. Either use the free hand pen or line pen and draw your outline.
8. Move the original image out the way and you can colour your figure in. (Tip: You can exact colour match the original image by using the eyedropper tool).
9. Select your model, right click, then ‘Make Component’.
10.Name your model and make sure that ‘Always face camera’ is ticked. Hit ‘Create’
And there’s your final Harry Kane SketchUp Face Me bringing it home.
*Maybe, possibly. Just maaaaybe.
And if you’d like your SketchUp Tutorial in a super speedy video form check out our Bobby Moore one below.
So, you’ve designed your tables, chairs and windows. Are you going to just leave them naked? Nope. You’re going to use the fantastic ClothWorks extension for draping cloth and ropes over components of any shape and size and for simulating flags and curtains.
Workflow functionalities include:
● Simple Grid and Smart Grid options for turning face or a set of faces within a component/group into a grid of faces, with a desired padding. An additional Purge Edges option can be used to remove the generated grid. These options are for manipulating cloth.
● Split Edges option for dividing an edge or a set of edges within a component/group into segments, with a desired padding. An additional Weld Edges option merges the split edges.These options are for manipulating wires.
● Loop Subdivision and Laplacian Smoothing options for subdividing and smoothing the resulting, simulated cloth (meanwhile preserving texture UVs).
● Drape and Undrape options for resetting and renewing cloth, rope, and pin orientations. This option is particularly useful for when changing cloth texture material.
● Record and Export options for recording simulation and then exporting the final animation into a sequence of PNG or JPG images, SKP files, OBJ files, and many other formats. A third-party
software, such as MakeAVI, can be used to combine a sequence of exported frame images into a video file.
Check out a few different ClothWorks tutorials below and have fun dressing up your modelling!
Last week we were at Clerkenwell Design Week with the SketchUp gang and we picked up a whole host of cool tips, tricks, and advice which would, quite frankly, be rude of us not to share with you, dear reader.
This post is all about everyone’s favourite F word: ‘Free’. You don’t need us to tell you that the Extension Warehouse can be a vast and beautiful – if slightly bewildering place. Therefore we’ve picked out just a few free extensions that we think could be the most useful to the largest demographic.
SketchUp Weld
An incredibly useful extension – you won’t realise how much you need it until you start to actually use it. Weld allows you to select multiple connected edges, curves, and/or arcs (“connected” means having common endpoints), then use the Weld tool to join them into a single “polyline”.
Joint Push Pull
JointPushPull is a script dedicated to Face extrusion, with several Tools.
NORMAL – Similar to native Push Pull, but in multi-face. Faces generated are non-jointed.
VECTOR – Faces are offset along a custom direction picked graphically in the model (or along model axes). Faces generated are jointed.
JOINT – Faces are offset along their normal but are kept jointed. Useful for thickening shapes.
EXTRUDE – Faces are offset along an average direction, keeping faces jointed. Gives more consistent results than Joint tool.
ROUND – Combination of Normal and Joint mode depending on the angle between faces, with automatic rounding of gaps between faces.
FOLLOW – Faces are offset along the direction given by their adjacent edges. This concept was introduced by a4chitect’s Smart Push Pull plugin.
SketchUp CleanUp
Pretty simple really – cleans up and optimizes your SketchUp model.
With this extension you can:
Fix duplicate component definition names (When in model scope)
Purge unused items
Erase hidden geometry
Erase duplicate faces
Erase lonely edges (Except edges on cut plane)
Remove edge material
Repair split edges
Smooth & soft edges
Put edges and faces to Layer0
Merge identical materials
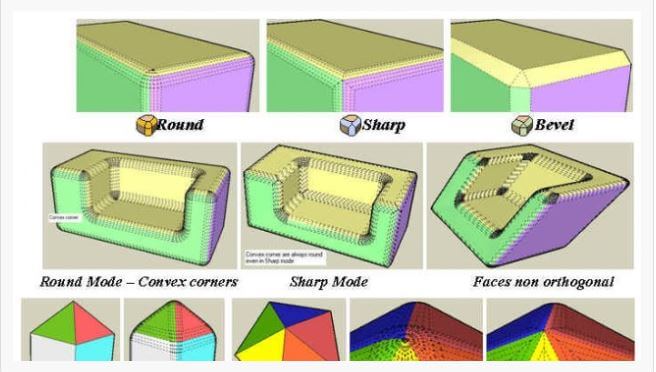
RoundCorner
RoundCorner performs the rounding of the edges and corners of 3D shapes along a 2D profile, in 3 modes: Round corners, Sharp corners and Bevel. RoundCorner also supports concave corners (always rendered as Round) and non-orthogonal edge faces. Corners can have 2, 3, or more edges.
Soap Skin & Bubble
This plugin allows you to apply a skin over edges to create complex curved surfaces.
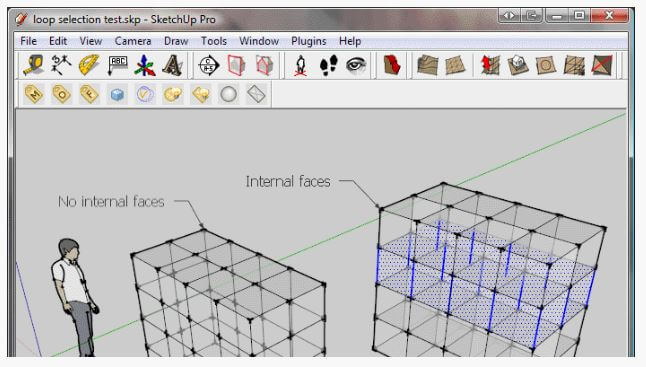
Selection Toys
Provides a wide range of selection modifiers, filter out all edges, faces etc.
Let’s you quickly select entities with similar properties such as material, layer orientation etc. Also lets you select similar instances of the same Dynamic Component.
Hopefully you’ve found our pick of the best free extensions in SketchUp Pro useful. Find a whole host of other goodies in the Extension Warehouse and let us know below if you’ve got a free favourite that helps you!
So, we covered some of the basics in the previous post and now we’re getting down to the finer details of ensuring our SketchUp modelling stays as lean as possible. Read on for more smooth and speedy tips and tricks.
Components vs. Groups
Always make Components instead of Groups whenever an object might repeat, or ever be used in another model.
Groups are great for grouping together components, such as grouping the landscaping elements together.
File Size: 101 kb
File Size: 135 kb. Even if the component instances are flipped, rotated, coloured from the outside, or scaled, the total file size stays small.
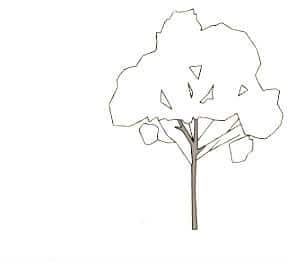
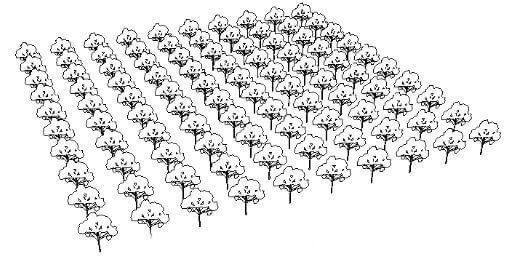
File Size: 143 kb. A model with 100 of the same tree component isn’t much bigger in file size than a model file with only 1 tree component.
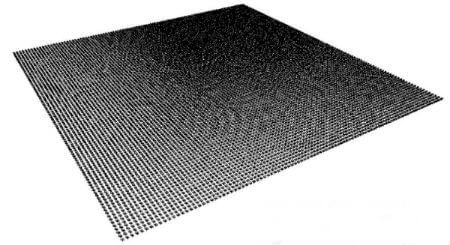
Need 10,000 trees? Thanks to components, the total file size only rises to 1.5 MB. Each extra tree component instance adds only a fraction of a kilobyte.
Stand-In Components
Save a complex component to your hard drive as a reference back-up.
In the model, edit and simplify that component to a few lines, or a rectangle, so that it renders more easily than the “real” component.
Later, when it’s time to present the model, right click on the component in the model and select Reload.
In the Reloading navigation folder, find the saved component on your computer and select it.
The Select/Replace technique works just as well.
Use a low-poly tree, for example, until it is time to present the model.
When it’s time to show the model, import a high-poly model into the file (place it anywhere).
Select all of the low-poly components.
In the Components Window, right-click on the high-poly component and select “Replace Selected.”
Delete the first randomly placed high-poly component.
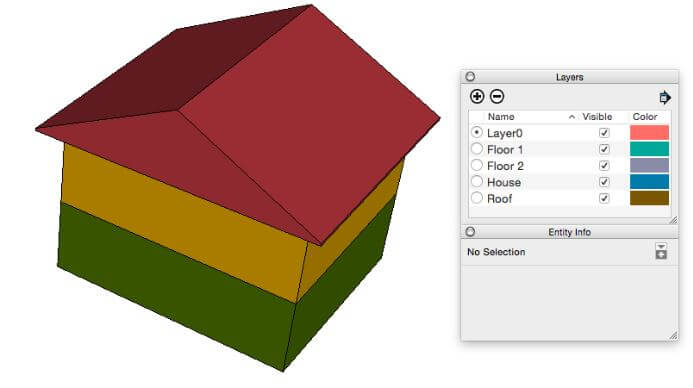
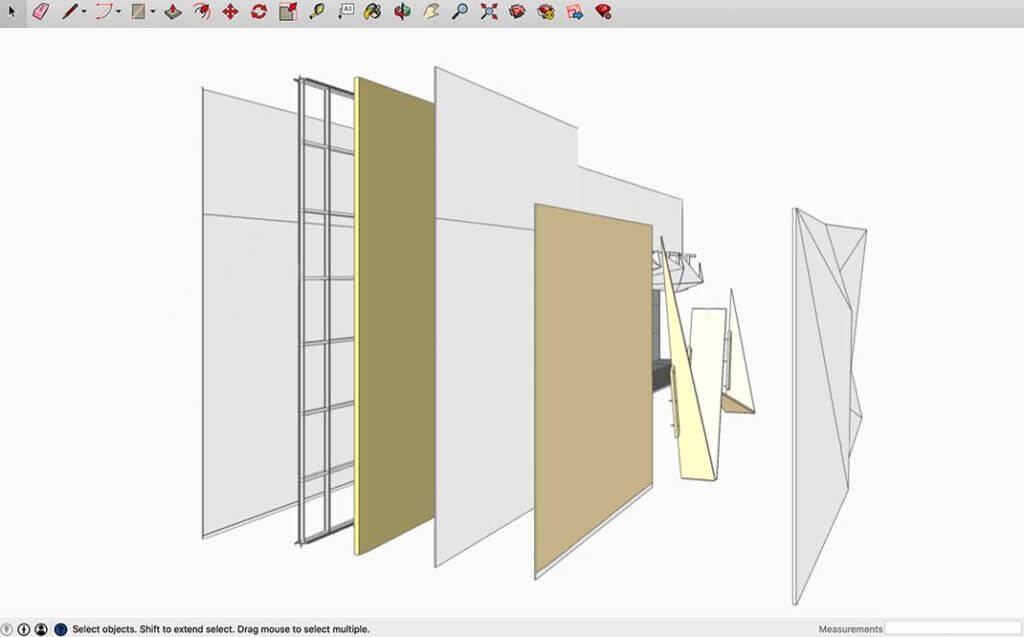
Turn off some Layers
If your model is acting sluggish, try turning off some layers that you don’t need to see right then.
Here we’ve deselected the roof and can also peer into the second floor.
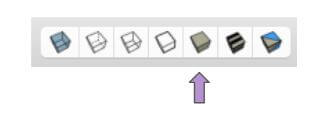
Styles
If needed, switch to the “Shaded” style while building geometry, as textured materials can slow down rendering.
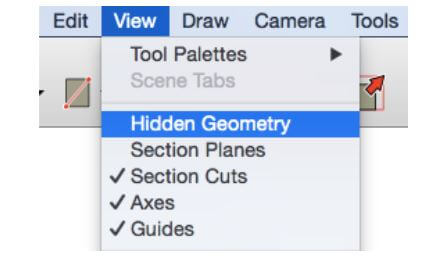
Turn off hidden geometry when not editing hidden lines.
Use a “fast modeling” style when building the model and save it for the “Working” scene.
Materials
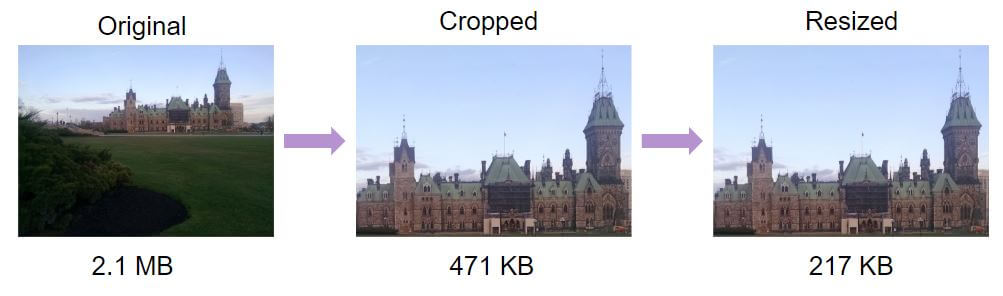
Examine image file sizes before importing. Pre-crop and resize images before importing them into the model.
For some imported photographs it helps to right-click on model surface and select “Make Unique Texture” to further crop and reduce pixels. Undo this step if it makes it too blurry.
Use .jpg files wherever possible for imported tiling images, as they often have smaller file sizes than pngs. Some exceptions are site maps, logos, and images with transparencies.
Don’t choose a tiling image file when a flat formulaic colour will do. Example: You can usually use a flat shade of grey instead of “brushed aluminium.”
There we have it. Just a few of our favourite tips to ensure modelling in SketchUp stays as agile as possible!
Please do let us know in the comments below if you’ve got a great tip that wasn’t covered here or in Part One.
Want to keep your SketchUp File size low and ensure that it renders quickly as you use it?
Yep, thought so.
Read on for some of our favourite tips and tricks to ensure your modelling remains agile.
Sluggish Modelling be gone!
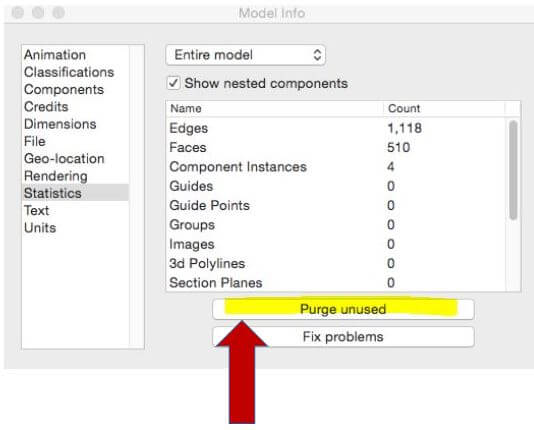
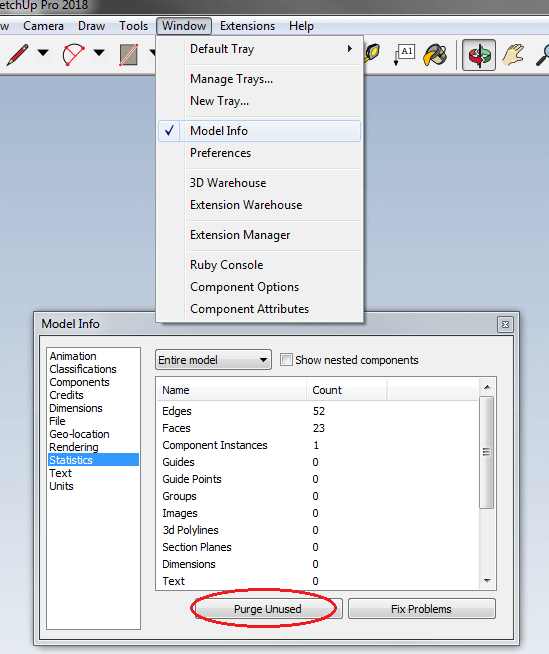
Purge Unused
Remember, deleting things from the model DOES NOT delete them from the model file.
Go to ‘Window’ > ‘Model Info’ > ‘Statistics’ > ‘Purge Unused’ to get rid of deleted Components, Styles, Layers, and Materials.
Do it before every big save.
This button = your best friend. If your best friend happened to be a button, that is.
Imported Components
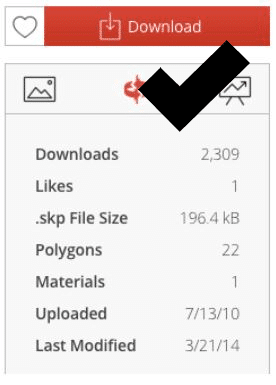
You wouldn’t go out and buy a new car or television without comparing and shopping around first. Same rules apply when you download a component or model from the 3D Warehouse. Always check the file size and edge count before you download from 3D Warehouse.
Pick the component with the smallest file and edge count that will sufficiently do the job.
You can always trade up to a higher quality component later with a “select/replace” technique.
Woah there! Sure you need such a large file?
Aha, much more reasonable.
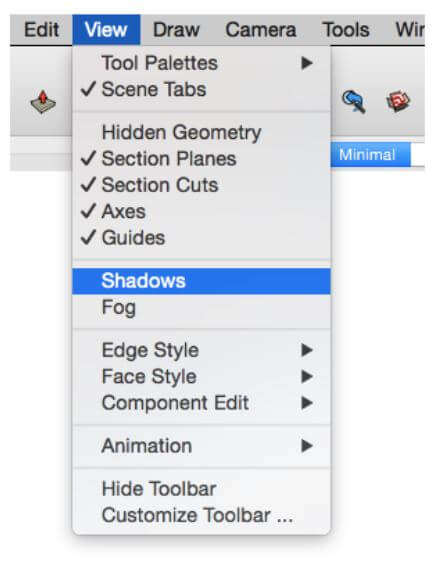
Turn off ‘Shadows’ and ‘Fog’
If the model is acting sluggish, turn off shadows and fog while working on the model, and before saving.
Save the “Working” or “Minimal” scenes without shadows or fog for quick modelling modes.
Save specific Scene Tabs with Shadows or Fog for quick presentation views, if the model complexity is small enough to render shadows.
No Shadows, no Fog = Sunny, quick rendering
General Good Housekeeping
Close down other applications – Close any other computer applications that you don’t need to have running. This might clear up some processing power.
Keep SketchUp updated – You can check whether a new version of SketchUp is available in SketchUp under Help > Check for update… (PC) or SketchUp > Check web for update (Mac).
We’ll get into more of the nitty-gritty of keeping your modelling agile in Part 2. In the meantime, please let us know below if you’ve got any great tips to keep your modelling agile!
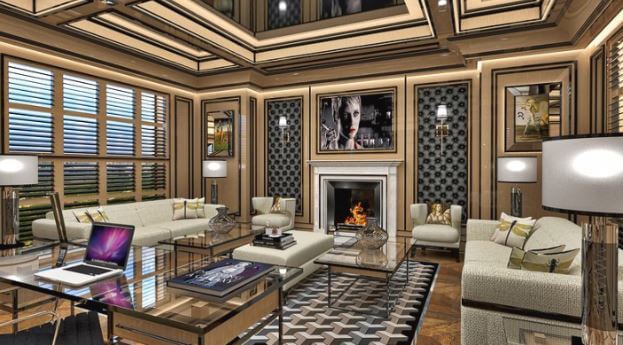
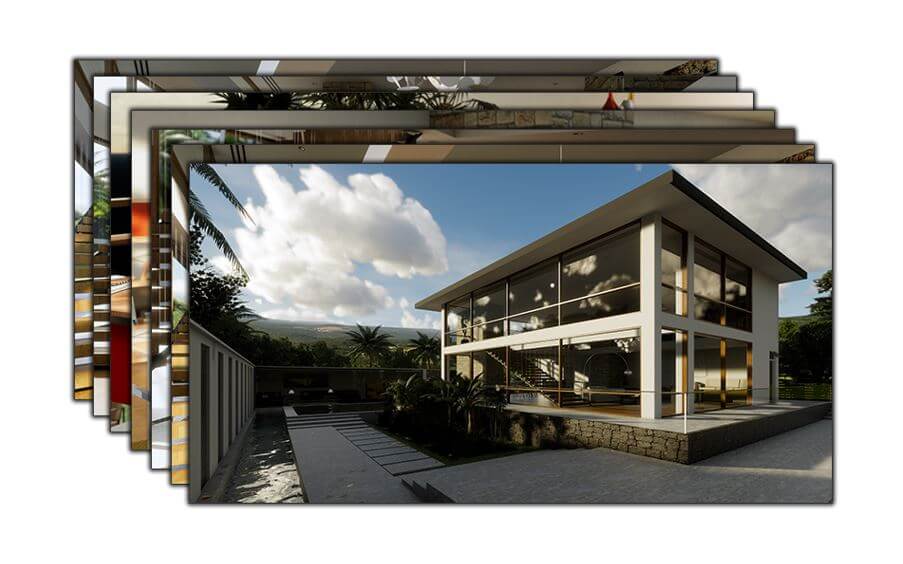
Martin Nealon, creative director and partner of Angel Martin Interiors, has worked as a top-flight interior consultant for over 30 years specialising in high-end domestic schemes. He is a registered member of the British Institute of Interior Design (BIID) and works on a range of traditional and modern projects across the globe. As well as being a passionate and productive designer, Martin is also a serious SketchUp aficionado, so I was thrilled to talk with him about his approach to work.
Panelled Drawing Room Render
Hi Martin, thanks for taking time out to talk to us! Could you introduce yourself and your team to the SketchUp community?
My name is Martin Nealon and I am the creative director at Angel Martin Design Consultants. As a company we specialise in high-end interior design and illustration. The team consists of myself, my partner and we have a graduate we will be taking on full-time soon.
I trained as a technical illustrator many years ago and after four years of leaning to draw cut away sections of car engines by hand and airbrush I was ready to take on the world. Unfortunately, in the final month of my course a little grey box appeared in the corner of the studio and I had never seen one of these before, it was called a Personal computer. (Yes, I’m very old!). The screen flickered on and a computer generated cutaway section of a car engine appeared and I watched as the lecturer rotated it and altered the lighting. I had no training in computers at all so immediately understood I was out of work before I even entered the job market. My career in interior design was a sideways move to use my hand drawing skills in an industry that still valued this type of drawing. As it happened it worked out well for me and I loved designing interiors for clients and soon opened my own company specialising in high-end domestic and commercial interior design.
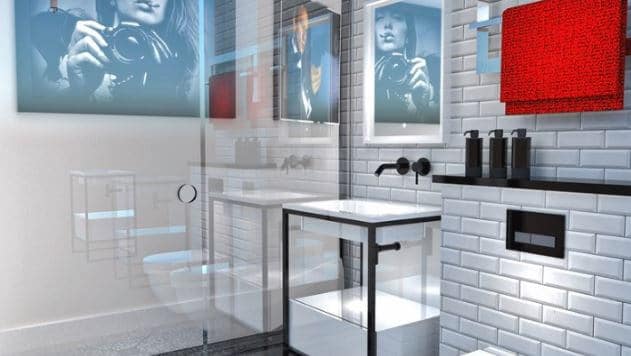
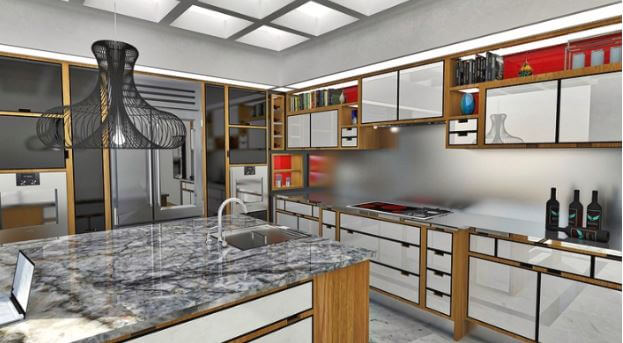
Shower Room Render
How did your team get going with SketchUp – and why choose SketchUp?
Well, life does have a certain irony as it was not many years into this career that technology caught up with me again as AutoCAD became the main program for designers. Technology was chasing my heels again last year as more and more designers were offering client’s 3D visuals and, at the time, all my work was presented as CAD plan and elevations. Based on the success I had achieved with AutoCAD I decided to invest in 3D software and evolve. I tried lots of different software packages but found them to be very complex to work with. I eventually settled on SketchUp Pro as it was relatively simple to learn and, when combined with V-Ray, could give a very impressive 3D representation of the scheme.
My perception of using SketchUp was to have a tool to offer clients a good quality 3D visual. What I wasn’t expecting was that the software was so intuitive and easy to use that I started to design within the 3D environment as well. This completely changed the way I work and has improved my ability as a designer exponentially.
The 3D visuals are now an integral part of my design process and presentation to clients.
“I was hoping SketchUp would help me to present my designs – I wasn’t expecting it to help me with the design process.”
An unexpected benefit from producing the 3D artwork is that architects and fellow designers liked my work so much that I began to get requests from them to produce 3D’s. My experience as a designer meant I had a wealth of experience and could understand what they needed and my new-found 3D skills meant I was well placed to interpret their needs and produce artwork for them. I have now set up a new company alongside Angel Martin that specialising in producing 3D artwork for fellow professionals at www.3dinteriorillustration.co.uk
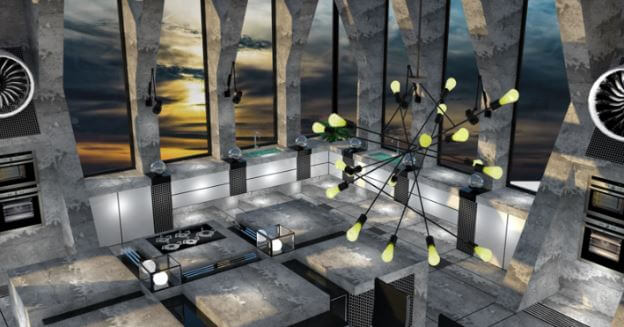
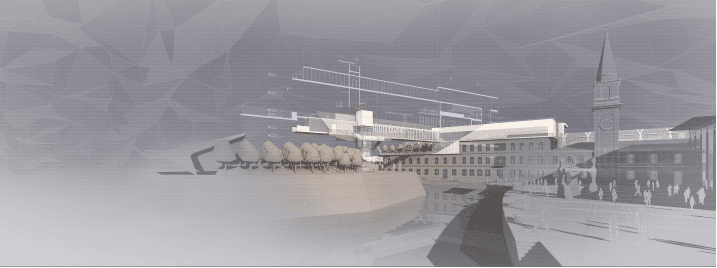
The Water Tower
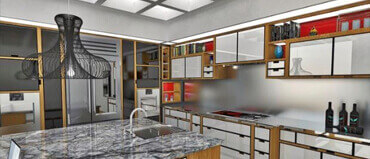
What does your typical design workflow look like?
My workflow starts with a basic CAD plan and elevations. Then I source items and reference material for the interior. The design is still a flat concept at this stage but the fun starts when I transfer the CAD drawing into the SketchUp package and start to pull the room into a 3D format.
Suddenly the room has form and I can navigate around, zoom in and start to play with the proportions and detail. Even adding colour and texture is fun, I can actually see how materials look and change each surface a the touch of a button until I’m satisfied with the overall look. From a presentation point of view I produce sketch renders of the model and then work up full renders filtered through V-Ray.
As I present to the client I start with the plan and elevation which most clients don’t fully understand and I watch their eyes glaze over as I enthuse about the detail.
I then go onto the sketch renders and I can see the client sit up in their chair as they relate to the drawings and become excited about the scheme.
The final stage is to casually flick over to the full renders which never fail to blow the client away as they see an almost photo-real concept visual.
What’s the one functionality you’re glad SketchUp has?
I love the sketch renders, I would like to see more options with these.
Hard question: If you had to choose, is there any one project you’re particularly proud of?
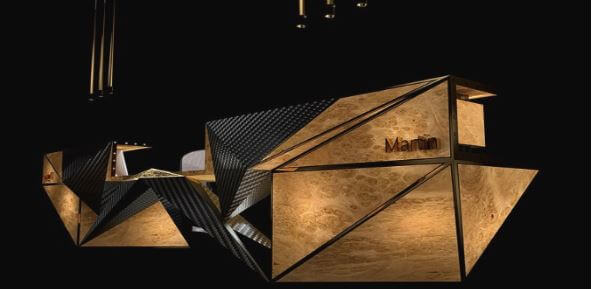
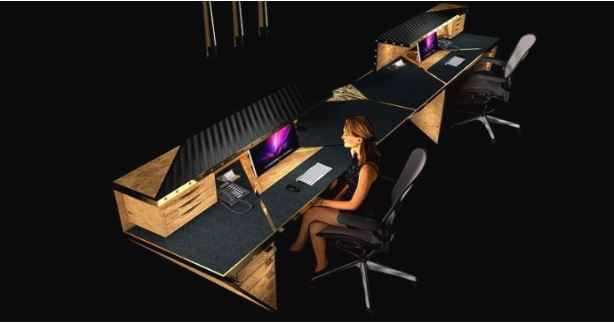
I have done lots of fascinating projects but one that sticks in my mind as being particularly enjoyable was a simple reception desk. Most reception desks tend to be a little bit predictable with the way they are designed and I wanted this one to be unique.
As a starting point I was fascinated by a simple origami bird, the angular form and simplicity of the folds were just wonderful.
“The design could not have been created without the 3D model, more importantly the SketchUp interface allowed me to work with the model, the process of modelling became a background function as the software is so intuitive allowing the actual design process to be at the forefront.”
I started to design this on CAD in plan and elevation but after two days of frustration came up with a very poor design. I then changed tack and started to build the desk from scratch in SketchUp, the 3D environment allowed me to literally fold panels to the desired shape. Rotate, zoom in and extrude each piece until I had a 3D model that encapsulated the concept perfectly.
After losing your right arm, you now work in SketchUp one-handed. This is incredibly inspiring and interesting. Is there anything else that is vital in helping you work?
The problem with using the mouse and keyboard in the normal way is that you sometimes need three hands to press the combination of keys required. As a one-handed designer you can imagine I was finding this very frustrating having to resort to holding a pencil in my mouth to press keys on occasion. My solution was to use a 3D mouse which made navigation much easier – then I could transfer to the keyboard as required.
My recent acquisition of the 3D Enterprise mouse means that I have access to the 3D mouse with numerous shortcut keys built-in around the side making it much easier to interact with SketchUp one-handed. SketchUp also allows me to place the various menus anywhere on the screen so by clustering them together on the bottom left, I minimise the travel on the mouse.
If you weren’t an interior designer, what profession would you have chosen? Do you have any other strong passions besides design?
Thirty years in the business and I still love designing interiors, I have never lost my passion – but if I wasn’t an interior designer I think I would have liked to be a book illustrator – I’m a bit of a sci-fi geek. I build and paint models, have done quite a few book illustrations, and I have also written a science fiction novel that was published last year.
We’re all familiar with the old adage, ‘seconds turn into minutes and minutes turn into hours.’ So no matter if you’ve been using SketchUp for years or are a newcomer, we’ve compiled five of our favourite tips that will get you designing smarter – and faster.
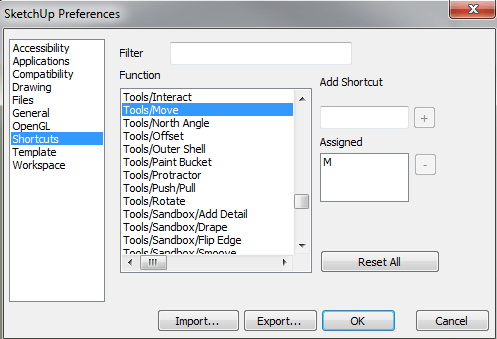
Use the Shortcuts
Yep, we’re going with the most obvious one first. SketchUp comes with a predefined set of shortcuts, but you can customise these to best suit you. Using shortcuts will help you work faster, make your user interface cleaner, and allow for more screen space for you to model. When shortcuts are used efficiently, they’ll enable you to skip menus and toolbars and boost productivity. Some SketchUp users tell us they barely even use the standard menu for their work and keeping only those related to plug-ins that can’t be conveniently switched to a shortcut. Need more information on customizing the keyboard? Have a look here.
Guidelines are your friends
Actually, maybe they’re better than your friends. Unless your friends happen to be multi-directional and infinitely flexible, too. They really are an amazing tool for speeding up your workflow unless you have super-human abilities to mentally visualize the model you’re working one (if you do, tell us how!). Add parallel guidelines and check distances using the Tape Measure tool. Check angles and set slopes using the Protractor tool. Added bonus: Too many guidelines? Just clear ’em all out with one shortcut and start all over again.
Group first, Layer later
Remembering ‘group first, layer later’ is an excellent rule of thumb when using SketchUp. By grouping first you can separate your geometry while also ensuring that the base geometry of the grouped object stays on Layer0. Having two levels of information separation allows it to be enhanced by using the scene system for more than just saving viewpoints.
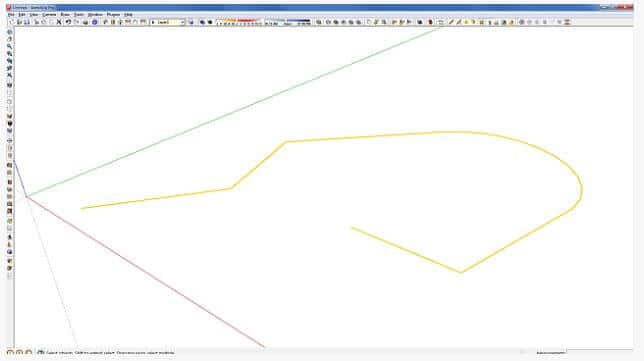
Photo Matching
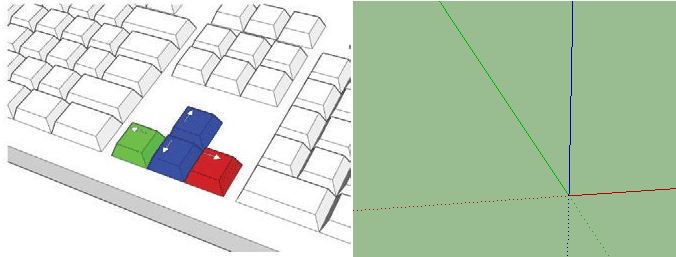
Success in using SketchUp’s photo matching relies on two things. First, you must ensure you’re using unedited original photography. Second, you need to ensure your model matches the scale of the subjects in the photo. A further tip is to get the camera’s focal length to match to the photo you’ve selected. To do this, place your yellow origin mark at the spot on the photo where you will place your model. From there, align the green and red axes to the features of the subjects in the photo to ensure everything is following the same direction.
Get in the habit of Good Housekeeping
Because SketchUp models save all the information inside the file, you’ll need to keep this in mind – the information stays inside even if you delete it from the workspace. This can clearly slow down your file performance. Therefore, a good tip is to do some regular housekeeping in order to keep your workflow speedy and snappy. To clean the excess element, go to ‘Purge Unused’ command in the components, material and layers.
So there we have it. Five of our favourite tips for speeding up your SketchUp workflow.
Let us know in the comments if you have a great tip to share!
Enscape™ is a virtual reality (VR) and real-time rendering plugin for SketchUp. With just one click, you can start Enscape and within seconds walk through your fully rendered project – no uploading to cloud or exporting to other programs required. That’s pretty neat.
With the recent release of Version 2.2, we take a look at some of the nifty brand new features that will significantly streamline your workflow.
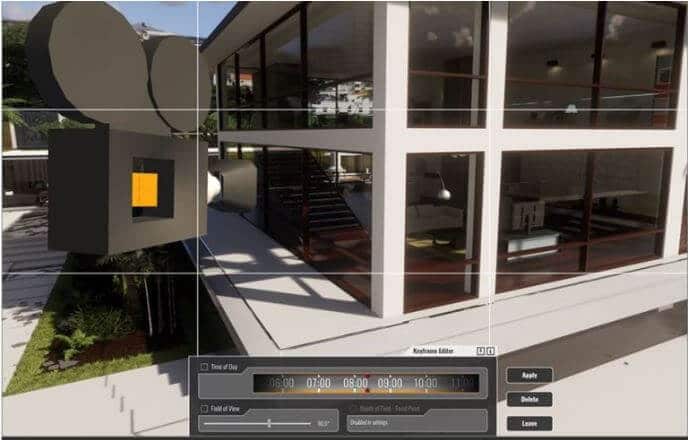
Multi Point Camera Tool
This camera tool swiftly allows you to add keyframes, change settings such as ‘depth of field’, ‘field of view’ or ‘daytime’ for each keyframe.
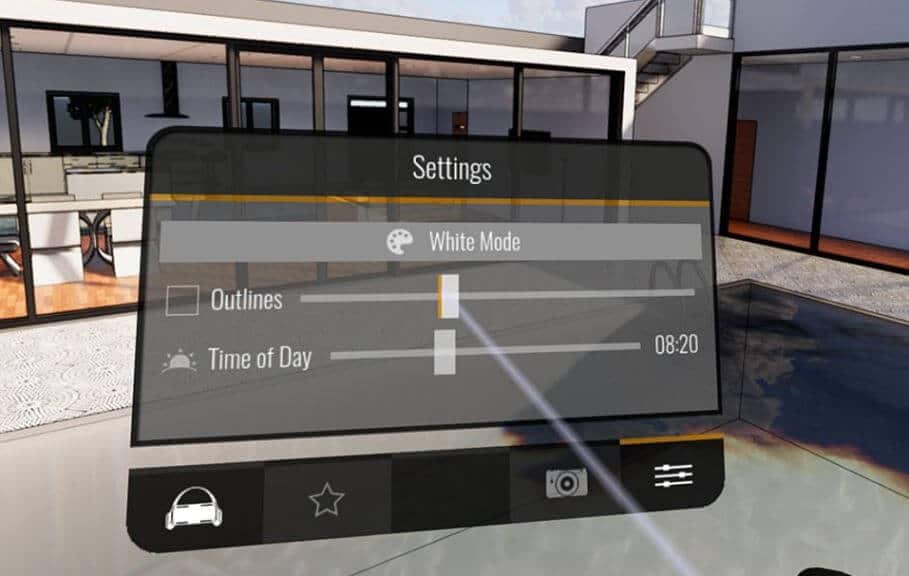
VR Interaction
Using this tool you can change the daytime, activate the ‘white mode’ and ‘outlines’ all while in VR. Now Oculus Rift, HTC Vive and Windows Mixed Reality are fully supported.
SketchUp Material Editor
The material editor allows you to specify PBR material parameters like albedo, normal maps and roughness.
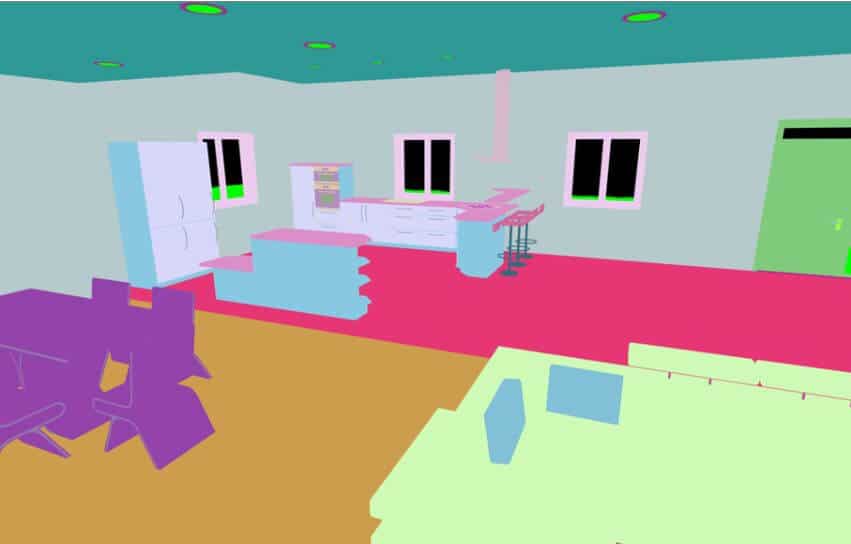
Layered Screenshot
For post-processing your images that were created with Enscape, you can now export a ‘depth’ and a ‘material ID’ image.
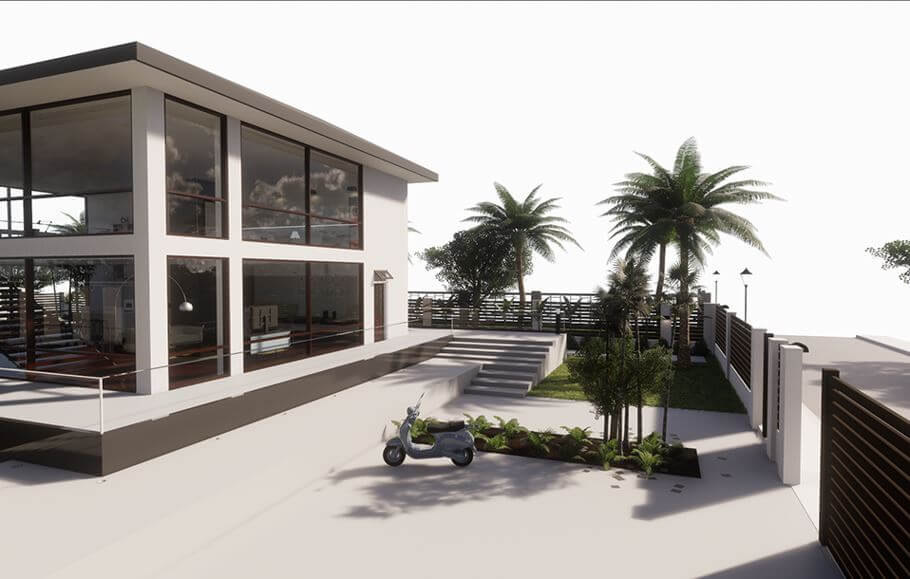
White Background
By using the white background option, you are able to make changes to the background without changing the skybox scene lighting and reflections.
Batch Screenshot
With just one click, you can export all of your favourite views and compare different stages of the project.
As well as these fantastic new features, there are a host of other improvements.
Light Brightness
A slider has been added to control all light sources at once, allowing a faster calibration of your scene brightness.
Sound Export
The last release saw new sound options for video export introduced – now you can include sounds in exported videos.
Image Quality
Both lighting and image quality has been improved, along with many new parameters like Vignetting or variable Chromatic Aberrations.
Windows Mixed Reality
These headsets offer inside-out tracking – meaning you’re not restricted to one tracking area.
For more Enscape information, please check out our website
Any questions? Please email us at sales@elmtec.co.uk and we’ll be happy to help!
We use cookies for ads personalisation and to ensure we give you the best experience on our website. If you continue to use our site we will assume that you are happy with it.