SketchUp for Absolute Beginners

Maybe you’ve seen it in action. Perhaps you’ve seen the awe-inspiring results for yourself. You might be a complete newbie. Whatever your situation, you’re keen to learn SketchUp and SketchUp student seems like an excellent way to kick start the journey. Welcome to our SketchUp tutorials for beginners. We hope you find it inspiring. SketchUp is the easiest way to learn 3-D modelling, which explains why some people dive right in. But if things don’t go right straight away, it’s frustrating. We’re taking things right back to the beginning here. By the end of this article you’ll know what you can do with SketchUp, how to set it up, understand the interface, learn the basics and find your way around the many brilliant free learning resources on offer. To make your first SketchUp experience a fantastic one, read on.

What You Can Do with SketchUp

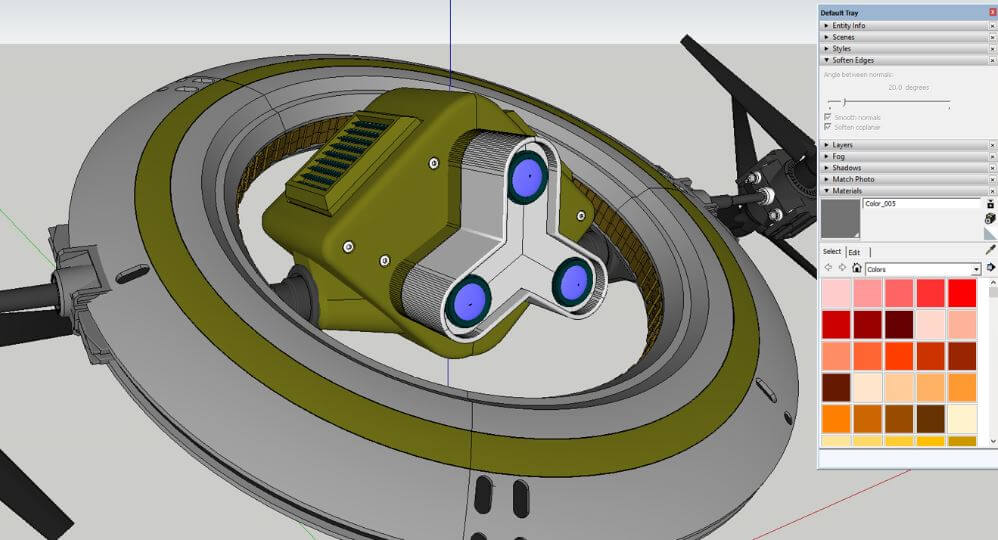
So you’re new to SketchUp. You’re going to love this. Let’s kick off with insight into what can be achieved with SketchUp. For a start, it’s super- easy to learn SketchUp 3D drawing. The software just happens to contain every function you could imagine. Simple to use with an infinity of complex results, this is the ideal tool for drawing in 2D and outputting your work to dramatic 3D.

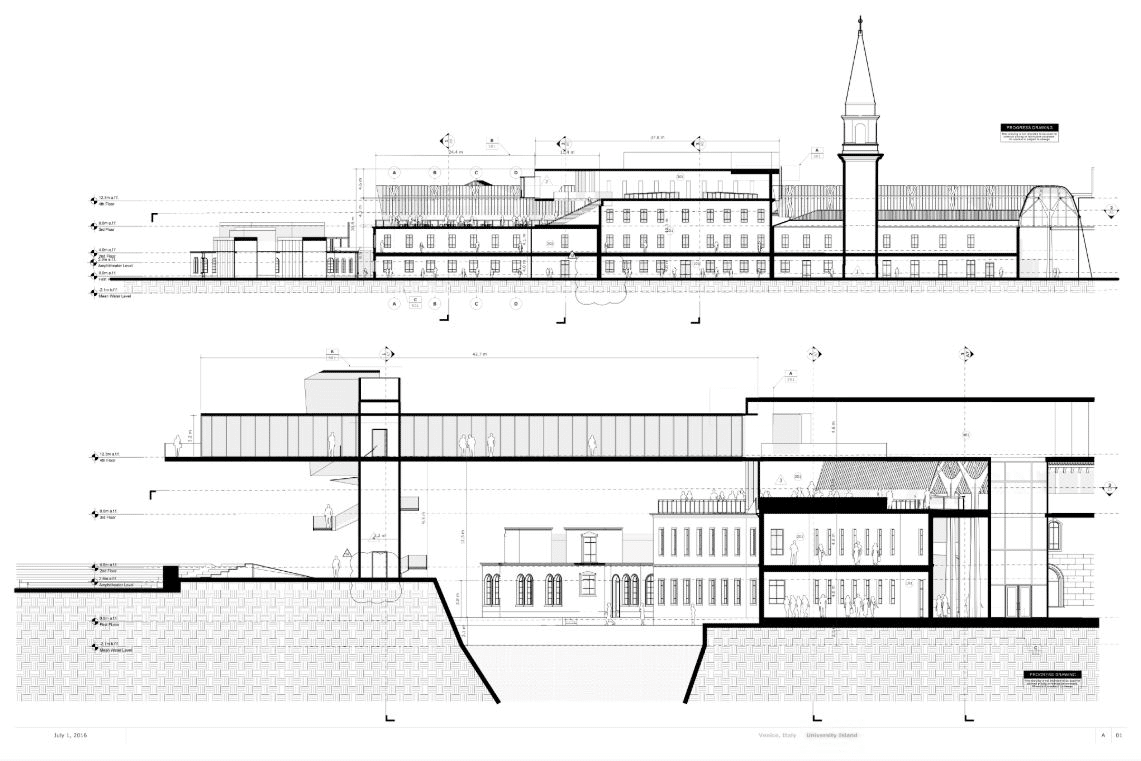
All you need to do is get a few basic skills behind you to be able to create professional 3D designs. It’s perfect for bringing bright ideas to life quickly and accurately. It won’t take you long to master the art of making accurate, scaled 2D and 3D drawings. Harnessing LayOut to create professional elevations, plans and sections gives you even more flexibility to make magic happen.

You can also use LayOut to generate powerful presentations and influential vector illustrations, and they’re just the tip of the iceberg. SketchUp Pro comes with a wow factor to help you delight your clients and convince colleagues in the shape of realistic walkthroughs, impressive flyovers and animations that explain a thousand words in an instant.

No wonder SketchUp is so widely used by professional architects, interior designers, graphic artists, product designers, game designers and more. Basically if you want to draw it, you can draw it in Sketchup.

Setting up SketchUp

Here’s where you start. First, how to download SketchUp. There are several versions, one of which will be perfect for you. As a total beginner, you’ll probably want to download SketchUp for Higher Education or a free 7 day SketchUp trial. Then there’s SketchUp Free. They all give you everything you need to be inspired, get designing, finish projects and present them the SketchUp way. All for no fee.

  •         SketchUp Free lets you discover basic 3D modeling on the web.
  •       SketchUp Pro is a desktop application you use via your browser, Chromebook or iPad. It gives you access to 4M + pre-built 3D models, an augmented reality mobile viewer, and unlimited cloud storage as well as all the design functionality you can imagine. It provides 2D design documentation, quick insights for design research, XR headset viewing, and access to plugins to extend SketchUp functionality even more.
  •         SketchUp for Higher Education is yours with SketchUp Studio, available in three versions for students, educators, and universities. The student version allows you to make stunning accurate 3D models. The educator version is all about using intuitive, powerful modelling tools in the classroom. And the university version is tailored to using the core modeling suite, designed for your uni.
  •         SketchUp for Schools is a free version for primary or secondary schools signed up to G Suite for Education. It lets youngsters enjoy free, intuitive 3D modeling tools designed to boost kids’ creative expression and develop exciting skills from a  young age. It is both highly accessible and easy to experiment with.

Get to Know the Sketchup User Interface

Dive in unprepared and you might get lost. Avoid that by dedicating time to really understand the user interface, one of the best ways to learn SketchUp quickly. It’s lovely to use and won’t take you long to become confident in what it offers, and where everything is. The icons are clear and obvious, and everything is where you expect it to be. 

Every version of SketchUp, including SketchUp Student, provides you with an intuitive, easy to learn 3-D drawing tool. But its simplicity hides a complex treasure trove of functionality. It makes a lot of sense to run before you walk, so exercise patience! Plenty of the more complicated and involved functions are hidden from view to keep things visually clear, clean and logical. You’ll quickly learn where they are, and as soon as you do you’ll fly.

Explore the menus in detail. Make it your mission to get familiar with all the amazing features and functions that don’t show up in the toolbars. Treat it like an expedition into the nuts and bolts of SketchUp, an exciting place where everything is possible when you know where to look. Once you’ve done that, it’s a dream to actually use the software. You’ll be so much more fluent from the start.

The SketchUp Quick Reference Card is your best friend. Everyone loves it, from highly experienced users to beginners like you. Print it out if you like, stick it in a frame, tape it to your desk, or bookmark the online versions for instant access to clever shortcuts, hot tips and handy hints. It’s an exciting destination revealing the sheer flexibility of this cool 3D design tool.

Watch SketchUp Video Tutorials

While we all learn in different ways, most of us benefit from digesting information in more than one way. That’s where SketchUp video tutorials come in, an excellent way to know useful stuff quickly in a clear and inspiring visual context. Take a look at the videos presented from the SketchUp Campus, which we cover in the next section. And hook up with SketchUp on YouTube, your source of a multitude of video content  covering a huge range of SketchUp essentials, basics, projects, and more.

There are specific YouTube playlists to dive into, including SketchUp Basics for education. Created for K-12 educators and students, it’s all about getting started with making models in SketchUp. It reveals everything you need to know about launching SketchUp, choosing a template, knowing toolsets, and navigating within your model, ideal for absolute beginners. At just under three minutes long it’s a quick win, and there are eight in the set. There’s also a 4-part suite of videos about how to get started in SketchUp. And that’s just for a start.  

Learn SketchUp Basics

It’s just like any new skill. You need to learn SketchUp basics before you can get properly creative. Now’s the time to learn the absolute SketchUp basics, and SketchUp Campus is a great destination. The SketchUp Fundamentals course. It gives you the fundamental building blocks for all your SketchUp models, covering the toolset and sharing some excellent tips and tricks for complex and simple functions. Take a look at Part 1 of the course and see how you get on.    

There’s more. Loads more. Campus contains a host of fantastic courses, many broken down into digestible chunks you’ll enjoy. Commercial Interiors, for example, contains 22 Lessons and the Layout Design Package contains 18 Lessons.  You can explore how to render SketchUp to Photoshop, find out all about Scan Essentials, discover LayOut essentials and more.  

Get to Know SketchUp Shortcuts

Everyone loves a shortcut and there are plenty of them to learn in SketchUp, all created to make designing easier. SketchUp Shortcut keys are a series of instant ways to activate tools and commands via your keyboard. Because they speed things up, they support a fester, smoother design workflow.

Here’s an example. Say you’re using the R key to activate the Rectangle tool. You don’t have to move your mouse away from your drawing to a toolbar or menu. And you don’t need to interrupt your thoughts either. Inside SketchUp you can look up and use shortcut keys via the Search tool. For every tool and command, you’ll find a brief description and a reminder of the keyboard shortcut assigned to it. You can also use mouse shortcuts, the most important of which activates the Orbit tool. All you do is hold down the mouse scroll wheel.

If you’re using Chrome or Microsoft Edge you’re in luck. They are the best ways to experience shortcuts in SketchUp for Web.

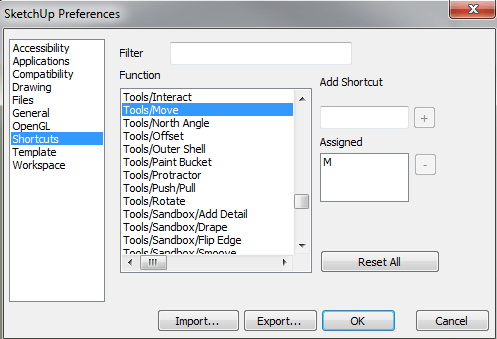
If there isn’t a shortcut for the tools you use most, you can make your own. It’s all about customising shortcuts. Either add a shortcut to a tool that doesn’t have one, or reassign a default shortcut to any tool or command in Search. To assign a shortcut, find the tool in Search. Then hover over it and click on the shortcut key, or the empty box where you want to put your own shortcut. 

Learning and using keyboard shortcuts for SketchUp will save you so much time. Every shortcut you master will mean you can get rid of another toolbar, giving you an even cleaner, simpler interface to enjoy.

It’s good to start by learning shortcuts for tools that you use most. Here are some popular default shortcuts:

  •         Select (Space bar)
  •         Line (L)
  •         Eraser (E)
  •         Arc (A)
  •         Rectangle (R)
  •         Circle (C)
  •         Push/Pull (P)
  •         Paint Bucket (B)
  •         Move (M)
  •         Rotate (Q)
  •         Scale (S)
  •         Tape measure (T)

 Join the SketchUp Community

We recommend you join the SketchUp Community Forum to learn SketchUp fast. It’s a friendly and welcoming place where you can either post a question of your own or explore a multitude of existing questions already answered by dedicated lovers of the programme.

There’s more hot community action over at the SketchUp Reddit Community, which has more than 26,000 members and dates back to 2010. More than two decades of expertise awaits you, complete with all sorts of inspiring posts from users all around the world.

The SketchUp Facebook page is a lively place to find inspiration, knowledge, insight, tips and more, frequently updated to keep things interesting. And we’re on LinkedIn as well, the business network where the world’s professionals showcase their wares. Last but not least you can find us here on Twitter UK, home to our latest tweets.

It’s good to know there are so many places you can engage with, connect with and interact with SketchUp pros and community members. Social media give you another key resource to support learning excellence from the get-go.

Use SketchUp Plugins and Extensions

SketchUp plugins and extensions are both the same kind of thing. They’re tools to give you added functionality. The SketchUp extensions collection is categorised into animation, developer tools, energy analysis, import and export, landscape architecture, rendering, scheduling, 3D printing, architecture, drawing tools, film and stage, interior design, productivity, reporting , plus text and labelling. As you can tell, it provides an enormous suite of free resources created for and by the community. You’ll find them here in the Extensions Warehouse.

The SketchUp Plugin Store, Sketchucation, is full of excellent plugins for every imaginable function. Universal Importers and Curve to Arc creation, Crop Selection and Find Gap plugins, urban design plugins, plugins for scale, boundaries, cuisine and more.

Use the SketchUp 3D Warehouse

Whatever version you use – SketchUp Student, Pro or something else – the 3D Warehouse is an enormous resource containing hundreds of free to use, ready-made items. It’s a library of custom third party extensions designed to help optimise your SketchUp workflow. Complete with 600+ extensions and a team of developers who are constantly creating new ways to hack your workflow, it is categorised into ‘industry’ and ‘workflow’. It provides a wealth of useful tools, all of which integrate smoothly with SketchUp Pro. Categorised in the same way as the Extensions Warehouse, it offers users an exciting and very wide choice of imagery.

Take a look at the wonderful animals category for a start. It contains all sorts of artwork to download and use, including wall art, drawings and paintings, wallpaper and textures. Then there’s Building Materials, stuffed full of essentials and creative approaches to the imagery you need. If you need it and don’t fancy drawing it yourself, it’s probably already in the 3D Warehouse.

Shadow an experienced user

Last of all, can you shadow an experienced user? You’ll learn SketchUp faster than ever when sitting next to someone who’s using the programme fast, fluidly and confidently, and it’ll give you an exciting insight into the pleasure of using this top class 3D design tool. Happy learning!

Love for LayOut, SketchUp: An Introduction

LayOut is one of the most underrated features in SketchUp, and we’ve always wondered why. If you’re not using LayOut, you’re missing out on a lot of potential!

2D drawings do get the job done when it comes to presenting work to clients. However, LayOut can make your design come to life by transforming SketchUp models into impressive diagrams, scaled prints, CD sets, and more.

Better yet, LayOut makes the presentation itself less nerve-wracking. This nifty tool even has intuitive presentation features so you can focus on your material, not on the logistics.

We want more people to see the value in LayOut, so we’re showing it some love in this post! Read on to find out what LayOut is, what it can do, and why it deserves a place in your design workflow.

What is LayOut

SketchUp is one of the best tools out there when it comes to creating 3D models. Still, creating an outstanding design is one thing. Having the collateral to show it off is another.

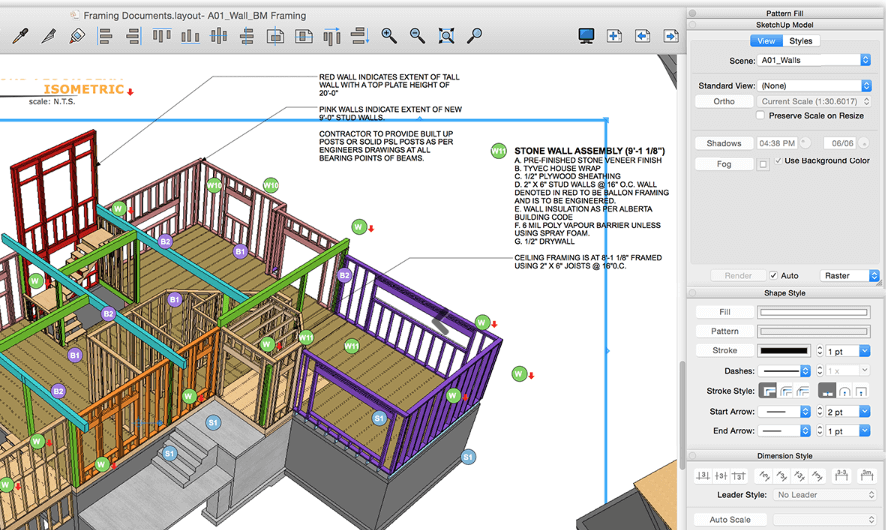
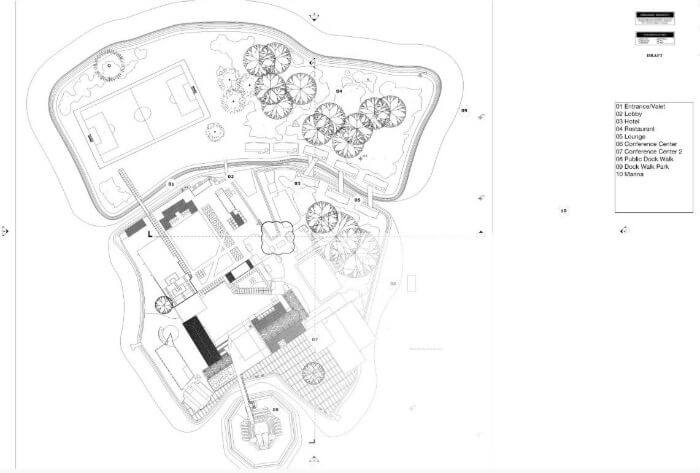
That’s where LayOut comes in – this brilliant tool was developed to help designers, architects, and other creatives communicate their work through detailed and beautiful 2D architectural documents. In other words, it takes your SketchUp models and turns them into presentation-ready 2D drawings, diagrams, prints, and more.

LayOut is built into SketchUp Pro, so you can’t use it without SketchUp. There’s no separate LayOut app, extension, or plugin.

That’s because they’re a team – SketchUp models and LayOut drawings work together to create stunning, comprehensive design documents.

LayOut Example 1


LayOut Example 2
LayOut Example 3

LayOut Features

Once you start using LayOut in SketchUp, your days of wrestling with 3D models and trying to get them to look right in a 2D document are behind you.

Here are some of the features that make LayOut such an incredible design tool:

1. Automatic and dynamic updating

Every page you create in LayOut is connected in real-time to your SketchUp model. 

So, if you make a change to your SketchUp file, it’ll automatically update in LayOut – no need to go in and make changes manually. It’s a massive time-saver, and you don’t have to worry that your LayOut documents are ever out-of-date.

2. Vector drawing tools

LayOut comes with a handy set of vector drawing tools. This means you can add text, dimensions, arrows, and other markups to your LayOut documents – all without having to leave the program. 

This is also convenient during a presentation, when clients and other stakeholders might have questions or suggestions about your design.

3. Print and export HD documents

Once you’re done putting together your LayOut document, you can print it out in high resolution or export it as a PDF, image, or CAD file. 

Every single detail in your design will be captured, so you can be confident that everyone who sees your documents will be seeing your best work.

4. Annotate and explain in real time

LayOut for SketchUp empowers you to present your work as dynamically as you design it. In addition, you can annotate it with whatever you need – materials, lineweights, dimensions, callouts, and more – to ensure that your designs are clear and easy to understand.

5. Produce construction docs

If you’re an architect or construction professional, LayOut was made for you. With its powerful tools and dynamic updating, you can easily create construction documents at each stage of the design process. No more missed details or out-of-date drawings – just accurate, reliable construction docs that everyone can understand.

As you can see, LayOut doesn’t just complement SketchUp. Instead, it amplifies its capabilities and creates a better experience for both you and your clients.

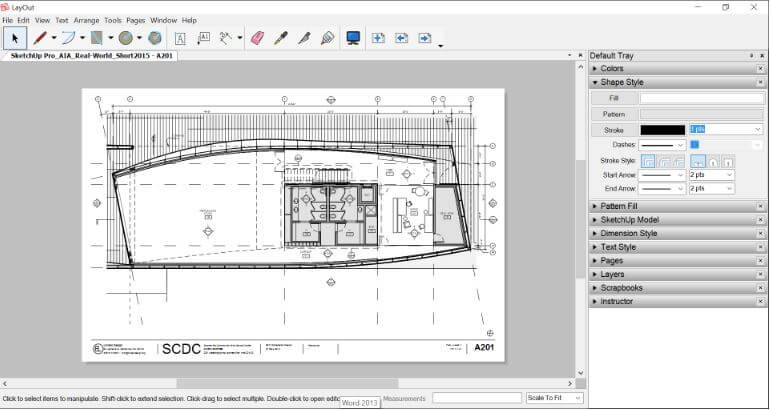
The LayOut SketchUp Interface

Aside from being helpful, LayOut also happens to be easy on the eyes. The interface is designed for intuitive use, so you can focus on your work and not worry about how to use the program.

Here’s a quick tour of the LayOut interface:

  • The Menu bar: This is where you’ll find most of LayOut’s available commands, including those for adding and arranging elements, navigating pages, and more.
  • The Default toolbar: You’ll find the most common design tools here, such as Select, Line, Text, Label, Erase, Style, Join, and Start Presentation.
  • The Document area: This part is where the magic happens – the Document area is where you SketchUp images and models go. After inserting them, you can then add dimensions, text, shapes, and anything else you need to create your final design.
  • Tray and Panels: If you look at the right side of LayOut’s screen, you’ll see panels that appear to be stacked on top of each other. These panels are how you access various options for fill, text and dimension styles, etc.
  • Status bar: At the bottom of LayOut’s window, you’ll see a gray box. This is the Status bar. On the bar’s left side are helpful tips for the tool you’re currently using. On the right, you’ll find the Zoom menu and the Measurements box. We recommend making a habit to glance at the Status bar every so often – it lets you know every time your document is autosaved by LayOut.
  • The Zoom Menu: Being able to zoom in and out is important when you’re working with detailed designs. The Zoom menu is how you do it in LayOut. Select your preferred zoom value from the menu or use one of the other zoom options, such as Zoom To Page, Zoom Selection, and more.
  • The Measurements Box: The Measurements box displays the coordinates for the current position of your mouse cursor, as well as the dimensions of any selected entity. You can also use the Measurements box to input specific values for entities, such as lines, rectangles, and polygons.

Those are the basics of the LayOut interface. To give you an even more personalized experience, LayOut developers even made it possible to customize the toolbar based on your workflow and preferences.

You can make the toolbar icons smaller or bigger, add your favorite commands to the LayOut toolbar, establish global preferences for backups, companion applications, startup templates, folder locations, and so much more!

Creating Documents in Layout

Are you ready to start creating in LayOut? Let’s take a quick look at how to create a new document in LayOut and how to insert a SketchUp model into the document you created:

To create a new LayOut document:

  • First, open LayOut. You’ll see the Welcome dialog box.
  • In the Welcome dialog box, you’ll be able to select a LayOut template.
  • Next, adjust document settings like orientation and paper size.
  • Once you’re happy with your settings, save your LayOut document.

To insert a SketchUp model into your LayOut document:

  • First, go to the LayOut document where you want to insert the SketchUp model.
  • Then, from the menu bar, select File > Insert.
  • After that, an Open dialog box will appear. Navigate to the file for your SketchUp model and click Open.
  • Next, after inserting the SketchUp model into your LayOut document, you can now start designing it to put the spotlight on the best features of your 3D models.
  • Need to update or change the SketchUp model? Simply go back to SketchUp, make your changes, and then update the model in LayOut. All your changes will be synced automatically!

Finally, it’s time to show off your work to the world (aka your clients). This is perhaps one of our favorite things about LayOut – it makes giving presentations a breeze!

You can present the design right from LayOut itself. Access this feature by selecting View > Start Presentation. You can also use the default toolbar and click on the Start Presentation icon.

Clicking either of these options will take your LayOut document full screen. Now you’re ready!

Play animations, navigate seamlessly between pages, and change the view of inserted SketchUp models – all with just a few clicks. In addition, you can control every aspect of your design, from the camera angles to the annotations, so you can be sure that your audience is seeing exactly what you want them to see.

Wrapping It Up

We’re excited for you to see how much LayOut can do for you. With its user-friendly interface, brilliant tools, and customisation options, we’re confident that LayOut will help you work smarter and have fun while you’re doing it.

Still have questions about LayOut? Watch our tutorial on Getting Started with LayOut!

SketchUp for Architects

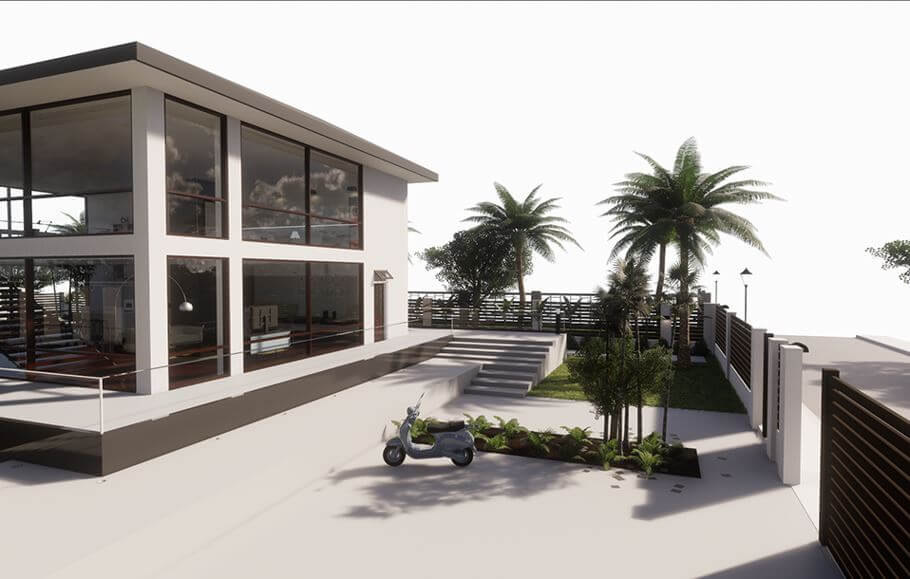
Are you researching SketchUp for architects? Good move! SketchUp is brilliant for architecture, your logical, simple and highly creative solution to stunning architectural drawings and remarkable designs. Perfect for representing hyper-realistic interiors and exteriors, it’s exactly what you need to impress clients, convince stakeholders, and share your ideas with colleagues and managers. SketchUp architect is a comprehensive, flexible tool set that brings your imagination to life in no time with superb 2D and 3D design. If you work in architectural design it’s an enjoyable way to achieve great things quickly and easily. And it’s rich in resources with masses of tutorials to tap into as well as a multitude of brilliant plugins and extensions. So let’s go on a voyage of discovery into SketchUp architecture. By the end of this article you’ll know exactly why it’s such a good idea to design buildings in SketchUp.

SketchUp Tips for Architects

First of all, as a SketchUp architect you’re never short of cool resources. There’s an abundance of excellent tutorials and guidance for architects, however experienced you are and whatever your skill levels. Take a tour of the SketchUp website to join the latest 3D Basecamp Conference, grab a Bootcamp ticket for top class training, or do both.

You’ll find a free trial to download and test drive for a full 7 days, more than enough time to get to grips with the programme. There’s SketchUp Campus to explore, for in-depth SketchUp training at your own pace. There’s a list of expert SketchUp Trainers who can help you, and a whole load of top class video content to consume on YouTube, including a three part series about learning SketchUp Architecture.

There’s a Help Centre stacked with SketchUp Pro tips, tutorials, and user guides. Plus forums to ask your own questions and find answers to existing questions, release notes to update you on every new version, and – last but not least – SketchUp Quick Reference Cards to make your design life even easier, faster, and more enjoyable.   

SketchUp Plugins and Extensions for Architects

SketchUp architect plugins and extensions give you a huge resource supported by an enormous community of keen and creative users. No wonder this is one of the most popular digital design software programmes. Large companies contribute, as do indie developers working on exciting new plugins and extensions, delivering a growing wealth of functionality to users. Harness the right plug-ins for a specific task and you’ll save time and hassle. There’s a vast amount to choose from, easy to narrow down by category or industry, or via reviews from the architectural community.

Plugins and extensions are much the same thing, simple tools that do very specific things for designers in no time at all, often via clever shortcuts. You might want to choose from an abundance of realistic-looking trees to save having to design trees yourself. There’s a free plugin called Architextures, which you use for creating and editing seamless textures, bump maps and hatches. 3D Bazaar gives you high quality render-ready content at your fingertips. ConDoc Tools optimises Layout and SketchUp for architects and interior designers. Instant Roof Nui does exactly what it says on the tin, creating amazing roofs in no time. The 3D Tree Maker is another popular choice for SketchUp architecture, as is Pushline, a super-simple and fast way to click an edge, or preselect and click on it, then push it.

SketchUp 3D Warehouse

The SketchUp 3D Warehouse is a vast library of custom-made third-party extensions created to optimise your SketchUp workflow. It is also packed with handy resources to support architectural design excellence, stashed in the ‘architecture’ category, along with building products and much more. You’ll find a collection of excellent 3D components relevant to architectural design including traditional windows and casements, full architectural design examples, and the same for interior designs.

This is your SketchUp architecture go-to workflow optimisation resource. It contains more than 600 extensions, with a team of developers working full-time to hack your workflow. You can tap into industry and workflow categories. Simply choose a pain point in your modelling or choose your sector to see a list of exciting extensions to ease your workflow. Every extension integrates smoothly and directly into SketchUp Pro. This is how you create beautiful photorealistic renderings in seconds, bringing your work to life in fresh new ways. You can model anything in a few clicks to level up your drawing skills. There are even dozens of extensions to prepare your model for 3D printing, designing and cleaning up solid shapes with ease and flair. That’s the way to do it!

Rendering in SketchUp

Rendering in SketchUp is a dream. As a SketchUp architect all you do is make your way over to the extensions warehouse to discover a wide variety of excellent rendering tools for SketchUp, including the top notch choices V-Ray, SU Podium, and Thea Render. You can integrate useful software into SketchUp simply via the Extension Warehouse then make stunning, fantastically realistic renders.

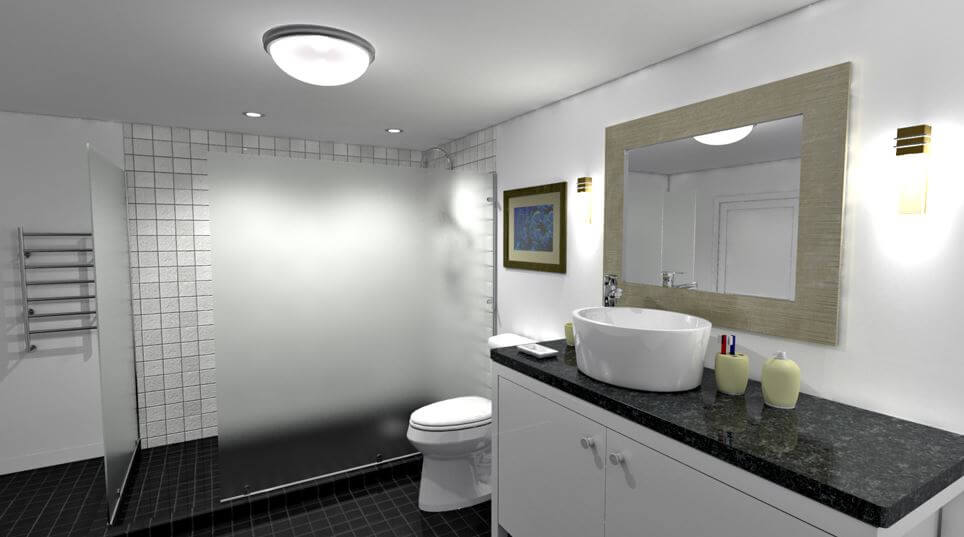
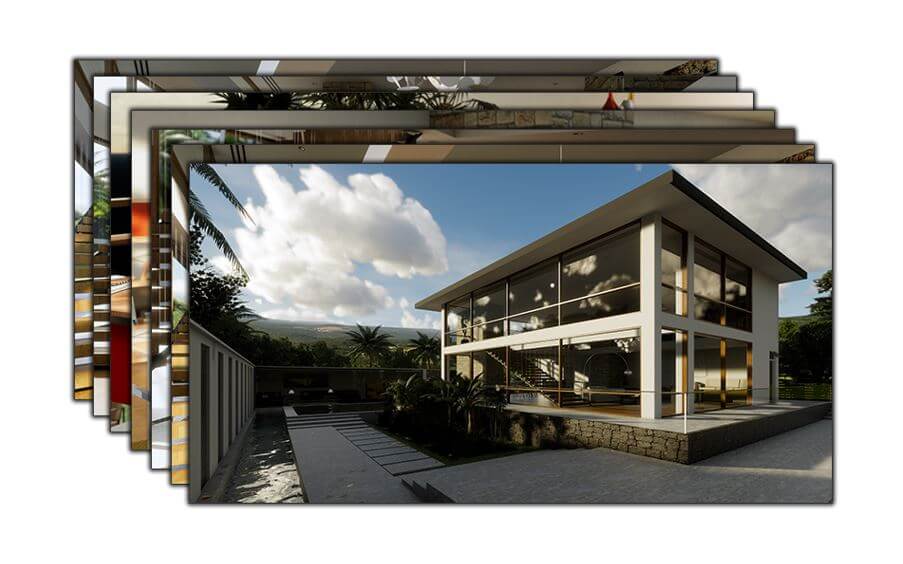
Combining rendering software with SketchUp is often all you need to deliver outstanding professional results. You can imagine how creating a hyper-real image of your design for clients, colleagues and other stakeholders to examine makes life so much easier. People can see exactly what you intend from the design. The lighting is completely realistic, whether it’s internal lighting or light from the weather outdoors. In a nutshell, rendering makes architectural designs easier to understand, more attractive, more realistic and easier to digest.

3D Architectural Walkthroughs in SketchUp

An architectural walk-through is like magic, an exceptional way to reveal your design in all its realistic glory. So what is a 3D architectural walkthrough? It’s an interactive 3D virtual tour of a property’s interior and exterior, and it’s a remarkably powerful visual tool. This is where SketchUp architecture really comes into its own, and the impact is quite something. All you do is use Sketchup along with rendering extensions from the Extension Warehouse to enable the creation of engaging 3D walkthroughs. As you can imagine they really bring architectural designs to sizzling life – enabling architects like you to showcase their work professionally. When impressive presentations are the name of the game, it’s a winner.

And the tech? Architectural walkthroughs are animations designed to reveal 2D designs, drawings and plans in 3D. It’s a proven way to help architects realise ideas.

Accurate SketchUp Measurement Tools

Obviously, accuracy is key to your SketchUp architect workflow and your success in architectural design. It’s good to know that Sketchup not only aces 3D design, you can also easily convert your work into 2D plans and elevations. There are loads of great measurement tools in SketchUp to ensure 2D drawings and plans are always accurate. And the software lets you change your designs dynamically whenever you like, as often as you want.

We recommend you always use the Measurement Tools provided in Sketchup, simply because the biggest challenge for architects using SketchUp is making sure you align models on the right plane. You have to think about the X, Y, and Z axes at every stage to avoid losing the plot! A change to the model on one axis will cause changes on the others, and the same goes when you want to move the model around. This leads to your lines failing to match up when you switch views.

Your best tools in this situation are the Tape Measure and Protractor tools. They mark out the three main axes so they’re always visible. And that means you can see exactly how your changes affect the overall model. Neat.

Now you know how SketchUp architecture will help you create ‘amazing’ every day. Have you tried it yet? Why not give it a free trial? 

ClothWorks SketchUp: Everything About This Extension

Why Use Clothworks SketchUp Extension?

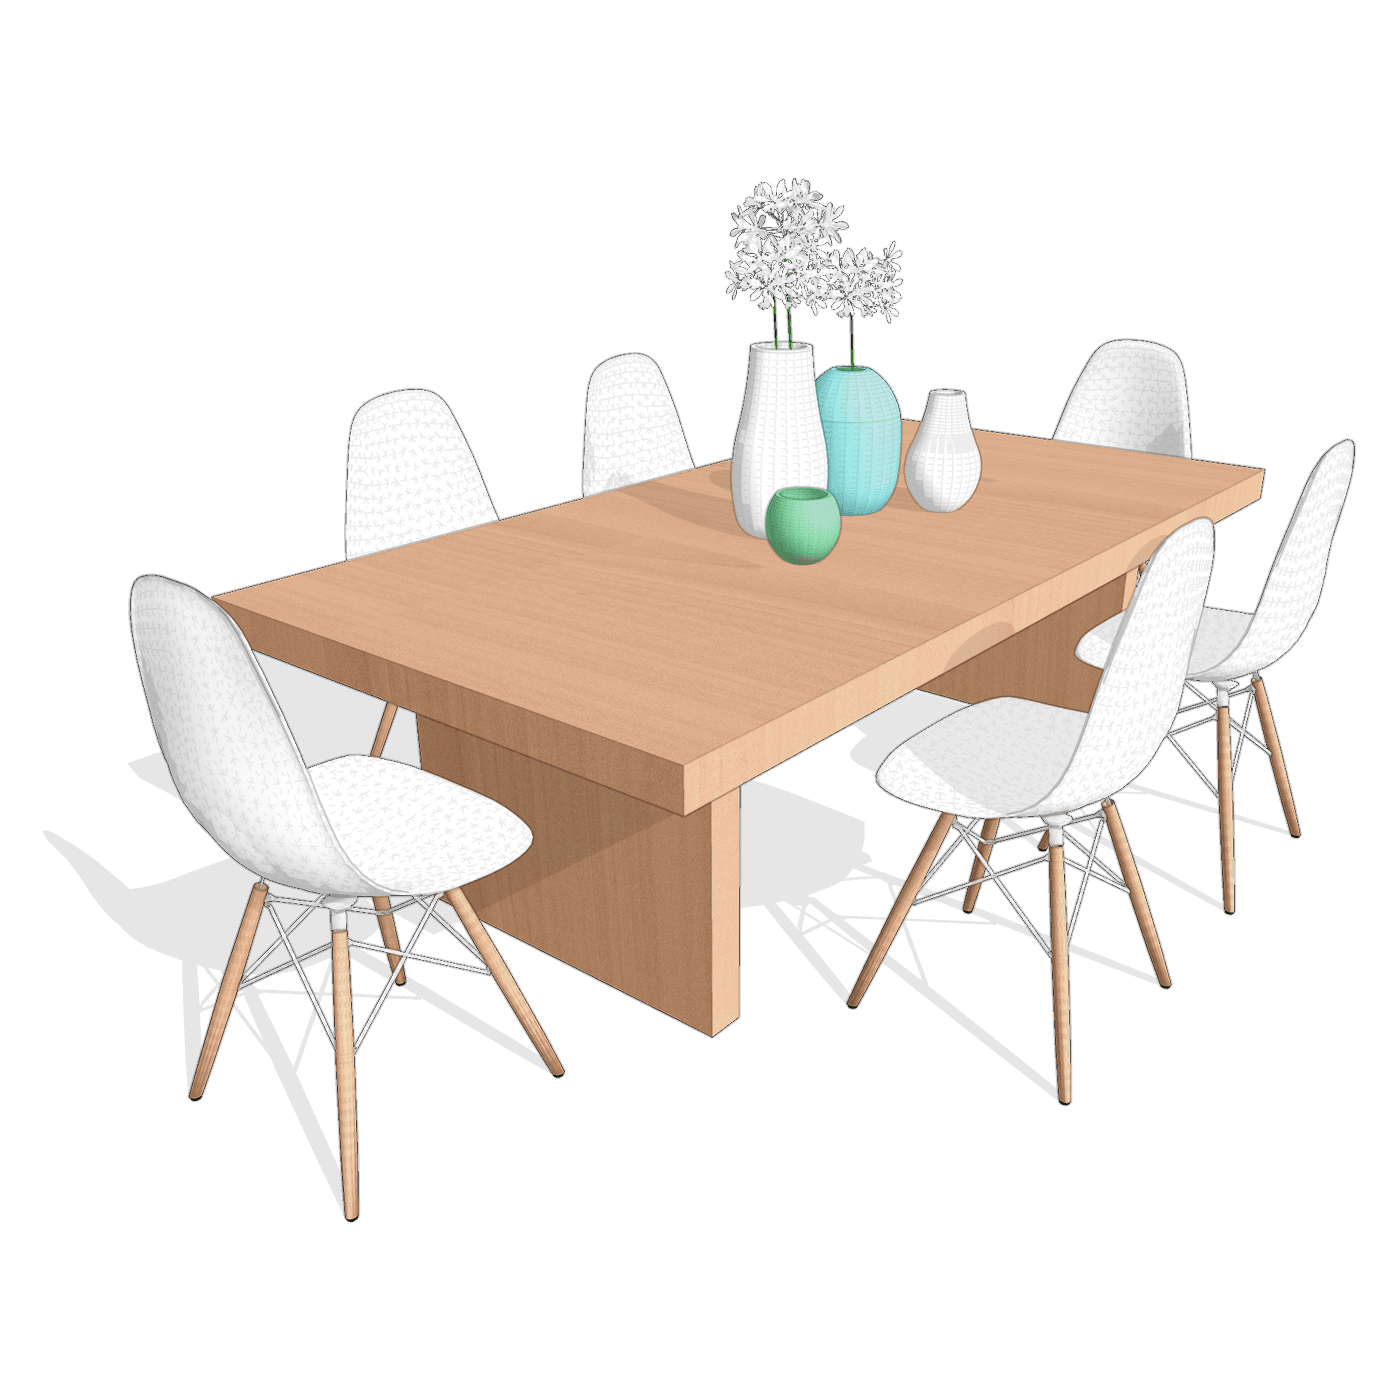
So, you’ve designed your tables, chairs and windows. Are you going to just leave them naked? Nope. You’re going to use the fantastic ClothWorks extension for draping cloth and ropes over components of any shape and size and for simulating flags and curtains.

Workflow functionalities include:

Simple Grid and ​Smart Grid options for turning face or a set of faces within a component/group into a grid of faces, with a desired padding. An additional Purge Edges​ option can be used to remove the generated grid. These options are for manipulating cloth.
Split Edges option for dividing an edge or a set of edges within a component/group into segments, with a desired padding. An additional Weld Edges​ option merges the split edges.These options are for manipulating wires.
Loop Subdivision and ​Laplacian Smoothing​ options for subdividing and smoothing the resulting, simulated cloth (meanwhile preserving texture UVs).
Drape and ​Undrape options for resetting and renewing cloth, rope, and pin orientations. This option is particularly useful for when changing cloth texture material.
Record and ​Export options for recording simulation and then exporting the final animation into a sequence of PNG or JPG images, SKP files, OBJ files, and many other formats. A third-party
software, such as MakeAVI, can be used to combine a sequence of exported frame images into a video file.

Check out a few different ClothWorks tutorials below and have fun dressing up your modelling!

http://https://youtu.be/W6_3wn-j83c

http://https://youtu.be/HSf1rzhGL7I

http://https://youtu.be/cJTMcJc6FqI

Need more ClothWorks in your life? Download it here.

Need more tutorials on ClothWorks? Head over here.

The Best Free SketchUp Pro Extensions

Last week we were at Clerkenwell Design Week with the SketchUp gang and we picked up a whole host of cool tips, tricks, and advice which would, quite frankly, be rude of us not to share with you, dear reader.
This post is all about everyone’s favourite F word: ‘Free’. You don’t need us to tell you that the Extension Warehouse can be a vast and beautiful – if slightly bewildering place. Therefore we’ve picked out just a few free extensions that we think could be the most useful to the largest demographic.

SketchUp Weld

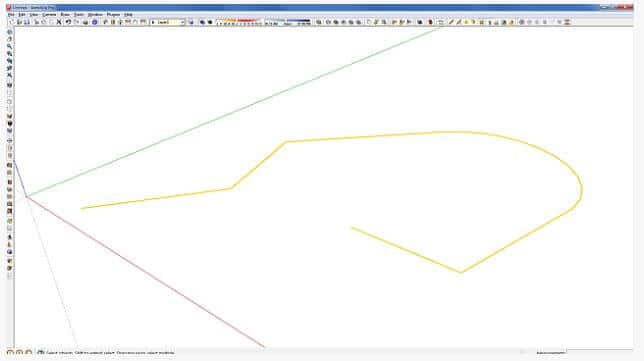
An incredibly useful extension – you won’t realise how much you need it until you start to actually use it. Weld allows you to select multiple connected edges, curves, and/or arcs (“connected” means having common endpoints), then use the Weld tool to join them into a single “polyline”.

Weld for SketchUp Pro

Joint Push Pull

JointPushPull is a script dedicated to Face extrusion, with several Tools.

  • NORMAL – Similar to native Push Pull, but in multi-face. Faces generated are non-jointed.
  • VECTOR – Faces are offset along a custom direction picked graphically in the model (or along model axes). Faces generated are jointed.
  • JOINT – Faces are offset along their normal but are kept jointed. Useful for thickening shapes.
  • EXTRUDE – Faces are offset along an average direction, keeping faces jointed. Gives more consistent results than Joint tool.
  • ROUND – Combination of Normal and Joint mode depending on the angle between faces, with automatic rounding of gaps between faces.
  • FOLLOW – Faces are offset along the direction given by their adjacent edges. This concept was introduced by a4chitect’s Smart Push Pull plugin.

SketchUp CleanUp

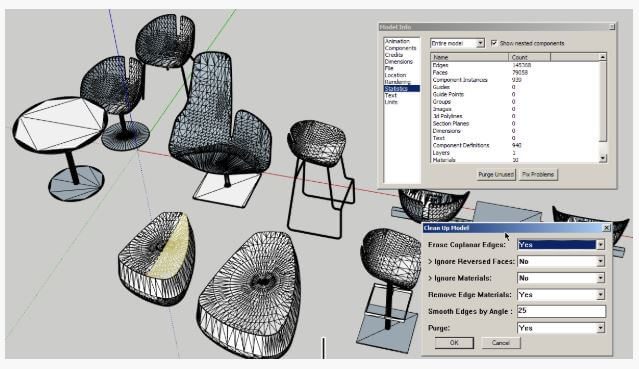
Pretty simple really – cleans up and optimizes your SketchUp model.

With this extension you can:

  • Fix duplicate component definition names (When in model scope)
  • Purge unused items
  • Erase hidden geometry
  • Erase duplicate faces
  • Erase lonely edges (Except edges on cut plane)
  • Remove edge material
  • Repair split edges
  • Smooth & soft edges
  • Put edges and faces to Layer0
  • Merge identical materials

CleanUp for SketchUp Pro

RoundCorner

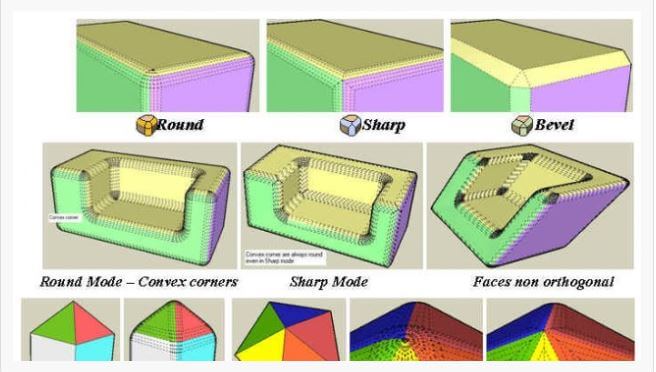
RoundCorner performs the rounding of the edges and corners of 3D shapes along a 2D profile, in 3 modes: Round corners, Sharp corners and Bevel. RoundCorner also supports concave corners (always rendered as Round) and non-orthogonal edge faces. Corners can have 2, 3, or more edges.

RoundCorner for SketchUp Pro

Soap Skin & Bubble

This plugin allows you to apply a skin over edges to create complex curved surfaces.

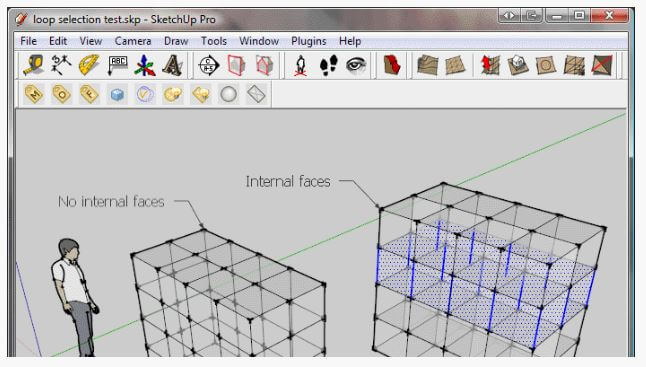
Selection Toys

Provides a wide range of selection modifiers, filter out all edges, faces etc.

 Let’s you quickly select entities with similar properties such as material, layer orientation etc. Also lets you select similar instances of the same Dynamic Component.

Selection Toys for SketchUp Pro

Hopefully you’ve found our pick of the best free extensions in SketchUp Pro useful. Find a whole host of other goodies in the Extension Warehouse and let us know below if you’ve got a free favourite that helps you!
[contact-form][contact-field label=”Name” type=”name” required=”true” /][contact-field label=”Email” type=”email” required=”true” /][contact-field label=”Website” type=”url” /][contact-field label=”Message” type=”textarea” /][/contact-form]

Tips for Agile SketchUp Modelling: Part 2

So, we covered some of the basics in the previous post and now we’re getting down to the finer details of ensuring our SketchUp modelling stays as lean as possible. Read on for more smooth and speedy tips and tricks.


Components vs. Groups

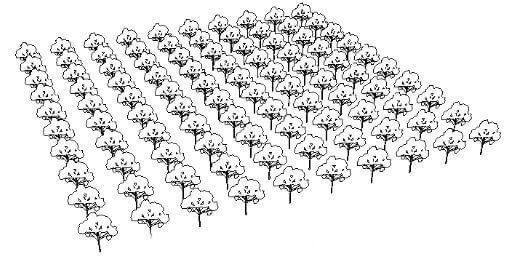
Always make Components instead of Groups whenever an object might repeat, or ever be used in another model.

Groups are great for grouping together components, such as grouping the landscaping elements together.

File Size: 101 kb


File Size: 135 kb. Even if the component instances are flipped, rotated, coloured from the outside, or scaled, the total file size stays small.


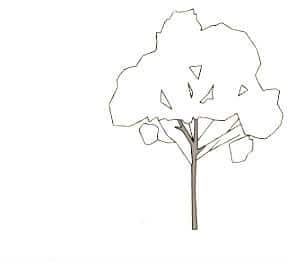
File Size: 143 kb. A model with 100 of the same tree component isn’t much bigger in file size than a model file with only 1 tree component.


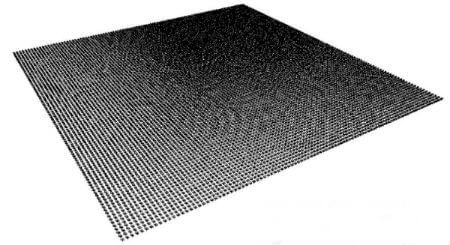
Need 10,000 trees? Thanks to components, the total file size only rises to 1.5 MB. Each extra tree component instance adds only a fraction of a kilobyte.


Stand-In Components

  • Save a complex component to your hard drive as a reference back-up.
  • In the model, edit and simplify that component to a few lines, or a rectangle, so that it renders more easily than the “real” component.
  • Later, when it’s time to present the model, right click on the component in the model and select Reload.
  • In the Reloading navigation folder, find the saved component on your computer and select it.

The Select/Replace technique works just as well.

  • Use a low-poly tree, for example, until it is time to present the model.
  • When it’s time to show the model, import a high-poly model into the file (place it anywhere).
  • Select all of the low-poly components.
  • In the Components Window, right-click on the high-poly component and select “Replace Selected.”
  • Delete the first randomly placed high-poly component.

Turn off some Layers

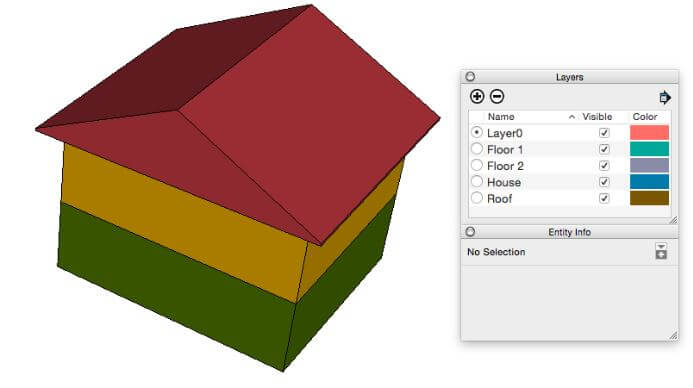
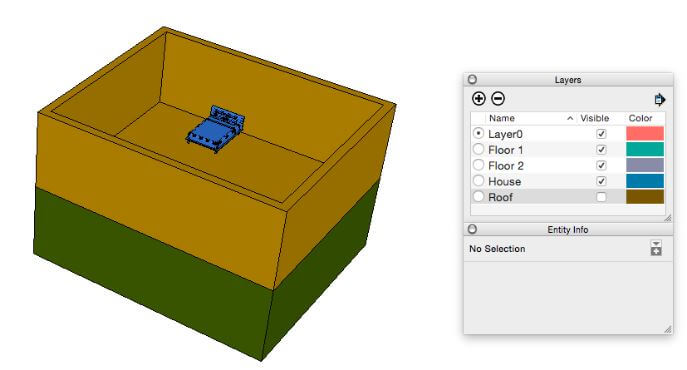
If your model is acting sluggish, try turning off some layers that you don’t need to see right then.

Here we’ve deselected the roof and can also peer into the second floor.


Styles

If needed, switch to the “Shaded” style while building geometry, as textured materials can slow down rendering.


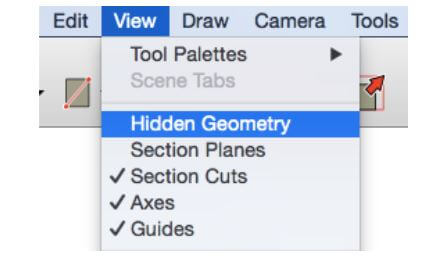
Turn off hidden geometry when not editing hidden lines.


Use a “fast modeling” style when building the model and save it for the “Working” scene.

Materials

  • Examine image file sizes before importing. Pre-crop and resize images before importing them into the model.
  • For some imported photographs it helps to right-click on model surface and select “Make Unique Texture” to further crop and reduce pixels. Undo this step if it makes it too blurry.
  • Use .jpg files wherever possible for imported tiling images, as they often have smaller file sizes than pngs. Some exceptions are site maps, logos,  and images with transparencies.
  • Don’t choose a tiling image file when a flat formulaic colour will do. Example: You can usually use a flat shade of grey instead of “brushed aluminium.”


There we have it. Just a few of our favourite tips to ensure modelling in SketchUp stays as agile as possible!
Please do let us know in the comments below if you’ve got a great tip that wasn’t covered here or in Part One.


[contact-form][contact-field label=”Name” type=”name” required=”true” /][contact-field label=”Email” type=”email” required=”true” /][contact-field label=”Website” type=”url” /][contact-field label=”Message” type=”textarea” /][/contact-form]

Get Speedy with SketchUp: Our Top 5 Tips

We’re all familiar with the old adage, ‘seconds turn into minutes and minutes turn into hours.’ So no matter if you’ve been using SketchUp for years or are a newcomer, we’ve compiled five of our favourite tips that will get you designing smarter – and faster.


  • Use the Shortcuts

Yep, we’re going with the most obvious one first. SketchUp comes with a predefined set of shortcuts, but you can customise these to best suit you. Using shortcuts will help you work faster, make your user interface cleaner, and allow for more screen space for you to model. When shortcuts are used efficiently, they’ll enable you to skip menus and toolbars and boost productivity. Some SketchUp users tell us they barely even use the standard menu for their work and keeping only those related to plug-ins that can’t be conveniently switched to a shortcut. Need more information on customizing the keyboard? Have a look here.

  • Guidelines are your friends

Actually, maybe they’re better than your friends. Unless your friends happen to be multi-directional and infinitely flexible, too. They really are an amazing tool for speeding up your workflow unless you have super-human abilities to mentally visualize the model you’re working one (if you do, tell us how!). Add parallel guidelines and check distances using the Tape Measure tool. Check angles and set slopes using the Protractor tool. Added bonus: Too many guidelines? Just clear ’em all out with one shortcut and start all over again.

  • Group first, Layer later

Remembering ‘group first, layer later’ is an excellent rule of thumb when using SketchUp. By grouping first you can separate your geometry while also ensuring that the base geometry of the grouped object stays on Layer0. Having two levels of information separation allows it to be enhanced by using the scene system for more than just saving viewpoints.

  • Photo Matching

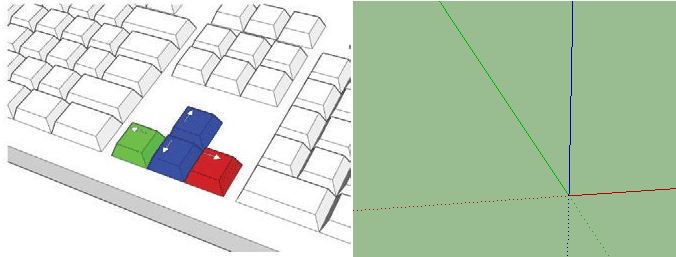
Success in using SketchUp’s photo matching relies on two things. First, you must ensure you’re using unedited original photography. Second, you need to ensure your model matches the scale of the subjects in the photo. A further tip is to get the camera’s focal length to match to the photo you’ve selected. To do this, place your yellow origin mark at the spot on the photo where you will place your model. From there, align the green and red axes to the features of the subjects in the photo to ensure everything is following the same direction.

  • Get in the habit of Good Housekeeping

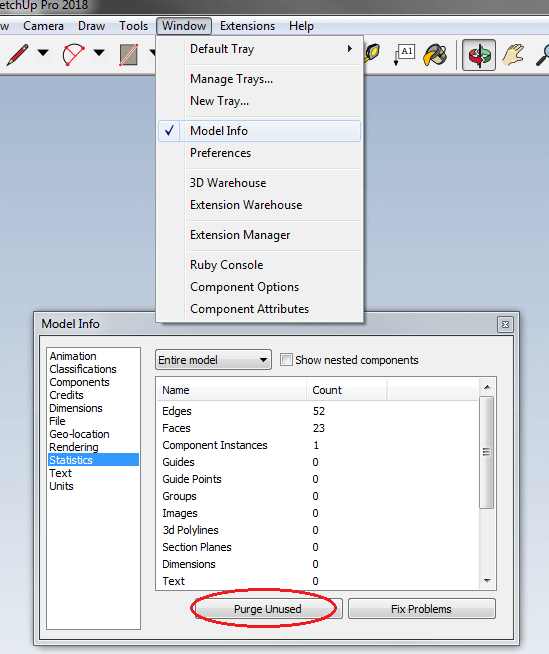
Because SketchUp models save all the information inside the file, you’ll need to keep this in mind – the information stays inside even if you delete it from the workspace. This can clearly slow down your file performance. Therefore, a good tip is to do some regular housekeeping in order to keep your workflow speedy and snappy. To clean the excess element, go to ‘Purge Unused’ command in the components, material and layers.


So there we have it. Five of our favourite tips for speeding up your SketchUp workflow.
Let us know in the comments if you have a great tip to share!


[contact-form][contact-field label=”Name” type=”name” required=”true” /][contact-field label=”Email” type=”email” required=”true” /][contact-field label=”Website” type=”url” /][contact-field label=”Message” type=”textarea” /][/contact-form]

Enscape 2.2 now available for SketchUp!

Enscape™ is a virtual reality (VR) and real-time rendering plugin for SketchUp. With just one click, you can start Enscape and within seconds walk through your fully rendered project – no uploading to cloud or exporting to other programs required. That’s pretty neat.
With the recent release of Version 2.2, we take a look at some of the nifty brand new features that will significantly streamline your workflow.

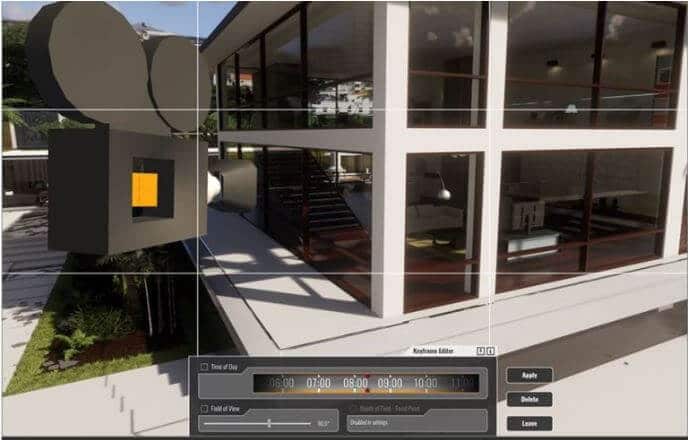
Multi Point Camera Tool

This camera tool swiftly allows you to add keyframes, change settings such as ‘depth of field’, ‘field of view’ or ‘daytime’ for each keyframe.

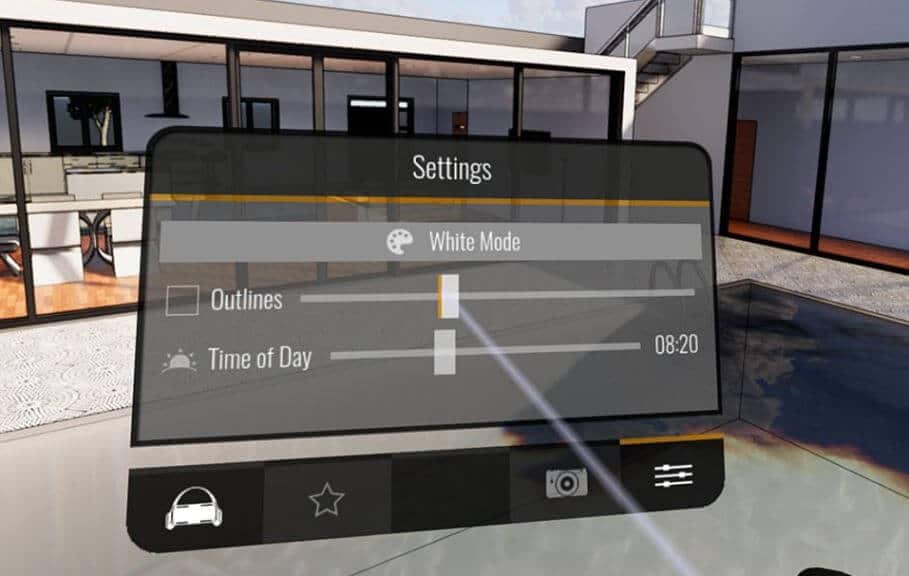
VR Interaction

Using this tool you can change the daytime, activate the ‘white mode’ and ‘outlines’ all while in VR. Now Oculus Rift, HTC Vive and Windows Mixed Reality are fully supported.

SketchUp Material Editor

The material editor allows you to specify PBR material parameters like albedo, normal maps and roughness.

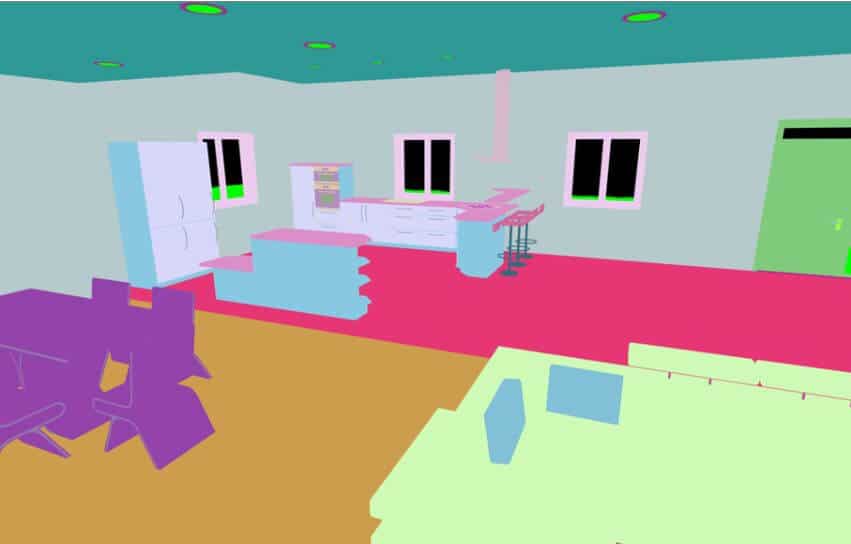
Layered Screenshot

For post-processing your images that were created with Enscape, you can now export a ‘depth’ and a ‘material ID’ image.

White Background

By using the white background option, you are able to make changes to the background without changing the skybox scene lighting and reflections.

Batch Screenshot

With just one click, you can export all of your favourite views and compare different stages of the project.

As well as these fantastic new features, there are a host of other improvements.

Light Brightness

A slider has been added to control all light sources at once, allowing a faster calibration of your scene brightness.

Sound Export

The last release saw new sound options for video export introduced – now you can include sounds in exported videos.

Image Quality

Both lighting and image quality has been improved, along with many new parameters like Vignetting or variable Chromatic Aberrations.

Windows Mixed Reality

These headsets offer inside-out tracking – meaning you’re not restricted to one tracking area.

For more Enscape information, please check out our website

Any questions? Please email us at sales@elmtec.co.uk and we’ll be happy to help!

Tip: Browsing and Downloading Materials

When all you want is a material (such as brick, tile, or grass); importing a whole component from the 3D Warehouse into your model can bloat the file with content you neither want nor need.

Fortunately, you can download only the material.

To find and download a component’s material directly in 3D Warehouse, follow these steps:

  1. Find the model whose material you want to download.
  2. Open the details page for that model, by clicking on the model.
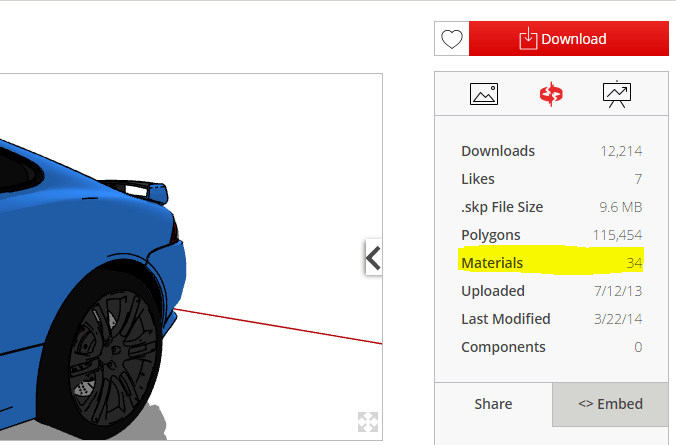
  3. This will open up the stats panel. Click the Materials link.
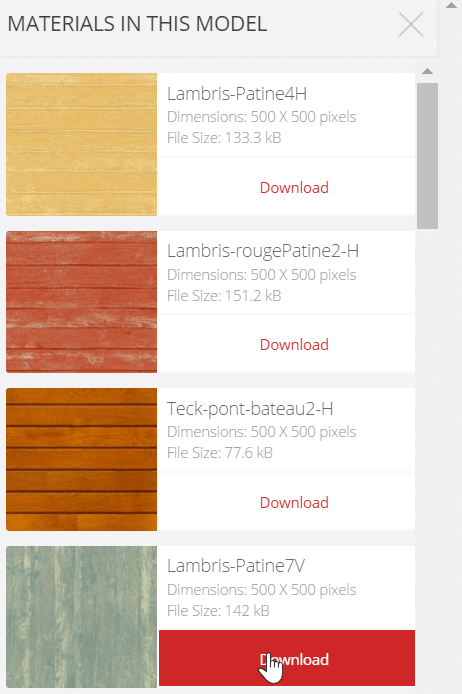
  4. You then see a list of the materials along with a bit of info about each one, as shown in the next image
  5. When you find the material you want to use, click the Download link.
  • If you accessed 3D Warehouse from within SketchUp 2017, SketchUp then retrieves the material from 3D Warehouse and activates the Paint Bucket tool with the material loaded and ready      to go. Click on the surface that you want to apply the material to, and, you’re done!
  •  If you accessed 3D Warehouse through a web browser, the SKM file for that material downloads. You can then add the SKM file to your local SketchUp content folders.

To see the Materials feature in action, check out the following video


About Elmtec

Elmtec have been the UK distribution partner for SketchUp since 2010, and service a network of UK and Irish resellers. We have over 22 years’ experience within the digital design community.

Contact Us

T: 01844 263 750
E: sales@elmtec.co.uk
W: www.elmtec.co.uk/sketchup