The Best Free SketchUp Pro Extensions

Last week we were at Clerkenwell Design Week with the SketchUp gang and we picked up a whole host of cool tips, tricks, and advice which would, quite frankly, be rude of us not to share with you, dear reader.
This post is all about everyone’s favourite F word: ‘Free’. You don’t need us to tell you that the Extension Warehouse can be a vast and beautiful – if slightly bewildering place. Therefore we’ve picked out just a few free extensions that we think could be the most useful to the largest demographic.

SketchUp Weld

An incredibly useful extension – you won’t realise how much you need it until you start to actually use it. Weld allows you to select multiple connected edges, curves, and/or arcs (“connected” means having common endpoints), then use the Weld tool to join them into a single “polyline”.
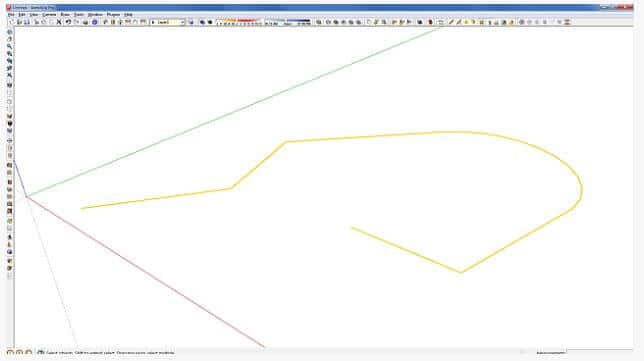
Weld for SketchUp Pro

Joint Push Pull

JointPushPull is a script dedicated to Face extrusion, with several Tools.

  • NORMAL – Similar to native Push Pull, but in multi-face. Faces generated are non-jointed.
  • VECTOR – Faces are offset along a custom direction picked graphically in the model (or along model axes). Faces generated are jointed.
  • JOINT – Faces are offset along their normal but are kept jointed. Useful for thickening shapes.
  • EXTRUDE – Faces are offset along an average direction, keeping faces jointed. Gives more consistent results than Joint tool.
  • ROUND – Combination of Normal and Joint mode depending on the angle between faces, with automatic rounding of gaps between faces.
  • FOLLOW – Faces are offset along the direction given by their adjacent edges. This concept was introduced by a4chitect’s Smart Push Pull plugin.

SketchUp CleanUp

Pretty simple really – cleans up and optimizes your SketchUp model.

With this extension you can:

  • Fix duplicate component definition names (When in model scope)
  • Purge unused items
  • Erase hidden geometry
  • Erase duplicate faces
  • Erase lonely edges (Except edges on cut plane)
  • Remove edge material
  • Repair split edges
  • Smooth & soft edges
  • Put edges and faces to Layer0
  • Merge identical materials

CleanUp for SketchUp Pro

RoundCorner

RoundCorner performs the rounding of the edges and corners of 3D shapes along a 2D profile, in 3 modes: Round corners, Sharp corners and Bevel. RoundCorner also supports concave corners (always rendered as Round) and non-orthogonal edge faces. Corners can have 2, 3, or more edges.

RoundCorner for SketchUp Pro

Soap Skin & Bubble

This plugin allows you to apply a skin over edges to create complex curved surfaces.

Selection Toys

Provides a wide range of selection modifiers, filter out all edges, faces etc.

 Let’s you quickly select entities with similar properties such as material, layer orientation etc. Also lets you select similar instances of the same Dynamic Component.
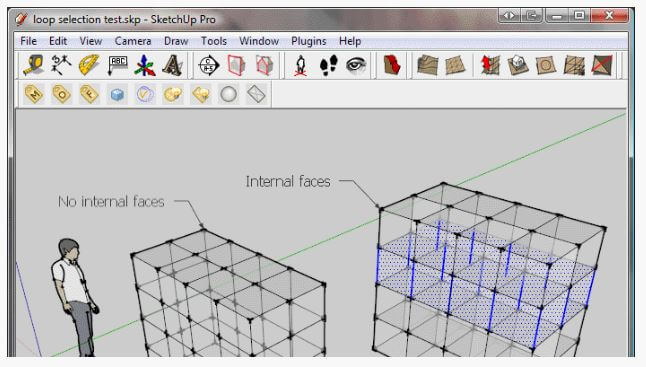
Selection Toys for SketchUp Pro

Hopefully you’ve found our pick of the best free extensions in SketchUp Pro useful. Find a whole host of other goodies in the Extension Warehouse and let us know below if you’ve got a free favourite that helps you!

[contact-form][contact-field label=”Name” type=”name” required=”true” /][contact-field label=”Email” type=”email” required=”true” /][contact-field label=”Website” type=”url” /][contact-field label=”Message” type=”textarea” /][/contact-form]

Tips for Agile SketchUp Modelling: Part 2

So, we covered some of the basics in the previous post and now we’re getting down to the finer details of ensuring our SketchUp modelling stays as lean as possible. Read on for more smooth and speedy tips and tricks.


Components vs. Groups

Always make Components instead of Groups whenever an object might repeat, or ever be used in another model.

Groups are great for grouping together components, such as grouping the landscaping elements together.

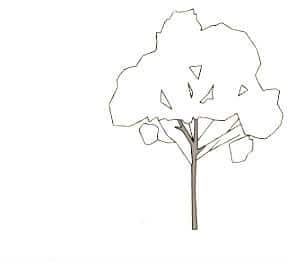
File Size: 101 kb


File Size: 135 kb. Even if the component instances are flipped, rotated, coloured from the outside, or scaled, the total file size stays small.


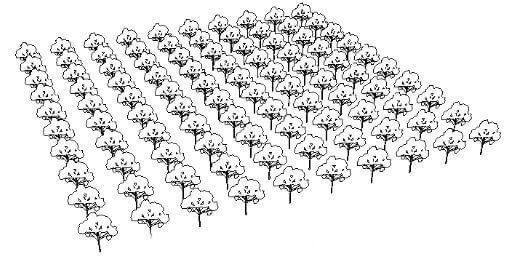
File Size: 143 kb. A model with 100 of the same tree component isn’t much bigger in file size than a model file with only 1 tree component.


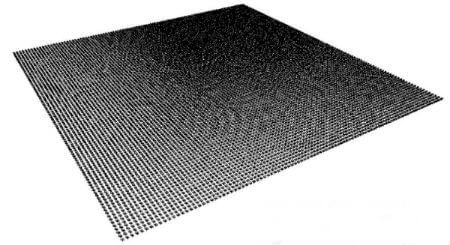
Need 10,000 trees? Thanks to components, the total file size only rises to 1.5 MB. Each extra tree component instance adds only a fraction of a kilobyte.


Stand-In Components

  • Save a complex component to your hard drive as a reference back-up.
  • In the model, edit and simplify that component to a few lines, or a rectangle, so that it renders more easily than the “real” component.
  • Later, when it’s time to present the model, right click on the component in the model and select Reload.
  • In the Reloading navigation folder, find the saved component on your computer and select it.

The Select/Replace technique works just as well.

  • Use a low-poly tree, for example, until it is time to present the model.
  • When it’s time to show the model, import a high-poly model into the file (place it anywhere).
  • Select all of the low-poly components.
  • In the Components Window, right-click on the high-poly component and select “Replace Selected.”
  • Delete the first randomly placed high-poly component.

Turn off some Layers

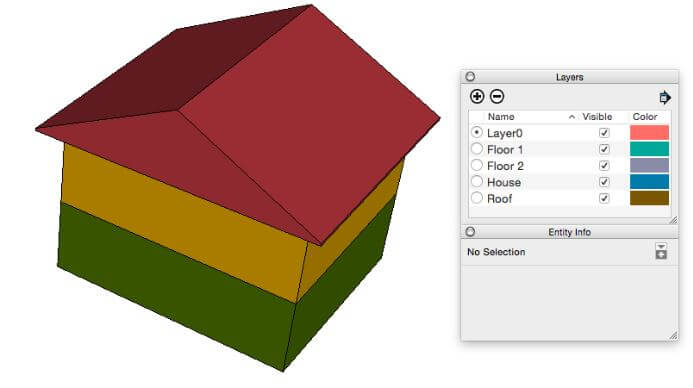
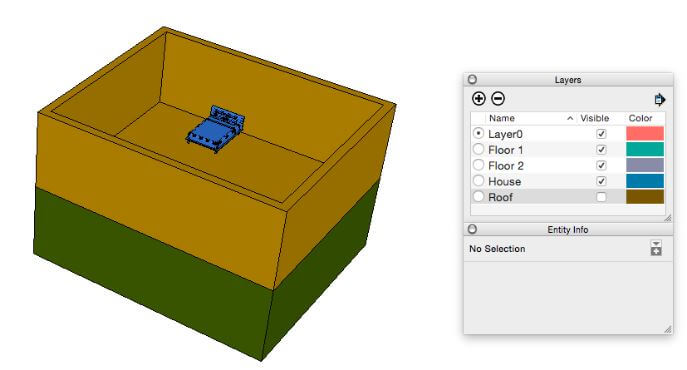
If your model is acting sluggish, try turning off some layers that you don’t need to see right then.

Here we’ve deselected the roof and can also peer into the second floor.


Styles

If needed, switch to the “Shaded” style while building geometry, as textured materials can slow down rendering.


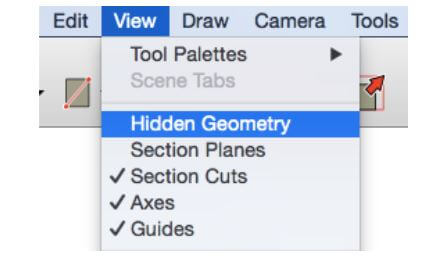
Turn off hidden geometry when not editing hidden lines.


Use a “fast modeling” style when building the model and save it for the “Working” scene.

Materials

  • Examine image file sizes before importing. Pre-crop and resize images before importing them into the model.
  • For some imported photographs it helps to right-click on model surface and select “Make Unique Texture” to further crop and reduce pixels. Undo this step if it makes it too blurry.
  • Use .jpg files wherever possible for imported tiling images, as they often have smaller file sizes than pngs. Some exceptions are site maps, logos,  and images with transparencies.
  • Don’t choose a tiling image file when a flat formulaic colour will do. Example: You can usually use a flat shade of grey instead of “brushed aluminium.”


There we have it. Just a few of our favourite tips to ensure modelling in SketchUp stays as agile as possible!
Please do let us know in the comments below if you’ve got a great tip that wasn’t covered here or in Part One.


[contact-form][contact-field label=”Name” type=”name” required=”true” /][contact-field label=”Email” type=”email” required=”true” /][contact-field label=”Website” type=”url” /][contact-field label=”Message” type=”textarea” /][/contact-form]

About Elmtec

Elmtec have been the UK distribution partner for SketchUp since 2010, and service a network of UK and Irish resellers. We have over 22 years’ experience within the digital design community.

Contact Us

T: 01844 263 750
E: sales@elmtec.co.uk
W: www.elmtec.co.uk/sketchup