Types of Garden Design to Inspire your next project

So you want to design a garden? How exciting. It’s a wonderful thing to do, designing a natural space for people to relax, enjoy the plants and flowers, and get all the benefits of being out in the fresh air. But what sort of garden will you go for, in what kind of style? The world is your oyster, of course, with countless types of garden styles in landscape design. Thanks to SketchUp you’ll be able to create a design for any kind of garden you like, from traditional to modern, flower-filled to focusing on greenery, something rocky, gravelled or mossy, you name it. This article explores the sheer variety of different types of garden design for you to experiment with. By the end of it you’ll know more about some of the most popular types of garden styles in landscape design, and you’ll have a good idea of the direction you want to take for your own design.  

Different Types of Garden Design

Thanks to the natural materials, the soil, the light, the weather and the human imagination, there’s an infinite number of garden design types and styles to experiment with. Your garden design might reflect the age or period of the house or other building it belongs to, something appropriate and subtle that sits perfectly against the backdrop. A Regency-style garden for a Regency house, for example, or a formal garden for a formal space. 

On the other hand it might be an exciting contrast, something dramatic or surprising that adds a real ‘wow’ factor to the space. It depends on your – or your client’s – taste and desires, what inspires you, and what piques your imagination. Once you’ve sussed out the soil type, the prevailing weather conditions and the light, all of which will affect the planting itself, you’re ready to go. So let’s take a tour of some of the world’s most popular garden styles. 

Traditional Garden Style

One very popular choice in our different types of garden design is the traditional garden style. It has some typical features you’ll want to include to get the look. This is a highly structured style, usually dividing the space into a series of ‘rooms’ bordered by hedges, walls or trellis, each with its own look or function. The vegetables are kept separate from the flowers and shrubs, there’s a lawn, and beautiful herbaceous borders where, ideally, flowers bloom throughout the spring and summer, then late into the autumn. 

Fill the borders with beautiful annuals and perennials. Plant them in swathes for a flowing look or dotted in threes, fives or sevens for a stylish and pleasing finish. This is where carefully planned colour schemes and plant combinations come into their own, along with trees and shrubs, paths and terraces. This garden style is perfect for a focal point, perhaps a pergola or a piece of garden sculpture, and every keen traditional gardener needs a shed or other suitable building to store tools and equipment. 

Cottage Style Garden

A cottage-style garden is informal and flowing, an easygoing, pretty and relaxed style where plants and flowers tumble around each other in a glorious mix. It’s all about the plants and flowers themselves. And it’s a great opportunity to creatively blend different colours, structures and textures. 

Plant fruit and vegetables alongside flowers and shrubs, plant high and low, tall and short, and make the most of all the different greens. Design a secluded spot to sit, work, chill or chat, and create winding paths through the blooms and greenery for people to explore. Because cottage style gardens are by nature small, forget lawns. Maybe think about a hidden courtyard instead, a paved space with a bench and loads of flowers, maybe even a small water feature. 

English Country Garden Style

An English country garden combines elements of both the traditional and formal garden style. You need space for this one because it’s all about gracious wide paths, either gravelled, brick or paved, and deep herbaceous borders like you find in a stately home garden. Add topiary and evergreen shrubs for winter interest, a lawn or several lawns linked by pathways. Include traditional garden furniture, statues, fountains, rose gardens, urns, a sundial, and plenty of trellis to grow climbers up to add to the rich, complex, frothy feel. Rosemoor, north Devon’s RHS garden, is an excellent example.

Coastal Garden Style

A coastal garden comes with exciting challenges of its own. It is rare to get  a hard or long-lasting frost on the coast thanks to the salty air and sea breezes. Salt affects some plants more than others, so choose plants that like the unique conditions, beauties like exotic sea cabbage and lovely lavatera. 

This type of garden is very like a dry garden, also not dissimilar to a Mediterranean garden, being typically very well-drained. Think about adding drought-tolerant plants which also withstand windy conditions. You might find you’re planting directly into gravel, shingle or sand, which keeps things interesting. You might add wooden decking for a seaside look, and let it fade to silvery grey naturally. You can add large feature rocks, and theme the garden furniture and ornaments. Think rope and sea glass, flags and faded chunks of wood as features. Gravels and aggregates in different sizes and colours add more interest and texture. Derek Jarman’s stunning coastal garden at Dungeness in Kent is a great example.

Japanese Garden Style

A Japanese garden is one of the most relaxing spaces you can imagine, unique in the world of garden design. It’s all about tiny details – the beauty of the miniature leaves of the mosses, the curious shapes of bonsai trees, the gorgeous swirly patterns raked into gravel and sand and soil. Plus stunning rocks, placed with great care for the maximum aesthetic impact. Think calm, cool and simple. It’s all about visual balance, about carefully planned features often complemented by empty space.

Instead of several trees or shrubs, a Japanese garden will have just one or two beautifully pruned specimens, and pruning is a very big deal indeed. There’s an interesting use of unusual materials, things like the classic mosses we’ve mentioned, and texture is vitally important in a Japanese garden. Water features are also a big deal, maybe a pond for Koi carp or a large rock with a depression in it where water can naturally gather. Moving water is a popular feature as well – think simple, elegant water features, maybe a single slice of slate with water running down the smooth face. Or simply a big ceramic pot full of water.    

Mediterranean or Dry Garden Style

Mediterranean or dry gardens have defining features of their own. Great drainage is a must here. For Mediterranean and dry-loving plants to thrive. It’s possible to achieve this in a damp space, like they’ve done in RHS Rosemoor’s Mediterranean garden, which thrives despite being a soggy spot in a frost pocket with heavy clay soil. They’ve simply built beds up from ground level rather than digging them down, using very well drained gravelly soil. 

Also called ‘Australian gardens’ or ‘desert gardens’, appropriate planting is at their heart. Choose drought tolerant and drought resistant plants like succulents, cacti and ornamental grasses. Include dry-loving garden perennials and herbs like rosemary, sage, lavender and verbascum. Dry or desert gardens also feature pots and sculptures, paved areas and paved pathways, and seating areas in the sunshine and shade. 

Wildlife Garden Style

The most popular types of garden styles in landscape design of all include the wildlife garden style. It’s all is about ‘messy gardening’, which involves leaving spaces untended for insects, amphibians, birds and more to make homes, breed, and enjoy life. There are some defining features of wildlife gardens but it isn’t actually a garden style, more like a way of gardening. Every garden can be wildlife friendly. Make it ‘no dig’, where instead of digging to uncover precious soil microbes to the light and air – which they don’t like – you simply mulch over the top and leave the goodness to sink in. Instead of cutting back dead plants in autumn and winter, leave them for the wildlife. 

Don’t use any chemicals. Provide food, water and shelter for creatures. Make a pond with a deep end for creatures to stay warm in winter and a shallow end for getting in and out. You’ll be amazed how fast the wildlife arrives. Give it a week after filling the pond and they’ll be there. Plant plenty of pollinator-friendly plants. Let ‘weeds’ grow in as many places as possible, appreciating their subtle natural beauty. Make or buy bug hotels, bat boxes and bird boxes. And leave little piles of dead leaves and twigs, branches and grass for creatures to hide, live and hibernate. If you have room for a compost heap don’t dig it over, let it rot down naturally. Take a look at these inspiring wildlife gardens you can visit.  

Sustainable Garden Style

Different types of garden design can also be sustainable, which is big news thanks to climate change and the wildlife crisis we’re suffering. People want gardens that work in partnership with wildlife, which help mitigate climate change. This style of garden is often more economical, involving using recycled, up-cycled and repurposed materials, reducing the use of natural resources, and making new and exciting features out of old and unwanted items. 

You might pile up some old chunks of wood into a casual sculpture, make a heap of rocks for creatures to shelter in, and plant specimens that flower from early spring to late in the year to keep the wildlife going. 

As a rule there’s less maintenance to do. It involves collecting seeds for the next year, using companion planting to encourage insects and other creatures, protecting food crops with netting, and choosing resilient varieties of plants that will adapt to the weather and changing climate conditions.

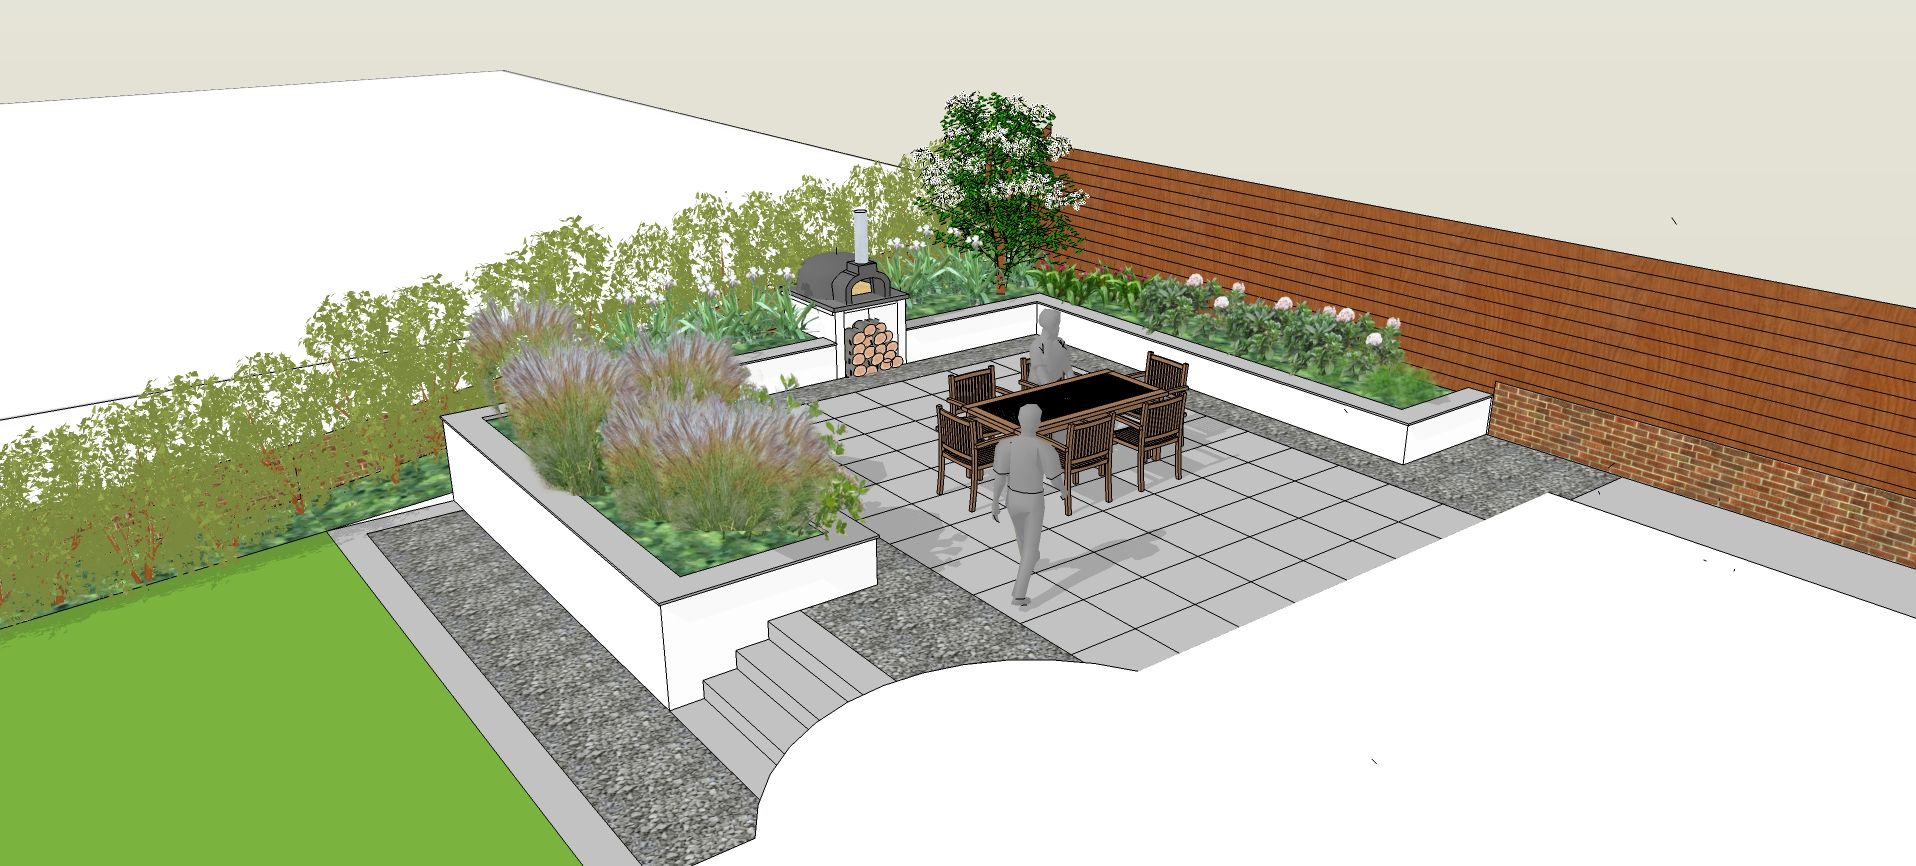
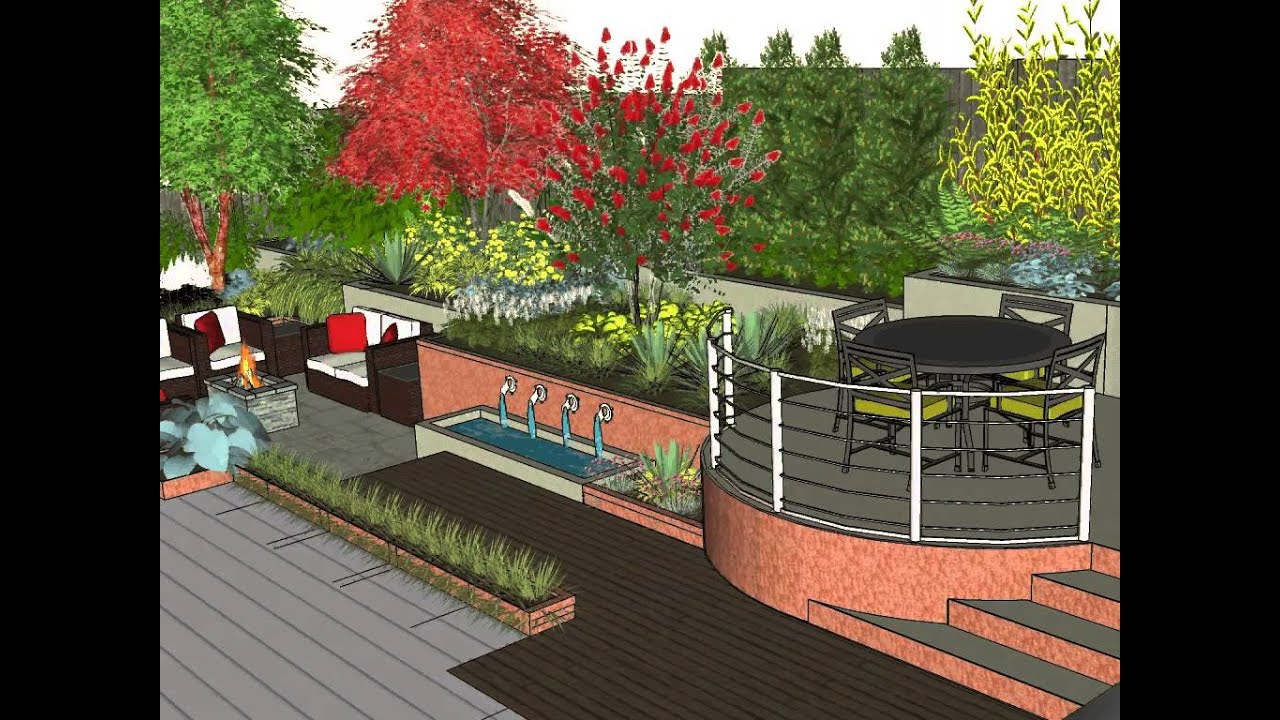
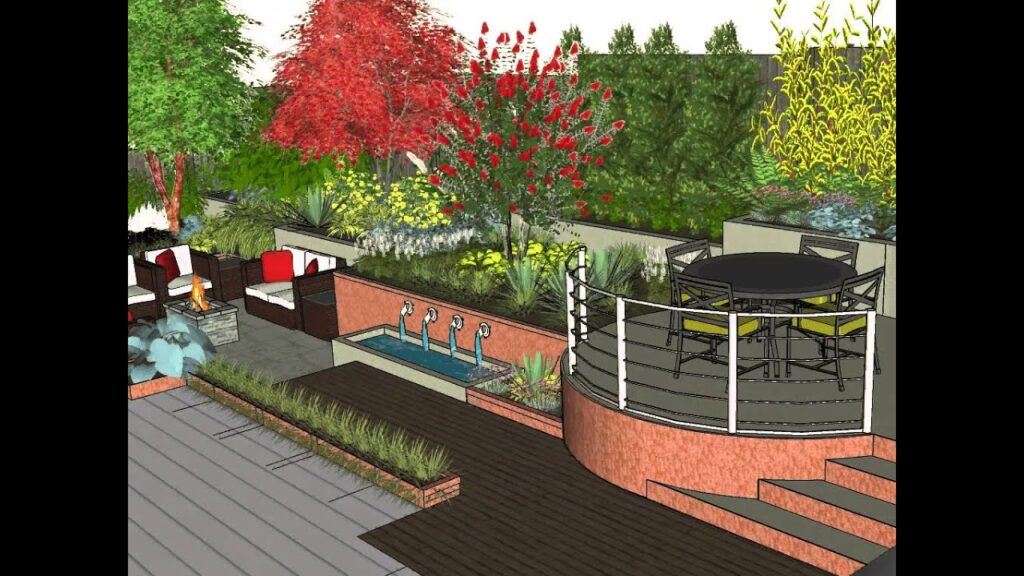
Create your own garden style

There’s endless potential for creating something unique to suit the space, your taste or the client’s taste. You might create a series of very different, contrasting ‘rooms’ for a large garden, each leading to the next with surprises every step of the way. You might cram a tiny city garden with exotic jungle plants which will survive thanks to the microclimate. Take London, where you can grow avocado trees or citrus plants from seed with ease, and sometimes they even bear fruit.  

Whatever types of garden styles in landscape design you decide to create, SketchUp will be with you every step of the way, making your job easier, more creative, and more fun. A collection of excellent tutorials helps you achieve magic, and you can test drive SketchUp Pro for free to see what you can achieve. 

How to Use V-Ray for SketchUp: Beginner’s Guide

New to the world of 3D design? One of the first skills you need to know is how to use V-Ray for SketchUp.

Both software complement each other perfectly. On one hand, SketchUp lets you draw in 3D, create 3D models interactively, and develop complex structures. On the other hand, V-Ray is a powerful 3D rendering engine that breathes life into SketchUp models. This includes infusing them with photorealistic material surfaces, lighting, textures, and other dimensions.

Despite all of its incredible features, learning V-Ray for SketchUp can be a bit confusing at first.

To help you get started, we’ve created an overview of how to use V-Ray for SketchUp. We’ll discuss what it is, how to install it in SketchUp and share examples of the many creative ways you can use it to make your 3D creations look exceptional.

What is V-Ray for SketchUp?

V-Ray is a powerful rendering software developed by Chaos Group, a leading provider of professional 3D graphics technologies.

Originally designed as a rendering plugin for 3D modelling software, V-Ray has since become a full suite of tools for creating stunningly realistic images across a number of industries.

V-Ray offers a range of features that make it an ideal choice for SketchUp users. Some of these features include the ability to create accurate lighting, realistic materials, and realistic reflections. On top of all that, it also offers a range of powerful post-processing tools, such as the ability to adjust shadows, textures, and colours.

In addition, V-Ray for SketchUp allows users to render scenes in multiple passes, adding to the outstanding realism and complexity of their renders.

The software is compatible with SketchUp Pro, SketchUp Studio, and SketchUp Viewer, and it’s incredibly easy to install and use.

Compared to similar 3D rendering software, V-Ray for SketchUp offers the following benefits:

  • Intuitive interface: V-Ray’s beginner-friendly facilities, like the “Quick Settings” feature for materials and lighting, make it easy for new users to get up and running quickly.
  • Fast rendering times: Unlike other 3D rendering tools, V-Ray for SketchUp offers quick rendering speeds, which means you can spend less time waiting and more time creating.
  • Interactive render previews: With V-Ray for SketchUp, you can preview your renders in real time and make adjustments as you go.
  • Compatibility with SketchUp: V-Ray is designed to work seamlessly with SketchUp, so you can easily integrate it into your existing 3D workflow.
  • Massive community and online resources: Countless professionals and novices use V-Ray for SketchUp, which means there’s no shortage of tutorials, guides, and resources available for users of all levels. For instance, need special V-Ray materials for your 3D model? A quick search will yield downloadable packs with dozens of realistic textures and materials.

These are just a few of the many benefits that V-Ray for SketchUp has to offer. Next, let’s look at how to install and use the software.

How to Install V-Ray for SketchUp

To install V-Ray for SketchUp, both your computer and SketchUp version must meet V-Ray’s system requirements.

As of December 2022, here’s what you’ll need:

  • RAM: 8GB RAM minimum, but 16GB RAM is recommended for optimal performance
  • Processor: 1st Gen Intel® Core™ or an equivalent processor with SSE4.2 support
  • Hard disk space: Minimum 2GB, but 12GB is recommended because V-Ray for SketchUp usually involves downloading additional content
  • Operating system: You’ll need one of the following: Windows 8.1, Windows 10, Windows 11
  • GPU support: To run V-Ray, you’ll need NVIDIA card(s) that are Pascal-based (or higher) with the latest video driver installed
  • TCP/IP: Only IPv4 is supported by V-Ray for SketchUp, and IPv6 is currently not supported

Note: If you’re interested in running the V-Ray Vision version, you’ll need a graphics card with Shader Model 5.0 plus DirectX 11 or DirectX 12.

For the SketchUp version, you’ll need SketchUp 2021, as V-Ray 5 for SketchUp can only be used with the latest SketchUp version. Once your computer meets these requirements, you can start the installation process.

To install V-Ray for SketchUp, simply follow the steps below:

  • First, download the V-Ray installer. This is an executable (.exe) installation file.
  • Open the .exe file, then agree to the Licence agreement.
  • Next, click ‘Install.
  • Optional: If you’re a Windows user, you’ll be asked if you’d like to share anonymous usage data. We recommend opting in as it helps V-Ray improve its software and services.

Once the installation process is finished, you’ll need to sign in to your Trimble account to authorise the software.

Now all that’s left is to fire up V-Ray for SketchUp and start creating stunning 3D scenes!

How V-Ray is Used

You can use V-Ray to transform any SketchUp 3D model – from simple objects to complex landscapes – into photorealistic versions of the original model.

To do this, V-Rays rendering engine emulates various light sources such as light bulbs, neon lighting and the sun so you can see how your model will look in different lighting conditions. What’s more, you can also adjust the intensity and colour of the different light sources to create stunning visuals.

Aside from emulating light sources, V-Ray’s materials facility takes realism to another level. You can add texture and surface detail to materials like stone, wood, fabric and even grass, making your 3D models look as true to life as possible.

When it comes to what you can use V-Ray for SketchUp for, there’s virtually no limit! Here are some examples:

  • Architectural design: V-Ray for SketchUp is one of the most popular 3D rendering tools in the architectural field. It’s used to create everything from floor layouts to 3D walkthroughs, turning ordinary buildings into works of art.
  • Product design: From consumer electronics to furniture designs, V-Ray can turn 3D product models into samples that leap off the screen.
  • Interior design: The ability to adjust the lighting and materials of your model makes V-Ray a fantastic tool for interior designers. It’s used to create photorealistic images of rooms, giving potential clients an accurate idea of what their space could look like.
  • Landscape design: When you’re creating a 3D landscape, there’s no better tool than V-Ray. You can create realistic trees and plants that look almost identical to the real thing and use the light emulating feature to create dreamy landscape scenes.

These are just a few examples of how V-Ray is used. It’s one of the most versatile 3D rendering programs available, so no matter what kind of project you’re working on, mastering the basics of V-Ray will enhance your workflow.

V-Ray Basics

V-Ray for SketchUp is highly intuitive, but having a basic understanding of its key features and functions can speed up the learning process.

First, you’ll find lots of free tutorials no matter what kind of learner you are. For instance, you’ll find many YouTube channels with content like this, all dedicated to V-Ray for SketchUp and its various features, making it easy to get a basic overview of the program.

Chaos, the company behind V-Ray, also offers informative and detailed tutorials that can help you with the specifics of rendering in V-Ray.

Lastly, being successful at V-Ray rendering requires having a good grasp of making 3D models in SketchUp.

Below are some of our top tips for getting your SketchUp models ready for rendering with V-Ray:

  • Model orientation: Realistic lighting depends on the accuracy of the model’s orientation. Make sure your models are properly aligned and that you have the correct light source set up in SketchUp.
  • Model optimisation: While V-Ray is one of the fastest 3D rendering tools out there, unnecessary details can slow down the process. Every part of your 3D model should serve a purpose – remove any elements that don’t add anything meaningful to the overall function or aesthetic.
  • Material naming: Name your materials sensibly in SketchUp, or you may end up confused when trying to assign materials in V-Ray. As an example, be as specific as possible – instead of “blue fabric,” use something like “blue polyester fabric.”
  • Level of detail: When making 3D models, don’t forget the small details, such as gaps between bricks or boards. V-Ray is a powerful tool that can render even the tiniest details, so while you should omit unnecessary details, feel free to include all the important ones, no matter how small they are.

Lastly, this is our best tip of all: have fun with exploring V-Ray for SketchUp!

You don’t need to be an expert 3D designer to enjoy the capabilities of V-Ray, and it’s perfectly okay to start with some basic shapes and models while you familiarise yourself with V-Ray for SketchUp.

Get started with V-Ray

V-Ray for SketchUp lets you unleash your imagination and explore levels of realistic rendering not possible before.

Take your time and don’t be afraid to experiment with the tools and features available on both platforms.

Download and install V-Ray today and discover all the possibilities for yourself!

You can also get a FREE 7-day trial of SketchUp Pro here – we’d love to give you more helpful advice and tips for using V-Ray for SketchUp, so contact us now!

Tips for Rendering in V-Ray

The V-Ray 3D rendering engine is so revolutionary, it won both an engineering Emmy and an Oscar for advancing the use of ray-traced rendering. It’s the go-to choice for the world’s finest architectural designers, CGI experts, landscape designers, VFX professionals, and many other creative artists.

At the same time, V-Ray is so beginner-friendly, you don’t need to be a 3D pro to take advantage of its features.

Using V-Ray with SketchUp makes it even easier to bring your designs to life since the two applications integrate seamlessly.

With that in mind, observing a few V-Ray render tips will help you get the most realistic results, streamline your workflow, and have fun while you’re at it.

Let’s get started!

V-Ray Rendering Tips

The top mistake among new V-Ray users is diving into 3D rendering without proper research or preparation.

With these V-Ray render tips, you can avoid making the same mistake and make sure you set yourself up for success:

1. Ensure more than adequate system resources

V-Ray 3D rendering is a resource-intensive program – this means it requires a powerful processor and a good amount of RAM to get the job done.

As an example, here are some of the minimum system requirements for installing V-Ray for SketchUp:

  • Minimum of 2GB hard disk space
  • Minimum of 8GB RAM
  • IPv4 TCP/IP
  • For GPU support, NVIDIA card(s) such as Volta- and Turing-based units with the latest video driver
  • Windows 8.1 for the operating system
  • And more

Anything below these specs won’t cut it. If you don’t have enough RAM or even a good graphics card, your renderings will take too long to process, or the quality will be too low.

On top of that, it’s also a good idea to exceed the minimum system requirements so that you can render faster and with higher quality.

For example, 2GB of hard disk space will allow you to run V-Ray for SketchUp, but with 12GB, you can easily download additional content without compromising the performance of your system.

Also, if you’re using a laptop, ensure it has an external power source, as V-Ray’s rendering process can be very energy-intensive. If you’re using a desktop, be sure to sync up the power supply with your graphics card.

2. Use GPU rendering

V-Ray is designed to use either the V-Ray GPU or the V-Ray rendering engine.

GPU rendering is faster and more efficient because it lets V-Ray use your system’s GPU cards to execute the ray-tracing calculations instead of the slower CPU.

To use GPU rendering in V-Ray, you will need to have a supported GPU and enable it in the V-Ray settings.

3. Make the model render-ready

Another overlooked V-Ray rendering tip is ensuring that the initial 3D model is ready to render.

Sure, you can skip this and go straight to rendering, but expect poor results and lengthy rendering times.

Instead, prepare your model by checking that it’s correctly textured, lit, and has all the necessary materials set up.

This means that all relevant objects should have the appropriate materials and textures applied, and that all surface shaders, displacement maps, and other materials have been established properly in SketchUp.

4. Clean up your model design

A big part of preparing your 3D model is cleaning up the design as well as you can.

Any unnecessary detail will bog down the rendering process and use up valuable time and resources.

For instance, look for stray lines that don’t serve any purpose. You can usually find these in the model’s outer faces, hidden edges, and other places.

Aside from that, check that all irrelevant components are removed from the scene. As an example, let’s say you’re rendering a living room. In this case, unused components can be things like a bedroom door, non-essential furniture, and other elements that don’t belong in the scene.

When you’re creating your model, we also recommend separating components into layers and properly labelling each layer. This will help you keep your model organised and make it easier to find any component you may want to adjust. Additionally, create layers for your materials and textures and make sure that each material has its own unique ID.

5. Properly orient faces

A render-ready SketchUp 3D model should observe the proper orientation of faces.

Faces in SketchUp have a front and backside. As a default, the material shows the back as grey and the front as white.

V-Ray and other software may render back faces invisible, which will result in inaccurate renderings and artefacts.

To prevent this, check that faces face inward and that all the normals of the faces point in the same direction. This will help create a cleaner render, as V-Ray will not have to work as hard to render the scene. On top of that, it also helps to remove any hidden faces or objects, as these can cause problems with rendering. Utilising the “Check Intersection” tool can help to quickly identify and fix any issues caused by incorrectly oriented faces.

6. Leverage V-Ray materials

You can use SketchUp materials to render in V-Ray, but if you want the best results, use V-Ray materials instead.

Materials in V-ray allow you to manipulate attributes like the glossiness of the surface, the reflection of light, and the opaqueness of the material.

Additionally, the V-Ray material library comes with pre-loaded materials such as wood, metal, glass, and more. Still, you can find even more materials for V-Ray online in the form of downloadable content from various websites, so take time to explore.

7. Optimise cameras and lighting

In SketchUp, the default settings for 3D models are one camera and one light.

By comparison, V-Ray offers a wider selection of lighting styles and types, along with multiple cameras. Take advantage of these tools to better emulate how the lighting behaves in the real world, including sunlight.

8. Make use of render-ready assets

To save even more rendering time, consider using render-ready assets in your 3D model.

You don’t need to create everything from scratch, nor do you need to clean up these components since they are already prepared for rendering.

Render-ready assets can include pre-made 3D trees, cars, animals, people, grass, water, and other common elements. With these assets, you can create more complex 3D scenes much faster while saving resources.

9. Optimise materials and colours

The colours you use in your 3D model can also affect the speed and efficiency of rendering in V-Ray. That’s because some colours are simply more demanding for rendering than others.

For example, off-white is easier to render than white because of the less intense colour. Similarly, diffuse materials are easier to render than glossy ones.

So if you’re looking for ways to reduce your rendering time, take a look at the materials and colours in your 3D model and adjust them accordingly.

10. Optimise lighting intensity

Like your colour choices, the intensity of lighting in your 3D model can also affect the rendering process.

Naturally, the brighter the lighting design, the more time and resources it will require to render it. So to optimise your lighting, cut down on the brightness as much as you can without sacrificing visibility and atmosphere.

Aside from that, be sure to use V-Ray’s lighting parameters like exposure, white balance, and light intensity to your advantage. This will help you achieve the best possible lighting while minimising the amount of time it takes to render.

11. Reduce hard edges

SketchUp 3D models use hard edges by default. However, rendering hard edges can lead to a jagged and artificial look, so you may want to smooth them out.

To do this, you can use either a chamfer modifier or a VrayEdgeTex Map to modify the edges. The Chamfer modifier lets you add edges to specific parts of your design, while the VrayEdgeTex Map allows you to customise the edge type, width, and opacity.

12. Add some noise

In terms of 3D modelling, “noise” refers to the variation needed to make a scene look as natural as possible. What noise does is that it helps to break up the monotony of a flat and uniform surface, adding depth and texture.

One way to do this is by using a Quadify Mesh with a noise modifier. You can control the level of detail and the strength of the effect, so you can fine-tune your scene to make it look more realistic.

Now to get rendering

Applying these V-Ray render tips will help you avoid common mistakes that can get in the way of creating beautiful and lifelike 3D scenes out of your SketchUp models.

Practising them consistently will also help you develop a strong foundation for working with the power of V-Ray and using its features to the fullest.

For instance, getting into the habit of cleaning up your 3D models, optimising materials and colours, plus strategically using render-ready assets can help you save time and resources when it comes to rendering with V-Ray.

Now it’s time to put these V-Ray render tips to the test!

Download and install V-Ray for SketchUp and start rendering. Don’t have SketchUp yet? We’re offering a FREE 7-day trial of SketchUp Pro to get you started. Good luck!

Sustainable Landscape Design with SketchUp

The fight against climate change is the biggest battle the human race has ever faced, and fighting it touches every part of our lives, in every way. That’s why sustainable landscape design principles are coming to the fore, something every professional and amateur garden designer is taking into account. In our world, green sustainable landscape architecture means everything, a proven way to reduce CO2 emissions, cut down the miles the tools, equipment and materials travel, choose the least-damaging materials and products, and generally create a garden with the smallest possible environmental impact. If you’re busy researching sustainable landscape design, this article is for you. By the end you’ll know what sustainable landscaping is, the considerations and principles behind it, and how SketchUp will help you achieve it. 

What is Sustainable Landscaping?

So what is sustainable landscaping? The term green sustainable landscape architecture describes landscaping that is sympathetic to the surrounding environment in every way, and involving naturally available resources. The idea is that a sustainable human-made landscape will exist in complete harmony with the surrounding ecosystem, moving to the rhythms of the wider natural environment without causing harm or disruption to nature. 

What is sustainable landscape design? It’s much the same thing. Sustainable landscaping means focusing on both the input and output of a human-made landscape, finding ways to minimise both. It’s about living well now without compromising the future, about putting the environment first, and importantly, about thinking local, using techniques that are not only sustainable but environmentally responsible and, ideally, even regenerative.

The smaller the impact on the wider environment and nature your design has, the better. The less impact on the future, the better. If you can design a garden that enhances what was already there, doesn’t cause any damage during the creation process and does a good job of nurturing the environment into the future, you’re onto a winner. 

Next, let’s take a look at exactly what all this involves in context.

Sustainable Landscaping Considerations and Principles

The main goals of sustainable landscape design are to conserve water and energy, reduce waste and decrease runoff. To achieve these goals in an ordinary residential garden you’ll need to adopt a specific mindset. It’ll mean treating water as a vital resource to be protected, valuing soil as an essential we can’t live without, preserving existing plants, and thinking carefully about how to conserve material resources. All this dovetails neatly into a few key principles that support sustainable landscaping. 

Principle #1: Treat Water as a Resource – The first of our sustainable landscape design principles concerns water. Too much water is one thing, too little is just as bad. We’ve all seen the horrific impact of recent droughts on countries like Australia and the USA, where November 2022 saw a frightening total of 43 US states experiencing ‘moderate drought’ or worse. The demand for water is already at an all time high and all too often precious rainwater is treated as waste, sent away into drains. Instead you can make wiser decisions thanks to a careful selection of plants and by designing with irrigation in mind. Depending where you live, flood prevention will be just as important. You’ll need to try and strike a realistic balance between water conservation and flood prevention.  

Principle #2: Value the Soil – Compacted soil in gardens causes problems because it makes hard work of drainage. The resulting run-off can cause flooding as well as pollution. Good soil helps more plants grow more healthily, supporting a more varied ecosystem. If you have patches of poor quality soil, they’ll be perfect for many wildflowers and native plants that don’t like a rich soil diet but thrive on soil with very few nutrients.   

Principle #3: Preserve Existing Plants – Too many people clear every plant out of a garden to design or redesign it, but that’s the opposite of sustainable landscape design. Because every plant matters, a sustainable approach is so much better. Assess the existing plants, keep native species, remove non-native planting if it’s causing issues, and design around new and mature trees instead of cutting them down. A tree is a thing of wonder, beautiful all year round, and an invaluable way to lock up CO2 out of harm’s way. 

Principle #4: Conserve Material Resources – The fourth of our sustainable landscape design principles is about materials. Many hard landscaping materials are very energy intensive, and the environmental impact is even worse if they’ve been transported a long way.  A sustainable approach means reusing and repurposing, recycling old stuff and insisting on local materials. Using local rock, for example, from a quarry nearby looks right in the context of the surrounding landscape as well as minimising the miles it has travelled.  

Using SketchUp for Sustainable Landscape Design

It’s great to know you can use SketchUp to support your personal and professional sustainability goals in sustainable landscape design. Here are some things to consider:


[h3] Keep existing plants and source locally

For both garden designs and redesign, it’s a good move to identify as many existing plants as possible to keep, and work them creatively into your garden design model. It’s good to source plants locally rather than buy from a long distance away, and be sensitive about which new plants to add to your scheme. 


[h3] Choose to move away from block paving to prevent flooding

Floods and water shortages are as bad as each other, so think about them both. It’s important to take rainwater runoff into account and manage it optimally. You might, for example, reject the idea of block paving because it prevents water run-off and can cause dramatic localised flooding to gardens, driveways and roads. Rainwater collection ponds don’t just give you water to keep plants alive and thriving, they also quickly become home to an extraordinary range of wildlife, which often arrives within days of a pond being filled. You might want to think about fitting a number of water storage butts fed from the gutters of the house, to help see the garden through times of drought. When you design optimal water drainage, routing and storage into your garden design, you cater for every rain-led eventuality that climate change brings. 


[h3] Source materials locally

Can you source local stone and aggregates? Is there a fencing company nearby? The more of the materials you can source nearby, the better. You’ll support the local economy as well as minimising the miles travelled. Materials like Indian sandstone are lovely but when you think how far they’ve been transported, at what expense to the environment, their appeal dims quite a lot! 


[h3]Sustainable outdoor lighting

There’s nothing quite so magical as outdoor lighting, and there are sustainable ways to achieve that, too. Make sure your garden lighting is low energy, solar powered garden lighting using cool, energy efficient LEDs rather than ordinary bulbs. Just make sure you don’t design bright lighting that stays on overnight, because it disturbs the circadian rhythms of the plants, birds, insects, mammals and other wildlife. Like us, to get a good night’s sleep, nature needs darkness. 


[h3]Design with wildlife in mind

Last but not least, design with wildlife in mind. A sustainable garden isn’t sustainable if it drives wild creatures away. Perhaps you could design a special area where ‘weeds’ can naturally grow. In a sustainable world there’s no such thing as a weed, every plant matters to the balance of the local environment, crucial for wildlife that feeds on it, breeds on it, and relies on it. Plant natives for birds, insects, butterflies, and all the members of the food chain that depend on them. Consciously create safe spaces and shelter for wild creatures. 


Add a host of excellent free tutorials and learning resources, a free version to play with and a full version called SketchUp Pro, and the programme offers everything you need to place sustainability at the heart of your outdoor design life. We hope you’re inspired by the sheer potential this popular garden design tool delivers for doing things the environmentally responsible way. Now you’re ready to go create your first green sustainable landscape architecture design, we wish you a great time using SketchUp to achieve something special. 


Using Materials for V-Ray

V-Ray by Chaos® is an incredibly powerful 3D rendering plugin that’s used by professionals in diverse niches like film and TV, advertising, and architectural visualisation. It’s available for platforms like SketchUp, Maya, 3ds Max, Cinema 4D and more.

V-Ray is highly rated for its ability to produce photo-realistic visualisations with its cutting-edge ray tracing technology. Whether you’re creating interior designs, architecture, 3D models, or special effects for film and TV, V-Ray can help you bring your vision to life. Since it also renders faster than other 3D applications, you can work faster and more efficiently.

However, for V-Ray to render the perfect scene, you need to use the right materials. In the context of 3D design and modelling, “materials” refer to digital representations of the surfaces and textures that you’d find in real-world objects.

The materials can play a huge role in creating realistic visuals, so it’s essential to use the right ones for your project. In fact, 80% of the time, V-Ray materials are the only elements you need to get an amazingly realistic render.

In this guide, we’ll cover what V-Ray materials are and how to navigate the V-Ray materials library. Then, we’ll teach you how to get started with using V-Ray materials, including how to install them in SketchUp, plus helpful tips for making the most of this tool.

What are V-Ray Materials?

V-Ray materials are the main tool for creating shaders, aka surface textures, in your 3D scenes. They’re responsible for defining the look and feel of your models and can help you create everything from realistic skin and fur to shiny metals and glass.

V-Ray materials also offer a wide range of options for rendering your visuals, from photorealism to stylized. This makes them perfect for a variety of different projects, from product visualisations to concept art.

It goes even more detailed than that – materials for V-Ray allow you to simulate ultra-detailed representations of how elements like light, colour, texture, and reflection act on a given surface.

On top of that, it also gives you greater control and accuracy for complex materials such as metals, glass, and fabrics, all of which can be difficult to represent using less-advanced 3D rendering software. Additionally, V-ray materials also offer quick rendering times without compromising visual fidelity.

You can use materials for V-Ray on any platform that supports the V-Ray plugin, including SketchUp.

To access V-Ray materials in SketchUp, simply follow the steps below:

  • First, open the “Asset Editor” by clicking the corresponding button.
  • You’ll then see a preview of all the materials available in the library.
  • The material list includes all the design colours, and these correlate with the colours of materials in SketchUp.
  • When you select a material in V-Ray, it will also be highlighted and previewed in SketchUp.
  • Likewise, when you choose a material in SketchUp, it will be highlighted and previewed in the V-Ray asset editor.

Using the V-Ray Materials Library

Once you’re inside the V-Ray materials library in SketchUp, the navigation is intuitive.

First, you’ll see a left-pointing arrow, and clicking on this will pull up the V-ray asset editor. Click that, and you’ll be presented with a list of categories of V-Ray materials. These categories include glass, concrete, foam, metal, bricks and more – each category has a handful of preset materials as well.

While the left arrow in the V-Ray editor pulls up the material library list, the right arrow will open up the layered material editor.

Here, you can make adjustments to the material’s transparency, opacity, reflection, refraction and more.

For instance, you can adjust the roughness of a material or change the glossiness, and you can even fine-tune the colour and brightness settings to make it as realistic as you want.

To save time, you can also use the Quick Settings collection available in the V-ray asset editor.

This section includes a range of settings that you can apply with just one click, making it easier to experiment and find the look you want.

Note:

Installing V-Ray automatically downloads the materials library, but you can easily add and manage additional material libraries by downloading them from online repositories.

Getting started with V-Ray Materials

Beginners to materials for V-Ray will find the Quick Settings feature an excellent way to get started.

Simply pick a material from the asset editor and then select a preset setting. This will instantly alter the preview of your material to give you an idea of what it will look like in a render.

By default, the preview is set to show a ball or sphere, but this can be changed to better represent the model in your render.

For example, you could select the fabric option or a floor option or set the wall option to view the material on a flat plane.

Through the preview, you’ll get a better idea of how the material will look with applied lighting, such as how glossy or reflective the material will be.

Here’s a quick walk-through of how you can use Quick Settings in V-Ray to a colour material:

  • Open the V-Ray Asset Editor or the SketchUp materials window – remember that you can use either one, but some find it easier to use the asset editor directly.
  • Click your chosen material.
  • Click the drop-down that opens up – this will give you the available Quick Settings.
  • Choose a preset that looks close to what you want – maybe it’s a “metallic” setting, textured concrete, or something more reflective like glass.
  • Observe how this setting affects the preview in terms of lighting, reflections, etc.
  • Play around with the adjustments. For instance, tone down or brighten up the lighting or adjust the glossiness and colour of the material.
  • Once you’re happy with the settings, click Apply, and you should see your changes instantly applied to the preview in SketchUp.

Since the Quick Settings facility allows you to rapidly explore the available options, you can use this feature to get more comfortable with the various settings. Then you’ll be able to go in and fine-tune the materials as you get more experienced.

How to install V-Ray Materials

The default materials library that comes when you install V-ray is a good starting point, but for more control and variety, you’ll eventually want to build up your own library of materials.

Luckily, you can find many of these online, and the sheer number of options available means you can create almost any look you want.

For instance, this V-Ray materials resource has a massive selection of materials, such as:

  • V-Ray fur
  • Plastics
  • Liquid
  • Cloth
  • Stone
  • Transparent
  • Organic
  • Etc.

In addition, they also have special materials for architecture and automotive, along with special effects and textures.

It’s easy enough to find, download, and install these materials from online sources. Here’s what you can do:

  • To get started, find the material you want. For instance, you can Google the phrase “V-Ray materials for architecture,” and you’ll find many sources.
  • Next, once you’ve chosen a material set, download it by clicking on the provided link.
  • Most online sources for V-Ray materials compress the files into a zip folder because multiple files are typically involved in each material. Unzip this folder somewhere on your computer.

Now you’re ready to install the files in your V-Ray asset editor. Here’s how to do it:

  • First, open SketchUp or the V-Ray asset editor.
  • Then, go to the “Material” menu, then click on the “Get Material” button.
  • Next, on the top left-hand corner of the window, click on the arrow and select “Open material library.”
  • After that, you’ll be prompted to select the file you want to open. Go to where you unzipped the material files and select it.
  • Upon clicking, you’ll see all the materials in the set appear in a list.
  • Click on each material to preview it and decide if you want to use it.
  • Then, click “OK” when you’re done, and the material will be added to your library.
  • You can now use it in your project.

Keep in mind that the more complex the material, the more files you’ll have to install. So double check that you’ve installed all of the necessary files before moving on.

Make things easier with V-Ray Materials

It’s no surprise that V-Ray has won not just multiple awards but also the hearts of millions of architects, 3D designers, and visualizers who rely on its power to create stunning visuals.

Through features such as Quick Settings and the easy installation of materials, V-Ray makes creating photorealistic renders easier than ever, especially in tandem with platforms like SketchUp.

The materials library that comes with V-ray is an excellent place to start, but don’t hesitate to explore online resources to find the perfect material for your project.

Materials for V-Ray are just one of the many powerful tools you can take advantage of as a SketchUp user.

Check out our wide range of SketchUp tutorials to help you master 3D modelling, rendering, and more. Our SketchUp Pro resources and tips can also help you get the most out of this powerful 3D modelling software.

Finally, grab your FREE 7-day trial of SketchUp Pro by signing up here!

Garden Design for Beginners in SketchUp

There’s nothing quite as lovely as relaxing in a beautifully designed, fit-for-purpose outdoor space, whether it’s something sleek and contemporary focusing on a variety of greenery or a bloom-filled space with traditional good looks at its heart. If you’re exploring the exciting subject of garden design for beginners, this article is for you. We’re going to reveal a host of cool and useful garden design tips for beginners, aimed to inspire. Read on to find out the steps you’ll need to take to design a garden, understand the space, and know the best tools for garden design. Welcome to our guide to simple garden design for beginners. 

Steps to Design a Garden

So far all you’ve got is an empty outdoor space, with or without a lawn. Maybe you have a part-designed garden and you want to bring all the elements together in a creative way that works both visually and practically. Maybe you want to redesign an existing garden. Whatever your goal, it can be hard to know where to start. While embarking on a garden design project can be daunting, SketchUp makes the whole process fun and easy. So first in our garden design tips for beginners article, here’s an idea about the things you’ll need to think about along the way. For the purposes of this article let’s imagine you’ve been asked to design a garden for a client. But the steps are the same whatever your starting point, whatever the project, even if it’s you designing your own garden.    

Step one is the initial consultation and brainstorming phase. If there’s no client you won’t need to figure out what they want, so you can dive right into the exciting brainstorming bit. What are the priorities you need to think about? Do you want it to be an entertainment space, or a place where gardening itself is the focus? Will children be using the space, and if so what age are they? Should it take safety into account for elderly people or does it need to be pet friendly, avoiding poisonous plants that can harm cats and dogs? 

Step two in our guide to simple garden design for beginners is all about getting to know the site in intimate detail. A detailed site survey will involve essentials like taking accurate measurements of the space. Bear in mind it’s always best to measure at least twice to make sure you’ve got it right. You’ll also need to pin down peculiarities like drain covers and access to water and sewage pipes. You might need to think about electricity cables or the buried equipment feeding into a ground source heat pump. If the land slopes it matters because you need to consider drainage to avoid potential flooding and stop large amounts of water gathering. Then there are existing features like patios, sheds, ponds, trees and other planting. It’s important to know that these days, every tree is precious. 

Step three involves creating your design concepts and mood board. Now you understand the scope of the space and you’ve decided on the client’s – or your own – requirements, you can get down to putting together an exciting collection of images, colours, materials and surfaces to play with, which represent what you’re considering for the final design. You might choose the elements based on their colour, the materials they’re made from, the fact that they flower or fruit at different times of the year, the maintenance, the weather, and all the things that will either restrict or direct the design. 

Step four in our tips on garden design for beginners, you’ll draft a concept plan – and this is where SketchUp is extremely useful. It’s really easy and fast to draft garden design ideas in SketchUp, and the representations you make will look wonderfully realistic. Assuming you’ve got the measuring bit right from the start, your ideas and inspiration should flow. Aim to nail down all of your key planting, garden furniture layout, and every other key garden design aspect you’ve specified. 

Step five is the stage at which you transform your ideas into full garden design plans, all based on your original ideas in SketchUp. It’s a simple matter to draft a complete garden design. You should include details of all the hard landscaping – whether it’s walls or sunken areas, hills and hillocks or flat areas for dining and entertaining, wildlife areas and water features. Plus the planting and any existing features you’re planning to keep and work around. 

Step six is the build itself, the garden design implementation. Because you’ve taken such care and put so much thought into each step, this part should go pretty smoothly. You might, of course, discover unexpected features either buried or hidden in some other way, but SketchUp makes it really easy to amend designs as well, so all is not lost.

Understanding Your Space

A garden site survey can make all the difference at this stage in the garden design beginner’s process, simply because it’s so rare to find an outdoor space that’s completely flat and a perfectly regular shape.  These details need to be carefully surveyed and accurate measurements taken. You’ll have to get to grips with the entire space, measuring it with great care to support your design. This means identifying, locating and measuring every element of the space that can’t be moved or changed, for example existing paths, steps, patio, garden entrances, drain covers, gutters, and more. 

It’s also sensible to make a note of all the different materials used within the garden, including grassed areas and block paving, concrete and paving stones, gravelled areas, borders and the rest. This level of intimacy, also covering the types, locations and sizes of trees and shrubs, is well worth noting. In garden design this deep level of knowledge and familiarity can make your eventual build so much easier and faster, with fewer hiccups and less potential for delay. 

Best Tools for Garden Design

There’s a lot to be said for designing a garden the traditional way, with pen and paper, and it’s still useful. Drawing by hand is also a pleasure for many. Plenty of garden designers genuinely enjoy the process of sketching by hand, at least when they’re getting their basic early ideas together. On the other hand SketchUp is a far more powerful and flexible design tool, as well as being faster and great fun. Once you’ve got to grips with the tool your garden design ideas can flow as fast as your thought processes, which makes designing even more of a pleasure. 

SketchUp is ideal for quickly capturing creative garden design ideas. It’s also ideal for trying out ideas in a way that provides a realistic 3D view of what the finished garden will look like, without having to do any real-life landscaping or garden modification. This means simple garden design for beginners can easily involve test driving radical ideas without having to actually do anything radical on the ground. You’ll feel free to take your designs to the max and beyond with confidence. 


The benefits of SketchUp are the same whether you’re creating a brand new garden design from a blank space or a garden redesign where you’ll be keeping some of the legacy features, either making the most of them or disguising them by rolling them cleverly into your design. And the 3D design capabilities of SketchUp are genuinely awe-inspiring. You can realise your proposed garden design virtually and evaluate it, along with your client if there is one, using 3D walkthroughs that look startlingly realistic. 


It’s fast and easy to make design tweaks and changes are easily achieved in SketchUp too, and every step of the process is easy and intuitive. As a garden design beginner you’ll love the way it supports learning as well as creating a professional looking garden design easily, having had fun doing it. A huge collection of tutorials and learning resources supports you all the way.  


Because SketchUp garden designs can be readily shared for comment and collaboration it saves time and hassle making decisions. And the programme’s superb augmented reality and VR capabilities really bring gardens to life for yourself and the people you design for. 


Last but not least, SketchUp generates the design documentation you need for a professional job via Layout. There’s a free version to play with, offering lots of exciting functionality, but once you’ve got to grips with it you’ll probably want to move to the brilliant all-singing, all-dancing SketchUp Pro, widely used and loved by professional garden and landscape designers across the globe. 


We hope you’ve enjoyed our guide to garden design for beginners. We’d like to wish you years of happy garden design! 


How to Design A Garden In LayOut SketchUp

The great outdoors matters more than ever before thanks to covid, which left millions of us wanting to create an outdoor space that looks great, is a lovely place to spend time in, and ticks all the right garden design boxes. So, how do you design a garden from scratch? Easy. Use SketchUp. SketchUp gives you a brilliantly simple way to create imaginative garden designs in a creative way that doesn’t drive you nuts with complexity or tie you in technical knots. It’s easy to use, fun to work with, and the results are outstanding. Here’s everything you need to know about how to design a garden layout using the world’s best-loved garden design software tool. By the end of it you’ll be raring to go, full of inspiration.

Designing Gardens in SketchUp

First, let’s explore exactly why SketchUp is such a popular tool for designing gardens. From a practical perspective it’s available in a free version, which gives you an excellent way into the intricacies of professional-style garden and landscape design. And it’s an exciting process to experience because in SketchUp you’re designing in a 3D space. The sheer realism of the images you produce makes it so much easier to appreciate the look and feel of garden designs. It’s easy for clients and other stakeholders to ‘get’ the design and know where you’re coming from. 


SketchUp is also really easy and fun to use, and fast to learn. There’s no steep learning curve to navigate, just a set of simple actions designed to get you where you want to be, quickly. Your workflow will feel smooth and logical, and you’ll create great results in no time. You’ll find it such a pleasure to generate fantastic 3D garden designs. Because SketchUp is totally intuitive, every garden design barrier is removed. There’s no gap between your own creativity and creative expression. 


If you’ve ever seen a SketchUp 3D garden design model rendered into a photorealistic image, you’ll know how startlingly powerful it can be, perfect for experimenting and just as good for convincing clients and others about your ideas. 


You won’t waste any time with SketchUp, either. A lot of the hard work has already been done. There’s an abundance of excellent extensions and plugins to support every aspect of quality 3D design, including rendering tools to bring your ideas to vibrant life with natural and man-made lighting effects. And there’s the legendary 3D warehouse, packed full of pre-designed 3D models that you can simply drag and drop into SketchUp, ready to impress. There’s no need to spend ages drawing a tree when there are countless realistic, beautiful 3D trees ready for you to use in any way you like. 


The 3D warehouse is stacked with every sort of garden related object and feature, including trees and plants, water features, lawns, ponds, rockeries, rocks, garden furniture, aggregates, exterior lights, mazes, fences, walls, hedging, and much more. There are even some excellent examples of Garden Layout designs pre-created in SketchUp, which you can use, manipulate, experiment with and enjoy for work or play.  


The relationship between SketchUp Layout and SketchUp is worth mentioning. While SketchUp is all about 3D modelling, its partner tool SketchUp Layout is an excellent 2D partner, responsible for creating 2D documentation from your 3D design in no time. It’s perfect for collaboration, drives enhanced productivity, and makes your workflow more of a pleasure as well as faster and more efficient end-to-end.

How to Design a Garden Layout in SketchUp

Here are some step-by-step bullet point instructions revealing exactly how to draft a garden layout design in SketchUp. 

  • Make sure you choose the right units – inches or centimetres – in SketchUp. It’s important not to get them mixed up or your scaling will be all wrong from the offset 
  • Use the SketchUp drawing tools – the pencil, rectangle, arc and the rest – to draft the overall shape of your garden layout. Whatever drawing tool you choose you’ll find it intuitive and simple
  • Bear in mind the structures and buildings may already have been modelled
  • Draw your garden-paths, patio, borders, fences, walls and anything else you want to include 
  • Set your dimensions to match the required layout design
  • Apply different materials to the garden surfaces. You might want to create a gravelled area, a tarmac turning circle for a driveway, or a beautiful grassed lawn 
  • Check out the 3D warehouse to see if you can make any handy shortcuts by using pre-created features like trees, streams, rockeries, ponds and entertainment equipment like barbecues and outdoor ovens – then import the pre-made models you want from the 3D warehouse and scale them to match your own garden layout dimensions
  • It’s easy to move your imported 3D elements around in the space to create the garden design you want 
  • Once the garden layout design is completed and looking the way you like it, it’s time to create your 2D layout
  • First, save your 3D model
  • Then, in SketchUp Pro, go to: File > Send to Layout. You’ll see the layout prompts for template selection – plain paper is usually a good option
  • It’s good to know the tools in Layout work exactly the same way as they do in SketchUp, keeping things nice and simple 
  • You can easily switch back and forth between Layout and SketchUp, making changes along the way so everything’s perfect 
  • SketchUp uses the concept of a camera to create views, and the results are amazing. Your Standard Views are: Top, Bottom, Front, Back, Left, Right and Iso
  • For your Garden Layout view you’ll want to make a plan (Top) view of your garden design
  • Select your Top view of the Garden Layout, then print it by selecting: File > Print
  • Alternatively, switch back into SketchUp to make design changes easily and quickly
  • If you ever get stuck or want to learn more faster, try the extensive SketchUp tutorial collection, a great way to learn even more about this popular 3d drawing and design tool 

It really is that easy and pleasurable to learn how to design a garden from scratch. Once you’re into the swing of it, which won’t take long, you’ll be able to draw almost as quickly as your imagination works, opening up a whole new world of creative efficiency, professionalism, and variety. Enjoy your garden design job more, love creating a beautiful garden for your own home.. it’s all at your fingertips thanks to SketchUp. 

SketchUp Plugins for Woodworkers

So you’re exploring SketchUp woodworking? You already know it’s used by thousands of talented woodworkers and carpenters around the globe to design wonderful things quickly, easily and accurately. But you’ve also heard about extensions, basically the same thing as plugins, extra tools you can use to make your life even easier and more pleasurable. Let’s take a good look at the best SketchUp extensions for woodworking. By the end of this article you’ll know which plugins will support your work, enhance it, and bring you even more of SketchUp’s legendary functionality. Here’s how using SketchUp for woodworking will improve the way you work, speed things up, and open a brand new world of fresh ideas to take you to the next level.

What are SketchUp Plugins

First, what are SketchUp woodworking  plugins? SketchUp Plugins are extra tools developed by members of the SketchUp community. They do it for free, dedicated to enhancing the programme’s excellent native tools and making SketchUp more useful by adding tools that are not available natively. Native, by the way, simply means the fixed tools designed into the programme.

If you’re wondering, the terms ‘plugin’ and ‘extension’ are mostly interchangeable in SketchUp. The difference is that plugins can have the .rb file extension, but extensions tend to be more robust, using the file extension: .rbz. Whichever you choose it’ll be intelligently designed to make your workflow easier, more creative, and faster.  

You can install SketchUp plugins using the automatic method or the manual method. You install .rbz plugins from inside SketchUp itself with one click. The .rb format is just as easy to install but you do it manually using a simple drag and drop process.  So which ones will you find you need to use the most often as a woodworker or carpenter? Next, let’s dive into some of the very best SketchUp Extensions for Woodworking.

OpenCutList

OpenCutList is available from the extension warehouse and it won’t cost you a penny. One of the best SketchUp extensions for woodworking, it’s free. The extension produces 100% accurate cut lists and cutting diagrams for woodworking or similar projects. A cut list is a list of all the parts needed to build a woodworking project, containing a number for each part along with its thickness, width, and length. Obviously it’s really important to get your cutlist right first time, since otherwise you could end up wasting money because you’ve bought too much of something or having to buy more because you didn’t buy enough in the first place, neither of which is good for clients, deadlines, and profit margins. Using SketchUp with this extension is a great aid for woodworking projects, and like everything to do with the programme it’s nice and easy to use.

This SketchUp woodworking plugin works by examining your components and the material properties of a scene, automatically creating a list of parts and cutting diagrams based on properties of the material, whether it’s solid wood, sheets of wood, dimensional timber or edge banding. You can change the grain direction, trimming sizes, saw kerf width, part oversizes, standard sizes of panels and more, and easily find parts in your model by highlighting them then indicating the grain direction and component orientation. It deals with offcuts and panels with ease. You can print or export the part lists and cutting diagrams and import objects from a CSV file.

CutMap

The CutMap extension creates in-model cutting diagrams or cutlists from SketchUp models. In-model cutlists let you use the power of SketchUp to view, examine, and modify your cutlists. Importantly, this means you can easily adjust them as you need to from inside your 3D design model. It’s yours for free from the extension warehouse. Sadly it isn’t compatible with the latest version of SketchUp… yet. The Beta version is available for you to play with, so watch this space. It’s such a handy tool it’ll probably be joining the rest soon.

GKWare Stairmaker

Whether you’ve designed a staircase before or not, you can probably appreciate how complicated they are to design, with so many design inter-dependencies and tensions. It’s a physics thing, and GKWare Stairmaker makes short work of it for you. It’s yours on a 7 day free trial basis then it costs just $50 for a non-expiring licence that lasts forever. One of the best SketchUp extensions for woodworking, this is a superb extension for the creation of curved and straight stairs and comes with a wealth of exciting options. There’s even a really good, detailed manual written by the plugin’s creator.

Stringers can be housed, also called routed, or sawtooth, also called cut. You can make closed or open riders with ease and flare or progressively flare the treads. It’s easy to change the thickness and depth of each Stringer and you’ve got total control over the thickness of treads, risers, landing thickness, nosing depth, bullnose radius and more. You can convert the stair tread drawings from 2D to 3D and name your own stair style with its own saved parameters. As you can imagine this takes designing staircases – even spiral ones – to a different level, making it easier to be creative while getting all the technical aspects right the first time.  

VMS Up

There are free and paid versions of VMS Up available, and an annual licence costs $46. This is a complete set of SketchUp woodworking tools. The VMS-Up package is a virtual woodworking shop that taps directly into your everyday processes. It handles essentials like mortise and tenon machining, domino or slat assembly, groove and moulding machining, and hardware installation with flair, letting you focus on the creative side of things. It’s all about faster, more accurate, better quality design and modelling.

The tools in this set use the same language you already use in your working life, making it intuitive. Using SketchUp for woodworking is even more fun when you can easily design your model in three dimensions realistically and professionally, and know the manufacturing and assembly will go smoothly. The package is also great for making side drawings. The VMS-Up package is available only from Adebeo, and there are some really good video tutorials to check out. On the downside, many of them are in French. But you can still understand what’s happening on the screen, and Google translate can turn the transcript into English for you. Just copy and paste the transcript from inside YouTube then drop it into the online translator.

K2WS_Tools

K2WS_Tools is available in the extension warehouse and there’s a free version to play with. This is how you create real furniture joints in models. It’s important to know this one only works on components, so don’t try it with anything else.

The tool includes a Mortise & Tenon Joint Option, Loose Tenon, Biscuits and Dowels, Domino function, Box Joints, Dovetails, Screw Holes, and Pocket Screw Holes. Some people call it the Dovetails Tool, which makes perfect sense. It’s compatible with SketchUp 2021. If you’d like to check it out there are some YouTube videos to watch, including demos and a drawing scene. Apparently, although the author’s site hasn’t been updated since 2014, it still works like a dream.

SketchUp plugins and extensions are supported by a load of handy tutorials. You can use the extensions with SketchUp free, now called SketchUp Web, and the Pro version. Now all you need to do is go design something amazing! 

Landscape lighting design in SketchUp

It looks uncannily real. It optimises your workflow, brings your ideas to vibrant life, and delights your clients. We’re talking landscape lighting design, and SketchUp makes it ridiculously easy. You’ll quickly learn how to apply day and night, natural and man-made lighting, all with a few clicks. Creating an awe-inspiring variety of effects, from dawn to dusk, sunny to dull, summer to winter is simpler than you might think. So how do you design outdoor landscape lighting? If you’re researching landscape lighting design, this article reveals all about how to do it in SketchUp, one of the world’s best-loved 3D design tools. Here’s how to plan outdoor landscape lighting like a pro, creating hyper-convincing effects for fun and at work.

How to Add Light in SketchUp

It’s simple to add convincing lighting to a SketchUp model, whether it’s garden lighting or to show the way the sun shines on a space as the day passes. It’s a great way to figure out where the shaded areas will be, and where lighting might enhance a design as well as make the space safer after dark.


Interior light in SketchUp lets you present a huge variety of interior lighting as accurately as the real thing. Light your design with different colours, render realistic shadows, simulate bright sunshine and make reflections so real they’re photographic, it’s all so simple.


There’s a variety of SketchUp Extensions to do the landscape lighting design job, rendering light sources for you in no time, including the popular V-Ray extension. The V-Ray asset editor lets you fine-tune your render settings. Open the ‘lights’ tab to add sunlight by default. Choose another option from a menu of sun-related parameters including colour, intensity, and size. To turn the sun off, simply disable it.


An alternative light source like a dome light comes with exciting parameters, too. Increase the light’s intensity to brighten a rendered image if you like. HDRI – High Dynamic Range Imaging – is fantastic for making detailed shadows and real-looking highlights. Once you get going you’ll love producing such hyper-realistic renderings, and so will your clients.


You’ll also enjoy exploring the 3D Warehouse, stuffed with pre-made outdoor lighting models you can download, play with and use in your own designs. The outdoor lighting section for example, contains goodies like modern and traditional lamp post designs, wall lighting, pendant lights and loads more, all free to use.   

How to Plan and Design Outdoor Landscape Lighting

3D renderings of landscape designs present many challenges, but SketchUp plugins take the pain out of the landscape light creation process, making it inspiringly fast – which drives better creativity and saves you a lot of time. It helps to get familiar with interior 3D rendering in SketchUp. So how, exactly, do you create realistic exterior renderings? For now, focus on just one extension, VRay. Once you’ve got to grips with it, the other light rendering extensions are easy to drive.

First, make yourself a pre-designed 3D landscape and take it to the ‘rendering ready’ stage. Choose a realistic height to create the rendered view from, usually head height, about 1.67 metres. Then set it using the lookaround tool. Try using the ‘two point perspective’ popular with architectural designers. Now you’ve completed the ‘shot’ of the 3D design, it’s time to set up your lighting options:

·         Turn on material override

·         Setup glass so that it can’t be overridden

·         Setup draft render settings that render quickly as you make changes

·         Set camera exposure settings 


There are two options to light a daytime scene, Dome light and Sunlight. VRay Sun creates realistic shadows and reflections but uses a default background you might want to replace, something you can do via Photoshop. Dome lighting gives you the most realistic lighting, background and reflections. The only downside is the work you need to set it up.


You can use realistic materials on all the surfaces in the shot. Just select the right materials for each. You can also add more exterior 3D elements like plants, trees, and rocks. Just be aware it uses up additional SketchUp resources.  


VRay’s lighting options model almost every kind of exterior lighting including Mesh light, Sphere light and Spot light as well as the sun. And you can put the lights anywhere in your design then adjust the parameters in VRay to get the perfect Light colour, Light intensity, the angle of the light and more.


These exciting landscape lighting design capabilities let designers model realistic light from all sorts of exterior lighting – from uplighters to spot lights to garden lights. You can light specific areas and destinations in the landscape, maybe a patio or seat where people will sit and relax, or an outdoor entertainment area with a BBQ, chiminea and garden furniture. Light a pathway, a gateway, an entrance and exit, a route through the landscape, anything you like. You can even try and test various lighting designs in the 3D model. Once you’ve configured the lighting the way you want, you can change the camera settings to achieve perfect rendering.


Whatever you design for the great outdoors it’ll look so real it’ll convince every stakeholder, making it so much easier to get agreement, approval, and sign-off.


Now you know how to design outdoor landscape lighting, and how to plan outdoor landscape lighting with flair. Go create light, and make your designs more realistic than ever before. If you like, download a free 7 day trial of SketchUp Pro and have fun playing with light. You might also enjoy browsing through the many tutorials on lighting exteriors in SketchUp, designed to make life even easier.  

Sketchup For Construction

Using SketchUp for Construction Drawings

Have you been looking for information about SketchUp for construction? SketchUp construction design software is widely used in your sector, a respected and popular tool used to speed up design, making the entire process smoother and faster. SketchUp Pro lets you identify potential issues before they become real-world problems, figure out a fair price for a construction project, and help your clients understand the plans more clearly and easily than ever before. Here’s what you need to know about the benefits of creating top class SketchUp construction drawings. By the end of this article you’ll know exactly why it’s such a good idea to know how to build a house in SketchUp.

SketchUp 3D Construction Modelling

SketchUp 3D construction modelling capabilities provide incredibly valuable design visualisation. As someone who works in the construction sector building plans are second nature to you, but not necessarily for your less-experienced clients. SketchUp construction documents make it a whole lot easier for non-experts to understand your plans.


SketchUp Viewer lets people investigate, evaluate and explore construction design projects before they’re brought to life, something that saves money, time and hassle. It means you can carry out revisions at an early stage before actually committing to the final construction documentation. SketchUp construction plans even come with the capability to use AR/VR to evaluate the different construction design options virtually. It’s a powerful tool that’s very easy to use as well as fun. And that makes it the perfect choice for construction contractors, small and large.

SketchUp for Construction Drawings

SketchUp for construction, using SketchUp Pro in conjunction with Layout, is a brilliant way to create accurate, useful, clear construction drawings directly from 3D models. It can be done in two ways, each with its own pros and cons.


Firstly, you can get the 2d information from the model itself. This means the model has to be very accurate in the first place. It’s important to add colour and texture to the interior of the elements so the sectioned model is good and clear. It also helps to apply a different colour or texture to each different kind of material. Using this method means your plans and sections are always closely related to the model. When you make a change in 2d it doesn’t take much work to make it appear in 3d. On the down-side the modelling takes longer and you need to know all about the construction of the building in detail. 


Alternatively you can generate a 2d group in SketchUp that contains all the 2d info you need, generated simply by right-clicking on the section plane. When you edit this group you can add all the fine detail you need to create accurate plans and sections. It’s handy not having to model everything in detail and being able to control the level of detail, but on the down side there’s no link between the model itself and the Layout presentation. Plus, the details of the section cut involves a 2d job, something SketchUp isn’t primarily designed for. On the other hand there are always TIG 2D Tools to rely on, and Layout itself helps a lot.


Layout lets you include essentials like dimensions, labels and text, all of which matter when you’re trying to get the details of a construction project across quickly, clearly and accurately. In exactly the same way you’d use old-school word processor tech, you type text into the drawing area. You can also import text from a file or even add Auto-Text defined on special fields inserted into the document. And the text can be formatted to your brand for great brand synergy.


Labels and dimensions are impressive. Labels come with an arrowed leader line which makes it easy to highlight individual elements. It can show Auto-Text as well as data from a SketchUp model. And dimensions display measurements either on the page or from a SketchUp model. You can share your SketchUp drawings in a variety of popular standard formats and import them into different CAD software tools. And you can print SketchUp for construction drawings easily, which is great when you prefer to work from printed diagrams rather than a screen.


Would you like to check out how to use more aspects of this great tool? Take a look at our tutorials, then figure out whether you need the free or Pro version via our handy comparison page. 

Now you know what Sketchup drawings, Sketchup dimensions and Sketchup diagrams can do for you. Will you be harnessing the amazing power of SketchUp Pro for your next construction project?

How are arcs made? Every arc you draw naturally contains 12 segments, but you can ask the programme to use more or less. More segments will make an arc smoother, but it’s more resource-hungry for Sketchup. Using fewer segments makes things faster but there’s a pay-off in the form of an arc that might look a bit blocky. It depends on the purpose of your drawing. For client-ready work, you might want to make things look as smooth as possible. For an initial sketch or early draft you might be OK with fewer segments and a less-smooth Sketchup curved surface.

About Elmtec

Elmtec have been the UK distribution partner for SketchUp since 2010, and service a network of UK and Irish resellers. We have over 22 years’ experience within the digital design community.

Contact Us

T: 01844 263 750
E: sales@elmtec.co.uk
W: www.elmtec.co.uk/sketchup