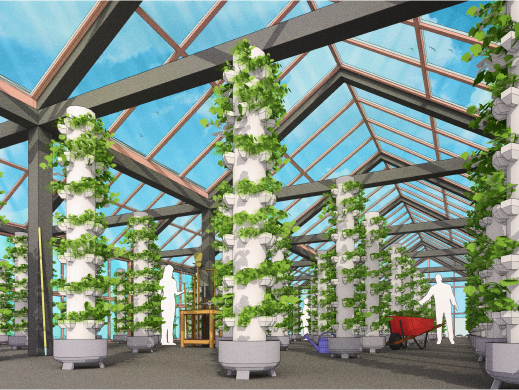
V-Ray by Chaos® is an incredibly powerful 3D rendering plugin that’s used by professionals in diverse niches like film and TV, advertising, and architectural visualisation. It’s available for platforms like SketchUp, Maya, 3ds Max, Cinema 4D and more.
V-Ray is highly rated for its ability to produce photo-realistic visualisations with its cutting-edge ray tracing technology. Whether you’re creating interior designs, architecture, 3D models, or special effects for film and TV, V-Ray can help you bring your vision to life. Since it also renders faster than other 3D applications, you can work faster and more efficiently.
However, for V-Ray to render the perfect scene, you need to use the right materials. In the context of 3D design and modelling, “materials” refer to digital representations of the surfaces and textures that you’d find in real-world objects.
The materials can play a huge role in creating realistic visuals, so it’s essential to use the right ones for your project. In fact, 80% of the time, V-Ray materials are the only elements you need to get an amazingly realistic render.
In this guide, we’ll cover what V-Ray materials are and how to navigate the V-Ray materials library. Then, we’ll teach you how to get started with using V-Ray materials, including how to install them in SketchUp, plus helpful tips for making the most of this tool.
What are V-Ray Materials?
V-Ray materials are the main tool for creating shaders, aka surface textures, in your 3D scenes. They’re responsible for defining the look and feel of your models and can help you create everything from realistic skin and fur to shiny metals and glass.
V-Ray materials also offer a wide range of options for rendering your visuals, from photorealism to stylized. This makes them perfect for a variety of different projects, from product visualisations to concept art.
It goes even more detailed than that – materials for V-Ray allow you to simulate ultra-detailed representations of how elements like light, colour, texture, and reflection act on a given surface.
On top of that, it also gives you greater control and accuracy for complex materials such as metals, glass, and fabrics, all of which can be difficult to represent using less-advanced 3D rendering software. Additionally, V-ray materials also offer quick rendering times without compromising visual fidelity.
You can use materials for V-Ray on any platform that supports the V-Ray plugin, including SketchUp.
To access V-Ray materials in SketchUp, simply follow the steps below:
- First, open the “Asset Editor” by clicking the corresponding button.
- You’ll then see a preview of all the materials available in the library.
- The material list includes all the design colours, and these correlate with the colours of materials in SketchUp.
- When you select a material in V-Ray, it will also be highlighted and previewed in SketchUp.
- Likewise, when you choose a material in SketchUp, it will be highlighted and previewed in the V-Ray asset editor.
Using the V-Ray Materials Library
Once you’re inside the V-Ray materials library in SketchUp, the navigation is intuitive.
First, you’ll see a left-pointing arrow, and clicking on this will pull up the V-ray asset editor. Click that, and you’ll be presented with a list of categories of V-Ray materials. These categories include glass, concrete, foam, metal, bricks and more – each category has a handful of preset materials as well.
While the left arrow in the V-Ray editor pulls up the material library list, the right arrow will open up the layered material editor.
Here, you can make adjustments to the material’s transparency, opacity, reflection, refraction and more.
For instance, you can adjust the roughness of a material or change the glossiness, and you can even fine-tune the colour and brightness settings to make it as realistic as you want.
To save time, you can also use the Quick Settings collection available in the V-ray asset editor.
This section includes a range of settings that you can apply with just one click, making it easier to experiment and find the look you want.
Note:
Installing V-Ray automatically downloads the materials library, but you can easily add and manage additional material libraries by downloading them from online repositories.
Getting started with V-Ray Materials
Beginners to materials for V-Ray will find the Quick Settings feature an excellent way to get started.
Simply pick a material from the asset editor and then select a preset setting. This will instantly alter the preview of your material to give you an idea of what it will look like in a render.
By default, the preview is set to show a ball or sphere, but this can be changed to better represent the model in your render.
For example, you could select the fabric option or a floor option or set the wall option to view the material on a flat plane.
Through the preview, you’ll get a better idea of how the material will look with applied lighting, such as how glossy or reflective the material will be.
Here’s a quick walk-through of how you can use Quick Settings in V-Ray to a colour material:
- Open the V-Ray Asset Editor or the SketchUp materials window – remember that you can use either one, but some find it easier to use the asset editor directly.
- Click your chosen material.
- Click the drop-down that opens up – this will give you the available Quick Settings.
- Choose a preset that looks close to what you want – maybe it’s a “metallic” setting, textured concrete, or something more reflective like glass.
- Observe how this setting affects the preview in terms of lighting, reflections, etc.
- Play around with the adjustments. For instance, tone down or brighten up the lighting or adjust the glossiness and colour of the material.
- Once you’re happy with the settings, click Apply, and you should see your changes instantly applied to the preview in SketchUp.
Since the Quick Settings facility allows you to rapidly explore the available options, you can use this feature to get more comfortable with the various settings. Then you’ll be able to go in and fine-tune the materials as you get more experienced.
How to install V-Ray Materials
The default materials library that comes when you install V-ray is a good starting point, but for more control and variety, you’ll eventually want to build up your own library of materials.
Luckily, you can find many of these online, and the sheer number of options available means you can create almost any look you want.
For instance, this V-Ray materials resource has a massive selection of materials, such as:
- V-Ray fur
- Plastics
- Liquid
- Cloth
- Stone
- Transparent
- Organic
- Etc.
In addition, they also have special materials for architecture and automotive, along with special effects and textures.
It’s easy enough to find, download, and install these materials from online sources. Here’s what you can do:
- To get started, find the material you want. For instance, you can Google the phrase “V-Ray materials for architecture,” and you’ll find many sources.
- Next, once you’ve chosen a material set, download it by clicking on the provided link.
- Most online sources for V-Ray materials compress the files into a zip folder because multiple files are typically involved in each material. Unzip this folder somewhere on your computer.
Now you’re ready to install the files in your V-Ray asset editor. Here’s how to do it:
- First, open SketchUp or the V-Ray asset editor.
- Then, go to the “Material” menu, then click on the “Get Material” button.
- Next, on the top left-hand corner of the window, click on the arrow and select “Open material library.”
- After that, you’ll be prompted to select the file you want to open. Go to where you unzipped the material files and select it.
- Upon clicking, you’ll see all the materials in the set appear in a list.
- Click on each material to preview it and decide if you want to use it.
- Then, click “OK” when you’re done, and the material will be added to your library.
- You can now use it in your project.
Keep in mind that the more complex the material, the more files you’ll have to install. So double check that you’ve installed all of the necessary files before moving on.
Make things easier with V-Ray Materials
It’s no surprise that V-Ray has won not just multiple awards but also the hearts of millions of architects, 3D designers, and visualizers who rely on its power to create stunning visuals.
Through features such as Quick Settings and the easy installation of materials, V-Ray makes creating photorealistic renders easier than ever, especially in tandem with platforms like SketchUp.
The materials library that comes with V-ray is an excellent place to start, but don’t hesitate to explore online resources to find the perfect material for your project.
Materials for V-Ray are just one of the many powerful tools you can take advantage of as a SketchUp user.
Check out our wide range of SketchUp tutorials to help you master 3D modelling, rendering, and more. Our SketchUp Pro resources and tips can also help you get the most out of this powerful 3D modelling software.
Finally, grab your FREE 7-day trial of SketchUp Pro by signing up here!


