How to design a house interior: An interior designer’s beginners guide to SketchUp

You want to know how to plan interior design of a house? This article reveals all about how to design the inside of a home. As an interior designer it’s your job to plan, research, and manage your design so it creates an internal environment that isn’t just good to look at. It’s also practical, designed to support good health and wellbeing whatever the purpose. It’ll be easy to move around, comfortable to be in, flow properly so people find it a pleasure to move around, and support the activities that go on in the space. If you’re looking to design the inside of a home, you’ll think about the needs of the people living there as well as common sense things like the layout and colours. Here’s how to make a complex job simple, enjoyable, and convincing to the clients you’re designing for. Read on to explore how to design a house interior in SketchUp, one of the world’s best-loved 3D design tools.

How to Plan the Interior Design of a House

You already know the design side of an interior is crucial to the interior’s success. Your first consideration in how to design a house interior is space planning, so let’s look at that. What is space planning? It’s the process of pinning down the absolute essentials before getting creative. You’ll figure out the design’s purpose, formalise all the functional requirements, and decide on the basic layout of specific areas in the home. As you can imagine this is an absolutely essential part of the interior design process, the information that underpins everything else you’ll do. 

Next there’s the process of interior design concept development. This reveals the central theme all your design elements are based on. You’ll bring it from the early ideas stage through to reality via careful planning. When it’s done properly an interior design concept provides a strong visual theme to evoke a specific mood using colours, spaces, and of course styling. It’ll involve making intelligent decisions about cabinetry, furniture, and the overall look and feel of the space. Lighting design is crucial too, of course, , since the way a space is lit tends to pull everything together into a satisfying whole that fits the brief perfectly. Thanks to SketchUp Pro and the other versions, all this is possible, simple to learn, and at your fingertips.

How to Design a House Interior in SketchUp

Next here’s some inspiring guidance for beginners to show you how to go about creating an interior design in SketchUp. This is how to plan interior design of a house. 

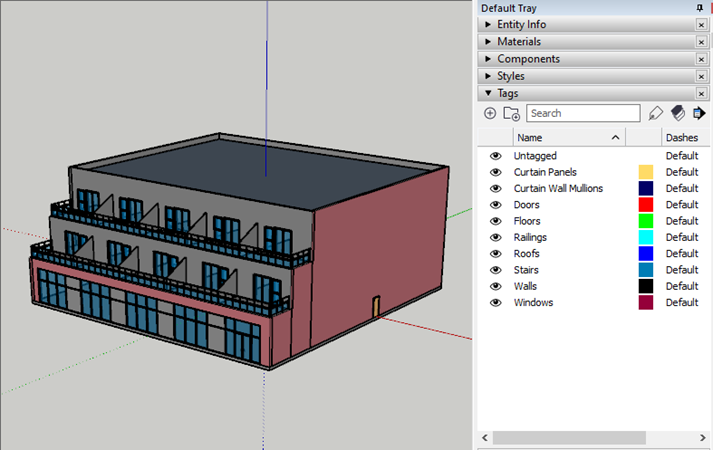
Start by preparing your workspace. It’s good to know SketchUp provides some useful templates to help you create an accurate floor plan for the project, saving you even more time. Next, you’ll need to set the camera viewpoint. You set it by clicking Camera > Standard Views > Top, which gives you an essential Plan View of the area you’ll be working on. It could be a single room, it could be an entire floor of a building, but whatever your starting point it has to be accurate, so measure more than once to double-check your assumptions. 

Next, it’s time to draw your geometries. In SketchUp Geometries consist of faces and edges, where edges are simply lines. As you can imagine it takes at least three lines to create a single face. If you change your view to X-Ray by clicking View > Face Style > X Ray, you’ll see the floor plan image as well as your lines. 

You’ll want to add accurate doorways and frames, windows and mouldings. If you’d rather just model one door and one window, you can do that with ease in no time. Rather than model them from scratch, you can simply use a pre-designed door, window or frame component made by someone else. 

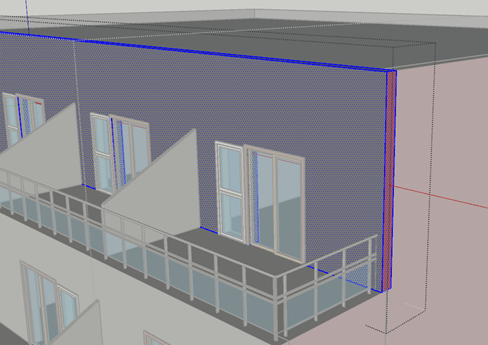
It’s handy to be able to organise the model using groups and components. Groups let you keep related elements organised in the drawing area, to make choosing and copying multiple elements easier. And SketchUp components let you re-use objects. 

There’s a huge collection of components and entire designs in the SketchUp Warehouse, all free to download and use in any way you like to save time and hassle. Choose from a wealth of quality pre-designed doors and windows, cabinetry and furniture, lighting, textures, materials and more. The 3D warehouse also provides cool examples of interior designs for you to refer to or use as you wish. 

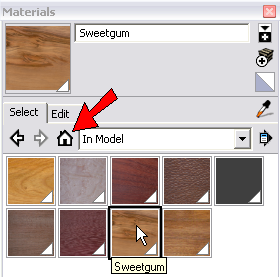
It’s just as easy and enjoyable to apply materials and decorate your interior once you’ve designed the layout. Materials add convincing colour and realistic textures to models, including delights like tiles, woods, colours, finishes and every imaginable texture. And you can add lighting, as we’ve mentioned, to reveal how natural and artificial light falls and moves within the space throughout the day. SketchUp provides a variety of lighting options including spotlights, sphere lights, rectangular lights, disk lights and linear lights as well as natural light in every imaginable weather condition and time of day. 

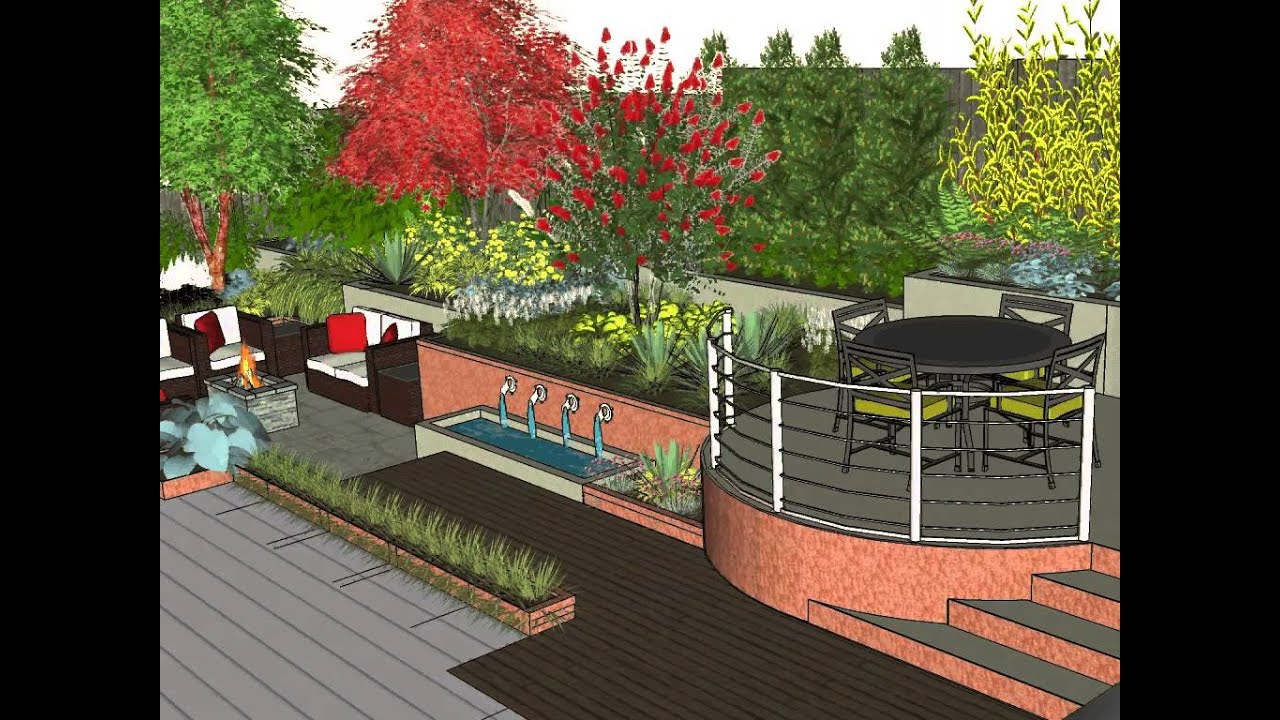
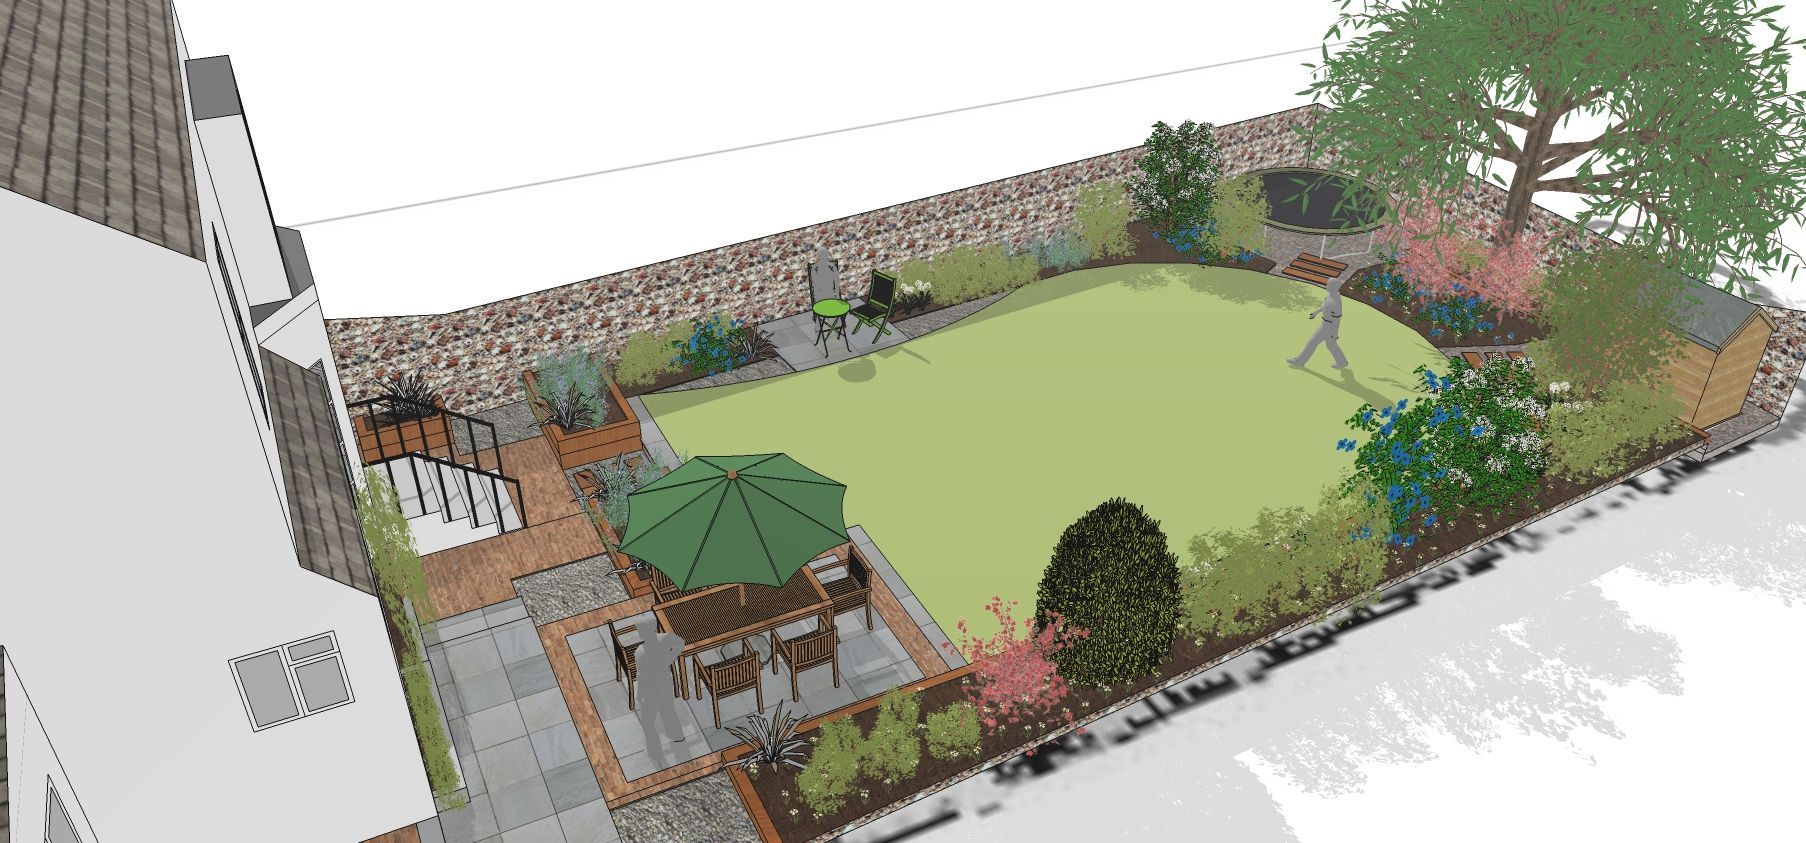
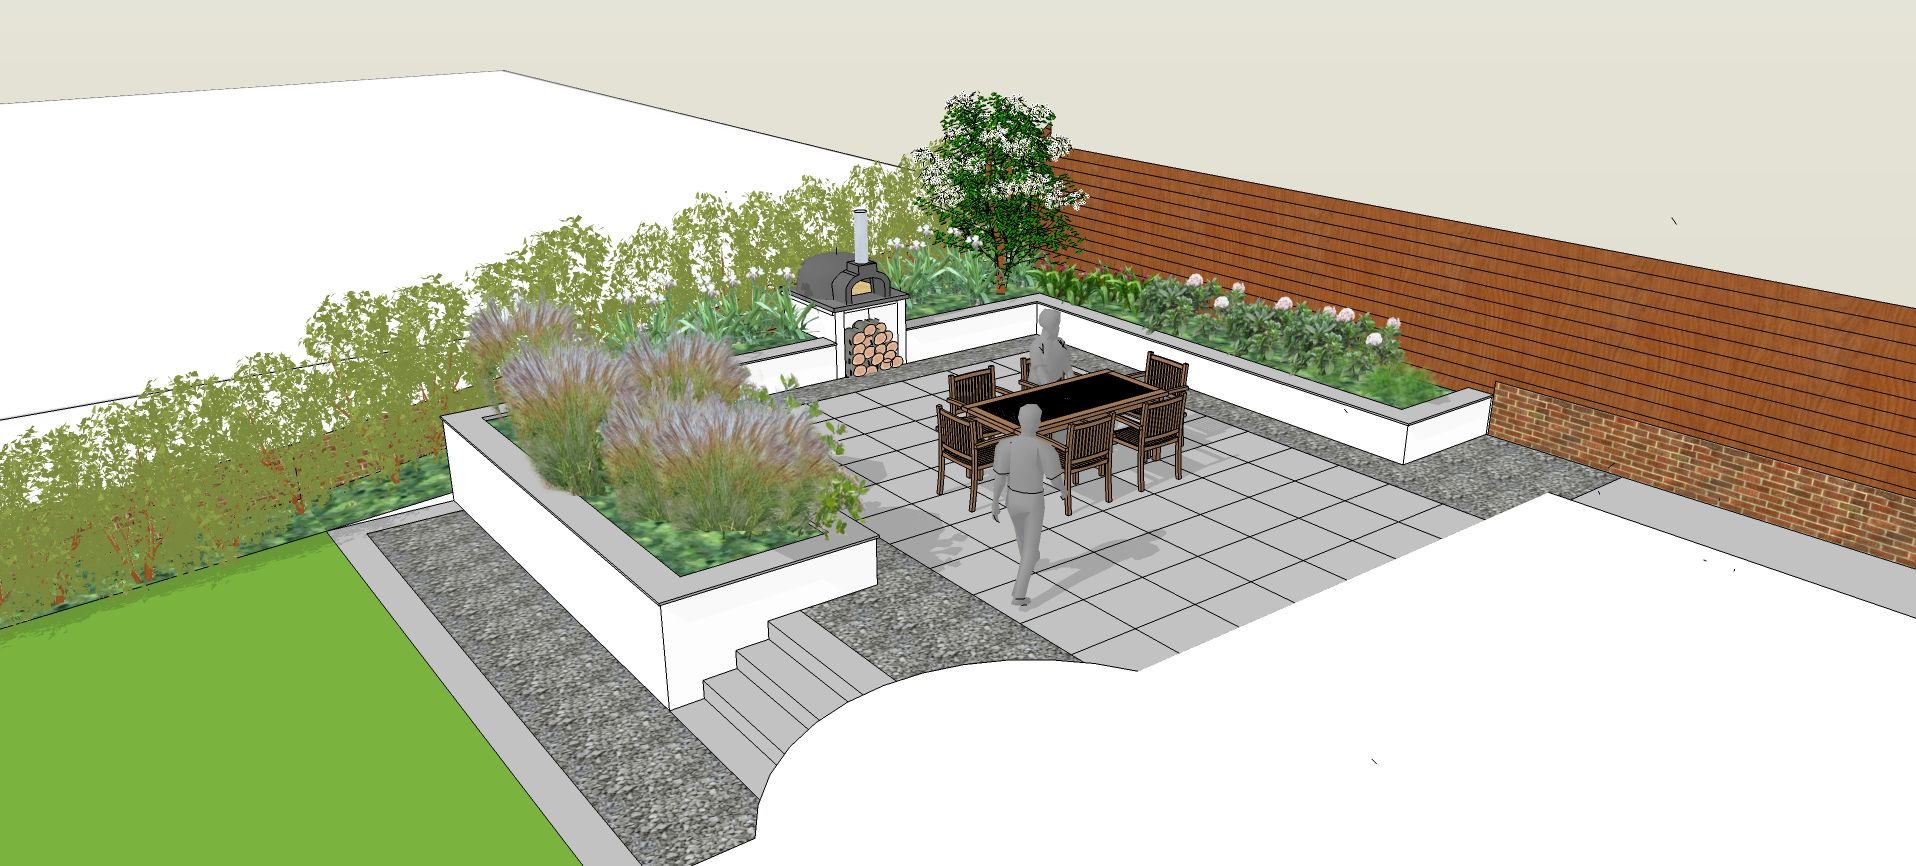
Last but not least SketchUp makes it a dream to render and visualise your interior design into convincing images that bring your work to life for clients. Take real-time rendering plugins for SketchUp like Enscape, which instantly create beautiful, realistic renderings to bring the interior to impressive reality.  

SketchUp for Interior Design

Now you know how amazing SketchUp is in your line of work, you can grab yourself a real treat in the shape of a free 7 day trial of SketchUp Pro, a great way to learn how to design a house interior quickly and pleasurably. Give it a go and it’ll transform your world. You’ll also want to check out the awesome range of learning resources available, including tutorials, videos and more.

Revit importer delivers flexible workflows in SketchUp

SketchUp unveils native interoperability and removes barriers to creative exploration in 2023 with the Revit Importer for Studio and elevated modeling tools in SketchUp for Desktop. 

Welcome to the next generation of creative exploration; updates for 2023 deliver the fastest, easiest, most native interoperable modeling experience yet. Trimble is connecting two core tools in the industry: SketchUp & Revit! The Revit Importer elevates SketchUp’s Studio subscription, while tangible improvements to core tools boost workflows in the desktop application. Indulge in SketchUp 2023’s powerful toolset for your next built masterpiece. Plus, there are two new scale figures to celebrate the new design year – Heather and her fierce but sweet cat, Lily.

Studio advances interoperability

Shave hours off your Revit-to-SketchUp workflow

The new import feature within a Studio subscription allows you to accurately and efficiently convert your Revit models into SketchUp geometry for deeper collaboration across project phases, teams, and stakeholders. Various workarounds exist to export Revit models to SketchUp, but this new importer saves the most time, is more accurate in geometry conversion, and leads to much lighter models.


By preserving model structures between Revit and SketchUp – Revit families and layers neatly translate to groups, components, and tags in SketchUp – you can save hours or even days of model cleanup and progress your project with accuracy. A smoother transition between design phases allows you to focus on what’s essential: fine-tuning your vision. 


“The Revit Importer sped up my importing and cleans up workflows from a couple of days to a few hours, even with complex models.”

-Carl Goodiel, VDC Manager


Why use it?

  1. Improve collaboration with project stakeholders who create Revit deliverables.
  2. Preserve model structures between software for less cleanup.
  3. Move Revit models into SketchUp to iterate new ideas quickly. 
  4. Build efficiencies; the imported Revit file is automatically optimized for easier geometry manipulation in SketchUp and significantly reduces file size.
  5. Create compelling visuals; Revit material colors and transparencies are respected during import to speed up visualization workflows.
  6. Translate Revit levels to SketchUp section planes. 


“We love the Revit Importer. It has saved us lots of time, and to my amazement, the converted file sizes are much smaller than other methods. This importer has become essential to our workflows. “

-Shyam Singh, GLMV Architecture


Trimble has made the Revit Importer a native functionality in SketchUp’s desktop application. Customers with Studio subscriptions can access this feature as soon as they update to the 2023 version. Customers with Pro subscriptions can install the Revit Importer in SketchUp 2023 and then initiate a trial to evaluate this new workflow. No Revit license is required. 


Discoverable and connected workflows


Using Studio’s new common installer, you can discover, download, and install all the tools you need for advanced workflows and complex projects. The subscription also includes V-Ray 6 for creating cutting-edge visuals and Scan Essentials for importing point cloud data – both were enriched with new functionality in late 2022. Please note that Studio is a Windows-only subscription. Scan Essentials is English-only, and V-Ray offers English and Chinese versions.

Breakthroughs for desktop

Build your anything –  faster – with new modeling and documentation features and improvements in SketchUp for Desktop. Explore a brand new Flip tool that replicates design elements predictably, manage DWG files in LayOut, and more.

Take the guesswork out of Flip transformations — the brand-new Flip tool lets you pre-visualize the outcome to model more predictably. Previsualize the plane you want to flip your selection along, then hover over the red, green, or blue planes to confirm the proper orientation. Click to flip! Fewer clicks and undoes means you can focus more of your valuable energy on developing a symmetrical relationship, evaluating it, and modifying it. Flip your model, and it just might flip your creative perspective too.


Pro Tip: Want to set up a quick, mirror relationship in a model to build more efficient components or make symmetrically-oriented copies? Toggle the Flip tool to activate Copy Mode, and you’ll flip a copy that is symmetrical to your selection. Use the tool to express a holistic vision based on a single, repetitive component. 

In LayOut, Trimble is fortifying interoperability by adding the ability to manage imported DWG files as references. Sound familiar? It’s the same process for managing referenced files in LayOut, but now they’ve expanded it to apply to all images, text files, or AutoCAD drawings. View all external file references, receive notifications if a file reference is outdated, and update, relink, or remove a file reference using the File Reference Manager. Better still, all your custom style edits (line weights, scale, and viewport positions) stay intact even when reference files are updated. Document and present your work confidently, knowing that all your references are up-to-date without wasting previous layout and styling work.

A true renaissance woman

From cheese making to ice climbing to feral cat rescue, there’s not a lot Heather can’t handle. If that’s not enough, she’s also a Senior Software Engineer at SketchUp, and she’s had a significant hand in the updates for 2023. Learn more about Heather and her cat, Lily, the new 2023 scale figure duo (article in English).

An enhanced, high-value offering

From the Studio overhaul to cross-subscription modeling improvements, SketchUp has removed workflow barriers to unleash your creativity in 2023. 

If you already have a Pro or Studio subscription, you can access SketchUp 2023’s time-saving improvements by emailing sales@elmtec.co.uk.

If you’re still on the fence, you can try a Studio subscription free for 7 days.

What is V-Ray?

What is V-Ray? How does V-Ray work? And what is V-Ray used for? If you’ve never come across it in your SketchUp life, you’re going to love V-Ray. This is how you create beautiful, convincing still and animated versions of your 2D and 3D models. The results are inspiring and attractive, the perfect resource to convince your stakeholders, get informed ‘yes’ decisions from clients, and see for yourself how your designs look when brought to real-feeling life. Read on to discover what V-Ray is, what people like you use it for and how it works. By the end of this article you’ll be keen to download the tool and get going.

What is V-Ray?

So what, exactly, is V-Ray? V-Ray is a commercial plugin for third party 3D computer graphics software applications like SketchUp. Designers use it to produce stunning visualisations and computer graphics in industries like the media sector, entertainment, film and video game production, industrial design, product design, and of course architecture, landscape design and garden design. 

The V-Ray application has been created and developed by the respected Bulgarian software company Chaos. V-Ray for SketchUp gives you all the 3D rendering software capabilities you need to combine real-time and photorealistic rendering inside SketchUp. Whether you’re a seasoned professional user or a beginner, Chaos V-Ray is stacked with brilliant tools to make visually compelling renders and animations that bring designs to life. 

Being so robust and packed with features, whatever the design task it’ll deliver perfect results every time to make your workflow flow better, save you time and hassle, and delight the people you’re designing for.

What is V-Ray Used For?

V-Ray focuses on rendering. Rendering, also called image synthesis, involves generating a photorealistic or non-photorealistic image from a 2D or 3D model using software to analyse and configure remarkably real-looking and attractive imagery. The image created by the software is called the render. 

V-Ray is popular with a broad range of people in all sorts of sectors, all of whom use it to transform their designs into awesome photo-realistic and creative images. As you can imagine architects in particular love the tool’s outstanding capabilities, as do their clients, simply because it turns flat architectural designs into extremely real-looking, wholly convincing images.  

How does it create magic? It’s a bit like having a virtual camera inside SketchUp. V-ray uses something called ray-tracing, a clever way to build an image by tracing the paths of light from the camera through pixels in an image plane, then cleverly simulating the effects as it comes across virtual objects. Creating different effects simply means the programme traces different rays. 

Expressed another way, V-Ray is a rendering engine that harnesses illumination algorithms like path tracing, photon mapping, irradiance mapping and something called ‘directly computed global illumination’ to build real-feeling imagery and animation. It illuminates exteriors and interiors with natural light using either the Sun and Sky system or a Dome light to set up image-based lighting. The resulting scenarios are presented as thumbnails for you to easily apply to your scene, to see which you like best.  

There’s more. You can also use V-Ray to make amazing animations. It cleverly renders the animation sequence as separate frames which you join together later to make an animated clip. No wonder it’s so popular with everyone from architects and product designers to Interior designers and landscape designers, as well as artists, animators and all sorts of other creative types. 

How Does V-Ray Work?

Next, let’s dive into exactly how people use V-Ray in SketchUp. Your first task is to check that both the computer you’re using and the version of SketchUp meet V-Ray’s requirements. First, know that V-Ray is supported for 64-bit operating systems and 64-bit versions of SketchUp. Processor-wise you’ll need an Intel* 64, AMD64 or compatible processor with SSE4.2 support. 

A minimum 8 GB RAM is essential but 16 GB RAM is recommended. You’ll need at least 2GB hard disk space but again, 12GB is recommended, including extra downloadable content. For TCP/IP, the system only supports IPv4, not IPv6, and your ideal operating system is Windows 10 or Windows 11. Last but not least, you’ll need to use SketchUp 2019, 2020, 2021, 2022, or the latest version, 2023. 

Next, how to install V-Ray. It’s a simple task: 

  • Download the V-Ray installer (it’s an .exe installation file)
  • Open the .exe file
  • Say ‘yes’ to the Licence agreement
  • Click Install
  • As a Windows user, it’ll ask you if you want to share anonymous usage data. We recommend you say yes, simply because it helps V-Ray’s developers improve the software even more  
  • Once it’s installed, sign in to your Trimble account to authorise the software

Once it’s installed you’ll see the V-Ray toolbar containing all the most popular V-ray tools. Now you can get cracking creating wonderful photorealistic renderings of your 3D designs, scenes and more. You can go play with exceptionally realistic light sources including light bulbs, neon lighting and the sun itself, revealing what your work will look like under different sorts of conditions. You can even change the light’s intensity and colour to add drama and excitement. 

Then there are V-Ray’s materials, designed to make realism even more real. Add convincing textures, create beautiful real-looking materials like stone, wood, fabric, and even grass, all making your output even more true to life, and even more inspiring. 

V-Ray and SketchUp Pro - Plans and Pricing

In answer to the question what is V-Ray: it’s brilliant. How does V-Ray work? Simply and intuitively. Now you know exactly what V-Ray is used for, by whom and how, and you’re keen to give it a try for yourself. You can check out the ins and outs of the free and Pro versions of SketchUp here, test-drive a free trial of SketchUp Pro here, or subscribe and buy SketchUp Pro right away. You can dive into a load of excellent tutorials and learning resources here, all free to use and readily available. And your SketchUp licensing options? There are special licences for commercial use, higher education, and even for primary and secondary schools. Whichever you choose, we hope you enjoy the journey!   

V-Ray For Mac

Everyone loves V-Ray. It’s such a brilliant way to generate exciting, realistic images from 2D and 3D drawings and designs. You already know it’s perfect for Windows machines – but can you use V-Ray on Mac? Luckily it’s a yes. This article delves into the details and gives you the insight you need to know about how to install V-Ray for SketchUp on Mac computers. By the end you’ll know how exactly to get the software onto your Mac machine. From then onwards, an entire world of stunning rendering is yours to play with.

Can You Use V-Ray on a Mac?

How about the details behind using V-Ray on your Mac? The first thing to note is that the V-Ray Graphic Processing Unit or GPU is not officially supported on the macOS operating system. It only works with C++ and CPU devices. On the other hand you can still use the V-Ray GPU in distributed rendering when your Mac runs the CUDA engine on a CPU device along with Windows or Linux running the CUDA engine on a GPU device. 

You also need to be aware of the developer Chaos’s hardware requirements for the software. As they say, there’s a critical disadvantage on Mac platforms simply because there isn’t official support for GPU rendering. If you’d like to use V-Ray GPU, Windows or Linux is your best choice. If that isn’t possible, here are the official MacOS hardware requirements. Please check your machine has all this before you try to Install V-Ray: 

  • Processor: Intel 64, AMD64, ARM or compatible processor with SSE4.2 support
  • RAM: Minimum 8 GB RAM, recommended 16 GB RAM
  • Hard Disk Space: minimum 2GB, recommended 12GB (includes additional downloadable content)
  • TCP/IP: Only IPv4 is supported
  • IPv6 is not supported
  • Operating System: Apple macOS 10.14.x or higher
  • SketchUp version 2019, 2020, 2021, or 2022

How to Install V-Ray for SketchUp on a Mac?

Next, how to install V-Ray for SketchUp on Mac machines, assuming you’ve already confirmed your hardware and operating system provides what you need, and you’ve also verified you have the right version of SketchUp itself. Here’s the installation process, step by step: 

  • Go to chaos.com, the developers of V-Ray 
  • Click the ‘Try’ button at the top right hand corner
  • Create an account for yourself – it’s easy and intuitive 
  • Choose the right ‘role’ from the drop-down list
  • Click continue
  • Select ‘V-Ray’
  • Under ‘Host Platform’ select: ‘SketchUp’
  • Click ‘continue’
  • Select V-Ray for SketchUp
  • Select the latest version of SketchUp – it should already be installed on your Mac 
  • Click ‘download’
  • Click on the downloaded file to open it
  • Click on the installer to begin the installation
  • Agree to the installation settings – remember the host version should be the version of SketchUp you chose, for example SketchUp 2022
  • Once it has installed, click ‘Done’

Now you can test your V-Ray installation by opening up any project, perhaps a 3D studio project you’re working on, and choose the basic V-Ray render settings to reduce the render time. If all is well it’ll render a superb quality image for you.  

V-Ray and SketchUp Pro - Plans and Pricing

Now you know you can use V-Ray on a Mac machine, understand the system requirements your machine needs, and know how to install V-Ray for SketchUp on Mac. Which kind of SketchUp licence will suit your needs best? Take a look at the choices here. There’s something for everyone. How to buy SketchUp Pro? Click here to claim your 7 day free Pro trial, or subscribe to it, and check out the differences between the free and Pro versions here.  

There are several licensing options to choose from, each giving you the functionality you need for use in schools, higher education, or for commercial purposes. 

And your next task? Here’s where the real enjoyment starts. Dive in, play with it, and have the time of your design life. If you need tutorials and learning resources there are stacks of them to enjoy, including brilliant video tutorials on YouTube. 

Best V-Ray Render Settings

You absolutely LOVE V-Ray for SketchUp? You’re not alone. It’s a popular tool for rendering superb quality, convincing images of your designs, whether it’s a stunning garden design, a home build, an innovative product or a landscape design project. In this article we’ll dive deep into the magic of the best V-Ray render setting, the high quality render settings V-Ray SketchUp is famous for.  And we’ll answer some popular questions about the software, including essentials like how long does V-Ray render take, how to export V-Ray render, how to improve V-Ray render quality and more. By the end you’ll have a good grip on the potential of this exciting design tool.

What are V-Ray Render Settings?

Let’s kick things off with the basics. V-Ray Settings give you full control over the parameters used to change and adjust the rendering process. You’ll find them via the Asset Editor in the Settings tab and as you’ll see, they’re organised in two panels. The main panel reveals the default options for the scene setup.

If the default Render Settings don’t give you the results you want, they’re adjustable. You can tweak the parameters. It matters because every project has slightly different render quality needs as well as differing deadlines. Sometimes you want fast renders for a meeting or presentation. Other times very high render quality is the focus. Because the criteria for speed and quality are different, so are the relevant render settings. Even making small tweaks to render settings can streamline the rendering process quickly and easily, and it’s fun to learn how.

Best V-Ray Render Settings

As we’ve mentioned, every design project’s render quality and timescales are different. V-ray’s render production focuses on either image quality or render time. To pin down the best compromise between image quality and render time, software engineers spent a lot of time measuring V-Ray’s performance on literally thousands of different scenes. This testing gave them a solid basis for the software’s optimised setup as well as a reliable starting point for a wide variety of designs and projects. The end results are always impressive.   

It’s interesting to know what happens behind the scenes. The render quality and time are driven by the number of calculations per pixel and whether the calculations are time-limited. That’s why V-Ray has two image samplers, Progressive and Bucket. The software creates the perfect balance using Max.sudivs and Noise Threshold parameters, basically the intelligence controlling the quality versus time ratio. 

For a better quality image you can increase the Max.sudivs value and/or decrease the Noise Threshold. Do the opposite to render faster, decreasing your Max.sudivs value and/or increasing the Noise Threshold. Just bear in mind the Render Time (min) parameter is exclusive to the Progressive Image Sampler. 

When you increase the Render Time (min) you get progressively better image quality because you’re letting V-Ray take longer to sample the image, and vice-versa. But how do you find the ideal settings? For the best results change one parameter at a time then run a test render to check the direction. The same goes for the value of every parameter. It’s best to stay within two times more or less than its original value.

How Long Does V-Ray Render Take?

Another important question about V-Ray is this: how long does V-Ray render take?  Considering how incredibly complex the back-room calculations are, it’s not bad. Most early-stage renders are ready within 30 seconds, more than good enough for designers at every stage of a project except the final, ultimate design.  

The quality of image you’d maybe want to present to a client for final sign-off or inspire someone to hand you a new project might take three or four hours. If the image is a whopper at more than 5 megapixels you could be looking at an overnight wait. And it’s well worth the wait, as you’ll know when you start using it. 

You can check out the render time using the Stamp option in the V-Ray Frame Buffer, and get more detail in the V-Ray Frame Buffer’s Stats > Timing rollout. 

How to Improve V-Ray Render Quality

Next, how to improve V-Ray render quality. For better image quality you need to increase the Max. Subdivs parameter for either the Bucket or Progressive Image Sampler. If it isn’t quite what you’re looking for try turning the Noise Threshold parameter down a bit. Over time you’ll probably develop a favourite set of parameters that suit the way you work, the things you design, and the design-to-production process. 

There’s another way. In V-Ray for SketchUp you can boost the render quality just as easily by dragging the Quality slider to a higher-quality preset. If you want to increase the sampling limit to boost the image quality, it takes a bit longer to render. 

To improve image quality without slowing down the render process, use the V-Ray Denoiser tool, perfect for denoising rendered images and included in your V-Ray install. Denoising’s clever post-rendering process helps remove noise in the image without affecting the render time. Or quickly denoise an image once it’s rendered.

You can boost a completed render’s quality without rendering from scratch. Combine the Progressive Image Sampler with the Resumable rendering feature. The feature lets you stop and start whenever you like, mid-render, without having to start again every time. 

How to Know When V-Ray Render is Complete

You’ll want to know when the render is complete. How to know when V-Ray is done rendering? It’s very simple. As soon as your render’s ready it’ll appear on your screen, there for you to save, use or share. With initial renders taking half a minute to complete, you can render and save multiple versions to show clients the alternatives, compare, discuss with teams, and store to inspire future projects.

How to Render Material ID in V-Ray SketchUp

Next, how to render material in V-Ray SketchUp. Use the Material ID Colour render element to make a mask based on the material ID Colour parameter you’ve chosen. First, add the Material ID attribute using the Add Attribute button. Then choose the colour’s Opacity and texture, both supported by the Material ID Colour channel. 

You set the Material ID Colour afterwards. The software sets an automatic colour which you change easily in Asset Editor. The V-Ray colour picker is an intuitive way to choose the colour ID you want and the choices are infinite. 

How to Speed Up V-Ray Rendering

It’s good to know how to speed up V-Ray rendering. For faster render times simply turn down the Max. Subdivs parameter for your Bucket or Progressive Image Sampler. If you’re using a Render Time (min) limit, all you do is nudge the time limit value down. 

Remember when you cut down your render time, you usually create more noise and the image quality decreases: one directly impacts the other. Tinkering with these values lets you come to the best quality and speed conclusions for the stage the project is at, what you’re designing, and the people you’re presenting it to.

How to Export V-Ray Rendering

How to export V-Ray render? There are a couple of ways to export V-Ray Rendering and they’re both nice and easy. To export the whole scene, open your Asset Editor. Left-click on the arrow in the bottom left hand corner of the render button. Then click the Export V-Ray Scene File button. 

You can do it through the Extensions menu, too. First create a proxy through the V-Ray Objects Toolbar, then pick the group or component to export. The icon doesn’t work until you select an object from your scene. Once you do, the Export Proxy button becomes active. 

To export a geometry selection, select the geometry then click Export Proxy. Choose Proxy Scene from the drop-down menu and click Export to export the geometry itself, the shaders, and the lighting. 


How to Save Rendered Image in SketchUp V-Ray

Knowing how to save rendered images in SketchUp V-Ray is also very easy. Find your way to the Settings tab in the V-Ray Asset Editor and it’s all very familiar. Using ‘Save Image’ lets you set or change the File Path. The file path specifies where the file lives on your machine and suggests file extensions. Once you’ve set your file path, the File Type option pops up. File Type is simply the file format, and you have the choice of png, bmp, tga, hdr, sgi, jpg, exr, pic, tif, and vrimg files.

V-Ray and SketchUp Pro - Plans and Pricing

Inspired? Ready to give it a go? Find out more about the free and Pro versions of SketchUp here, and treat yourself to a free trial of SketchUp Pro here, which is also where you can subscribe to SketchUp Pro. There’s a wealth of exciting and informative tutorials and learning resources to explore here, free to use, and a good choice of different SketchUp licensing options for commercial use, higher education, and schools. 

How to Design an Earthquake Proof Building in SketchUp

Simple earthquake proof building design. Is it even a thing? Yes, it can be a simple task to create a design for an earthquake-proof building, as long as you have the right tools… and in this case the perfect tool is SketchUp.  If you’re researching earthquake-proof-building-design, read on. This article dives into what are the design features of an earthquake proof building and reveals which building design will best withstand an earthquake. By the end you’ll understand how earthquakes affect buildings, know ways to make a structure earthquake-proof, which materials to use, and more.

How earthquakes impact buildings?

Earthquakes can be extremely violent and catastrophically destructive. Even when they measure fairly low on the Richter Scale they can cause serious structural damage, simply by moving and shaking the solid ground beneath buildings, something called ‘generation of inertia forces’ and a big risk for building designers to factor in. The quake causes the ground to shake, moving the base of the building while the roof stays put. When the roof stays in its original position like this, it’s called inertia.

Because the walls and columns are attached to it, the roof is dragged around along with the building’s base. As you can imagine the stresses and strains created can easily bring an unprepared structure down. Inertia forces cause shearing stresses, which leads to structures deforming. The ground shakes, the base of the building moves, the roof moves in a different way, and the difference makes internal forces in columns that bring the column back to its original position.

There’s also the damage caused by horizontal and vertical shaking. While structures are designed to withstand vertical loads, earthquakes shake the ground in three directions. Vertical loads add or take away from existing loads. Horizontal shaking creates inertia along with lateral displacement, crucial to the structure’s strength. No wonder quakes create such powerful structural stresses that buildings collapse or are quickly damaged beyond repair.

How to make a building earthquake proof

First in our guide to simple earthquake proof building design, here’s a broad-brush look at how to make a place safe. Earthquake-proof buildings are carefully designed to withstand the destructive forces unleashed when the earth moves. So what are the design features of an earthquake proof building? Whatever the circumstance, they tend to focus on five key solutions.

An appropriate, flexible foundation provides strength and durability exactly where it’s needed, at the point where the building and the earth meet. Seismic dampers reduce the impact of shaking. Thanks to them a design will be able to handle severe input energy and slash harmful deflections, forces and accelerations. Seismic dampers come in a variety of types: viscous dampers, friction dampers, yielding dampers, magnetic dampers, and tuned mass dampers.

Shielding structures from vibrations keeps the elements of a building where they belong, more able to stay put simply because they vibrate less. Structural reinforcement adds core strength to the whole thing. And using adequately ductile materials means the structure can flex and bend safely rather than crack and break. Let’s take a detailed look at these in action.

Creating a Flexible Foundation

What are the design features of an earthquake proof building? Flexibility means a lot. One of the simplest ways to mitigate the impact of earth movements is to construct buildings on top of flexible pads. These cleverly isolate the foundation from the earth beneath, making them a key aspect of simple earthquake proof building design. This is called base isolation, done by constructing the building on top of flexible pads made of steel, rubber and lead. If an earthquake strikes it’s the isolators that vibrate, leaving the building stable.

This alone makes a big difference, which is why it’s widely used in places where there’s a high risk of earthquakes. A good example is the 750 mile-long San Andreas Fault in California, which marks the tectonic boundary between the Pacific Plate and the North American Plate.

It’s good to know the SketchUp 3D warehouse includes useful pre-made examples of anti-earthquake building foundations, ready for you to download and use as your basis and created to save you time. Take a look at this one, for example, which clearly reveals how the flexible foundation pads do their magic.

Counter Forces with Damping

Which building design will best withstand an earthquake? It’s also about something called damping. Earthquake resistant buildings include features designed to absorb the dramatic shocks from a quake and render them harmless. They’re called seismic dampers and they suck up the destructive energy so the building doesn’t have to.


There’s a relatively new way to do this using the miracle material graphene, a single layer of carbon atoms with remarkable properties. Graphene is the strongest material in the world, with a strength of 42 N/m and an intrinsic strength of 130 gigapascals. It’s two hundred times stronger than the toughest steel and is also unusually elastic. No matter what the stresses and strains are, graphene stays the same. Adding a layer of graphene on top of a natural rubber pad works wonders to absorb the shockwaves.


There are useful and inspiring 3D models of buildings including seismic dampers in the SketchUp 3D warehouse, ready for you to use and make your own. Have a look at how the dampers work in this seismic tower design, for example.

Shield Buildings from Vibrations

Scientists are busy exploring various ways to shield buildings from earthquake vibrations by diverting the energy elsewhere. One way they’ve achieved it is using 100 concentric plastic and concrete rings buried at least a metre below the building’s foundation. The idea is that the rings work to absorb the vibrations, which die down significantly before they reach the foundation and the building above it.

The idea comes from the amazing ‘invisibility cloaks’ designed to hide objects by bending light waves around them, something used to hide fighter planes. Physicists from the UK and France found they could harness the same principles to hide an object from the destructive waves made by an earthquake. It’s possible to shield a building so an incoming earthquake wave acts like the building isn’t there, a lot like water flowing around a rock in a river.

It works because the wave pattern generated by an earthquake, like water, can bend smoothly around the building, effectively making it invisible to the wave and redirecting vibrations around it. The rings we mentioned can even be tuned to different wavelengths to cope with the differing wavelengths created by a quake.

Structural Reinforcement

Quake-proof structural elements are also a big deal, involving shear walls, diaphragms, and moment-resisting frames.

Shear walls are designed so they help a building keep its shape when a quake is moving it around, usually supported by diagonal cross braces made of steel. You can imagine how a structure that keeps its shape in the first place is less likely to collapse.

A diaphragm is basically a horizontal structural element like a floor or roof, specially designed to transmit lateral loads to the building’s vertical resisting elements. Earthquake-resistant buildings have these elements on their own decks, strengthened horizontally so they share the violent force loads and make them less destructive.

Moment-resisting frames are structures placed among a building’s joints. They let columns and beams flex and bend, rather than break because they’re stiff and resistant to moving. Again there are some cool examples to use, ready made, at the SketchUp 3D Warehouse, for example this shear wall design, and this floor and ceiling diaphragm. You’ll also find this pre-made design for an earthquake proof house interesting.

Ductile, Earthquake-Resistant Materials

Next, the materials. Obviously some materials are better at resisting damage from quakes than others so it is really important to choose the right building materials for your earthquake-resistant design. Ductility is the feature you’re looking for, since materials with high ductility absorb large amounts of energy without breaking.

Structural steel is one of the most ductile materials of all, which is why it’s so critical to modern buildings in earthquake zones. Specially-engineered, fibre-reinforced concrete has similar properties. Interestingly, wood is also a good material for resisting earthquakes. As you can imagine there are plenty of useful pre-designed structural components in steel and wood available from the SketchUp 3D Warehouse. Take a look at this steel joist girder, and this wooden flooring frame.

Now you know the basics around simple earthquake proof building design, designing a building or other structure to resist earthquake damage. What will you design first? You might want to check out the  enormous collection of SketchUp tutorials, and even test-drive the Pro version of the software for yourself, free for 7 days.

*Please note that this blog post is to act purely as a guide, no safety professionals were consulted during the creation of this guide – always consult with an expert before going ahead with projects of this nature*

Tips for Browsing and Downloading SketchUp Materials

SketchUp materials deliver magic to your designs. Without materials you’ve got something fairly interesting and informative. With them your work is inspirational. And it’s so quick and easy to use materials for SketchUp to bring designs into vivid, realistic life. This guide looks into everything you need to know about downloading SketchUp materials such as marvels like SketchUp materials stone choices – including everything from rockery stone to building stone – along with wood materials, SketchUp materials collection insights and more. Read on to find out how to enhance your drawings and inspire your stakeholders. 

What are Materials in SketchUp?

Let’s tackle the basics first. What are SketchUp Materials? They’re essentially digital paints with a colour and an optional texture, all defined within an image file. You might want to use a blue roofing material, for example, with a realistic-looking texture that simulates metal. The SketchUp materials collection is enormous, giving you everything you need to create designs that don’t just look great, they look real enough to convince clients, colleagues and everyone else. By making your drawings as realistic and accurate as possible, you make everyone’s life easier, including your own. 

Think stunning coloured roofing tiles created in a few clicks to enhance unusual building designs, imagine a huge variety of wood materials for everything from furniture to garden decks and architectural projects. The SketchUp materials stone collection is equally impressive, a host of beautiful finishes to bring your drawings to the next level. There are grass and landscape material, plus many more materials for SketchUp, that are all free to use.

Browsing and Downloading Materials for SketchUp

So where do you find all this amazing stuff? Materials for SketchUp can be found and downloaded from the 3D warehouse, a huge collection of free resources for users to dive into. The only limit is your imagination. Why not have a look for yourself? All you do is enter the search query ‘materials’ into the search box at the top of the page to see what’s there. The popular 2016 stone colour collection, for example, contains 34 different materials covering all sorts of stone types, from golden sandstones to pale and dark grey slate-look materials and pure white marble.

There are countless brilliant wood materials textures to tap into as well. There’s wood with and without a strong visible grain, in every shade and colour, whether it’s decking for your garden design or wood for kitchen cabinets and work surfaces. Marble wall pattern material helps designers create drawings of luxurious interiors and exteriors, and there’s a host of gorgeous landscape related materials to enjoy. Imagine a collection of materials for making hyper-real trees, shrubs, site furniture and more. Think travertine steps and black slate tiling, and loads of wonderful tile materials including mosaic tiling and subway tiling, marble tiles and patterned ceramic tiling.    

How do you download all this fabulousness? SketchUp materials download is really easy, the same as everything else in SketchUp. Once you’ve found the material you want to download, simply click the Download button. If you like you can download just the material itself and avoid importing the whole component into SketchUp. 

Let’s use this collection of wood materials and textures as an example. To download individual materials from this collection, from the model info (RHS) – click ‘Materials’. This’ll present you with a list of the materials used in the particular model. Each has a name and dimensions, along with the file size. Just find the material you want then click the ‘Download’ button. That’s it. 

How to Import New Materials in SketchUp

So you’ve downloaded the materials that inspire you, and it was as easy as pie. Now you need to import the material files into SketchUp to use them, and it’s equally simple. Maybe you want to use wood materials, SketchUp collections of every kind of wood. Here’s what to do: 


  • Select File > Import
  • Find the Import dialogue box
  • Navigate to the material image you’ve downloaded
  • Select it
  • Select ‘Use As Texture’
  • Click Import.


This very simple process makes the imported materials available in SketchUp for you to play with in any way you want. As you can imagine, using pre-created materials saves users a huge amount of time and effort. So now there’s no need to go to the trouble, time and expense of making a travertine floor tile of your own or spend ages making convincing looking grass when there’s plenty of ready made options that are right at your fingertips. 

How to Apply Materials in SketchUp

Next, let’s look at how to actually apply the materials for SketchUp you’ve chosen. Again, it’s a super-easy process that makes designing and drawing such a pleasure, smoother and faster as well as more efficient and a whole lot more fun. Experimenting with various materials and textures is one of the biggest joys of using the software, driving instant design and boosting your creativity. 


Here’s how to apply materials in SketchUp on a Windows PC: 


  • Find the paint bucket tool in the Getting Started, Large Tool Set, Principal toolbar, or in the menu bar under tools-paint bucket
  • Select the tool
  • Open the materials panel
  • Choose a collection of materials
  • Click on the material you want to use


It’s just as easy and fun on a Mac: 


  • Find the paint bucket tool in the Large Tool Set toolbar, the tool palette, or in tools-paint bucket
  • Select the paint bucket and a colours panel appears
  • Choose a colour using one of four colour picker tabs or use the materials collections
  • Choose the materials collection you want to use
  • Click the particular material you want to apply to your model


Imagine being able to apply an attractive basalt stone surface to your kitchen design in no time. If that doesn’t give you the effect you have in mind, it’s an easy matter to change it for, say, a pale limestone surface or something vivid and colourful in little glass mosaic tiles. It’s so quick and easy you can do it while a client observes, letting them choose the finish they prefer while you work. And if it turns out you love creating materials of your own, you can add them to the 3D warehouse for others to use and enjoy. It’s a community thing, adding more materials for SketchUp to keep the inspiration going. 


If you haven’t tried it yet, you might want to explore a collection of marvellous SketchUp tutorials, designed to make your journey of discovery even more exciting and speedy. Then make your way to SketchUp Pro to explore the magic of the software in detail. You’re going to love it.

Tips for Agile SketchUp Modelling

If you’ve ever heard of agile modelling, you’ll already be aware of the advantages. If not, you’re in for a treat. Agile design principles will help you, as a talented designer, maximise the effectiveness and efficiency of your workload. Agility will help you please your clients and delight every kind of stakeholder. Saving time means saving money, which is always good news for any business. And it’s also an excellent framework for minimising mistakes, organising yourself and your projects, and keeping everything running smoothly. Let’s take a good look at the agile design process in a SketchUp world. By the end of this article you’ll understand what it is, why it matters, how to do it for yourself, and the most important best practices for designing in an agile way.

What is Agile Design?

It’s always best to begin with the basics. So what is agile design? In a nutshell, agile modelling principles give you a useful iterative framework for you to develop your designs faster and better. 

In our world the word ‘iterative’ means repeating a sequence of instructions until you reach a predefined end result. Every time you complete the steps of a sequence in a given order, you’ve completed an iteration. When you carry out a series of trial-and-error style cycles, adjusting a design according to what you learned during the previous iteration, the creative process is formalised without affecting your creativity. You refine your work in a logical way through repetition, moving continuously towards your goal. It’s a great way to work for everyone involved, from designer to client. 

The agile design process is highly collaborative. It creates a fast-paced and exciting working environment where big tasks are broken down into manageable chunks, each dealt with or ‘actioned’ in short time periods called sprints. A sprint can last days or weeks. 

As you can imagine, agile methodology’s iterative framework is an excellent fit with software development, and just as good for the kind of work SketchUp users do. The business benefits are well worth having: fast feedback, appropriate customer involvement, easy change management, and great team motivation.

Agile Design Process and Principles

Next, let’s explore the agile design process and the associated agile design principles. The agile design process involves a series of logical phases:

  • Understand
  • Research
  • Sketch
  • Design
  • Prototype
  • Test
  • Refine


The idea at the core of agile working is that you forget about perfection, and it’s actually liberating. In agile methodology it’s more important to make progress than have endless lengthy discussions. The emphasis is on building, testing and iterating solutions instead of getting mired in endless talk. 

And how about agile design principles? While many of the ideas behind agile modelling specifically relate to software and website development, it’s easy to see how they apply perfectly to the work our users do. 

For a start you model with a purpose. You’re not confused about the project and your role in it. You have a specific purpose, which helps drive you in the right direction. Embracing change is a key principle, since the goals and requirements will change as the project evolves. Every aspect of the project might change over time, and that’s fine. Incremental change is usually easier to handle than big, sudden changes, and that’s an agile way to work. 

When you assume the best solution will almost always be the simplest, you’re engaging in agile thinking. Agile designers keep their modelling simple so it’s easier to re-think future requirements without problems. And because your goals are small and incremental, the next goal is always front-of-mind. Quality work sits at the heart of all this, which means you meet people’s expectations more efficiently. There’s no rushed work. And the fast feedback agile demands is also a big advantage too, keeping your project firmly on the rails and heading in the right direction. 

Agile working involved just enough documentation rather than drowning in too much paperwork or struggling to understand too little of it. You keep stakeholders in the loop, with incremental decisions to make along the way. Every piece of documentation is worth having. 

Tips for Agile Design and Modelling in SketchUp

SketchUp supports the agile design process beautifully. It enables collaboration perfectly, one of the most important basics of the agile method. SketchUp Viewer’s collaboration features let groups of people experience SketchUp projects using immersive virtual and augmented reality devices. Members of the group can join in with collaboration sessions via a local Wi-Fi network or do it remotely over the web. When collaborating in a room, the owner of the room is the presenter, the rest are attendees, not unlike the software so many of us used to stay in touch during the pandemic. You even have your own avatar to show who you are, and where you are in the virtual project related to everyone else. It isn’t just useful, it’s great fun. 


SketchUp also supports the iteration that sits at the heart of agile design. The Purge Unused command, for example, gets rid of all the unwanted Components, Styles, Layers, and Materials you’ve deleted. Importing Components by downloading them from the 3D warehouse speeds up your workflow no end, feeding into effective iteration. Agile experts recommend considerate component selection, where you pick the smallest file size and edge count for design efficiency. Turning off ‘Shadows’ and ‘Fog’ makes your modelling more efficient and the process less sluggish. When you save your interim working scenes without shadows or fog, you maximise your efficiency. As long as you always have the latest updated version of SketchUp, agile working will be yours for the taking. 


If you’d like to delve deeper, there’s lots of information about maximising your efficiency here, in an article about SketchUp best practices and applied principles


Agile Modelling Best Practices

You’ll want to know about the best practices for agile modelling and product design. Here goes. First, it’s about creating the right kind of culture where agile working can thrive and make the best impact. This means the opposite of centralised work. You need to think about a way of working that’s de-centralised, cross-departmental and self-organising, driving a culture that majors on being proactive and collaborative first and foremost. 


You’ll need to establish a great strategy to unite everyone involved, an umbrella under which you all work, feeding directly into all the relevant KPIs and goals. And building focused user stories is tremendously helpful. It lets you take an essential customer perspective on the design’s context, function, and the issue it resolves. This complements your formal representation of the end-user journey from discovery to using the design. 


Honest and open communications are key, especially important for successful team building. Sharing knowledge in the right way means delays are minimised and communication problems avoided. If your teams are remote it’s even more important for you all to be on the same page, all able to make any issues clear, talk about problems, and deal with potential bottlenecks, all feeding into the right stakeholders. 


Working in sprints means working more like a 100m sprinter than a marathon runner. Nothing drags on longer than it needs to, you release your deliverables frequently in small chunks, and fix things as they occur. And this means you always deliver good value, every step of the way.  


Agile design principles and the agile workflows you create as a result of them mean the clients and users determine a project’s success. Because agile design is centred around the product and its intended benefits to the client, they’re placed at the centre of everything – which is exactly where they belong. 


Now you understand the agile design process, agile design principles and know why agile modelling is the thing to aim for. Take a look at SketchUp’s excellent collection of essential tutorials and test-drive SketchUp Pro for the full story. It’s inspiring!  

How to Design a Small Garden

How can you design a small garden layout? And, perhaps more importantly, how can you design a small garden for free? The answer is, you can design a small garden space easily and quickly, using a fun tool you’ll fall in love with. SketchUp is a wonderful way to make good-looking, accurate garden designs in no time, and it’s easy to learn. If you have a limited outdoor space of your own you want to transform into something magical, read on. This article reveals how you can create something beautiful and practical, a garden design achieved quickly, with flair and imagination. By the end of it you’ll be inspired to open up SketchUp and give it a go. Here’s how to design a small garden in SketchUp.

Designing Gardens in SketchUp

SketchUp is great for designing gardens of all sizes, and it’s perfectly possible to do it without paying a penny. The software is available in a free version and it’s really good for garden and landscape design. Even if you’ve never used SketchUp before, you’ll enjoy the learning process. It really is fun. 


There’s a wealth of great tutorials to help you get where you want even faster, also free, plus access to the famous 3D Warehouse, home to masses of free pre-made designs for everything from building materials to trees. Garden furniture, plants, lawn materials, stone materials, wood materials, they’re all there for you to download easily and use in your design for a small garden. Plus water features and ponds, exterior lighting, patios, hedging, you name it. All you do is drag the pre-designed 3D models you want into SketchUp. 


Basically, in SketchUp, design takes place in an exciting 3D space. The results are brilliantly realistic. With such a short learning curve to climb you’ll be creating fantastic 3D designs in no time. Even if you’ve never used a tool like this before.


 The intuitive nature of SketchUp for garden design removes the barrier between creative thought and creative expression when you’re learning how to design a small garden layout. Think it, draw it. Everything is so simple to use, you’ll soon be designing almost as fast as you think. It feels wonderful to bring ideas to life so fast.    


SketchUp lets you render 3D garden models into stunning photo realistic images so convincing they show you exactly what the finished garden will look like, in proportion, 100% accurately. As long as you’ve given the right measurements in the first place, your design will look true-to-life. And that makes it so much easier to make decisions. 


Add all the many useful and inspiring extensions and plugins that support every aspect of 3D design, and give you handy short-cuts, and you can see why SketchUp is so popular. The rendering plugins alone will blow your mind. 


Back to the 3D Warehouse… which also contains examples of pre-made small garden designs created in SketchUp by users. They’re great for inspiration and you never know, you might love the programme so much you end up designing show-gardens of your own for the community. Search the 3D warehouse for ‘small garden design’ to find some great examples like this one, and this.  


You can learn a lot by importing a design from 3D Warehouse and exploring it in SketchUp, a good way to get a head start. One of them might even form the basis of your own garden design for a small space. They’re really easy to adapt and customise. This is how to design a small garden for free without any hassle.  


How to Design a Small Garden in SketchUp

Here’s some step by step instructions on how to design a small garden in SketchUp, showing how easy it makes your life. Never designed a garden in your life? You’ll be fine. Never used garden design software? Not a problem. Here’s how to design a small garden layout in a few steps. It really is this easy to use: 


  • Make sure you’ve chosen the right units – choose feet or centimetres 

  • Use the SketchUp drawing tools – the pencil, rectangle, arc and more – to draft the overall shape of the small garden. You’ll be surprised how well you get on

  • Draw in your garden paths, patio, borders, fences, walls and other solid structures 

  • Set the dimensions to match the your garden layout – this makes for an accurate design that works in real life 

  • Apply ‘materials’ to the garden surfaces like patios and paths, lawns and gravelled areas

  • Find cool premade SketchUp models from the 3D warehouse to use in the garden design, everything from fountains and trees to individual plants, lawn textures to ponds and garden furniture. Some of the furniture is real, you can buy it in the shops if you like the way it looks in your design

  • Import the models from the 3D warehouse and scale them to match your garden dimensions – another easy job 

  • Move the imported 3D elements around until they’re in the positions you want – do they fit, are they too big or small? If so, find more in the Warehouse to suit your small garden design. It’s almost as fun as actually shopping


There’s more to think about. How does the light fall into the space in real life in summer and winter, and at different times of day? Knowing where the sunshine and shade fall will help you decide where to put the garden furniture, outdoor heater, patio, flowers and whatever else.  Once you render the finished design with a lighting plug-in, you’ll see exactly how the sunlight affects the space. 


Then there’s privacy – you can design it into the garden if the space is overlooked.  Maximising the patio space becomes easy. Move things around with ease and choose the best patio size and position. Adding height to the garden helps create interest and visual enjoyment. Take a bare rectangular garden, interrupt it in any number of ways and you instantly get a bigger-feeling space, no matter how small it is, like putting plants in the centre to make the views more interesting than planting round the edges. 


Grow plants up walls and fences to soften the lines and provide places for wildlife. Add a simple pond and watch the wildlife arrive like magic. Use digital paint to test the colour of the garden fencing. Black, deep purple, deep red, they’ll all make the space look bigger. Rich colours also showcase planting beautifully, adding instant drama. To draw things in and make the space feel more intimate, paint the fencing or walls a light colour.


Can you see how much fun it’s going to be, and how satisfying, now you know how to design a small garden for free? SketchUp is ideal for experimenting with small garden design ideas fluidly and enjoyably. Happy designing!  


How to Design a Garden Border in SketchUp

Sketchup is totally brilliant for garden design. The exciting speed you can design at, the sheer variety of resources and the beautiful 2D and 3D results all make it a very popular garden design tool. The output is realistic and accurate, making it easy for you, your clients and any other stakeholders to get a clear picture of what the finished garden’s going to look like. This article explores exactly how to design a garden border, one of the most popular traditional features in garden design that can also be taken to fresh and exciting new places using Sketchup to express your limitless imagination. Read on to find out how to do it with confidence and flair. 

Designing a Garden Border

First, let’s take a look at the most important things to think about when designing a new border for a garden. The soil matters for a start, since it affects which plants will thrive in the border. While you can add nutrients to the soil it’s usually best to stick with plants that enjoy the existing conditions. 

Chalky soil, for example, is well-drained and tends to be dry as a result. Clay soil sits at the other end of the scale, wet and heavy rather than dry and light. Sandy soil comes with its own challenges, as does loamy soil. All this will affect the plants you choose for the border and the way you place them within the area. That’s why borders differ so widely from garden to garden. 

To pin down the best plants for the garden, think about all of the above then think again bearing sustainability in mind, a big tick for today’s garden designers in a climate change world. But plants are only one feature of a garden border. Consider the overall colour scheme. Will you major on subtle greens, from dark to pale to variegated? If you’re planting flowers will you go for a random riot of colour or pick two or three shades to focus on? 

Then there’s the background. You probably won’t find yourself designing a border out of context, so think about the background as well. Is there an existing wall or fence? What height is it? Will you be enhancing the fence or wall with trellis or some other plant support system? Maybe you’ll train espalier fruit trees along the wall behind the border, perhaps you’ll paint the fence a dramatic colour to showcase the planting. Deep, rich colours like aubergine, burgundy and black, for example, make natural greens shine out beautifully.  

If you need to increase, decrease or change the shape of existing borders, SketchUp is a great tool for experimenting with design ideas. 

How to Design a Garden Border in SketchUp

The 3D Warehouse you get free access to with Sketchup is packed with beautiful examples of garden border design in SketchUp, and they’re great for inspiration. Take a look at this one, and this. You can download them, redesign them, move the elements around, change the dimensions, add more features and plants, and more. Because the foundation is already there it’s an easy and exciting process. So how do you design a garden border in SketchUp step by step? Let’s have a look: 

  • First, choose the right units, either feet or centimetres. The results will be very different so don’t get them mixed up! 
  • Use a variety of cool SketchUp drawing tools – the pencil, rectangle, arc and so on – to draft the overall shape of the garden border
  • Find inspiring SketchUp models from the 3D warehouse to incorporate into the garden border design, things like the right kind of shrubs and plants
  • Import existing models from the 3D warehouse then scale them to match the garden layout dimensions
  • Move your imported 3D elements around to create the kind of garden border design you have in mind
  • SketchUp lets you also design the associated garden walls and fences 
  • You can even use light to show where the shadows and the shaded areas they create are – this is particularly handy because once you’ve got an accurate pan of where the sun and shade falls throughout the day and through the seasons, choosing the right plants is so much easier 
  • You can also add in features like sheds, lawns, trees, and other exterior structures into the design easily and quickly, making the end result as accurate, attractive and easy to understand as possible – which makes getting the go-ahead from clients more of a pleasure than a potential pain 
  • Combined, SketchUp and the 3D Warehouse make a brilliant tool for effective garden design whatever the size, shape, and style of the land 

When to Plant Your Garden Border

When thinking about designing your border, consider when to plant. The timings will feed into the garden design, giving your client different vistas and looks through the year. Ideally you’ll want to make sure there’s colour and interest in every month and through every season, so the views are always beautiful. 

Depending on the time of year, different plants and flowers have their own unique needs. If you’re planning to plant in spring or summer most things will grow as soon as they’re in, while planting out in autumn or winter, when the growth slows and stops, they won’t get going until spring. 

If you’re designing a garden for planting outside the growing season you can give your client two designs, one showing your idea in full bloom and leaf, and the other in winter before things have had a chance to grow. Then you can manage their expectations.  

Now you know how to design a garden border in Sketchup. Did you know Sketchup comes with a huge collection of fantastic tutorials for every imaginable purpose, so the learning process is fast and fun? There’s even a free version of Sketchup Pro for you to test drive, giving you the chance to experiment. What kind of garden border will you design first?  

About Elmtec

Elmtec have been the UK distribution partner for SketchUp since 2010, and service a network of UK and Irish resellers. We have over 22 years’ experience within the digital design community.

Contact Us

T: 01844 263 750
E: sales@elmtec.co.uk
W: www.elmtec.co.uk/sketchup