There’s a garden design project on the cards, and you’re busy researching the most popular cad for garden design. So which garden design cad does the best job, offers the most flexibility and potential for creativity, and provides the most resources? And which has the best tools and plugins? What about tutorials and courses to support your learning curve? It can be a minefield, but we’re here to help.
Read on to find out all about the best CAD software for garden design. By the end of this article you won’t just know how to make the best choice of tools for a truly professional job done fast and well, you’ll be inspired to create stunning garden designs incorporating all sorts of wonderful green stuff. Welcome to our world!
Best Software for Garden Design
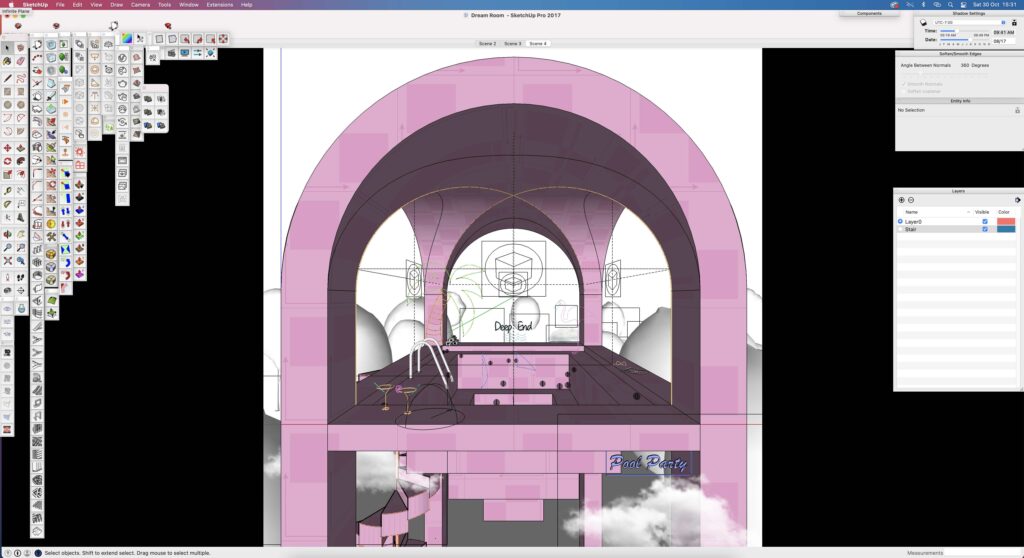
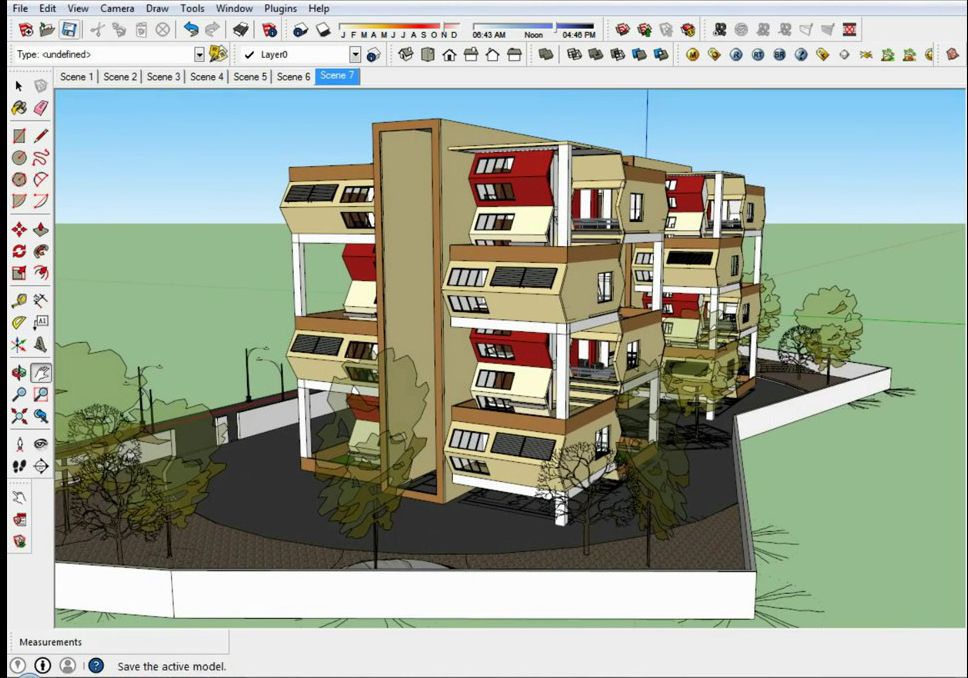
Is the best garden design cad free? It can be. There are many excellent CAD software packages that are perfect for Landscape and Garden design, and one of the most popular of all is Sketchup, an excellent tool for landscape and garden design so good it’s used by design professionals worldwide.
Sketchup lets designers like you bring their garden designs to stunning realistic life with 2D drawings and 3D modelling. It offers a superb streamlined workflow, which takes you smoothly and logically from the concept drawing stage right through to the actual, accurate site plan – including your planting plans. The software allows you to create workable site surveys and intricate construction detailing, whether you’re designing a tiny garden from scratch or remodelling a huge existing outdoor space.
SketchUp’s simple, intuitive garden cad software tools let you create and work on a totally accurate 3D model that brings your ideas to dazzling, realistic life. It’s ideal for Mac or PC, incredibly simple to use – even for beginners – and it’s powerful enough to delight professional landscapers. There’s nothing it can’t achieve.
One key factor that puts Sketchup in the ‘best’ category is how easy it is to learn and use, another is the sheer, thrilling abundance of excellent resources in the 3D warehouse, free to use. Proven software plus every extra tool and resource you could possibly need makes it a top choice.
How do Landscape Designers Use CAD
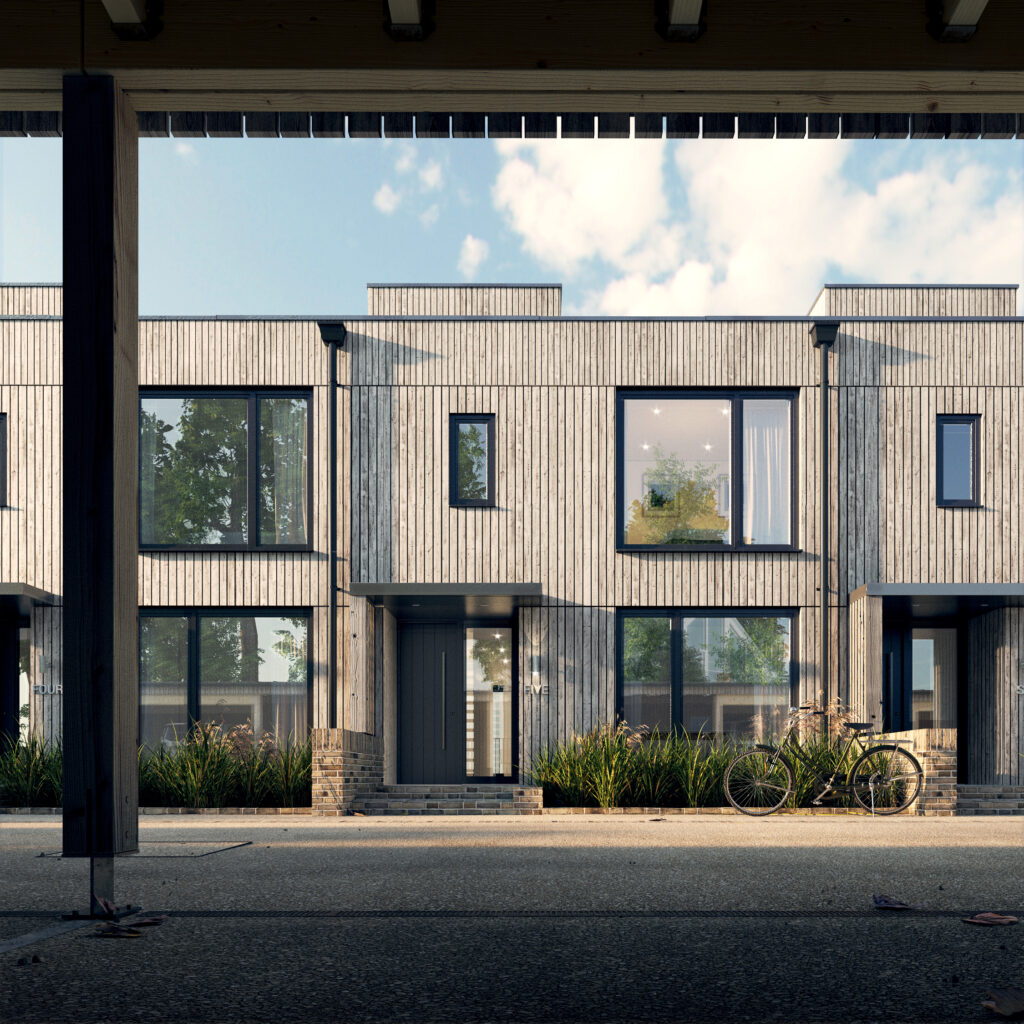
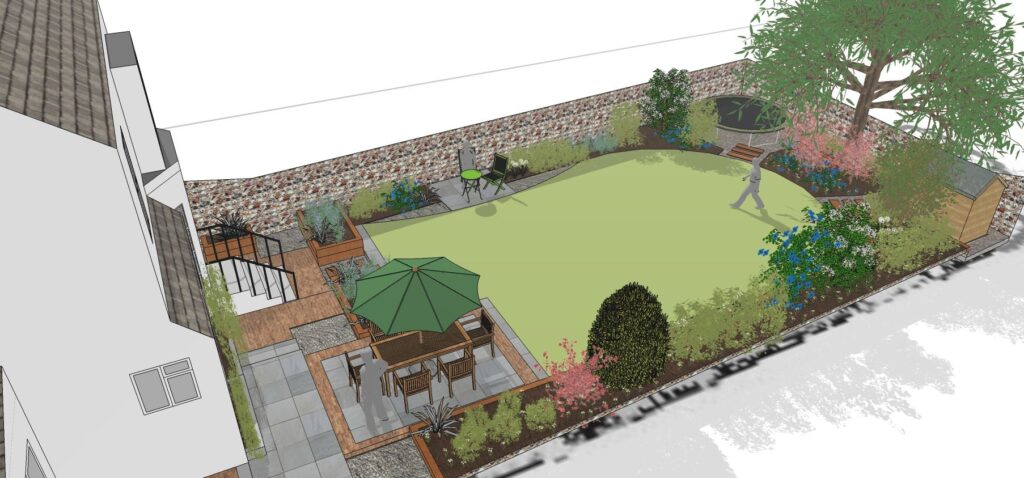
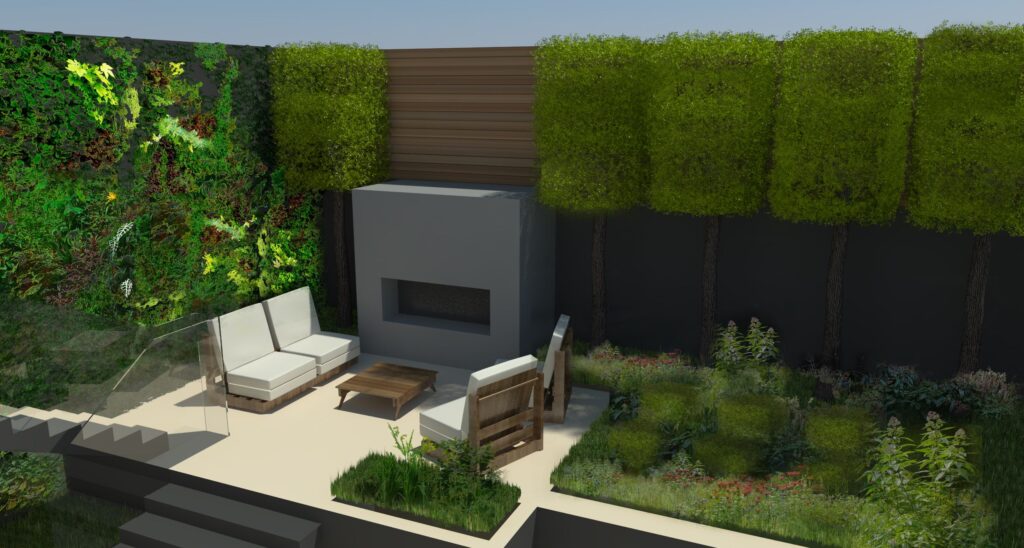
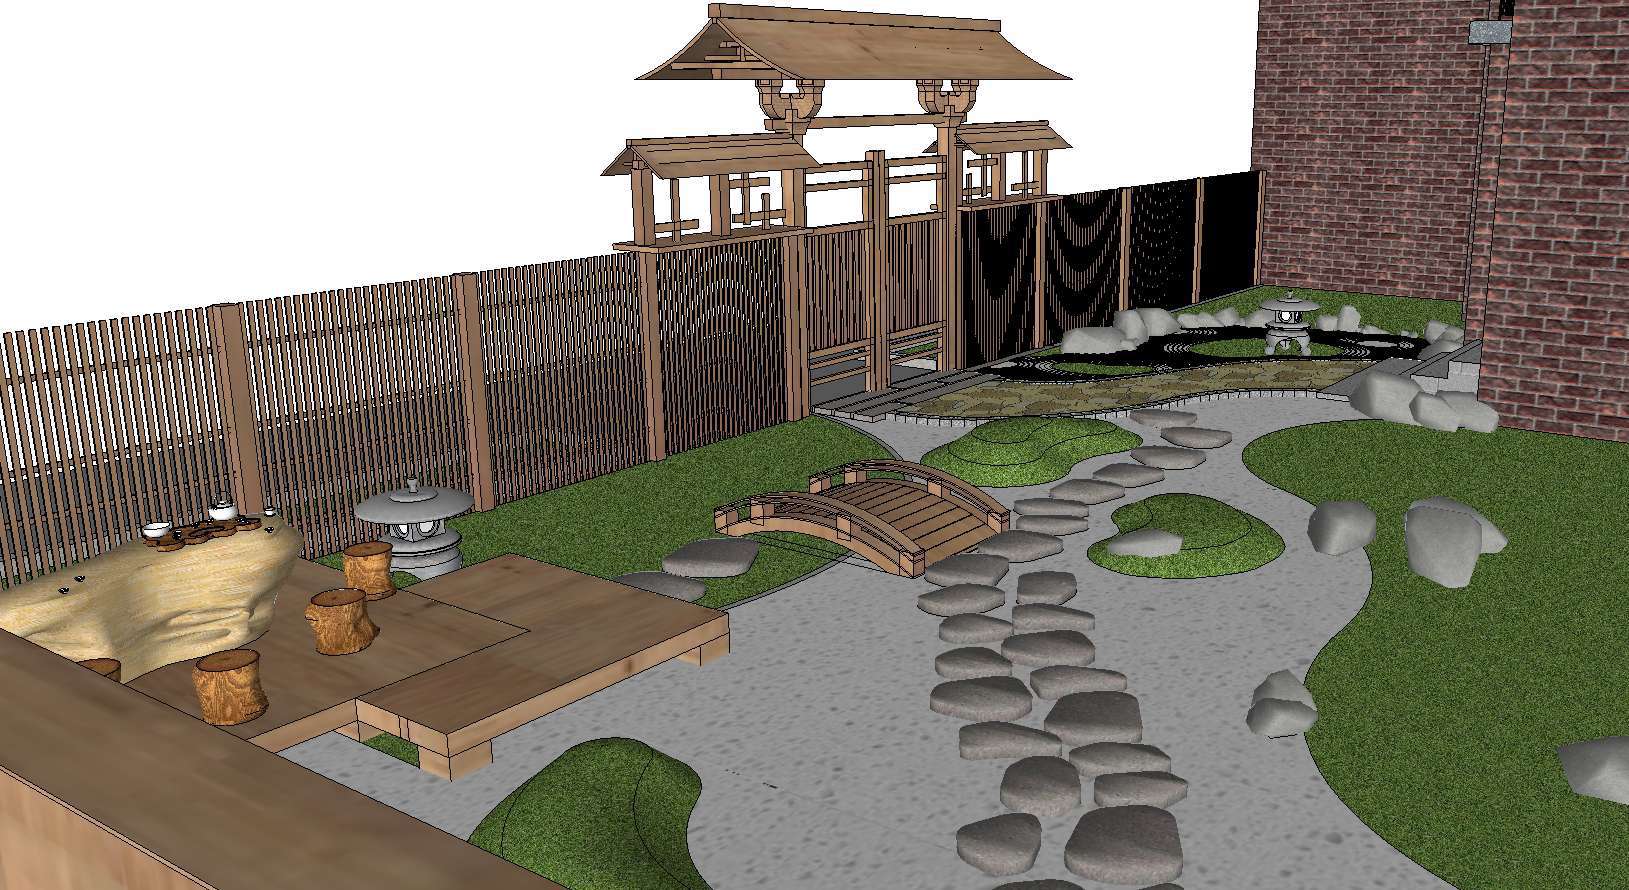
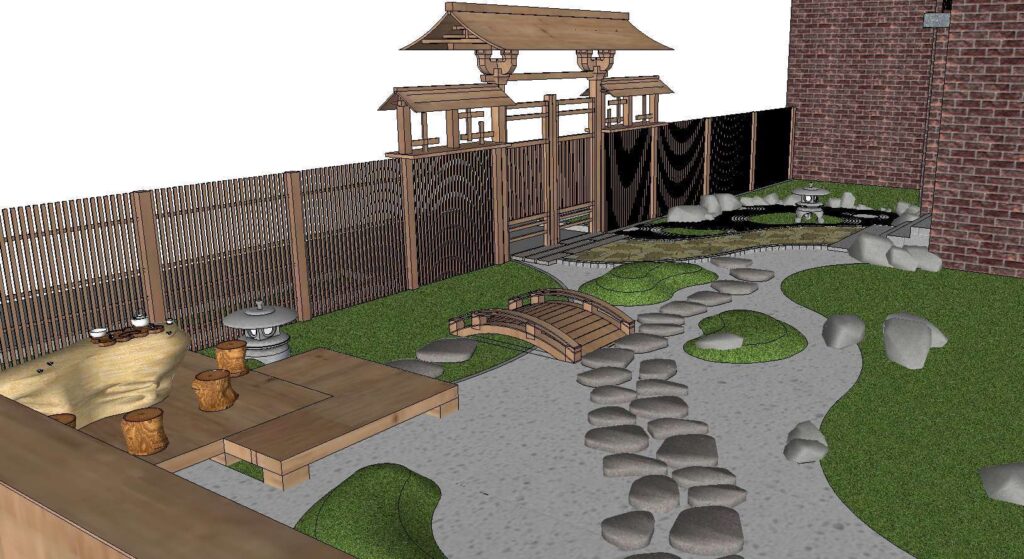
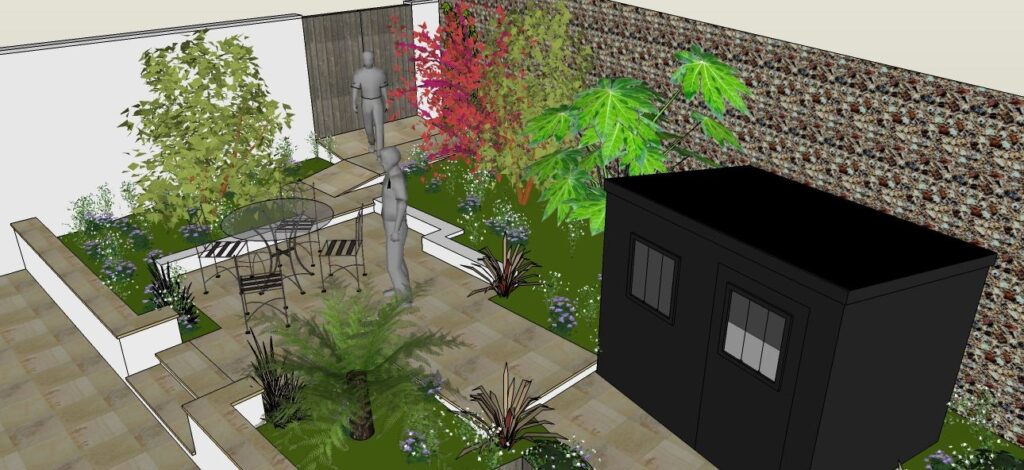
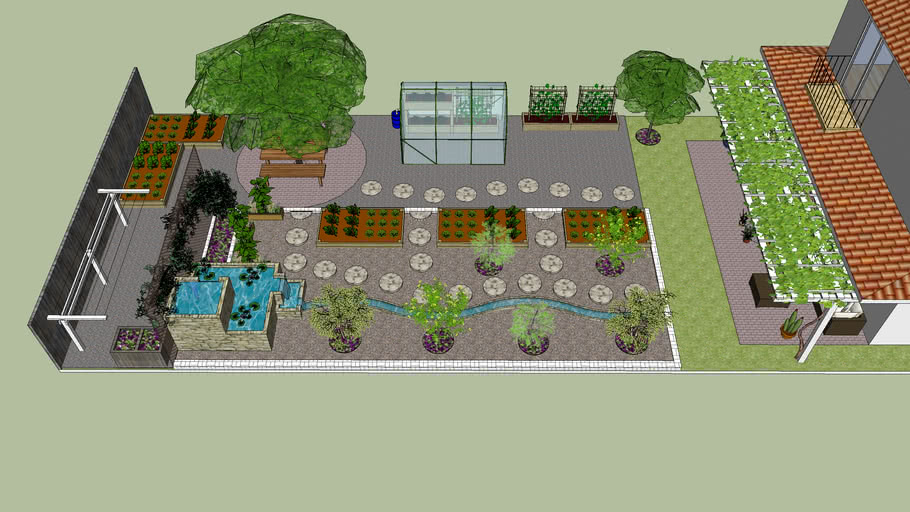
Effective landscaping involves so many different factors. It’s about creating beauty, but it’s also a highly practical matter. You’ll want to take account of everything from drainage to planting, ground preparation to installations. It really helps to be able to model your features in advance then view them in context, and Sketchup garden design cad lets you do exactly that, saving you time and money. The amazing scale models it generates are brilliant for client walk-throughs, being wholly accurate, visually attractive, and wonderfully convincing.
So what are some of the key aspects of using Sketchup CAD for garden design? Sketchup garden design cad software features a simple, intuitive way to:
- Import your CAD files in various standard formats, providing all the flexibility you and your clients need.
- Import surveys, plot plans and even Google earth and Google maps images to enrich the client experience and ensure every detail is carefully considered.
- Create accurate site plans to truly represent your designs.
- Generate excellent, highly realistic terrain and contour representations that give a clear picture of all the elements you have in mind.
- Get detailed breakdowns of all the construction elements, the planting and more, pinning down exactly what’s needed to do the job in the real world.
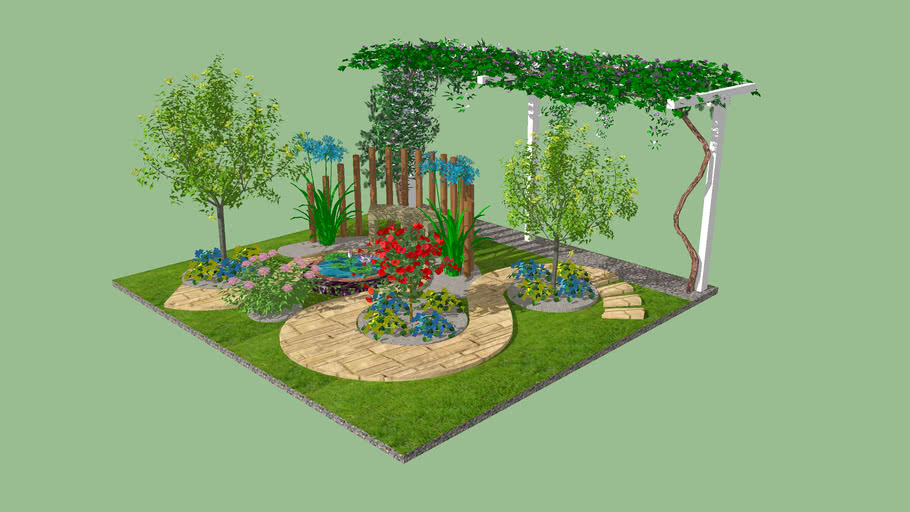
Sketchup’s garden cad software is perfect for creating any size of design, from small planters to large scale landscapes. There are plenty of exciting and inspiring resources in the 3D warehouse for you to tap into as well. All this means Sketchup saves you time, saves you money, saves you effort, and provides marvelously engaging 3D models for convincing, successful client presentations. Last but never least, it even supports accurate and successful installation.
How to Create a Landscape in Sketchup
So how do you make a landscape in CAD? Let’s summarise the process for creating a landscape using Sketchup. It’s surprisingly straightforward:
- Draw out your terrain, either using the Sandbox tools or by importing geolocated terrain.
- Add your details to the terrain – the boundaries, any existing structures and planting.
- Make design changes and adjustments as required
Seriously. It’s that easy. If you’d like to try it for yourself, we recommend you get started with Sketchup by downloading the free trial and having a go. It isn’t just extremely intuitive, the software’s simplicity means it’s also a lot of fun. Forget the frustration of learning a complex garden design cad, treat yourself to the Sketchup experience instead.
Sketchup Landscape Design Resources
One of the most inspiring things of all about Sketchup cad for garden design is the abundance of cool online resources for Sketchup landscape design. If you get stuck, there’s a tutorial designed to help. If you want to know exactly how to achieve a certain design element, there’s an easy-to-learn course for it. Maybe you want a particular tree. You might well find it inside the 3D Warehouse, available for instant use.
- Loads of popular courses and tutorials in garden and landscape design.
- The Sketchup 3D warehouse, stacked with a huge variety of 3D models for landscape designers.
- Lots of free extensions and plugins, including fantastic short cuts for creating curved landscape shapes and placing plants, a fantastic free extension 3D tree maker, ways to make instant terrain, and tools to help you achieve faultless feature based terrain design.
CAD Software for Garden Design
We’ve given you a snapshot of garden design cad, free and paid-for. Next, how about visiting the Sketchup downloads area, where you can download yourself a free 7 day trial of Sketchup Pro to play with? You might also get a kick out of the v-ray for Sketchup free trial, or want to check out the many free resources and tutorials that support users so effectively.
If you’d like to ask questions, we’re always happy to answer them. In the meantime, enjoy experimenting with the planet’s best-loved garden design cad software, the garden cad software the professionals love.


 sales@elmtec.co.uk