3D Printing Software for Beginners: A Comprehensive Guide

You’re keen to discover the magic of 3D printing – but you have some questions. Is there such a thing as 3d printing software for beginners?  If so, what are the choices, and how easy are they to use? This article dives right into the world of 3D printing design software for beginners, giving you the information you need and explaining how to choose the perfect tool for your situation. Read on, find out all about it, and you’ll be ready to set off on an exciting journey of discovery. Whether you’re a pro designer or a newbie, whatever sector you happen to work in, here’s where your design world gets even more interesting. 

The Basics of 3D Printing Software for Beginners

First in our guide to 3d printing software for beginners, free or paid-for, let’s nail down the basics. To print 3D models you need two things: software and hardware. Your 3D print machine represents the hardware side of things and, like all hardware, it won’t work without software to control and run it.  

What is 3D Modelling?

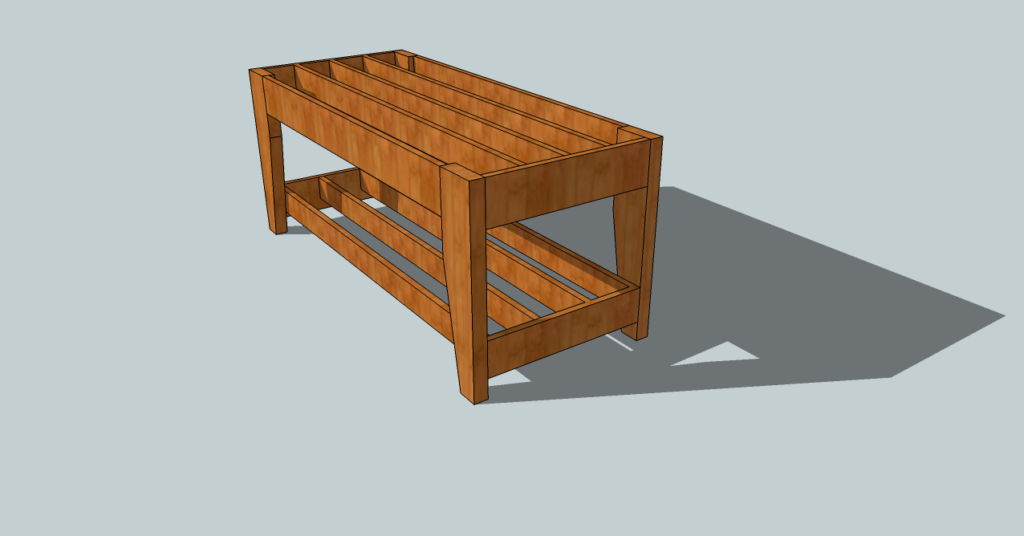
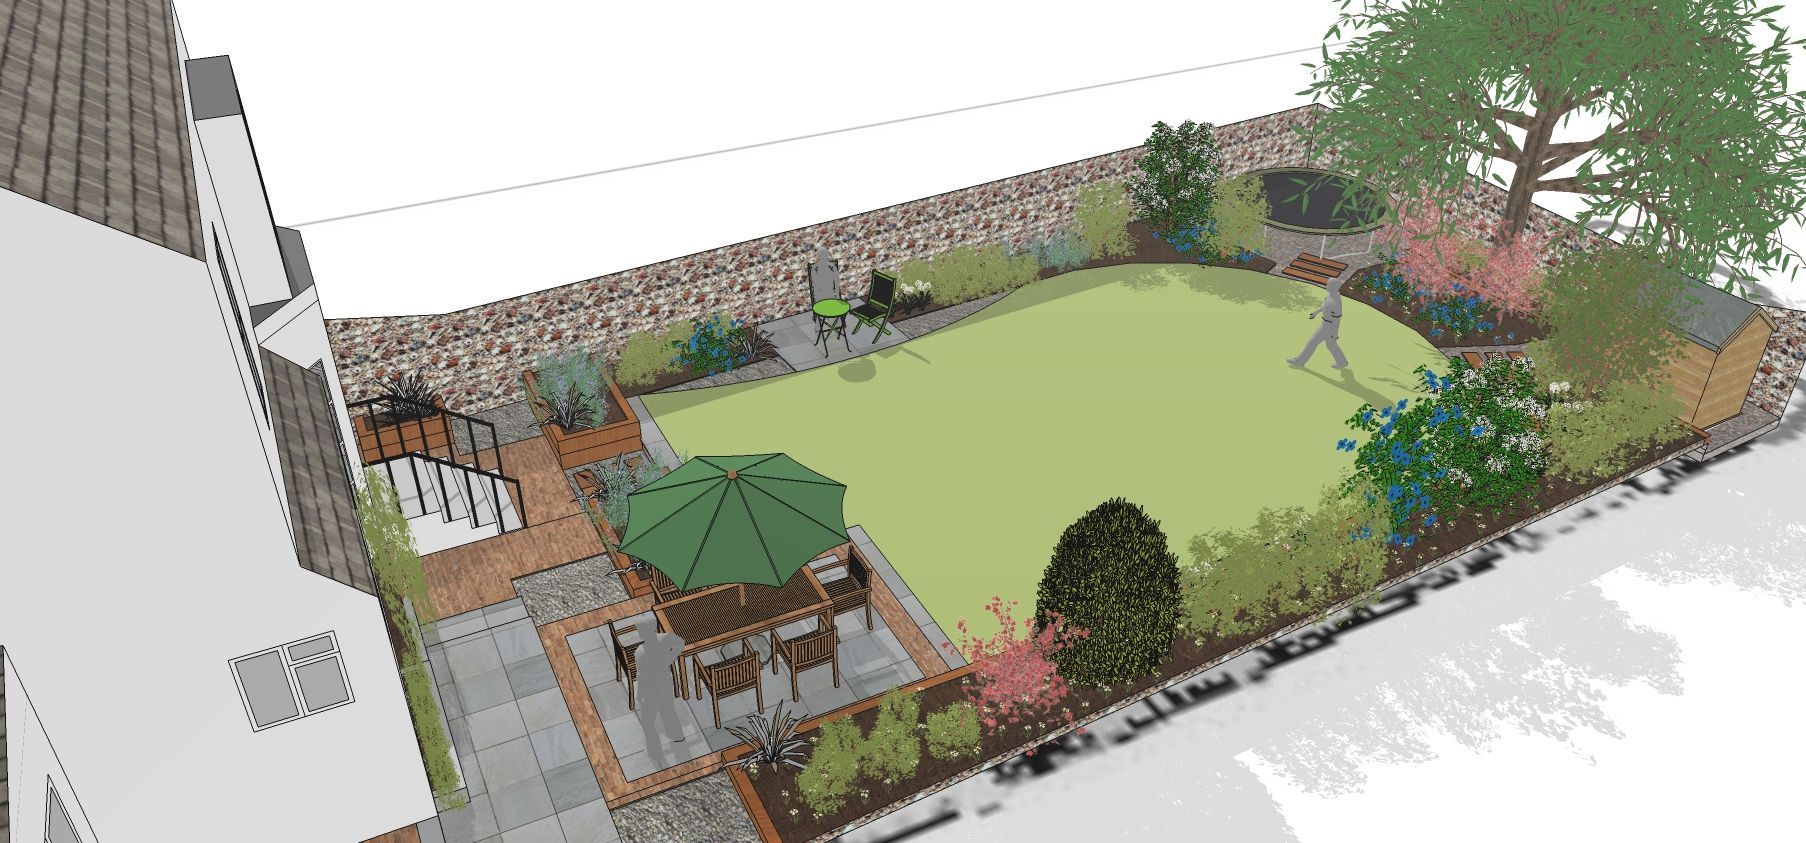
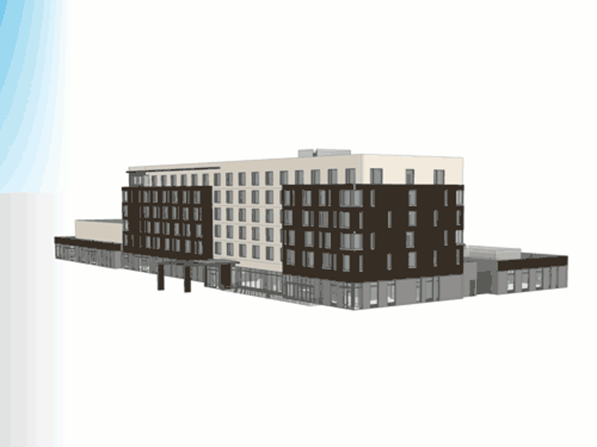
Next, let’s define 3D modelling. 3D modelling is used widely in all sorts of industries including animation, gaming, architecture, garden design, and actual 3D printing. It simply means drawing accurate, realistic three-dimensional digital representations of objects. It’s done using specialist software that gives you the capacity to not just draw in 2d but create remarkable life-like 3d versions. These in turn translate into models that can be printed in three dimensions by specialist print machines using molten plastics to print an object in slices, layer by layer. 

Different Types of 3D Printing Software for Beginners

3D printing software comes with all sorts of different features and capabilities. If you’d like to test drive free 3d printing software for beginners, you might like to give Tinkercad a try. It’s really good for beginners to 3D printing, a no-cost web-based 3D modelling tool that’s super simple to get the hang of with a variety of tools and features, ideal for everyone from school age to professional designers. Used by more than 50 million people, it’s a good starting point. 

Fusion 360 takes things a bit further with more advanced 3D modelling capabilities, making it a popular choice with professionals. This also means there’s more to learn but the learning curve is well worth conquering thanks to cool features like convincing parametric modelling, impressive simulation, and awe-inspiring rendering. Fusion 360 is cloud-based. As well as handling  3D modelling it’s an excellent CAD, CAM, CAE, and PCB platform for professional product design and manufacturing. You can use it to design, engineer and create more or less anything thanks to the tool’s exceptional electronics and PCB design capabilities. 


Blender enables the whole 3D pipeline right from the earliest modelling, rigging and animation stages through to simulation, rendering, compositing, motion tracking, video editing and game creation. Blender is also free to use, frequently chosen by artists and animators because of its sheer versatility and large collection of excellent tools and features. It’s naturally a bit more challenging for beginners but if you’re used to learning new software, you should enjoy experimenting with it. 

Choosing the Right 3D Printing Software for Beginners

So how, exactly, do you make the best choice for the things you want to print in 3D? If you’ve never used 3D printing software before, it makes sense to choose the tool that’s the easiest of all to use. You can always go for more feature-rich and complex software once you’ve learned the bare basics. 

Cost is always an issue, which means no-cost programs are a popular choice for beginners. Some are completely free, and others cost quite a lot, making them an investment you won’t want to make until you’re confident it’s the right tool for you. Experiment first, pay second. 


Think about the features you need. You might not know what’s best for you until you give a few different tools a try. If you know exactly what you need, invest time in figuring out which package gives you the things you need most. It’ll depend on what you want to use the tool for. Just make sure it’s compatible with the 3D printer you’ll be using, and works properly on your machine’s operating system.

Frequently Asked Questions:

Do I need 3D modelling experience to use 3D printing software for beginners?

Luckily there are some wonderfully simple and intuitive 3D modelling software choices that you should be able to get to grips with quickly. Take Tinkercad, for example, designed with easy use in mind and popular with schools as well as professional designers.

Can I use any 3D printing software with my 3D printer?

You’ll need to make sure the tool you choose is compatible with the 3D printer you’ll be using. Some are designed for a specific printer brand or type and don’t work with all 3D pint machines.

How long does it take to learn 3D printing software for beginners?

It depends. If you’re used to learning new tools you’ll learn faster than if you have no experience in learning new software. If it’s a complicated program it’ll take longer to get to grips with than a simpler alternative. Some are very easy, like Tinkercad, and take a few hours to learn. Others, including Fusion 360 with its advanced features, may take you longer to become fluent.

Are there any free 3D printing software programs for beginners?

Tinkercad and Blender are just two of many free 3D printing software programs available, both worth testing to see if they suit your kind of project.

Time to experiment...

Now you know you can get free 3d printing software for beginners, it’s time to test-drive 3d print software for yourself. Before long you’ll be confident in bringing your designs to dramatic 3D life, fluent in 3d printing design software for beginners and ready to take your knowledge to the next stage. Pick the right tools, dedicate some time to learning and the amazing world of 3D printing is open to you. We hope you enjoy the learning process that transforms drawings into beautiful three-dimensional life. 

Importing AutoCAD Architecture to SketchUp

So you’re exploring importing AutoCAD Architecture to SketchUp? This is your expert guide. By the end of it, you’ll know what AutoCAD is and how it interacts with SketcUp, the benefits of importing the architecture to SketchUp, how to do it, and the best practices to make it super simple. Read on to learn all about how to import AutoCAD architecture to SketchUp, close the gap in your knowledge, and become fluent.


Overview of AutoCAD Architecture and SketchUp

First, let’s explore AutoCAD Architecture and SketchUp. AutoCAD Architecture is software designed for architects and engineers. It’s what you use to make detailed 2D and 3D models of buildings and other built and natural structures. SketchUp is popular 3D modelling software that’s also popular in the architecture and construction sectors. 


AutoCAD Architecture comes from the people at Autodesk and goes back quite a long way, released for the first time in 1982 and was revolutionary at the time. SketchUp is younger, developed by Trimble and released for the first time in the year 2000.


So what’s the difference? AutoCAD Architecture and SketchUp have different capabilities and features. They’re both popular with architects, but AutoCAD Architecture offers advanced capabilities and more features. It can output accurate construction documents and make complicated engineering calculations. 


SketchUp, on the other hand, is extremely easy to learn and use thanks to the intuitive interface, which means it’s a popular choice for fast design iterations and rapid visualisation. Together, they give architects everything they need to imagine and design quickly, efficiently, and beautifully. 

Benefits of Importing AutoCAD Architecture to SketchUp

Next in our guide to how to import AutoCAD architecture to SketchUp, the benefits. Sketchup lets architects and designers work super-fast and fluidly, designing intuitively and efficiently. When you import your AutoCAD Architecture files into SketchUp, it’s really simple to work with the resulting 3D models to amend your designs in no time. This saves you time and hassle, makes the design process more enjoyable, and creates outstanding output to inspire clients and other stakeholders. 

The idea is that you enjoy a fast, seamless workflow between AutoCAD Architecture and SketchUp. Using both tools together in tandem means more streamlining, less manual input and less data duplication. As well as saving time and effort this means there’s less risk of 

design errors,  ultimately saving you even more time. 


There’s more. When collaboration is on the cards with your team, clients and others, importing AutoCAD Architecture files into SketchUp enables fast. Easy sharing, where everyone can see the design and interact with it in real-time, all in inspiring, realistic 3D. 

This means your imagination flows smoothly, the quality of your work is excellent, it’s easy to collaborate to get the job done faster, and the approvals process is efficient and smooth.  

How to Import AutoCAD Architecture to SketchUp

Next, a short step-by-step guide to importing AutoCAD Architecture to SketchUp. 

  • Check and prepare the CAD file 
  • Open the SketchUp model you want to import your .dwg or .dxf file to 
  • Choose File > Import to see the dialogue box 
  • Go to the saved CAD file 
  • Choose AutoCAD Files *.dwg or *.dxf
  • Choose the file you want to import
  • Click Options to see the Import AutoCAD DWG/DXF Options dialogue box 
  • If you need to, choose your preferences in the Geometry 
  • Choose the Preserve Drawing Origin checkbox to put your imported geometry in the origin defined by your .dwg or .dxf file. If you want to place the imported geometry near the SketchUp origin, leave the box unchecked 
  • Make sure to import the geometry at the right scale by choosing the same unit used in your CAD file from the Units drop-down list
  • Click OK in the Import AutoCAD DWG/DXF Options box
  • Go back to the Import box, click the Import button and SketchUp Pro will import your CAD file 

Best Practices for Working with AutoCAD Architecture Files in SketchUp


It’s good to have some tips for organising, managing and optimising files and performance in SketchUp, something that’s essential for every design project. Because large file sizes can slow down SketchUp’s performance, you’ll want to optimise the file size. You can do this by using proxy models and also by cutting down on the number of polygons in your model.

There are some essential best practices for making sure your AutoCAD Architecture and SketchUp files are compatible, so you get a seamless workflow. Here’s how to do it. 


Make sure you only import strictly necessary geometry. While SketchUp models can be just as accurate as CAD models, they won’t give you the same line-intensive drawings. So clean up or remove any content from the CAD file that you won’t need post-import to SketchUp. Maybe simplify the CAD file to just walls, or the walls, doors and windows if you need to model them in SketchUp. 

It’s also helpful to separate levels of detail in different CAD files. If it’s packed with the necessary geometry, can you break one file down into smaller ones? Maybe one with the site plan information, one with the floor plan, and the third containing specific details? 

You might find there are missing elements or things are at the wrong scale. If you pick a small unit like mm but your model was originally intended to display in feet, you’ll end up with tiny faces that’ll be lost on import. Your faces need to be at least .001 square inches. If you don’t know the units that were used in the original file, pick a large unit like feet or metres then resize the model post-import. 

When you use the ‘export for SketchUp’ feature to import a LayOut file you’ll need to use the Merge Coplanar Faces option to make certain the imported faces are clean. 

If your floor plan or other vector graphics is an Adobe Illustrator file, export the .eps file to .dwg or .dxf format in Illustrator first, then import the vector graphics. When you Adobe Illustrator to first reduce the number of anchor points to define your curves, it improves the performance of the file in SketchUp. Take care when extruding faces from curves with a lot of line segments, simply because it can dramatically increase the size of the SketchUp file. 

So what are the best practices for working with AutoCAD Architecture files in SketchUp? : Finally, the guide will provide best practices for working with AutoCAD Architecture files in SketchUp, such as using groups and components to organise the model and maintaining a consistent layer structure.

There are preferences to choose from in the Geometry area. Merge Coplanar Faces asks SketchUp to remove triangulated lines from planes automatically. Orient Faces Consistently analyses the faces’ direction so they face the same way. Preserve Drawing Origin places imported geometry at the origin defined in your .dwg or .dxf file. You can also drag and drop files into the SketchUp drawing area, via the import box that pops up automatically. 

Now you know how to import AutoCAD architecture to SketchUp. As you can see it’s easy to create brilliant architectural drawings in SketchUp, even for beginners. And at Elmtec we have all the insight, knowledge, guidance and information to make it a pleasure. Would you like to test-drive the software for yourself? We have plenty of handy tutorials for you to dive into, and here are the differences between the Pro and free versions of SketchUp to help you decide where to begin the journey. It’s going to be awesome!  

Guide to using V-Ray for SketchUp Animation

Animations are a brilliant way to bring designs to sparkling life, loved by designers of every sort and appreciated by stakeholders and clients. The results can be awe-inspiring. When you use SketchUp you get access to VRay, which creates perfect animations – and the imagery is outstanding. So, how to save images in v-ray in SketchUp?  In this article, we explore exactly how to render an animation in V-Ray for SketchUp, how to animate sunlight, and how to animate clouds. Then we’ll walk you through playing back a rendered animation and sharing your animation. By the end, you’ll understand how to make the magic happen.

Rendering an Animation in V-Ray for SketchUp

First of all, you’ll want to know how to render an animation in V-Ray for SketchUp. Your first task is to set up the scene properly and make sure the camera settings are right. 

Creating scenes lets you see different views of a model, for example from different angles or using different rendering styles. To set the camera the way you want, move your cursor over the camera model, select Edit Camera and use the Camera Properties dialogue box to change its settings. First, set the starting position of the camera and save the view in the scene tab, then move the camera to the end position you want and make another scene tab to mark it. 

Once you’re happy with the scene and the camera settings, it’s time to render your animation. You’ll already have installed and downloaded VRay, so your first task is to open up the V-Ray Asset Editor. This is where you create, save and open assets and change their settings, including the materials, textures, geometry, lights, and of course the Render Channels.

Once you’re in the Asset Editor, click on the Animations tab then pick V-Ray Animation. Choose the file format you want and set the animation’s output location, the place you want to save it to. Then you can adjust the rendering settings in any way you like to get the effects you need. All you do to begin the animation render is click ‘Render’. 

The realism of the lighting depends on the accuracy of your model’s orientation, so align them properly and make sure you’ve picked the right light source SketchUp. Also, make sure you’ve removed any unnecessary details from your 3D model to maximise the speed of the rendering process.  Name your materials clearly so you can easily assign them in V-Ray without getting confused. And check all the fine details are correct since even tiny things like accidental gaps between bricks or boards will be rendered. 

Playing Back a Rendered Animation

Next in our guide to V-Rray for SketchUp animation, the most exciting bit of all – playing back a rendered animation. After rendering your animation, you’ll want to play it back to see how amazing the results are.  Luckily, unlike other 3D rendering tools, V-Ray for SketchUp delivers fast rendering so you won’t have to wait forever.

How do you play back an animation in SketchUp and V-Ray? It’s nice and simple. First, open the V-Ray Frame Buffer. Then click the Animation tab and select the right animation file. All you do to play it back is click the Play button. You can change the speed of your playback easily, making it run faster or slower, and use the Scrubber to navigate through the frames.

If you want smooth results you can optimise the playback by changing the resolution of the animation or picking a lower-quality render.

Animating Sunlight in V-Ray

Sunlight makes such a difference to an animated architectural project, as well as to garden design, landscape design and more. It can bring an image to life in a way nothing else can, creating a hyper-real version to help convince the people who matter. 

How to animate sunlight? You can easily animate sunlight in V-Ray for SketchUp, and can even change the direction and intensity of the light over time as the animation progresses. You might, for example, want to show a client how an internal space is lit by the sun from morning through to evening. 


First, add V-Ray Sunlight to your scene. The position of the sun in the Shadows panel is recognised and rendered by V-Ray. Simply adjust the Sun’s position and rotation so it suits your needs then open up the V-Ray Sun Parameters window. Click on the Animation tab and select V-Ray Animation. Set the start and end frames for your animation, and change the direction and intensity of the sunlight via your animation timeline. That’s it. 

Animating Clouds in V-Ray

You can also animate hyper-realistic clouds in V-Ray for SketchUp, giving you an even more compelling picture of the way natural light affects the design, inside or outdoors. Here’s how to create and animate clouds in V-Ray, including adjusting the speed and direction of the clouds as time passes. The results are powerful, influential and exciting ways to enhance internal presentations and client meetings.   

How to animate clouds? First, add a V-Ray Volume Grid to the scene. Then pick a cloud texture to use via the Volume Grid. The clouds are remarkably real-looking, adding an exciting extra dimension to your work. Open the V-Ray Volume Grid Parameters window and click on the Animation tab. Then select V-Ray Animation. Set the start and end frames for your animation, and change the cloud speed and direction over time with the animation timeline. It is that simple. 

Animating Clouds in V-Ray

Finally, how to share your animation. Once the animation is rendered and you’ve played it back, made any changes and created a final version, it’s time to share. You can export the animation in a variety of popular formats and upload it to a choice of equally well-known video-sharing platforms, including Vimeo and YouTube.  

It’s very easy. Just pick the file format you want and the output location for the animation, like you would when sharing any other kind of file. You can always use a video compression tool to reduce the file size if it’s too large for easy sharing.  

You can use the finished film in all sorts of ways. Sharing it on social media platforms and forums gives you a wide audience, some of whom will re-share your work with their networks to give you useful exposure. It’s just as easy to embed the animation on a web page on your site, or in your online portfolio as an inspiring piece of content for visitors to enjoy. If you like you can give people a download link or send it as an attachment in an email so they can download it for themselves, and even save it to their machine. 

Rounding everything up

V-Ray comes with a beginner-friendly interface including Quick Settings for lighting. It offers unusually quick rendering times. It provides stunning interactive render previews and you can make changes as you go. It works perfectly with SketchUp, easy to integrate into your workflow. And the huge community and many online resources make it a dream to learn. No wonder it’s such a well-loved rendering tool.

If you’d like to test-drive SketchUp for yourself and experience the magic of animating your work the V-Ray way, click here to explore the potential of SketchUp Free versus SketchUp Pro. This is where your journey begins. 

The 3 Stages of Woodworking: From Raw Material to Masterpiece

Do you love wood? It’s such an amazing material, so very versatile. It can be carved, sawn, pressed, steamed and shaped. Imaginative woodworkers have made entire cars from wood, along with quirky lighting, espresso machines, keyboard covers and motorbikes. There’s even a stylish MK2 wooden iPad cover made by Miniot. This article explores the 3 stages of woodwork, whether you’re inspired to design and make something practical for a construction project or something purely decorative. When you take a careful, methodical approach and understand the particular material you’re working with, you’re set for success. Here are the three stages of woodworking to help you along the way.

Stage 1: Choosing the Right Wood

The first stage of the 3 stages of woodwork is to choose the right wood for the job. It’s important because, depending on the type of tree, wood can be super-light like balsa wood or incredibly dense and heavy like the toughest African blackwood. Wood can be either stiff or flexible, soft or hard. With an impressive 73,300 or so different tree species in existence across the world, each has its benefits and downsides depending on what you want to make. So where do you start? 

First, think about durability. If you’re making an item for outdoor use, will it stand the weather and if so, for how long? If it’ll be exposed to moisture or sunlight will it deteriorate fast or last for decades? You’ll need to pick the perfect wood for the conditions: indoor or outdoor, taking the location’s weather into account.  

Second, the look. Do you want a dark, dramatic wood or something pale and bright? Do you want the wood to have complex patterning, like you get in burr walnut for example, or no visible patterns, just a plain and simple surface in one colour? How about the texture? A rough finish, for example, wood with the bark left on, is perfect for some projects.  If you’ve ever seen a stunning wooden table with the bark intact around the edge, you’ll know the score.  

Third, think about workability. Do you need the wood to be easy to cut, shape, and sand or are you prepared to work harder to get the effect you want using tougher wood? Oak and maple, for example, are tough, and more difficult than average to work with. If you’ve ever tried to fix a curtain rail to an old oak lintel, you’ll know how rock-hard it can be.  Woods like pine and cedar, in contrast, are softer and a lot easier to work with. The grain can make a difference too. Coarse-grained wood can be more difficult to sand perfectly smooth than fine-grained timber.  

Stage 2: Building Your Piece

Now you’ve picked the right wood for the job, it’s time to get building. So what steps do you take to get things going? Most woodworking projects come with the same process: you plan, measure, cut, join and sand – then you finish. 

The planning side of a woodwork project involves drawing a detailed plan of the item. Your plan should include all the right measurements as well as any angles and joints. It’s surprising how quickly things can go wrong at this early stage, with measurements at risk of going astray, so as the old saying goes, measure twice and cut once. We recommend you measure more than twice and check all your assumptions carefully. Then you won’t waste time, effort and materials. 

Next, the cutting stage. You’ll mostly use a saw to cut the wood into the desired shape and size, whether it’s an industrial-sized automatic sawing machine of some sort or something smaller like a crosscut saw, a specialist type of handsaw for cutting wood across the grain by hand. There are almost 40 different kinds of wood saw, so there’ll be one that’s perfect for the job.  


Joining is a matter of using nails, screws, or glue to attach the pieces of wood. Every joint has to be good and secure because one bad joint can throw the entire item out of whack, leaving it with fundamental weaknesses. You’ll need to understand which joins are best for your project, and again there is a lot to choose from – 15 or more including mortise and tenon joints, angle mortises, dowelled butt joints, lap joints and dovetails. 

Stage 3: Sanding and Finishing

Now for the third in our three stages of woodwork. Sanding is a matter of patience, either by machine or by hand using the right kind of sandpaper for the wood you’re working with. Most of the time you’ll kick off with a coarser paper and work your way through to finer papers to achieve a beautifully smooth surface with no rough edges. Remember to always sand in the direction of the grain, even if it’s very fine-grained timber, otherwise, you’ll just end up with a tatty scratched-looking surface. 

The finishing stage is where your piece comes to vibrant life, giving it a wonderful professional look. Applying coats of stain, paint, or varnish protects the wood, and varnishes also bring the gorgeous natural colour of the wood to the fore.  


Staining wood changes the colour, adding vibrancy and interest to raw timber. You can make a plain, light-coloured wood dark, or even transform it with a bright-coloured stain. You might want the natural grain to show through – or not. Just pick a stain that complements your design. 


Sealing is all about protecting the wood. Apply a coat of sealer to protect the surface from the mildew and mould that can take hold after a long, cold winter, keep it safe from fading in the sunlight, and more. A sealing product will also help to preserve the colour. 

Painting covers the wood surface completely to give you an entirely different look. Choose any specialist wood paint you like, from matt to gloss, water-based to oil-based, bright to subtle, and sophisticated heritage shades to cheerful primary colours.   

Frequently Asked Questions: 3 Stages Of Woodworking

What tools do I need to get started in woodworking?

The basics are pretty simple. Choose a suitable saw, drill, hammer, and chisels bearing in mind the sort of projects you’ll be tackling. If in doubt, ask an expert. If it all goes well and you’re inspired to do more you might also want to invest in a planer, jointer, and router to take your skills to the next stage.

Can I use any type of wood for my project?

No, simply because every kind of wood is different, with its unique properties. Pick the type of wood that’s right for the project, one that is adequately durable and strong, heavy or light, hard or soft, light coloured or dark, smooth or heavily grained and textured.

How do I know if my piece is properly finished?

It’s a feel thing. The finished item should feel smooth to the touch without any rough bits. It’ll be even and free from ragged spots, even in the places you can’t see. If you’ve used a wood finishing product the brushstrokes should be invisible to give you a professional consistent look.

The 3 stages of woodworking... explained!

Now you know what’s what, you’re ready to go create. Woodworking is such a rewarding hobby once you get some basic skills under your belt. It does come with the need to understand the various properties of different woods, but it’s an interesting journey of discovery you’ll enjoy. 

A methodical approach to building and finishing wooden items makes all the difference between something good and something outstanding. You’ll get a kick out of taking pride in your workmanship. When you follow the three stages of woodworking – choosing the right wood, building the item well and finishing it beautifully – the results will be stunning, hard-working and long-lasting. What will you make first? 

Creating Plans for Woodworking with SketchUp

As a woodworker, plans sit at the heart of everything you do. Great plans help you save time, conserve materials, prevent waste, meet budgets, delight clients, and avoid mistakes. If you’ve never tried a SketchUp woodworking template on for size, now’s the time to get busy with one of the world’s best-loved and respected 3D design tools. You’ll find SketchUp woodworking models useful, practical, and inspiring, and they might just change your life. Modeling designs in SketchUp formalises your thinking, helps pin down the exact amount and type of materials you need, and supports dazzlingly good client presentations. So let’s explore what they’re all about and how to use them.

Using SketchUp for Woodworking Plans

SketchUp is a top class 3D modelling tool that’s all about creating and editing beautiful 2D and 3D models with the software’s patented Push and Pull method. The tool lets you transform any flat surface into 3D shapes by simply clicking and pulling, which makes designers’ lives so much more fun as well as easier and faster. It’s easy to learn, a joy to play with, clients adore the results, and the toolset is wonderfully robust and varied. It’s hugely popular 3d modelling software for woodworking, as you can imagine, and is considered by many to be the best cad software for woodworking projects. 

You’ll also discover an awesome collection of SketchUp tutorials for woodworkers, specially created to help you learn even faster and become an expert in no time. There are masses of great YouTube guides for those of you who learn best from video, and just as many cool courses to extend your knowledge and capabilities. In no time you’ll understand how to resolve the joinery before you begin work, understand exactly how much wood you need, make an accurate cut list before cutting a single thing, and print out brilliantly detailed plans to follow when you eventually buy the materials. 

SketchUp woodworking plans are supported by some excellent resources. Take the SketchUp 3D Warehouse, which is packed with handy and inspiring premade SketchUp woodworking plans for you to freely use in any way you like. You can simply follow them or go further and copy them, amend them, and make them your own, whether it’s coffee table woodworking plans, single bed woodworking plans, queen size bed woodworking plans or something else altogether. If you want to design it, there’s probably a helpful SketchUp woodworking template already waiting for you.  

What are the main reasons why SketchUp is good for woodworkers? For a start there’s no need to build mock ups because digital 3D modelling takes care of it. It lets you sketch and evaluate ideas fast and easily, discarding and embellishing as you go. You can import digital imagery to use as the basis for 3D reproduction plans and it’s super-easy to examine and check your designs from every imaginable angle. This means you can modify your work without so much as going anywhere near a chunk of wood – which means wasting wood just isn’t an option. 

The SketchUp woodworking models, drawings, plans and cut lists you create are highly accurate as long as the information you input in the first place is right. And you can play with changing the materials instantly, to see which woods look best. All this means it’s just as good for hobbyists as it is for woodworking pros, and the free version of SketchUp is the perfect way to test-drive the software at no cost. All you do is download and install the free version – or go for the full package by subscribing to SketchUp Pro, to begin the journey. 

Why is Green Building Design Important?

Now you know what is green building design. So why does it matter? Every one of us has to make an effort to slow climate change, and everything we do to fix it matters. We have to protect the natural environment that nurtures us before it turns on us. We must reduce waste and cut down on the amount of energy we use. People matter too. The people who design today’s built environment have more to think about than ever, improving the health and wellbeing of those who will live and work in their buildings. 

How to Create Woodworking Plans in SketchUp

Next, here’s a simple step by step guide about how to create woodworking plans in SketchUp. 

  • First download Sketch-Up 
  • Open the EXE file and follow the simple instructions to finish the installation
  • Now it’s time to start drawing 
  • First, think about the size and shape of your design
  • Choose the template ‘Woodworking – Inches
  • Click ‘Start Using SketchUp’ – Now you’re in the Drawing and Modeling Interface
  • Move the cursor to the far left side where the Drawing Toolbar is
  • Find the rectangle tool 
  • Select it and move the cursor to Origin, where all the axes meet
  • Left click
  • Type in the length x width – you’ll see what’s happening in the bottom right corner
  • Now select the Push Pull tool and select the top of the rectangle you’ve made 
  • Use the quick action buttons to draw frames: circles, rectangles, squares, blocks etc, adjusting the details until they’re what you want 
  • Once you have sketched the woodworking design out in SketchUp and the layout is accurate, you can play with textures 
  • Once the design’s finished you can easily convert it to 2D using the Layout tool – which is how you create your 2D SketchUp woodworking plans

SketchUp Woodworking Plans

Now you know about SketchUp woodworking models and SketchUp woodworking plans. It really is that simple. When you take the time to input accurate data in the first place your drawings and plans will be perfect, a wholly correct representation of the finished, real-world item, whether it’s a suite of wooden garden furniture, a fitted book case, a storage box or whatever else your imagination dreams up. 

Are you ready to go? Great. You’re going to love this. Click here to download the free 7 day trial of Sketchup Pro, and check out the many free tutorials and other learning resources here.

What is Green Building Design?

Everybody’s doing it. Green design isn’t unusual. It’s the thing to do. As more of us wake up to the potential for doing things sustainably and sensitively, doing our bit to help fight climate change, a greener approach is a must. This article looks at what is green building design and how to design a green building. If you’re researching green building design, this guide reveals everything you need to know about what it is, why it matters, the principles underlying it – and how to actually do it. 

What is Green Building Design?

Green building design is sustainable building design. They mean the same thing: creating structures and using materials and processes that meet or beat high environmental standards throughout the building’s life-cycle, from the early stages where you decide on the siting and surroundings to the design and construction of the structure itself.  

It also affects the way the building operates, the maintenance, the renovation and – ultimately, the way it is off-boarded or disposed of once demolished. It’s holistic, end-to-end, and takes the wellbeing of the natural environment and climate into account at every stage. Basically it’s all about meeting the needs of the present without causing damage in future. 

Why is Green Building Design Important?

Now you know what is green building design. So why does it matter? Every one of us has to make an effort to slow climate change, and everything we do to fix it matters. We have to protect the natural environment that nurtures us before it turns on us. We must reduce waste and cut down on the amount of energy we use. People matter too. The people who design today’s built environment have more to think about than ever, improving the health and wellbeing of those who will live and work in their buildings. 

Principles of Green Building Design

How to design a green building? The primary principles of green building design vary according to where you look, but there’s an over-arching principle of ‘do no harm’. In an ideal world we don’t just avoid harm, we do active good. So we’ve taken the most popular six from various sources to give you a flavour of what it’s all about. 

First, you’ll optimise the potential of the site. Since every detail matters in an environmental context, you’ll want to consider everything from the location of the build to its orientation, and the surrounding landscaping if there is one. All these things affect local ecosystems, transport, and energy use. 

Second, you’ll want to optimise the building’s energy efficiency, as well as thinking about what kind of energy it’ll run on. Ideally you’ll aim to design a net zero energy building, an excellent way to significantly reduce the world’s dependency on fossil fuels. Think heat pumps instead of gas boilers, renewable electricity instead of oil or coal—derived power. 

Alongside climate change, the world is facing a worrying water crisis. It’s ironic when sea level rise is one of the major threats to a steady climate. But it means we all need to protect and conserve water. Because wildlife depends on it as much as us, we need to factor it into our building designs. A truly sustainable building uses water efficiently to minimise the impact on our fresh water stock and every creature depending on it. 

Optimising the space inside a building and the materials used is another way to go greener. While the world’s population growth is starting to slow down, slower now than it has been since the 1950s, we still need to take great care of the natural resources  we have left, using them wisely. Sustainable building materials usually minimise environmental nightmares like pollution, too. 

It’s essential to enhance Indoor Environmental Quality or IEQ, simply because a healthy, comfortable building has such a positive impact on the way people feel, behave, and work. Good air quality and an environment at the right temperature makes us feel happy, which makes us more productive in so many ways. 

Last but not least, a green building optimises operation and maintenance. Everyone does the right thing by specifying sustainable materials and systems, operational matters, and ongoing care and maintenance. When everyone involved collaborates to make a building green, including engineers, architects, site contractors and suppliers, the results are amazing.  

How to Design a Green Building

So what are the key steps involved in designing green buildings? You’ll want to carefully assess the needs of the project. A formal planning and needs assessment is a great way to make sure you’ve pinned down all the requirements. Planning involves finding a crack team of good people, a comprehensive end-to-end budget, the materials, the energy supply and potential consumption, the site itself, the landscaping, the water, electricity, air quality, and the waste disposal. It’ll cover any planting and include site planning and site assessment. Let’s explore them in order.  

Once you’ve figured out the needs of the buyers and set some goals to work to, you’ll want to build the right team. You’re looking for people who are highly knowledgeable about green design principles, regulations, trends and materials, including designers and architects, engineers, builders, insurers, and officials like Building Inspectors. Look for expertise in green design theory and practice, a keen eye for energy conservation techniques and experience in cost-benefit analysis.

Site design involves a host if essentials like soil analysis, the topography of the land, the weather or climate, and ways to conserve the site’s ecological diversity. It’s about planning for rainwater collection and doing everything you can at every stage to prevent waste, creating urban greenways and walking trails, cycle paths and safe spaces for wildlife. You’ll take existing plants and trees into account. And you’ll be sensitive to water, avoiding affecting any water on the site and surroundings, planning to harvest and re-use it. Once all that’s done you’ll know what you can build on the site, and what you can’t do. 

Next in our journey into how to design a green building, it’s time to actually start designing the place, including the complex support systems it will depend on: the drainage, waste disposal, ventilation, heating, cooling, electricity supply and lighting. The wind matters because it affects the balance of the air pressure and thermal loss. You’ll want to make the most of natural sunlight and the potential for natural ventilation. Good heating, ventilation, and air conditioning will help people adjust and balance the cooling and heating they need, and intelligent building materials like smart bricks both adjust the thermal mass and help keep temperatures steady. Again, every single aspect matters. 

The building interior is just as important in green building, taking the same careful approach to finding the most sustainable solutions, thinking further ahead than ever before, and taking more responsibility for the future of a building at its birth. 

What is green building design without the best 3D design software? It’s nowhere near as easy and nowhere near as enjoyable! A great 3D design tool is a wonderful tool, giving you the flexibility, seed and efficiency you need to design ‘green’ like a demon quickly, intelligently and creatively, ideally supported by equally good tutorials and learning resources. And that brings us on to SketchUp.  

SketchUp Pro Plans and Pricing

Are you ready to design with green principles and practices in mind? It’s the future, and it’s thrilling. You might like to check out SketchUp Pro, there’s a free 7 day trial available and you can compare it with the free version here. You can also buy it on the same page. There’s a range of tailored licenses to choose from, so there’ll be the perfect one for you, whether you want SketchUp licensing options for your commercial design business, for personal use, for higher education, a primary school or secondary school.

A Guide to Designing for 3D Printing

It’s revolutionary. For the first time ever we can design a thing, send the digital 3D model file to a printer, and then print it in perfect, accurate 3D. The results are awesome and the potential is inspiring. Whatever sector you design in you’ll probably want to know how to design for 3d printing. This guide reveals all about what is actually a pretty simple process. By the end of it you’ll understand how to design 3d models for printing, get some top tips for 3D printing design, and enjoy a quick tour around the wonderful world of SketchUp, one of the world’s best-loved 3D design tools. 

How to Design 3D Models for Printing

3D printing is sometimes called additive manufacturing. It simply means making solid 3 dimensional objects from a digital file using an additive process. The printer lays down layers of molten material, adding more until the object is complete. Every layer is a thin cross-section of the thing you’re printing. 

This way of working costs less than traditional manufacturing, bringing the cost of 3d parts, models and prototyping right down as well as putting it in the hands of anyone with a suitable 3D printer. 3d printing improves success rates, reduces waste, and speeds up product development. 

3D print is exciting because you can print complex 3D shapes directly and see them develop as you watch, a fascinating process in itself. Take note of these essential best practice tips and you’ll be a step ahead from the offset. Here’s how to design for 3d printing. 

Figure out the build volume – which affects the size of the things you can print. Basically if your design is bigger than the printer can print, it won’t print. You need to know this before you begin designing to save yourself time and hassle. If your design needs more printer capacity it isn’t the end of the world. You can break it up into manageable parts called modules and print them separately. 

Choose the right orientation – Fused Filament Fabrication or FFF describes the way the print material extrudes, where the object is built up of melted material layer after layer. Because FFF prints layer by layer you need to decide the orientation early on because it influences your design choices. 

No sharp corners – You can probably see it in your mind’s eye. Sharp corners come with powerful shrinking forces which kick in as the print cools. It can easily warp, whereas rounded corners don’t tend to because they spread the forces to lessen the risk.

Think about overhang supports – FFF printed parts can cope with overhangs, but there’s a practical limit. When you want to stop layers from drooping or curling on your overhangs, don’t print unsupported

overhangs at an angle less than 50° from the vertical axis down. Take care over overhang quality too, which can depend on the material. Some need support at lower angles than others.

Know your bridging supports – Bridging support guidelines are crucial. Always make un-supported horizontal bridges 10mm or less to print problems and failures.

What’s the nozzle size and hole size? – The printer nozzle size matters. Bigger nozzles print faster and the nozzle size also drives the design’s minimum height and wall thickness. Hole size is another important thing. The best way to success is simply avoid modelling holes less than 2 mm diameter so you can be sure they don’t get blocked up. 

Top Tips for 3D Printing Design

Now you know how to design 3d models for printing. Next, here are some high-level tips for 3D printing design. 

First, choose the right 3D modeling software. SketchUp is a great pick for all sorts of reasons, including the fact it’s used by every imaginable sector where 3D design is a thing. 

Second, choose the right materials for your 3D printing project. Will it be a resin-based material or the most common, plastic? State-of-the-art machines usually use fine powdered material for a highly detailed finish. You might choose a metal, or even carbon fibre. You’ll probably enjoy the learning process.  

Third, follow all the 3d printing design guidelines and rules to hit the success button, like those we’ve talked about above. There’s no need to experiment and fail when others have done the hard work before you!

And fourth, like you would with any project, double check your design before pressing the print button. Find any problems, fix them, then check the file one last time. 

Choosing the Right Software - How to Use SketchUp for 3D Printing

SketchUp is one of the world’s most popular 3D modeling and design programs for 3D printing. So how to use SketchUp for 3D printing? We’ll keep it simple with a step-by-step guide. 

  • Set your template properly – It’s a potentially expensive and embarrassing mistake to make, so first set your template to metric or imperial, millimetres or inches. Do it like this: Window > Preferences > Template > 3D Printing – Millimetres or 3D Printing – Inches
  • Install a free SketchUp STL extension like the SimLab STL Importer for SketchUp or SketchUp STL. The STL file format is the most common in 3D printing, used by most people so ideal for sharing, editing and printing designs with other software. A SketchUp STL extension means you can export your model to a 3D printer as an STL file
  • Follow tried and tested 3d printing design guidelines, in other words avoid thin surfaces and walls, make your model watertight and solid, and steer clear of internal overlaps
  • Take a look at your model from the inside – this is where you might find hidden mistakes that mean the model can’t be printed. Use SketchUp’s Entity Info feature to know more, using Select and Hide to see inside the model. Or switch into x-ray-mode by clicking on View > Face Style > X-ray
  • Make an outer shell – As we’ve said, overlapping objects cause problems in 3d printing.
  • But when you create an outer shell it automatically deletes all the internal overlapping parts
  • Fix your faces – If the surface of your model is facing in the wrong direction, usually facing the inside of the object instead of the outside, the software changes the colour of the surfaces to pale blue for you. To fix it all you do is right-click on the inside surface then select Reverse Faces
  • Make curves smoother by increasing your circle and arc segments, just as simple to fix  
  • Zoom in close – It’s useful to know that some problems are so tiny it’s hard to see them without zooming in. It’s worth spending time checking the small stuff, but there’s an easier way. SketchUp extensions like Solid Inspector 2 find problems automatically and show you where they are 

There’s an exciting feature in the SketchUp 3D Warehouse. When you upload a model to it, tick the ‘I want this to be 3D printable’ button and it fixes any modeling errors instantly, which means you can safely download it as an STL file then let the 3D print magic begin

A true renaissance woman

SketchUp Pro Plans and Pricing

Now you know how to design 3d models for printing and how to use SketchUp for 3d printing. If you’re inspired to design and print something amazing in 3D , check out the ins and outs of the free and Pro versions of SketchUp here. You can order a free trial of SketchUp Pro here, or subscribe and buy SketchUp Pro right away on the same page. There are countless excellent extensions here, as well as a good choice of SketchUp licensing options with special licenses for commercial design, higher education, primary schools and secondary schools.

How to design a house interior: An interior designer’s beginners guide to SketchUp

You want to know how to plan interior design of a house? This article reveals all about how to design the inside of a home. As an interior designer it’s your job to plan, research, and manage your design so it creates an internal environment that isn’t just good to look at. It’s also practical, designed to support good health and wellbeing whatever the purpose. It’ll be easy to move around, comfortable to be in, flow properly so people find it a pleasure to move around, and support the activities that go on in the space. If you’re looking to design the inside of a home, you’ll think about the needs of the people living there as well as common sense things like the layout and colours. Here’s how to make a complex job simple, enjoyable, and convincing to the clients you’re designing for. Read on to explore how to design a house interior in SketchUp, one of the world’s best-loved 3D design tools.

How to Plan the Interior Design of a House

You already know the design side of an interior is crucial to the interior’s success. Your first consideration in how to design a house interior is space planning, so let’s look at that. What is space planning? It’s the process of pinning down the absolute essentials before getting creative. You’ll figure out the design’s purpose, formalise all the functional requirements, and decide on the basic layout of specific areas in the home. As you can imagine this is an absolutely essential part of the interior design process, the information that underpins everything else you’ll do. 

Next there’s the process of interior design concept development. This reveals the central theme all your design elements are based on. You’ll bring it from the early ideas stage through to reality via careful planning. When it’s done properly an interior design concept provides a strong visual theme to evoke a specific mood using colours, spaces, and of course styling. It’ll involve making intelligent decisions about cabinetry, furniture, and the overall look and feel of the space. Lighting design is crucial too, of course, , since the way a space is lit tends to pull everything together into a satisfying whole that fits the brief perfectly. Thanks to SketchUp Pro and the other versions, all this is possible, simple to learn, and at your fingertips.

How to Design a House Interior in SketchUp

Next here’s some inspiring guidance for beginners to show you how to go about creating an interior design in SketchUp. This is how to plan interior design of a house. 

Start by preparing your workspace. It’s good to know SketchUp provides some useful templates to help you create an accurate floor plan for the project, saving you even more time. Next, you’ll need to set the camera viewpoint. You set it by clicking Camera > Standard Views > Top, which gives you an essential Plan View of the area you’ll be working on. It could be a single room, it could be an entire floor of a building, but whatever your starting point it has to be accurate, so measure more than once to double-check your assumptions. 

Next, it’s time to draw your geometries. In SketchUp Geometries consist of faces and edges, where edges are simply lines. As you can imagine it takes at least three lines to create a single face. If you change your view to X-Ray by clicking View > Face Style > X Ray, you’ll see the floor plan image as well as your lines. 

You’ll want to add accurate doorways and frames, windows and mouldings. If you’d rather just model one door and one window, you can do that with ease in no time. Rather than model them from scratch, you can simply use a pre-designed door, window or frame component made by someone else. 

It’s handy to be able to organise the model using groups and components. Groups let you keep related elements organised in the drawing area, to make choosing and copying multiple elements easier. And SketchUp components let you re-use objects. 

There’s a huge collection of components and entire designs in the SketchUp Warehouse, all free to download and use in any way you like to save time and hassle. Choose from a wealth of quality pre-designed doors and windows, cabinetry and furniture, lighting, textures, materials and more. The 3D warehouse also provides cool examples of interior designs for you to refer to or use as you wish. 

It’s just as easy and enjoyable to apply materials and decorate your interior once you’ve designed the layout. Materials add convincing colour and realistic textures to models, including delights like tiles, woods, colours, finishes and every imaginable texture. And you can add lighting, as we’ve mentioned, to reveal how natural and artificial light falls and moves within the space throughout the day. SketchUp provides a variety of lighting options including spotlights, sphere lights, rectangular lights, disk lights and linear lights as well as natural light in every imaginable weather condition and time of day. 

Last but not least SketchUp makes it a dream to render and visualise your interior design into convincing images that bring your work to life for clients. Take real-time rendering plugins for SketchUp like Enscape, which instantly create beautiful, realistic renderings to bring the interior to impressive reality.  

SketchUp for Interior Design

Now you know how amazing SketchUp is in your line of work, you can grab yourself a real treat in the shape of a free 7 day trial of SketchUp Pro, a great way to learn how to design a house interior quickly and pleasurably. Give it a go and it’ll transform your world. You’ll also want to check out the awesome range of learning resources available, including tutorials, videos and more.

Revit importer delivers flexible workflows in SketchUp

SketchUp unveils native interoperability and removes barriers to creative exploration in 2023 with the Revit Importer for Studio and elevated modeling tools in SketchUp for Desktop. 

Welcome to the next generation of creative exploration; updates for 2023 deliver the fastest, easiest, most native interoperable modeling experience yet. Trimble is connecting two core tools in the industry: SketchUp & Revit! The Revit Importer elevates SketchUp’s Studio subscription, while tangible improvements to core tools boost workflows in the desktop application. Indulge in SketchUp 2023’s powerful toolset for your next built masterpiece. Plus, there are two new scale figures to celebrate the new design year – Heather and her fierce but sweet cat, Lily.

Studio advances interoperability

Shave hours off your Revit-to-SketchUp workflow

The new import feature within a Studio subscription allows you to accurately and efficiently convert your Revit models into SketchUp geometry for deeper collaboration across project phases, teams, and stakeholders. Various workarounds exist to export Revit models to SketchUp, but this new importer saves the most time, is more accurate in geometry conversion, and leads to much lighter models.


By preserving model structures between Revit and SketchUp – Revit families and layers neatly translate to groups, components, and tags in SketchUp – you can save hours or even days of model cleanup and progress your project with accuracy. A smoother transition between design phases allows you to focus on what’s essential: fine-tuning your vision. 


“The Revit Importer sped up my importing and cleans up workflows from a couple of days to a few hours, even with complex models.”

-Carl Goodiel, VDC Manager


Why use it?

  1. Improve collaboration with project stakeholders who create Revit deliverables.
  2. Preserve model structures between software for less cleanup.
  3. Move Revit models into SketchUp to iterate new ideas quickly. 
  4. Build efficiencies; the imported Revit file is automatically optimized for easier geometry manipulation in SketchUp and significantly reduces file size.
  5. Create compelling visuals; Revit material colors and transparencies are respected during import to speed up visualization workflows.
  6. Translate Revit levels to SketchUp section planes. 


“We love the Revit Importer. It has saved us lots of time, and to my amazement, the converted file sizes are much smaller than other methods. This importer has become essential to our workflows. “

-Shyam Singh, GLMV Architecture


Trimble has made the Revit Importer a native functionality in SketchUp’s desktop application. Customers with Studio subscriptions can access this feature as soon as they update to the 2023 version. Customers with Pro subscriptions can install the Revit Importer in SketchUp 2023 and then initiate a trial to evaluate this new workflow. No Revit license is required. 


Discoverable and connected workflows


Using Studio’s new common installer, you can discover, download, and install all the tools you need for advanced workflows and complex projects. The subscription also includes V-Ray 6 for creating cutting-edge visuals and Scan Essentials for importing point cloud data – both were enriched with new functionality in late 2022. Please note that Studio is a Windows-only subscription. Scan Essentials is English-only, and V-Ray offers English and Chinese versions.

Breakthroughs for desktop

Build your anything –  faster – with new modeling and documentation features and improvements in SketchUp for Desktop. Explore a brand new Flip tool that replicates design elements predictably, manage DWG files in LayOut, and more.

Take the guesswork out of Flip transformations — the brand-new Flip tool lets you pre-visualize the outcome to model more predictably. Previsualize the plane you want to flip your selection along, then hover over the red, green, or blue planes to confirm the proper orientation. Click to flip! Fewer clicks and undoes means you can focus more of your valuable energy on developing a symmetrical relationship, evaluating it, and modifying it. Flip your model, and it just might flip your creative perspective too.


Pro Tip: Want to set up a quick, mirror relationship in a model to build more efficient components or make symmetrically-oriented copies? Toggle the Flip tool to activate Copy Mode, and you’ll flip a copy that is symmetrical to your selection. Use the tool to express a holistic vision based on a single, repetitive component. 

In LayOut, Trimble is fortifying interoperability by adding the ability to manage imported DWG files as references. Sound familiar? It’s the same process for managing referenced files in LayOut, but now they’ve expanded it to apply to all images, text files, or AutoCAD drawings. View all external file references, receive notifications if a file reference is outdated, and update, relink, or remove a file reference using the File Reference Manager. Better still, all your custom style edits (line weights, scale, and viewport positions) stay intact even when reference files are updated. Document and present your work confidently, knowing that all your references are up-to-date without wasting previous layout and styling work.

A true renaissance woman

From cheese making to ice climbing to feral cat rescue, there’s not a lot Heather can’t handle. If that’s not enough, she’s also a Senior Software Engineer at SketchUp, and she’s had a significant hand in the updates for 2023. Learn more about Heather and her cat, Lily, the new 2023 scale figure duo (article in English).

An enhanced, high-value offering

From the Studio overhaul to cross-subscription modeling improvements, SketchUp has removed workflow barriers to unleash your creativity in 2023. 

If you already have a Pro or Studio subscription, you can access SketchUp 2023’s time-saving improvements by emailing sales@elmtec.co.uk.

If you’re still on the fence, you can try a Studio subscription free for 7 days.

What is V-Ray?

What is V-Ray? How does V-Ray work? And what is V-Ray used for? If you’ve never come across it in your SketchUp life, you’re going to love V-Ray. This is how you create beautiful, convincing still and animated versions of your 2D and 3D models. The results are inspiring and attractive, the perfect resource to convince your stakeholders, get informed ‘yes’ decisions from clients, and see for yourself how your designs look when brought to real-feeling life. Read on to discover what V-Ray is, what people like you use it for and how it works. By the end of this article you’ll be keen to download the tool and get going.

What is V-Ray?

So what, exactly, is V-Ray? V-Ray is a commercial plugin for third party 3D computer graphics software applications like SketchUp. Designers use it to produce stunning visualisations and computer graphics in industries like the media sector, entertainment, film and video game production, industrial design, product design, and of course architecture, landscape design and garden design. 

The V-Ray application has been created and developed by the respected Bulgarian software company Chaos. V-Ray for SketchUp gives you all the 3D rendering software capabilities you need to combine real-time and photorealistic rendering inside SketchUp. Whether you’re a seasoned professional user or a beginner, Chaos V-Ray is stacked with brilliant tools to make visually compelling renders and animations that bring designs to life. 

Being so robust and packed with features, whatever the design task it’ll deliver perfect results every time to make your workflow flow better, save you time and hassle, and delight the people you’re designing for.

What is V-Ray Used For?

V-Ray focuses on rendering. Rendering, also called image synthesis, involves generating a photorealistic or non-photorealistic image from a 2D or 3D model using software to analyse and configure remarkably real-looking and attractive imagery. The image created by the software is called the render. 

V-Ray is popular with a broad range of people in all sorts of sectors, all of whom use it to transform their designs into awesome photo-realistic and creative images. As you can imagine architects in particular love the tool’s outstanding capabilities, as do their clients, simply because it turns flat architectural designs into extremely real-looking, wholly convincing images.  

How does it create magic? It’s a bit like having a virtual camera inside SketchUp. V-ray uses something called ray-tracing, a clever way to build an image by tracing the paths of light from the camera through pixels in an image plane, then cleverly simulating the effects as it comes across virtual objects. Creating different effects simply means the programme traces different rays. 

Expressed another way, V-Ray is a rendering engine that harnesses illumination algorithms like path tracing, photon mapping, irradiance mapping and something called ‘directly computed global illumination’ to build real-feeling imagery and animation. It illuminates exteriors and interiors with natural light using either the Sun and Sky system or a Dome light to set up image-based lighting. The resulting scenarios are presented as thumbnails for you to easily apply to your scene, to see which you like best.  

There’s more. You can also use V-Ray to make amazing animations. It cleverly renders the animation sequence as separate frames which you join together later to make an animated clip. No wonder it’s so popular with everyone from architects and product designers to Interior designers and landscape designers, as well as artists, animators and all sorts of other creative types. 

How Does V-Ray Work?

Next, let’s dive into exactly how people use V-Ray in SketchUp. Your first task is to check that both the computer you’re using and the version of SketchUp meet V-Ray’s requirements. First, know that V-Ray is supported for 64-bit operating systems and 64-bit versions of SketchUp. Processor-wise you’ll need an Intel* 64, AMD64 or compatible processor with SSE4.2 support. 

A minimum 8 GB RAM is essential but 16 GB RAM is recommended. You’ll need at least 2GB hard disk space but again, 12GB is recommended, including extra downloadable content. For TCP/IP, the system only supports IPv4, not IPv6, and your ideal operating system is Windows 10 or Windows 11. Last but not least, you’ll need to use SketchUp 2019, 2020, 2021, 2022, or the latest version, 2023. 

Next, how to install V-Ray. It’s a simple task: 

  • Download the V-Ray installer (it’s an .exe installation file)
  • Open the .exe file
  • Say ‘yes’ to the Licence agreement
  • Click Install
  • As a Windows user, it’ll ask you if you want to share anonymous usage data. We recommend you say yes, simply because it helps V-Ray’s developers improve the software even more  
  • Once it’s installed, sign in to your Trimble account to authorise the software

Once it’s installed you’ll see the V-Ray toolbar containing all the most popular V-ray tools. Now you can get cracking creating wonderful photorealistic renderings of your 3D designs, scenes and more. You can go play with exceptionally realistic light sources including light bulbs, neon lighting and the sun itself, revealing what your work will look like under different sorts of conditions. You can even change the light’s intensity and colour to add drama and excitement. 

Then there are V-Ray’s materials, designed to make realism even more real. Add convincing textures, create beautiful real-looking materials like stone, wood, fabric, and even grass, all making your output even more true to life, and even more inspiring. 

V-Ray and SketchUp Pro - Plans and Pricing

In answer to the question what is V-Ray: it’s brilliant. How does V-Ray work? Simply and intuitively. Now you know exactly what V-Ray is used for, by whom and how, and you’re keen to give it a try for yourself. You can check out the ins and outs of the free and Pro versions of SketchUp here, test-drive a free trial of SketchUp Pro here, or subscribe and buy SketchUp Pro right away. You can dive into a load of excellent tutorials and learning resources here, all free to use and readily available. And your SketchUp licensing options? There are special licences for commercial use, higher education, and even for primary and secondary schools. Whichever you choose, we hope you enjoy the journey!