




Designing with Water using V-Ray for SketchUp

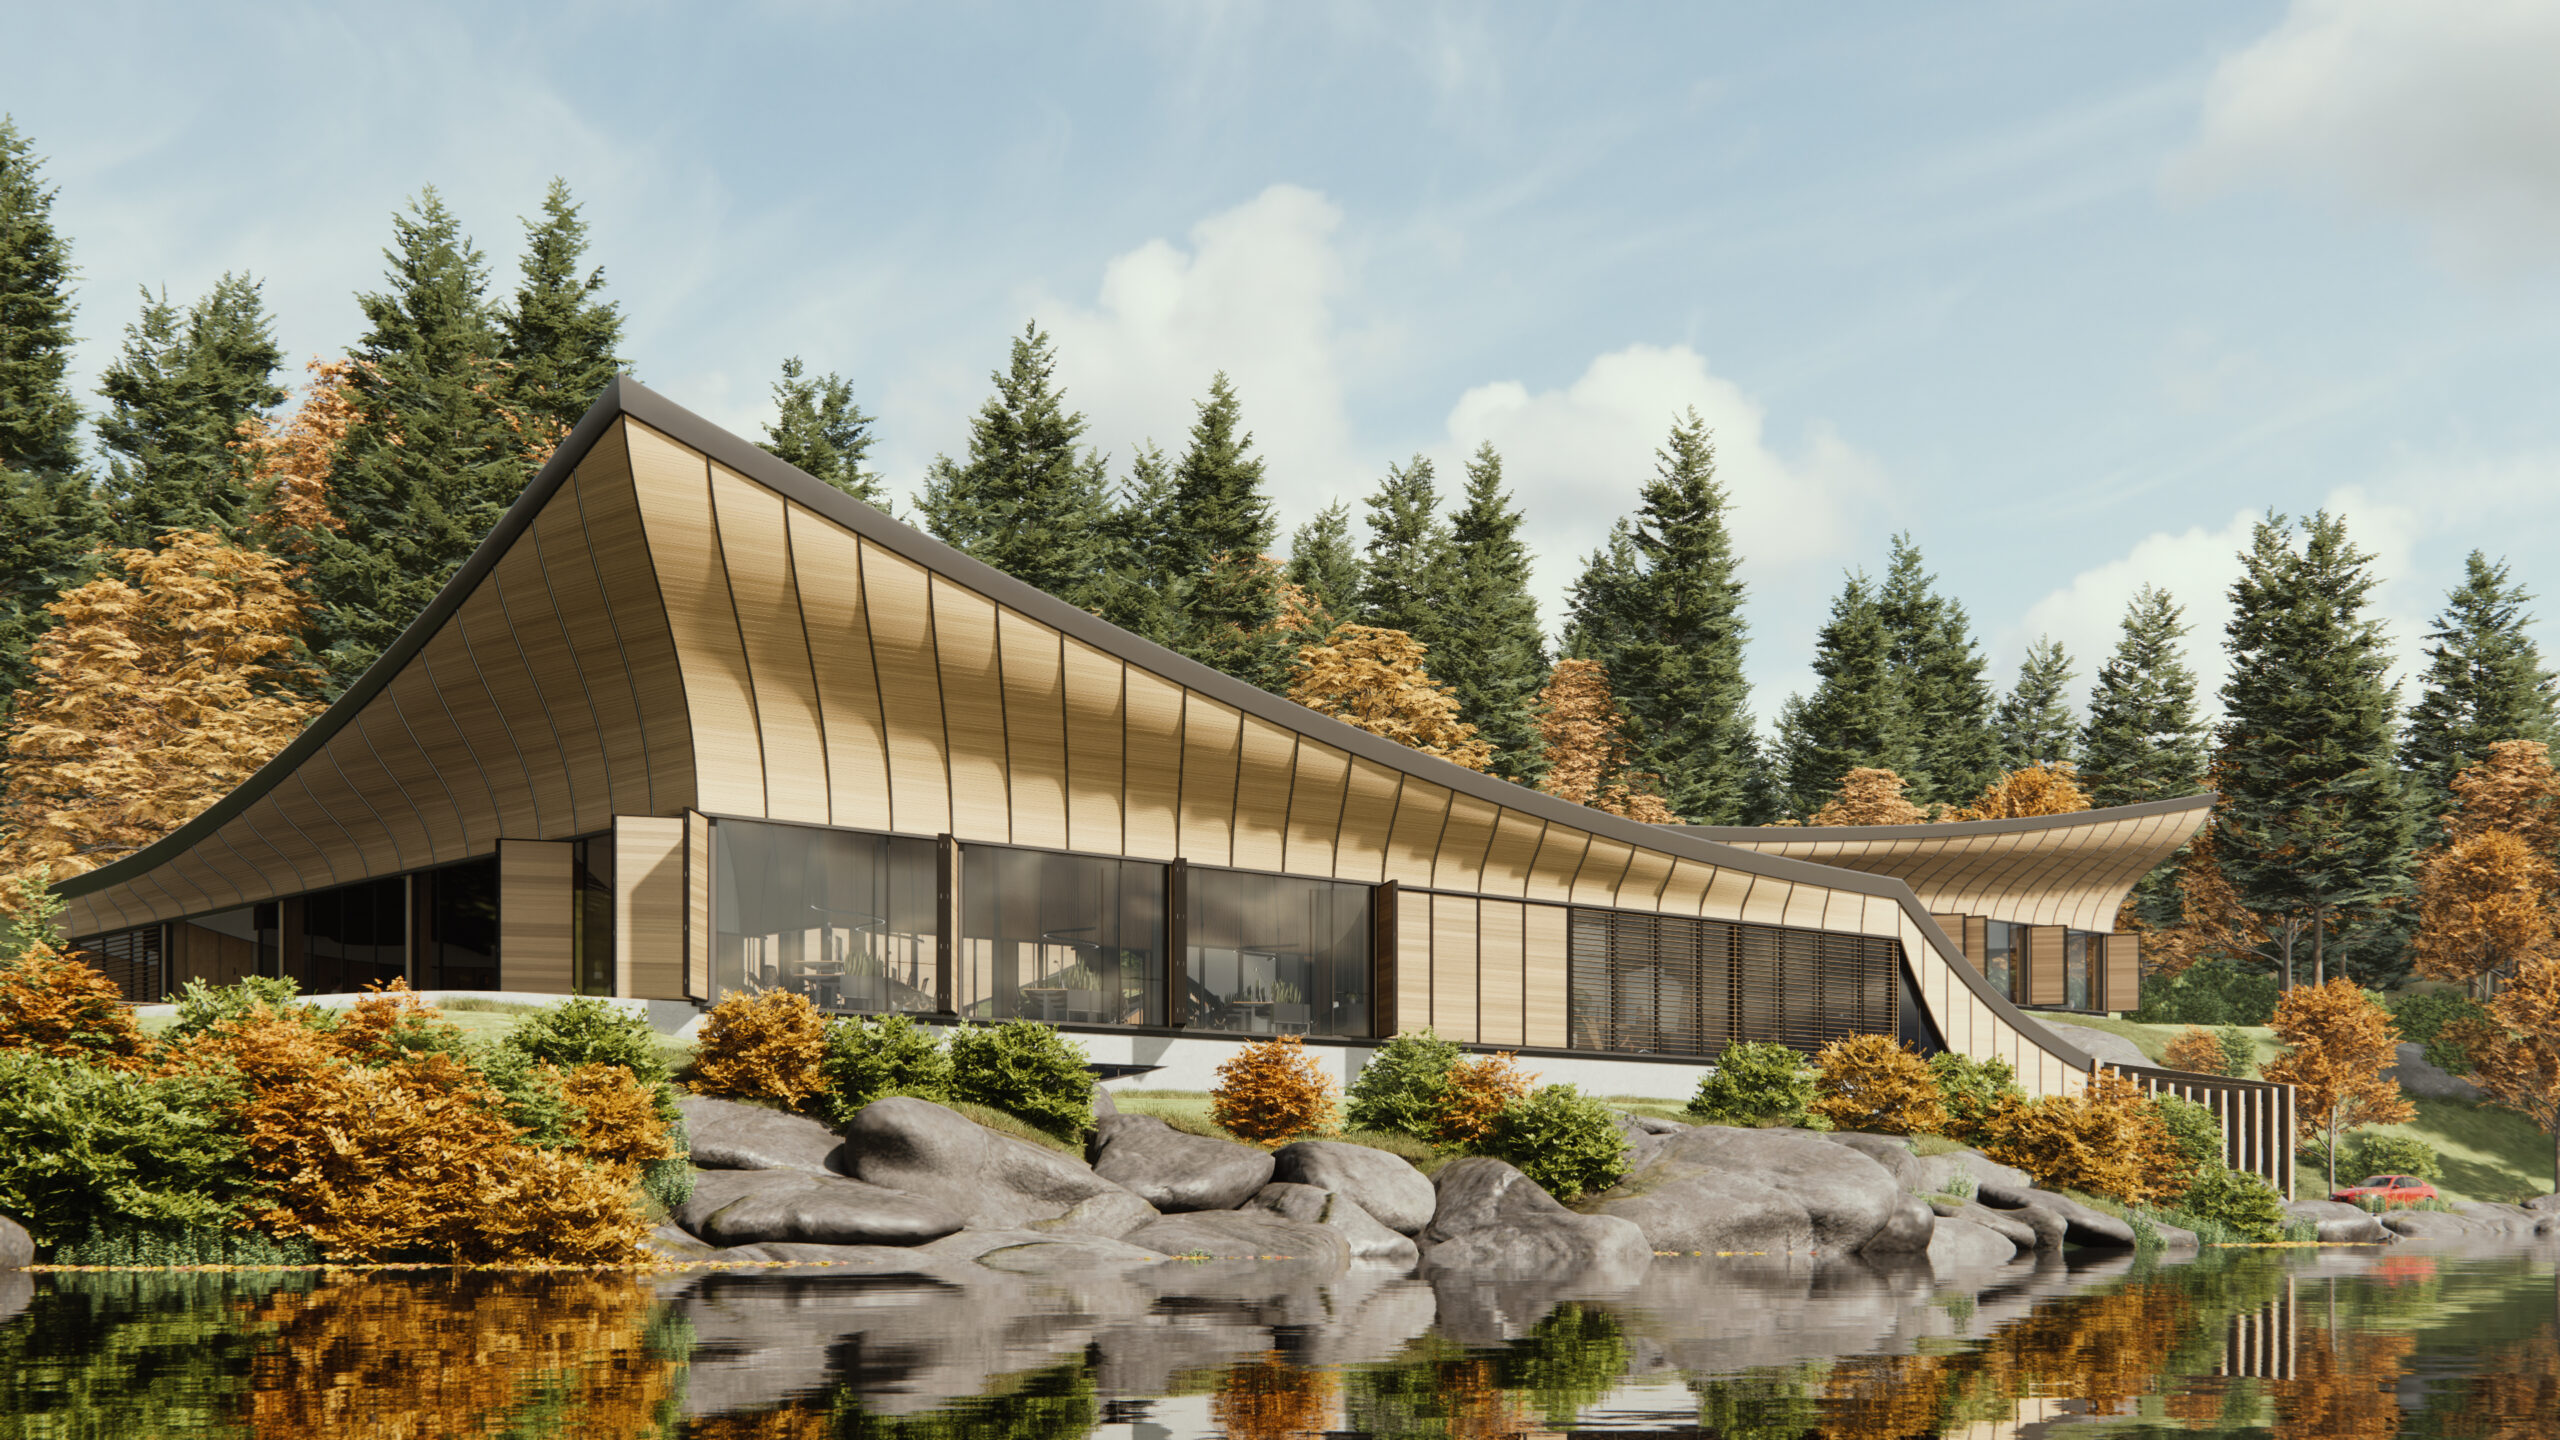
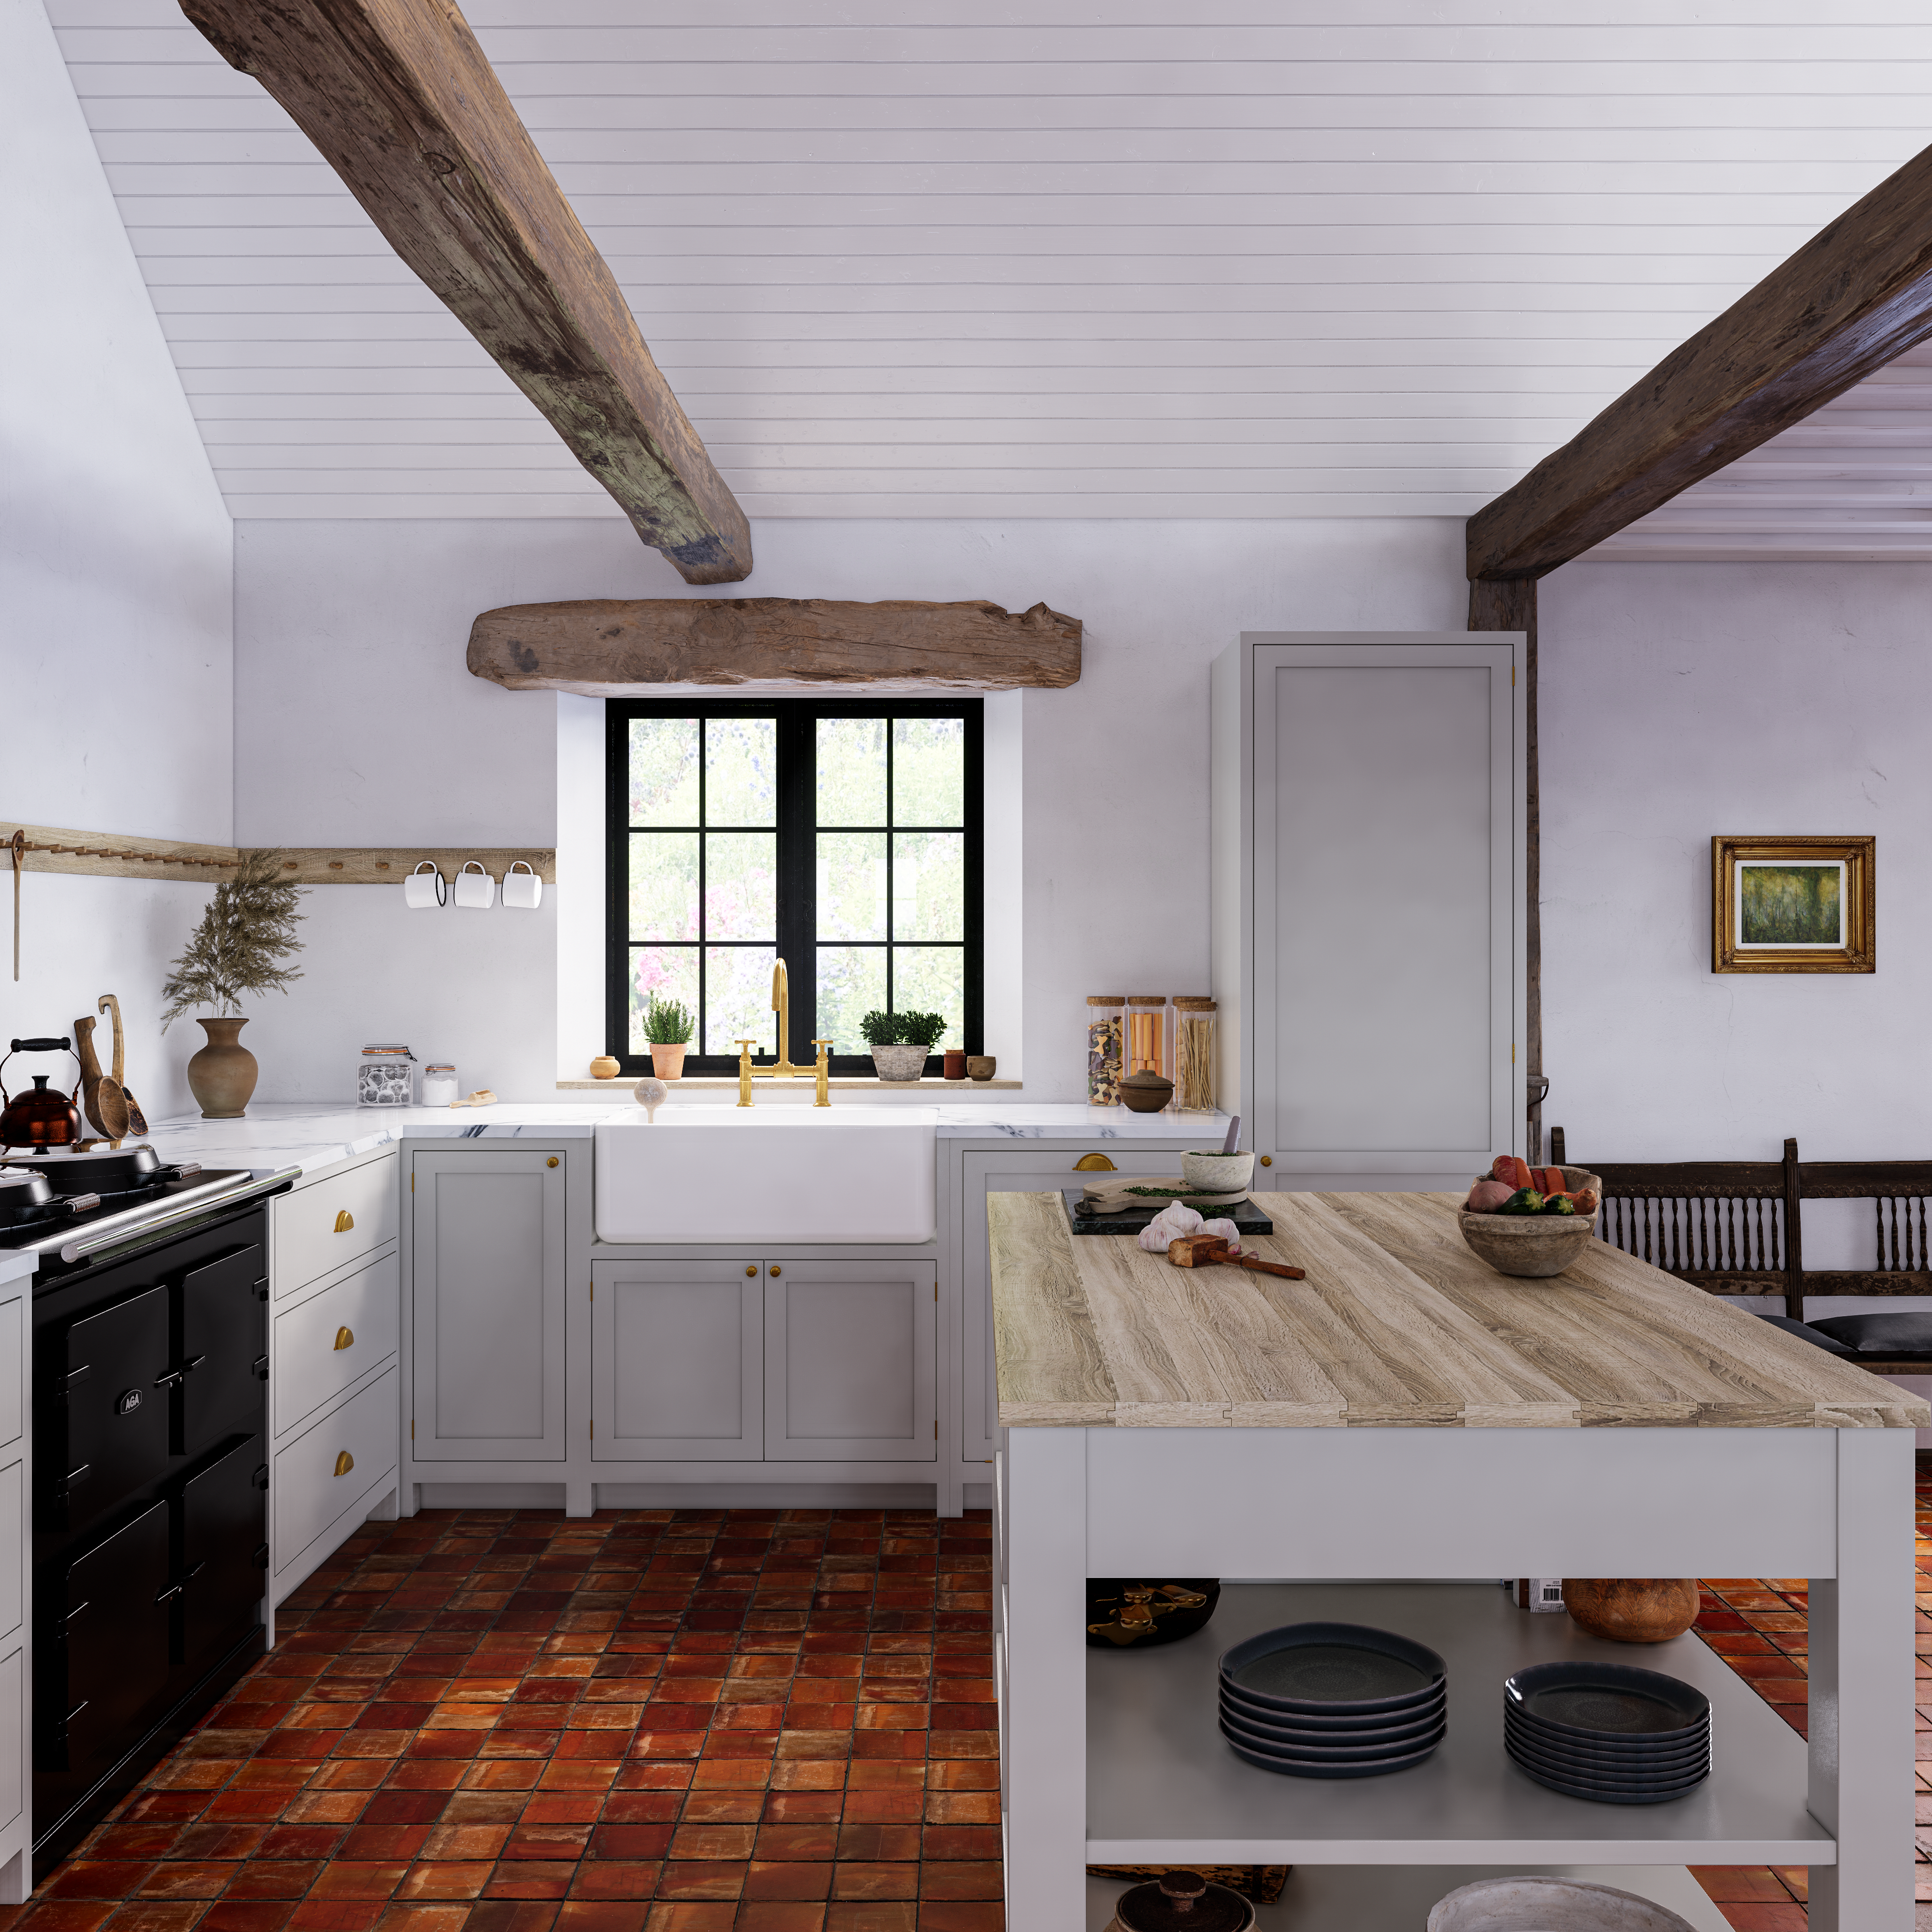
Water features bring life and fluidity to design. They evoke a strong emotional response and lure people into the scenery you created. Incorporating water is easy with SketchUp and V-Ray and today you’ll explore a V-Ray water tutorial which will make renders a breeze.

The Art of Water Design in SketchUp

Some of the most prominent designs in the world include water; Bellagio Fountain (Paradise, Nevada), Fallingwater (Mill Run, Pennsylvania), and The Dubai Fountain (Dubai, United Arab Emirates) demonstrate the transformative power of water in design. Today, we will explore how to apply water transparency and more with V-Ray and SketchUp tools.

Mastering Water Rendering Techniques in V-Ray for SketchUp

Once you’re ready to render water with SketchUp and V-Ray, launch the software, ensure all the menus are there and proceed to:

  1. Import scene
  2. Apply water material from the V-Ray Asset Editor
  3. Use Texture Placement to manipulate the position
  4. Adjust the Reflection and Refraction parameters
  5. Adjust Environment
  6. Adjust the depth, colour, and opacity for a convincing water effect

Use the Caustics simulation feature for water transparency, reflection, refraction, and other water properties. 

Experiment with camera angles and note that the absorption distance parameters change how light interacts with water. Use the Displacement map from the Asset Editor to generate detailed, realistic water textures.

Pay attention to the surroundings when you apply water reflection in V-Ray. Set up proper lighting setups, time of the day, and weather to enhance realism and create the desired atmosphere. Furthermore, add landscape and architectural elements to improve the balance of your design.

Creating Realistic Water Environments with V-Ray for SketchUp

Some techniques for designing realistic water in SketchUp using V-Ray include the use of proxies and displacement maps. Proxies are low-polygon replicas of original models that speed up the rendering process yet still show complex geometry.

Displacement maps help you add intricate details to water by actually changing its surface as you design it. These are ideal for creating ripples, foam, splashes, and waves.

Alternatively, V-Ray’s Material editor can help you make water material and fine-tune reflections, colour, and glossiness. You will also have control over how light penetrates the water. 

On the other hand, the Refraction tab lets you add water reflection in SketchUp. With it, you can alter the Index of Refraction, and adjust refraction colours. For a more realistic effect, there’s the Displacement tab with a noise map that simulates surface tension and ripples.

SketchUp and V-Ray features can help you design a modern urban plaza, combining architectural details with a fountain as the visual focal point. Or, you can work on a coastal resort landscape, which successfully pairs natural elements like water and trees, with the resort’s design, to achieve harmony and enhance the visual impact of the designs.

Adding Water Motion and Animation in SketchUp

SketchUp and V-Ray water tools help you animate water elements to create spectacular visual effects and enhance the dynamic nature of the design. You can either use a water texture map or Asset Editor to create realistic water from scratch and animate it with: 


  • A displacement map
  • Caustics effect
  • V-Ray wind options


Animating scenes in SketchUp is simple. Once you’ve created and organised frames, you can play them in two ways:


  1. Context-click the scene tab and select Play Animation
  2. Via Scene Manager, then View – Animation – Play


You can also use the Animator plugin, which controls the movement of objects in a specified timeline. Comprehensive materials and water setting in V-Ray for SketchUp combined with movement will bring water to life and create immersive and engaging scenery.

Adjust the texture animation speed, explore particle settings and Displacement map, intensity and colour for stunning water animations.

Try to create a seamless loop to maintain fluidity – match starting and ending frames to avoid abrupt transitions. Finally, synchronise water with surrounding elements. Bring in light, shadows, and objects that will reflect on the surface for increased realism.

Test your skills by creating hotel resorts or water theme park projects to enhance the overall design narrative and learn more in the SketchUp and V-Ray water tutorial.

Elevating Designs with Water and V-Ray in SketchUp

There’s nothing like a calming water feature to improve aesthetics and atmosphere in your designs. Bringing water into your scene will evoke emotions in viewers, harmonise sharp architecture with the natural world, and create memorable experiences.


Utilising intuitive tools and rendering capabilities of V-Ray and SketchUp, you too, can achieve realistic and lively water representations. Whether a still water surface in one image or water ripples in an animation video, SketchUp and V-Ray water features give you all you need to achieve lifelike water representations. Explore displacement maps, caustics effect, and V-Ray wind for endless possibilities to create stunning water elements. 


Next time you feel something is missing from your design, try including a water element to elevate your render, bring your creativity to a higher level, and leave a lasting impact on viewers. Elmtec is here to help uplift your designs with more than 25 years of industry experience. Head over to their site to explore free trial options and pro versions of SketchUp.


How to Create a Walkthrough in SketchUp

Imagine taking clients on a tour of your newly designed architectural wonder before it is even built in the real world. With SketchUp, you can. Today, you will learn how to create a walkthrough in SketchUp, which extensions to use for animation and how to share your designs.

Understanding the Power of Walkthroughs in SketchUp

The SketchUp walkthrough feature gives a virtual tour to viewers, providing a realistic sense of scenery, space, and design flow. Now, your clients, stakeholders, and team members can become even more immersed and engaged with your project by seeing what you do up close and fostering communication that helps clients visualise the outcome.

Walkthroughs are key for architectural designs, urban or facility planning, or museum settings as they help viewers better understand how the concepts will behave in the real world.

Step-by-Step Guide to Creating a Walkthrough in SketchUp

Here’s how to organise a walkthrough of a SketchUp model:

  • Click the Position Camera tool 
  • Set viewing height at eye level (type the height value on the keyboard)
  • Place the Camera, focus on a specific point
  • Wait for the Look Around to activate
  • Move the camera with the Look Around tool 
  • Use the Walk tool to move the Camera in different directions (click and drag the cursor)

All the tools you need to create a walkthrough in SketchUp are clustered in the Camera menu, Camera toolbar (Windows) or Navigation Tools (Mac) and Large tool set. 

Walkthroughs work best when the Camera has a wide field of view. To change it, select the Zoom tool, press the Z key or go to Camera – Field of view in the Menu bar. Type a value in degrees and millimetres; “deg” will set a degree field and “mm” will set the focal length of the camera.

The Measurement box is automatically set to accept height value, so you can just type it in. The Camera will be oriented toward the north (top of the screen) by default, so you’ll want to click and hold the mouse where you want to position it. Once you’re in the Walk mode, you can switch to Look around by clicking and holding the scroll wheel.

Refine your SketchUp walkthrough even more with scene transitions, annotations, and text which will guide the viewers. Find the scene transitions in the View – Animation – Settings section. If you’re looking for a smooth animation, set the scene delay to 0 seconds.

Add text to your scenes by creating a layer for each scene and adding the comment to a layer you’ll show. Alternatively, group comments and use the Outliner tool to control their visibility.

Enhancing Your Walkthroughs with Captivating Visual Elements

While creating a walkthrough in SketchUp, make sure to include tactile textures and materials (glass, metal, carpets), lighting, reflections, realistic shadows, or weather. Captivating foreground and background elements like other buildings or vehicles will create depth and visual impact, while interactive elements will increase engagement and improve experience. 


Animated elements, like fountains or fireplaces, will add a sense of movement and a hyper-realistic environment. Place these elements strategically, and pay attention to clusters and groups and how they flow. Simulate natural movement with repetition or variation of objects. 


Utilise some of the best walkthrough plugins for SketchUp such as Animator or Keyframe Animation plugins. Animator is a powerful tool that lets you create moving objects, camera animation, and more. Keyframe extension helps you animate individual objects with interpolated keyframes. This tool is ideal for animating realistic vegetation and weather effects. 


Alternatively, there’s an SU Animate extension you can use to create scenes that play as animations when you need your objects to move along a path. All these tools offer an array of options to help you transform the walkthrough experience by introducing lively objects.

Presenting and Sharing Your Walkthroughs in SketchUp

Once you’re done with your design, it’s time to show it to others. There are various ways to present your work:


  • Video export for direct walkthrough showcase
  • Image export that you can compile into a slideshow via external software
  • SketchUp online viewer for sharing 3D models
  • Third-party cloud-based solutions and other platforms (Unity, UnrealEngine)
  • SketchUp VR Export
  • Other VR platforms (Oculus, HTC Vive)
  • Enscape plugin for real-time rendering

Video files can be exported as:

  • .mp4 – a compressed but the most supported video file type
  • .avi – gives a large video file for all devices
  • .webm – works with web browsers or VLC
  • .ogv – also works with web browsers of VLC

To export on Windows:

  • Go to File – Export – Animation – Video
  • Choose where to save it
  • Name the file
  • Select the format from the Save As Type
  • Check Options for resolution, aspect ratio, frame size, frame rate
  • Click OK once you’re done
  • Click Export

To download on Mac:

  • Go to File – Export – Animation
  • Repeat the steps above

Virtual reality applications and video hosting platforms are especially beneficial for the walkthrough of a SketchUp model, as they provide a more immersive experience. You can also include music and sound effects, which will bring out the maximum in your design.

By sharing walkthroughs via these platforms, you improve client communication and allow for better feedback. Finally, walkthroughs act as robust marketing materials that bring realistic experiences to clients and stakeholders, which is why they should be incorporated into client presentations and websites.

Mastering Walkthroughs to Bring Designs to Life in SketchUp

SketchUp walkthroughs have immense significance when it comes to accurately presenting your work. They bring designs to life, facilitate decision-making, and boost the engagement of the stakeholders, positively affecting the success of the project and client satisfaction. 

Luckily, creating a walkthrough in SketchUp takes just a few clicks, pointing the Camera, and utilising the Look Around and Walk tools. Utilise Animator or Keyframe Animation to make elements move and bring another layer of realism. Include music or sounds to further immerse the viewers into the scene, show design intent and push the boundaries of design communication.

Elmtech has over 20 years of experience and all the tools you need to start using walkthroughs as a tool to enhance design presentations and captivate clients and stakeholders. Compare what SketchUp Free and Pro can do for your projects today and explore tutorials to learn more.

Best SketchUp Extensions for Architects

Utilising SketchUp extensions for architecture is a surefire way to elevate your designs and discover new, advanced techniques in design render. Read on to learn which extension to use for 3D models, subdivisions, BIM integrations, or high-quality rendering. Or explore some advanced techniques to generate parametric objects, collaborate with stakeholders, and 3D print your work.

Understanding the Importance of SketchUp Extensions for Architects

SketchUp is a powerful architectural tool that supports various extensions with additional features ideal for creating complex designs and streamlining workflow. SketchUp extensions for architecture bring advanced modelling tools, parametric design capabilities, integration with BIM, rendering, and collaboration options. 

With these plugins, you can enhance design quality and present your project in a new light, especially when it comes to intricate building forms or urban planning that meets energy efficiency standards.

Essential SketchUp Extensions for Architects

When it comes to SketchUp, there’s a plugin for anything. Let’s dive into the best architecture extensions for SketchUp:

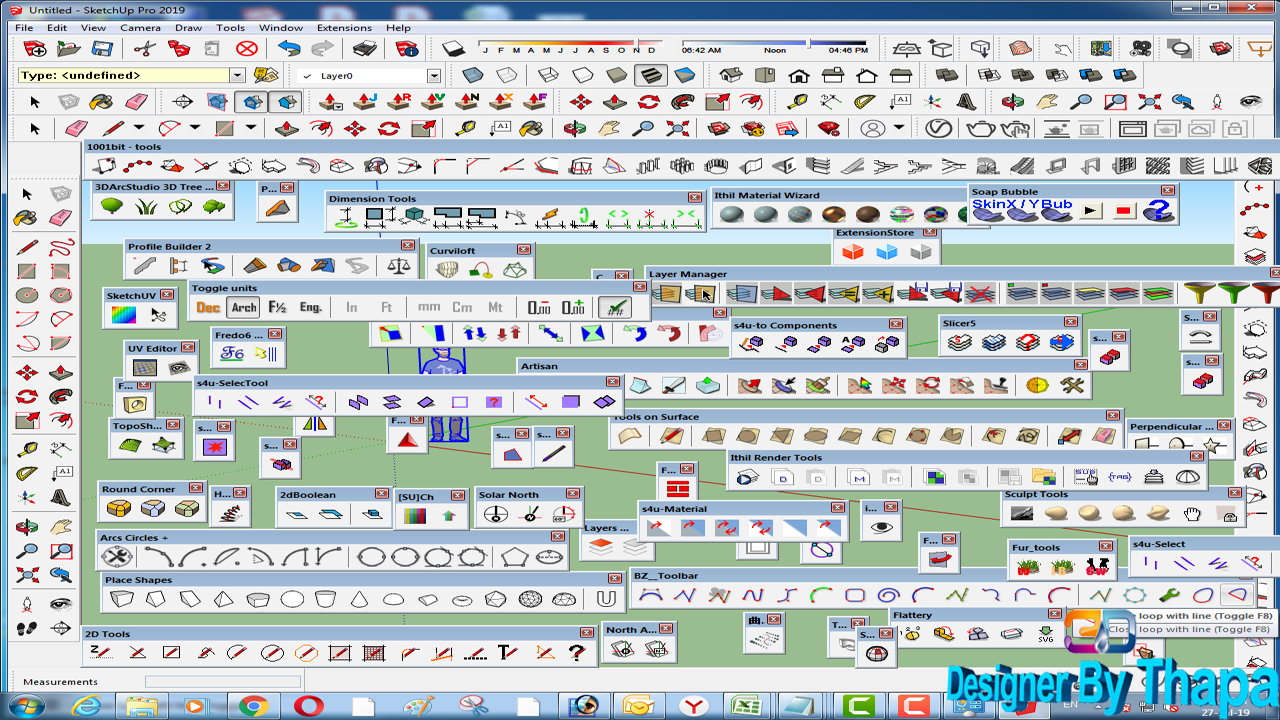
1001bit Tools

This SketchUp extension offers an array of 3D models suitable for your architectural masterpieces. You’ll get access to staircases, roofs, windows and doors, together with shadow analysis tools. 1001bit Tools Pro lets you create parametric architectural elements and use 40 different tools in your design.

Artisan

Artisan brings you powerful modelling tools with subdivision, sculpting, and soft selection options. This SketchUp extension for architecture is perfect if you’re looking to design abstract sculptures, terrain, furniture and many other complex forms and intricate architectural details.

Trimble's Connect

Besides the BIM integration capabilities, Trimble is enabling architects to import and export industry-standard file formats, collaborate with other professionals or streamline the exchange of building information between stakeholders. Trimble is a unique cloud-based platform that streamlines workflow.

Sefaira

Sefaira is among the best architecture plugins for SketchUp when it comes to energy analysis. It facilitates energy simulations and evaluation of thermal performance. Sefaira helps you explore building performance and get fast results to meet sustainability goals.

Enscape

Enscape offers robust rendering features in real-time. Use it to integrate visualisations into your workflow, create walkthroughs and animations, and quickly export models. What’s more, with Enscape, you can present your work in an AR setting and create an immersive 3D experience. Enscape also supports BIM exports.

Skalp

Skalp is one of the architecture plugins for SketchUp that offers a variety of tools. It offers live updates on model changes, support for nested groups and components, texturised models, pattern textures, and more. With Skalp, you can also export to SketchUp Pro’s LayOut, or import CAD patterns and create plans and elevations.

SimLab Composer

Finally, the SimLab Composer is another feature-rich extension, with powerful dynamic visualisation tools. It offers rendering, 360° rendered images, scene building, and more. With SimLab, you can also automate massive workflows, import a range of 3D file formats, share your work in the cloud, or build VR catalogues. 

All these SketchUp extensions can enhance the visual presentation of architectural designs and boost communication with stakeholders and other architects.

Advanced Techniques with SketchUp Extensions for Architects

Use the 1001bit Tools extension to generate and manage parametric objects. Find the Tools in the toolbar, activate the extension and click on the object you want to generate. Define size, orientation, and materials, and click to place it in the scene. 

Go for Trimble’s Connect architecture plugin for SketchUp to collaborate and enhance BIM workflow. Find your Trimble Connect plugin under the File section in SketchUp. Set the Trimble folders online, and proceed to sign in. Now, you can access models, Collaboration Manager, publishing features, and more.

SketchUp extensions also support CAD file formats, so you can exchange design information via AutoCAD or Revit. You can export files for 3D printing or CNC machining with STL Export in SketchUp. Alternatively, use extensions such as Solid Inspector or Cleanup to fix issues with geometry, so your models are ready for print.

Choosing the Right SketchUp Extensions for Your Architectural Workflow

When considering which SketchUp extensions for architecture to use, think in terms of software compatibility, user experience, support, and developers behind the plugin. Consider the complexity of your model, rendering requirements, and collaboration features. Explore user reviews, and free trials to get a sense of the tool.


Sometimes you won’t find what you need in one plugin alone. Luckily, you can combine some of the best architecture extensions for SketchUp for improved results.


For example, use Sefaira, Skalp, and V-Ray for energy analyses and sustainability assessments. With Skalp’s detailed section drawings and V-Ray’s rendering capabilities, you’ll optimise designs to showcase their energy efficiency via high-quality presentation.

Then, use 1001bit Tools for parametric modelling, Artisan for organic terrain, and Sefaira again, for real-time energy analysis. These architecture plugins for SketchUp help you design intricate landscapes paired with natural elements, which still meet sustainability requirements.

Enscape, SimLab Composer, and Artisan will provide you with robust rendering features, and organic models for complex terrains, and give you access to VR tools to enhance design visualisations. Explore SketchUp tutorials and best practices to see which other plugins you can combine.

Enhancing Architectural Design with the Best SketchUp Extensions

SketchUp extensions for architecture offer enhanced design capabilities and improve your efficiency. These diverse plugins bring additional functionalities such as advanced modelling, BIM integration, energy analysis, rendering, and visualisation, all of which improve your design, productivity, accuracy, and collaboration.

Embrace the power of Artisan, V-Ray, Enscape, or Sefaira to see their transformative potential and achieve remarkable design outcomes. These plugins will streamline your workflow, and support you through every step of design, from creating 3D models to selecting which materials to use for a lifelike feeling. Combine them to gain access to even more features, all within one software.

Elmtech has been around for over two decades and is here to help you unlock the latest tools when it comes to architecture and design. Explore Free and Pro SketchUp features with Elmtec today, to enhance architectural practice through technology and innovation.

SketchUp Pro vs Fusion 360 for 3D Printing & Design

The world of 3D modelling software is filled with options, and selecting the best one can be challenging. Today, we’ll compare SketchUp vs. Fusion 360 for 3D printing, and cover their basic features to help you decide which software is the right pick for you.

Understanding the Differences Between SketchUp Pro and Fusion 360

When it comes to SketchUp vs. Fusion 360 for 3D printing, both are very popular and serve the same purpose, with slight differences. SketchUp is easy to use, with an uncluttered interface, ideal for hobbyists and professionals alike. It requires a shorter learning curve.


While it’s simple, SketchUp supports an array of powerful extensions and pre-built components which can help you prepare your models for 3D printing, optimise designs, and sort documentation.


On the other hand, Fusion 360 is a parametric 3D modelling software, created for engineers and mechanical designers who deal with complex 3D modelling. Fusion 360 offers powerful integrated CAM (Computer-Aided Manufacturing) functionality and cloud-based collaboration tools.


When deciding on SketchUp vs. Fusion 360 for 3D printing, know that SketchUp Pro can be yours with a one-time purchase, while Fusion 360 requires a subscription. Still, you can explore free trials for both.


Keep in mind that SketchUp may struggle with complex designs, and has somewhat limited compatibility with some file formats.


If you require robust designs and parametric modelling, and don’t mind diving into the software to learn all its complex functions, opt-in for Fusion 360. Still, know that this programme may turn out to be costlier in the long run.

Exploring 3D Printing Capabilities in SketchUp Pro

SketchUp comes with some core modelling tools you can use to easily create 3D models. Plus, you can always download and install more 3D modelling and printing plugins (like SketchUp STL or Solid Inspector 2) to streamline workflow and improve designs. 

With SketchUp Pro, you can generate printable 3D models from scratch and create any shape with SketchUp’s Move and Scale tools. You also have access to different materials, additive manufacturing features, comprehensive tutorials, and more.

Then, you can use Solid Modelling to fix and optimise models before setting up print parameters and export STL or FBX, OBJ and similar formats. Use these features to run case studies on architectural models, product prototypes, or even art installations. Follow the example of Aaron Dietzen, who has used SketchUp Pro to design a deck for his home.

Remember, SketchUp’s friendly interface and robust native features paired with extensions can help you achieve high-quality 3D printed results with ease. These are some of the best practices to follow to avoid common issues that may arise during the printing process:

  • Know your printer’s capabilities
  • Design models to match the size, layout, and build volume
  • Avoid overly complex details.
  • Ensure the scale and orientation are correct
  • Use 3D Visualizer and SketchUp Pro to preview

Exploring 3D Printing Capabilities in Fusion 360

Fusion 360’s features and tools allow you to dive into parametric design, create complex models, or alter designs using history-based modelling. Its integrated CAM functionality helps you create toolpaths for CNC machining as well as additive manufacturing processes. Fusion 360 includes simulation and analysis tools, where you can test how your models function before printing.

Besides parametric modelling, this software comes with integrated tools such as generative design, mesh modelling, cloud collaboration, and more, all of which streamline the transition from design to fabrication during 3D printing.

These robust Fusion 360 manufacturing capabilities are perfect for designing functional prototypes such as prosthetic limbs, or intricate mechanical parts like gears which are used in industrial machinery. Some, like Phillipe Starck, have also designed furniture with this software.

If you wish to make the most out of Fusion 360, start with utilising parametric design principles and use the platform to collaborate and share your design with team members and clients. Go for Fusion 360’s analysis tools to explore parts of your design that need improvements, and always adjust design parameters to match the property of the materials you’re using.

Comparing Workflow Efficiency and Design Flexibility

Both SketchUp and Fusion 360 can speed up your workflow, each with its features. SketchUp Pro offers a user-friendly interface and robust library of components which speeds up conceptual design and allows you quick iterations.

On the other hand, Fusion 360 brings you timeline-based editing features, CAM functionality, design iteration management, and a straightforward transition to manufacturing, but is somewhat more complex to learn.

SketchUp and Fusion 360 offer support for industry-standard file formats, like STL or OBJ, which helps you collaborate and share files with other architects and stakeholders, all within the software interface.


Your decision between SketchUp and Fusion 360 for 3D printing should be based on what’s important for your workflow. SketchUp Pro offers a user-friendly interface and affordability. It’s an ideal choice if you’re working on projects related to architecture and conceptual design. On the other hand, Fusion 360 acts as an advanced tool for mechanical design, engineering, and manufacturing. 

Choosing the Right Software for 3D Printing & Design

SketchUp Pro is a user-friendly software tailored for architects and designers, offering simplicity and compatibility with third-party plugins and 3D Warehouse. It’s cost-effective and supports collaboration and 3D printing.

Fusion 360, on the other hand, suits complex 3D modelling across industries but demands a higher skill level due to its steep learning curve.

When choosing between SketchUp and Fusion 360 for 3D printing, consider your design needs, workflow, and budget. Try free trials, read user reviews, and study real-world case examples to make an informed decision.

Visit Elmtec to explore SketchUp’s free and pro features, and make a final decision about which one will bring you remarkable results in your 3D printing projects.

Digital Design for Woodworkers: Exploring SketchUp’s Impact

Woodworking is an ancient craft that continues to thrive in the modern era, blending tradition with innovation to create exquisite furniture, cabinetry, and decorative pieces. In recent years, digital tools have revolutionized the woodworking industry, enabling craftsmen to enhance their design capabilities, improve precision, and streamline their workflow. Among these tools, SketchUp has emerged as a popular choice, offering woodworkers a versatile platform for 3D modeling, visualization, and project planning.

This case study aims to explore the practical implementation of SketchUp in a real-world woodworking project, highlighting its benefits, challenges, and overall impact on the craft. The study focuses on the collaboration between a renowned woodworking studio and a high-end residential client to design and construct bespoke furniture pieces. 

The case study will delve into various aspects, including the initial design process, SketchUp’s role in creating accurate 3D models of furniture pieces, utilizing SketchUp’s extensive library of woodworking components, and incorporating precise measurements and joinery details. Furthermore, the study will assess the integration of SketchUp with other woodworking software and machinery, such as CNC routers and laser cutters, to optimize production processes and ensure seamless execution. Collaborating on this case study with us and here to share his journey so far is George from George James Carpentry.

“I worked on some great projects over the years such as Tottenham Hotspurs and other VIP clients”

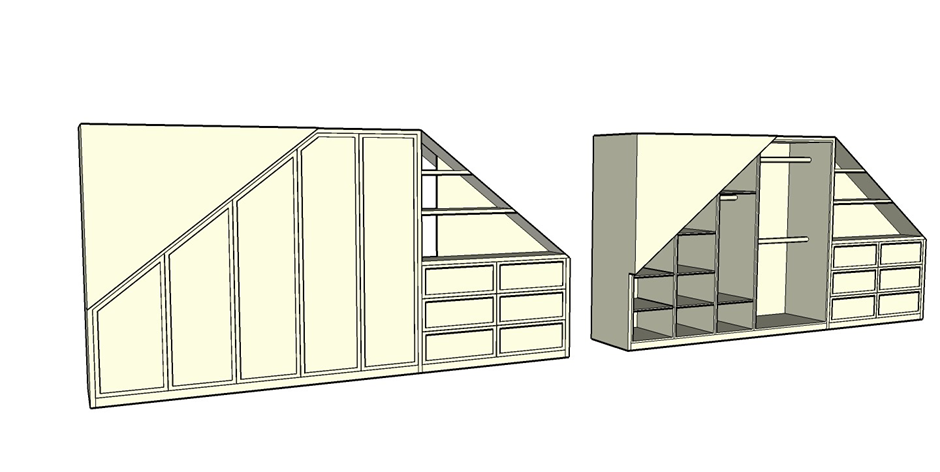
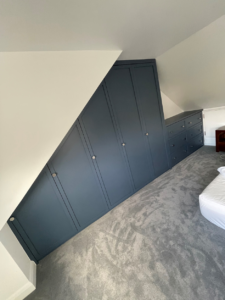
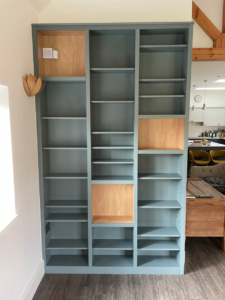
After leaving school and not really know what he wanted to do, George fell into general carpentry and after a period of time becoming more and more focused on wardrobes and under the stairs cupboards and creating additional space for clients. Before the business he is in now, George moved to a loft conversion business and begun working more and more with slanting wardrobes and angled storage.

After a while George decided it was time for him to go it alone, ditch the London commuting and long hours working for someone else and start up “George James Carpentry”.

Great! George, how does SketchUp tie into all of this?

Angled wardrobes and storage spaces is how I go into SketchUp, I needed a software that gave a good idea of how the end design would look but also whether the design would fit and allow for accurate dimensions back into a 2d plan. I needed something that gave fast results too as I had just had a son and I wanted to be at home as much as possible.

I actually started learning learning how use SketchUp for woodworking through Freebird Interiors, whom just give you a really good insight into getting started with SketchUp as a beginner carpenter and pick up the skills to get the design and angles right.

Recently I have started working more on my iPad and am enjoying using SketchUp for iPad, my only complaint to Apple more so is that there is no esc key on an iPad!

The process using SketchUp for iPad is seamless and it means I can draw the project while I am with the customer (which is great but can be a little daunting!) but it also means we can have a discussion there about whether they are happy with the design or wish to make changes, so that when I go off to confirm the pricing and design it is a shorter and clearer process.

I first went out on my own in 2021 and I am enjoying every minute it!

What is your most memorable project?

One of the first projects I did when I went out on my own was a sort of reverse under stairs set up with two angles on the bottom, now one of my biggest selling points is that I complete most of the work in my workshop rather than going to the clients house and building and trying to cut the angles on the driveway. This is one of the first projects I also had while using SketchUp and it wouldn’t have been possible to get these angles as accurate as I did, without SketchUp.

In conclusion, SketchUp has emerged as a powerful ally for woodworking enthusiasts, enabling them to elevate their craftsmanship, streamline their workflow, and deliver exceptional custom-made furniture pieces. By combining traditional woodworking techniques with digital precision and visualization, SketchUp empowers woodworkers to create stunning, functional, and personalized creations that meet the demands of clients and showcase their artistic flair.

Tips, Tools & Extensions for Urban Planning Rendering in SketchUp

SketchUp is a powerful rendering tool which offers an intuitive interface, perfect for urban planners and designers, enabling them to create visually stunning and accurate representations of their ideas. Today, you’ll explore urban planning rendering in SketchUp, with a selection of recommended plugins to use.

Understanding the Importance of Urban Planning Rendering in SketchUp

SketchUp brings robust rendering capabilities for quick visualisation and an extensive library of pre-built components for a fast design process. Urban planning rendering in SketchUp introduces realism and improves visualisation and communication with investors, stakeholders and the community. 


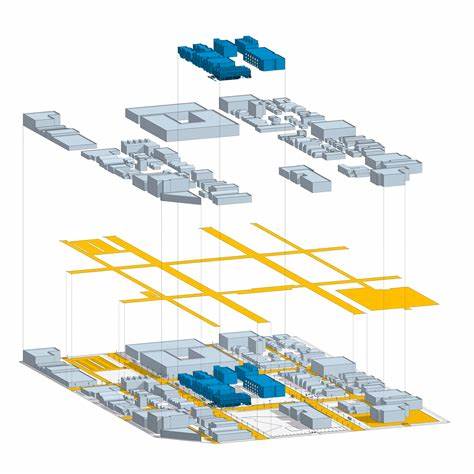
Using SketchUp for urban planning allows you to create detailed 3D models of buildings, streets, and parks. For example, this software was used for rendering the High Line Park in New York and the South Boston Waterfront District and has been instrumental in conveying the urban context and proposed design to the public and investors alike.

Essential Tips for Urban Planning Rendering in SketchUp

SketchUp brings you a selection of native tools and plugins for urban planning rendering, such as: 

  • Material Editor 
  • Lighting tools 
  • Section Planes 
  • SketchUp’s 3D Warehouse 
  • V-Ray
  • Lumion 3D
  • Enscape
  • Skatter
  • Instant Terrain
  • Eneroth
  • TurboSquid
  • Instant Road
  • RenderHub

Apply Materials with the Paint Bucket tool, or swap one material for another via Ctrl, Shift, or Ctrl+Shift (Windows) or Option, Shift, Option+Shift (Mac). You can also easily change the structure of the Material because the colour and texture are separated. Explore roof or wall materials and follow other tutorials for more options.

If you wish to use Lighting tools, install Enscape to combine it with SketchUp. Then you can adjust the sun in the Enscape rendering window, or visit the Enscape Objects button to find Sphere, Spot, Linear, Rectangular, and Disk lighting types to redesign the appearance of your light source. 

Once you finish your design, use the Slicing a Model feature to look at how your models are organised. Select the Section Plane tool or go to Tools – Section plane, adjust the placement with the Move tool, align the camera, and determine which section is the active cut.

Additionally, explore SketchUp’s 3D Warehouse and its selection of 5 million models and products to pick whatever you need for urban rendering.

The V-Ray plugin is known for its ability to create highly realistic renderings with advanced lighting, materials, textures, global illumination, and more. It’s flexible, and professional, yet has some learning curve.

You also have Lumion 3D and Enscape, more real-time rendering extensions, that seamlessly integrate with SketchUp and come with a material library, objects, and environmental effects.

If you want to include some natural elements and vegetation, there’s Skatter, a plugin that facilitates the distribution of objects (trees, plants, and people) across surfaces. Instant Terrain and Eneroth will help you manage terrain, while SketchUp has an import GIS feature which enables the integration of real-world geographic data.

Finally, you’ll find that TurboSquid, Instant Road, and RenderHub offer pre-built urban components (roads and buildings) which save time during the modelling process.

Recommended Extensions for Urban Planning Rendering in SketchUp

Urban planning rendering in SketchUp is easy with these extensions: 

  • V-Ray for SketchUp – combines real-time and photorealistic rendering
  • Enscape – offers rendering and virtual reality features, lighting simulations, and environmental effects
  • Lumion – known for its speed, details, and atmosphere features
  • Artisan – brings subdivision, sculpting, soft selection, and free-form deformation options to improve design

All these plugins can easily be integrated with SketchUp to provide advanced rendering options and elevate your workflow. Then, there are plugins which bring additional urban planning features, such as building massing tools, traffic simulation, or urban analysis:

  • Profile Builder – ideal for quick modelling of smart building materials
  • PlaceMaker – gives you access to high-resolution aerials, terrain, and 3D cities
  • Skalp – offers Pattern textures, live updates, mapping queries, Styles, and more
  • Urban Network Analysis – computes five types of graph analysis measures on spatial networks

With these extensions, you can evaluate design alternatives, track development, and assess the visual impact of your projects. SketchUp for urban planning integrates with other rendering software and GIS platforms, which helps you manage data exchange or accurately run urban simulations.

Elevating Urban Planning Rendering in SketchUp

Urban planning rendering in SketchUp facilitates effective communication, stakeholder engagement, and informed decision-making in urban planning projects.

Using realistic materials and lighting together with post-processing techniques guarantees impactful renders. With SketchUp for urban planning, you’ll have access to intuitive tools and streamlined workflow. 

Combine the power of SketchUp with Artisan, V-Ray, or Lumion for lifelike renders, or utilise Urban Network Analysis or Place Maker plugins for analysing terrain and implementing 3D cities. Visit Elmtec today to explore free trial options and purchasing options.

Transforming Visualization with SketchUp

In the dynamic world of architectural visualization, where creativity meets technical precision, the role of cutting-edge software tools cannot be overstated. Among the array of applications available to visualization professionals, SketchUp has emerged as a powerful and versatile tool, revolutionizing the way architectural designs are conceptualised, communicated, and brought to life.

This case study explores the transformative impact of SketchUp on the field of visualization, as witnessed through the experiences of a dedicated practitioner in architectural visualization, Henry, owner of HBC visual.

Henry has used SketchUp to enhance his 3D modelling designs giving his clients optimum Visulisation of their ideas from start to finish.

So Henry, tell us a little more about who you are and what you do!

Great, so I currently run a Visulisation business where I support designers, planners and architects bring their designs to life for their clients or for themselves. I use my previous 10 years of experience to help them fill in the gap between 2d floor plans and designs and photo realistic visuals. 

Specialising in interior, architecture and town planning, currently on small scale with aims to move towards larger projects in time.

When did you first come across SketchUp?

OOOOO that was a long time ago! I think it was still Google SketchUp if I remember correctly! It was while I was studying but it was an early version for sure.

Then went to university and learned a few of the other 3D modelling platforms but continued using SketchUp in the background, nothing major at this point, no layers, groups etc!

When I moved into my placement year whom I later continued working for, they did not use Visulisations at all, so I stepped in with SketchUp and begun to develop my skills further, after a while of using SketchUp alongside V-Ray and completing a workflow in the business I was creating some high-quality renders for the company.

Around 6 years ago I began spending more time on SketchUp, watching YouTube videos, self help videos and joining community to learn new skills.

From its humble beginnings as a 3D modeling tool, SketchUp has evolved into a comprehensive platform that offers an unparalleled level of control, realism, and interactivity. With its rich library of pre-built components, its ability to import and export various file formats, and its powerful rendering capabilities, SketchUp has become an indispensable tool for professionals across the architectural visualization spectrum.

I have found Enscape to be much easier to pick up as a software and similar to use but it really depends on what you need to use it for, Enscape has been great for me for an interior designer.

Within my design workflow there are a few plugins and additional features I like to use, LayOut is an interesting one, I really enjoy using it and the drawing work you can create from it, I don’t use it as much as I like, just down to the type of work I do. I use a few plugins to round corners, solid shapes, random rotation and texturizers for Enscape, it depends on what I am doing but the usual plugins.

SketchUp 2023 has launched, with the addition of new features

In conclusion, this case study showcases the transformative impact of SketchUp on the field of architectural visualization. Through its intuitive interface, comprehensive features, and powerful rendering capabilities, SketchUp has become an invaluable tool for professionals seeking to elevate their visualization workflows. As we explore real-life projects and examine the firsthand experiences of practitioners, we gain insight into how SketchUp has reshaped the way architectural designs are conceptualized, communicated, and brought to life.

Thanks, Henry, for the great insight into your views from SketchUp! Click below to follow him on Instagram!

How to Make Glass in V-Ray: A Comprehensive Guide for 3D Artists

Realism is everything in 3D design. It brings your creations to vibrant life, leaves stakeholders feeling they understand your ideas clearly and makes presenting everything a dream. And that includes glass, a material that plays a starring role in so many buildings and other designs. So how, exactly, do you represent glass in SketchUp? You need V-Ray, one of the most popular SketchUp extensions and your route to visual brilliance. Read on to find out exactly how to create glass material in V-Ray, from start to finish, along with some handy FAQs.  

Setting up Your Scene

Now here’s a thing – virtual glass created in V-Ray behaves exactly like real-life glass. This means there are some crucial aspects of your work to get right before you go ahead and add glass. It’s all about setting up the scene properly in the first place. Here’s the first stage in how to make glass in V-Ray.

  •         First, your lighting. As you know, glass reflects. In fact, it’s extremely reflective and refractive, reflecting and refracting the light in your scene. To show off these realistic properties, you’ll need to ensure the lighting in your scene is set up right.
  •         Second, your camera. Think hard about the camera’s angle and position, since the camera’s position profoundly affects glass refraction and reflection. Experiment first, and once it’s right you know for sure you’ll get the effects you want.  

·         Third, object placement. Where will your glass object look best in the scene? You’ll find putting it on a windowsill gives you a completely different effect than you get by standing it on a table in the room’s centre – just as it does in real life.

Adjusting Material Properties

Now your scene is perfectly set to showcase glass at its best advantage. Now you can play with the material’s properties, which involves four key things: The index of refraction, reflections, refraction itself, and absorption, all of which contribute to creating realistic glass in V-Ray.

  •         First, your Index of Refraction or IOR. This drives how much the glass object will bend light as the light shines through it. As you can imagine, different types of glass come with their own IOR values. They’ll be different for frosted glass, clear glass, thick glass, thin glass, coloured and plain glass, and so on. So pin down the type of glass you’re trying to make first, then move on to the next step.  
  •         Reflection matters too. Because glass is so reflective, you’ll need to figure out the best reflection properties for the look you want. You can play with the reflection colour and glossiness to make the kind of effect you’re thinking about.
  •         Refraction is what makes glass transparent. You change the refraction colour and glossiness to make a glassy fine surface that light passes through.
  •         Finally, absorption. You can play with the glass’s colour and density until you get the perfect absorption level. For this stage, bear in mind the material’s thickness and density both affect the colour.

Tips and Tricks

It may take you a few goes and some experimentation to get there, but once you do you’ll be delighted. These tips will help you get where you want to be faster.

  •         A high-resolution texture map helps you create a more realistic glassy surface
  •         The Fresnel effect is adjustable too, again giving you a more realistic look because it drives the way the glass reflects and refracts light at different angles
  •         A slight bump map gives you a subtler subtle texture to add even more realism to your glass materials and objects

Introducing Elmtec  

So now you know how to make glass in V-Ray with SketchUp. Get it right and the results are mind-blowingly good, contributing to dazzling presentations, faster customer approval of your ideas, and designs that are more than practical, they’re also beautiful and realistic. Like all things SketchUp, the V-Ray extension is fun to use and a delight to play with. Once you’ve got glass creation under your belt, your designs become even more exciting, inspiring, and professional.  

Are you ready to give it a go? Elmtec is your trusted digital distribution partner. We have more than a quarter of a century’s experience serving the digital design community, and we’re known and loved for being one of the leading distributors of professional hardware and software. Your purchase is backed by highly qualified specialists whose product knowledge, industry experience and support are second to none. Take a look at the free vs pro versions of SketchUp here.

How to Install SketchUp Studio for Mac

Welcome to the world of Elmtec. As a trusted UK-based distribution partner for SketchUp we’ve been helping people like you out since 2010, servicing a huge network of resellers across the UK and Ireland. Thanks to over 22 years of digital design community experience, we’re perfectly placed to support you with SketchUp Studio installation. Read on to discover the simple step-by-step process to install SketchUp Studio on your Mac, giving you the opportunity to create sheer design magic with this exciting design tool. Here’s how to install SketchUp Studio for Mac. 

Preparing for Installation

First, you need to confirm your machine has the right system requirements for SketchUp studio for Mac. We’ll take you through the steps to verify your Mac’s compatibility and essential specifications around the operating system version and the capabilities of the hardware. We’ll also give you the insight you need on crucial updates and preparations before installing SketchUp Studio, including software updates and the disk space available.

Downloading and Installing SketchUp Studio

To get started with SketchUp Studio, you need a Mac installer. We’ll cover the different ways of getting hold of Studio, including direct download from the official SketchUp website.

We’ll give you detailed instructions, clarified using screenshots, covering vital steps like running the installer, accepting the licence agreement, and choosing the right install preferences. We’ll also explore the most common issues people run across and provide troubleshooting tips, everything from fixing installation mistakes to dealing with conflicts in compatibility.

Activating SketchUp Studio Licence

Once you’ve installed SketchUp Studio, you’ll want to activate your licence. We’ll take you through the activation process in detail, so you know for sure you’re entering the right licence information. If you have any problems we’ll troubleshoot them for you, so you can fix them fast. It’s our job to deliver a smooth, seamless licence activation experience for everyone. We’ll also reveal the many benefits of activating a SketchUp Studio licence, which unlocks premium features, delivers product updates, and gives you access to a wealth of brilliant learning and support resources.

Exploring SketchUp Studio Features

SketchUp Studio is incredibly feature-rich, offering exceptional tools to revolutionise your digital design life and speed up your workflow. We will provide an overview of these features, while highlighting their many exciting benefits. We’ll explore SketchUp Studio’s advanced 3D modelling, stunning visualisation tools and more, revealing how the professionals bring their ideas to life, along with real-life examples and case studies showing exactly how the tool will enhance your designs. Last but never least we’ll dive in to show you how to achieve seamless plugin and extension integration to customise your designs in thrilling ways.

Tips for Optimising SketchUp Studio Performance

Finally, we’ll dive into smooth performance, efficient utilisation and optimal settings so you can make the most of SketchUp Studio on your Mac, everything from adjusting settings to using  hardware resources effectively. Thanks to our expert insight you’ll be able to maximise productivity and minimise problems. We’ll talk about updates, discuss bug fixes, mention security patches, and explain new features as well as helping you maintain top Mac performance, understand best practice, and make the most of the SketchUp Studio magic.

Are you ready for SketchUp studio for Mac?

Follow our detailed installation guide to install SketchUp Studio for Mac confidently. The Elmtec team takes great pride in being a trusted, respected distribution partner for SketchUp, dedicated to supporting your digital design adventure every step of the way. Next, it’s time to reach out to Elmtec to explore the free trial options and paid-for versions of SketchUp Studio. Enjoy! 

Key Benefits of SketchUp Studio

Welcome to our world! We’re Elmtec, a trusted UK and Ireland distribution partner for SketchUp Studio since 2010. More than 20 years of experience in the digital design side of life means we’re perfectly placed to talk about the magic of SketchUp in all its variations. 

This article will discuss the brilliant SketchUp Studio, a premier subscription-based tool providing all the functionality you need to design brilliance into every project, using the power of SketchUp Pro with loads of extra features to boost your workflow. So why is SketchUp Studio such a game-changer for designers and architects? Read on to find out.

Enhanced 3D Modelling Capabilities

SketchUp Studio provides a host of advanced 3D modelling tools and features to empower lifelike, exciting designs high in precision and rich in creativity. The software lets you make complicated models with ease, generate accurate measurements just as easily and quickly, and add remarkably realistic renderings. It’s all down to a comprehensive set of modelling tools together with a truly intuitive interface, making using the software a real pleasure as well as enhancing your professional life.


The software’s clever push-pull technology means you can manipulate complex 3D geometry simply and quickly while using Studio’s intelligent inferencing system to achieve accuracy and efficiency throughout the design process, from start to finish. There’s also a huge library of dynamic components, textures, and materials to tap into, giving designers even more capabilities and adding extra versatility.

Seamless Collaboration and Communication

SketchUp Studio comes with collaboration at its heart. It’s also big on communication, half the battle when you’re dealing with design teams, clients, and a variety of different stakeholders.

Because the software is cloud-based, integral collaboration tools are perfect for real-time collaboration. So multiple people can work on the same project at the same time, with instant feedback and comments to keep the flow flowing.  


Various cool built-in features include shared view links and model viewing capabilities, letting you share your work easily with anyone who needs to be involved, at any stage. The resulting quality of communication and decision-making means projects run smoothly, efficiently, and fast.


Because SketchUp Studio integrates with all sorts of popular external project management and communication tools, including Trimble Connect, you can also achieve seamless cross-platform collaboration and a speedy workflow, both of which contribute to efficiency.

Collaboration and Communication Tools

SketchUp Studio is more than a design tool. It also delivers the features you need for seamless, integrated collaboration and communication, both of which can make all the difference between a smooth, efficient project and one that takes more time and effort than you expected.  The tools enable the perfect level of collaboration with everyone involved, from team members and clients to every other stakeholder along the way.

 This level of highly effective communication means the workflow is beautifully streamlined. Real-time collaboration, instant feedback, cloud storage, and shared view links make everything super-easy, giving users the level of quality project coordination needed for a successful and enjoyable design project every time.

Extensive Asset Library

You’re going to love this. A real stand-out feature, SketchUp Studio comes with an excellent and far-ranging asset library, packed with everything from desirable pre-built 3D models to materials and textures. Another big time-saver, this feature means you won’t always need to start from scratch and build them yourself. Choose from ready-made furniture, architectural elements, plants, trees, wall coverings, landscape features and more, all designed to help you move the needle forward even faster.


The Trimble 3D Warehouse forms an integral part of SketchUp Studio, acting as a community-driven repository of high-quality 3D models. The user-generated content it contains is constantly updated with fresh designs created by the community. It also contains an equally large collection of plugins and extensions, created to extend SketchUp Studio’s capabilities and help you customise your workflow with impressive results. And, of course, there’s a multitude of free tutorials to help you learn even faster.

Advanced Visualisation and Presentation Tools

Choose SketchUp Studio to delve deep into an exciting collection of advanced visualisation and presentation tools, another way the software enhances your work. Hyper-realistic visualisations are yours thanks to popular photorealistic rendering plugins like V-Ray, adding light and life to projects to make the designs you create immersive.

You’ll also enjoy the thrills of SketchUp Studio’s animation features, a fast and easy way to make stunning walk-throughs and fly-overs, creating an inspiring narrative that makes it even easier for stakeholders to understand and approve your work. Then there’s VR. You can use virtual reality to take presentations to the next level, letting clients experience and engage with your designs in a fully immersive and powerfully influential way.

Time and Cost Efficiency

Because SketchUp Studio has such powerful features and an intuitive interface, you make useful time and cost savings that you can pass on to clients. Beautifully simple modelling tools and streamlined workflows make design iterations and refinement an easy matter, cutting down the overall design time.


100% accurate measurements and real-time visual feedback mean it’s hard to make mistakes but if you do, errors are easy to fix and revisions just as easy to make. This means even more time savings and even better cost efficiencies. Taking this into account, along with the tool’s famously good collaborative features, means you’ll spend less time in meetings and sending long emails, and more time creating ‘fantastic’. The improved client satisfaction and potential for better profitability all this brings make SketchUp Studio even more desirable.

To conclude, the many key benefits of SketchUp Studio empower designers to do more things, do them better, and delight clients more. No wonder we’re so proud to be involved as a trusted distribution partner for SketchUp Studio and pleased to be able to give support and expertise to the digital design community as a whole.

Would you like to discover more about the software’s superb 3D modelling capabilities, seamless collaboration tools, extensive asset library, advanced visualisation features, time and cost efficiencies, and awesome design potential? Give Studio a go – it’ll change your design life.