
Do you love wood? It’s such an amazing material, so very versatile. It can be carved, sawn, pressed, steamed and shaped. Imaginative woodworkers have made entire cars from wood, along with quirky lighting, espresso machines, keyboard covers and motorbikes. There’s even a stylish MK2 wooden iPad cover made by Miniot. This article explores the 3 stages of woodwork, whether you’re inspired to design and make something practical for a construction project or something purely decorative. When you take a careful, methodical approach and understand the particular material you’re working with, you’re set for success. Here are the three stages of woodworking to help you along the way.

Stage 1: Choosing the Right Wood
The first stage of the 3 stages of woodwork is to choose the right wood for the job. It’s important because, depending on the type of tree, wood can be super-light like balsa wood or incredibly dense and heavy like the toughest African blackwood. Wood can be either stiff or flexible, soft or hard. With an impressive 73,300 or so different tree species in existence across the world, each has its benefits and downsides depending on what you want to make. So where do you start?
First, think about durability. If you’re making an item for outdoor use, will it stand the weather and if so, for how long? If it’ll be exposed to moisture or sunlight will it deteriorate fast or last for decades? You’ll need to pick the perfect wood for the conditions: indoor or outdoor, taking the location’s weather into account.
Second, the look. Do you want a dark, dramatic wood or something pale and bright? Do you want the wood to have complex patterning, like you get in burr walnut for example, or no visible patterns, just a plain and simple surface in one colour? How about the texture? A rough finish, for example, wood with the bark left on, is perfect for some projects. If you’ve ever seen a stunning wooden table with the bark intact around the edge, you’ll know the score.
Third, think about workability. Do you need the wood to be easy to cut, shape, and sand or are you prepared to work harder to get the effect you want using tougher wood? Oak and maple, for example, are tough, and more difficult than average to work with. If you’ve ever tried to fix a curtain rail to an old oak lintel, you’ll know how rock-hard it can be. Woods like pine and cedar, in contrast, are softer and a lot easier to work with. The grain can make a difference too. Coarse-grained wood can be more difficult to sand perfectly smooth than fine-grained timber.
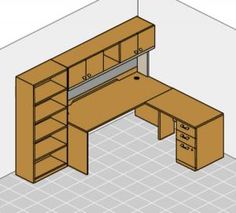
Stage 2: Building Your Piece
Now you’ve picked the right wood for the job, it’s time to get building. So what steps do you take to get things going? Most woodworking projects come with the same process: you plan, measure, cut, join and sand – then you finish.
The planning side of a woodwork project involves drawing a detailed plan of the item. Your plan should include all the right measurements as well as any angles and joints. It’s surprising how quickly things can go wrong at this early stage, with measurements at risk of going astray, so as the old saying goes, measure twice and cut once. We recommend you measure more than twice and check all your assumptions carefully. Then you won’t waste time, effort and materials.
Next, the cutting stage. You’ll mostly use a saw to cut the wood into the desired shape and size, whether it’s an industrial-sized automatic sawing machine of some sort or something smaller like a crosscut saw, a specialist type of handsaw for cutting wood across the grain by hand. There are almost 40 different kinds of wood saw, so there’ll be one that’s perfect for the job.
Joining is a matter of using nails, screws, or glue to attach the pieces of wood. Every joint has to be good and secure because one bad joint can throw the entire item out of whack, leaving it with fundamental weaknesses. You’ll need to understand which joins are best for your project, and again there is a lot to choose from – 15 or more including mortise and tenon joints, angle mortises, dowelled butt joints, lap joints and dovetails.
Stage 3: Sanding and Finishing
Now for the third in our three stages of woodwork. Sanding is a matter of patience, either by machine or by hand using the right kind of sandpaper for the wood you’re working with. Most of the time you’ll kick off with a coarser paper and work your way through to finer papers to achieve a beautifully smooth surface with no rough edges. Remember to always sand in the direction of the grain, even if it’s very fine-grained timber, otherwise, you’ll just end up with a tatty scratched-looking surface.
The finishing stage is where your piece comes to vibrant life, giving it a wonderful professional look. Applying coats of stain, paint, or varnish protects the wood, and varnishes also bring the gorgeous natural colour of the wood to the fore.
Staining wood changes the colour, adding vibrancy and interest to raw timber. You can make a plain, light-coloured wood dark, or even transform it with a bright-coloured stain. You might want the natural grain to show through – or not. Just pick a stain that complements your design.
Sealing is all about protecting the wood. Apply a coat of sealer to protect the surface from the mildew and mould that can take hold after a long, cold winter, keep it safe from fading in the sunlight, and more. A sealing product will also help to preserve the colour.
Painting covers the wood surface completely to give you an entirely different look. Choose any specialist wood paint you like, from matt to gloss, water-based to oil-based, bright to subtle, and sophisticated heritage shades to cheerful primary colours.
Frequently Asked Questions: 3 Stages Of Woodworking
What tools do I need to get started in woodworking?
Can I use any type of wood for my project?
How do I know if my piece is properly finished?
The 3 stages of woodworking... explained!
Now you know what’s what, you’re ready to go create. Woodworking is such a rewarding hobby once you get some basic skills under your belt. It does come with the need to understand the various properties of different woods, but it’s an interesting journey of discovery you’ll enjoy.
A methodical approach to building and finishing wooden items makes all the difference between something good and something outstanding. You’ll get a kick out of taking pride in your workmanship. When you follow the three stages of woodworking – choosing the right wood, building the item well and finishing it beautifully – the results will be stunning, hard-working and long-lasting. What will you make first?


