
Everyone loves V-Ray. It’s such a brilliant way to generate exciting, realistic images from 2D and 3D drawings and designs. You already know it’s perfect for Windows machines – but can you use V-Ray on Mac? Luckily it’s a yes. This article delves into the details and gives you the insight you need to know about how to install V-Ray for SketchUp on Mac computers. By the end you’ll know how exactly to get the software onto your Mac machine. From then onwards, an entire world of stunning rendering is yours to play with.
Can You Use V-Ray on a Mac?
How about the details behind using V-Ray on your Mac? The first thing to note is that the V-Ray Graphic Processing Unit or GPU is not officially supported on the macOS operating system. It only works with C++ and CPU devices. On the other hand you can still use the V-Ray GPU in distributed rendering when your Mac runs the CUDA engine on a CPU device along with Windows or Linux running the CUDA engine on a GPU device.
You also need to be aware of the developer Chaos’s hardware requirements for the software. As they say, there’s a critical disadvantage on Mac platforms simply because there isn’t official support for GPU rendering. If you’d like to use V-Ray GPU, Windows or Linux is your best choice. If that isn’t possible, here are the official MacOS hardware requirements. Please check your machine has all this before you try to Install V-Ray:
- Processor: Intel 64, AMD64, ARM or compatible processor with SSE4.2 support
- RAM: Minimum 8 GB RAM, recommended 16 GB RAM
- Hard Disk Space: minimum 2GB, recommended 12GB (includes additional downloadable content)
- TCP/IP: Only IPv4 is supported
- IPv6 is not supported
- Operating System: Apple macOS 10.14.x or higher
- SketchUp version 2019, 2020, 2021, or 2022
How to Install V-Ray for SketchUp on a Mac?
Next, how to install V-Ray for SketchUp on Mac machines, assuming you’ve already confirmed your hardware and operating system provides what you need, and you’ve also verified you have the right version of SketchUp itself. Here’s the installation process, step by step:
- Go to chaos.com, the developers of V-Ray
- Click the ‘Try’ button at the top right hand corner
- Create an account for yourself – it’s easy and intuitive
- Choose the right ‘role’ from the drop-down list
- Click continue
- Select ‘V-Ray’
- Under ‘Host Platform’ select: ‘SketchUp’
- Click ‘continue’
- Select V-Ray for SketchUp
- Select the latest version of SketchUp – it should already be installed on your Mac
- Click ‘download’
- Click on the downloaded file to open it
- Click on the installer to begin the installation
- Agree to the installation settings – remember the host version should be the version of SketchUp you chose, for example SketchUp 2022
- Once it has installed, click ‘Done’
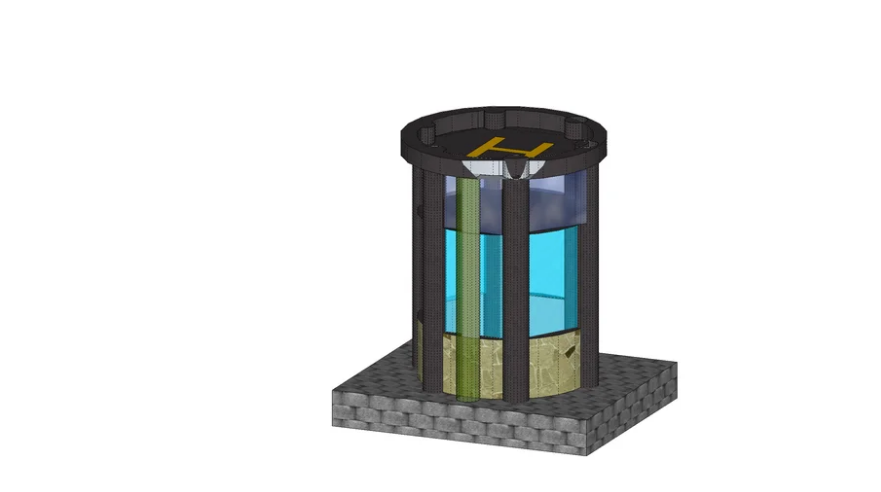
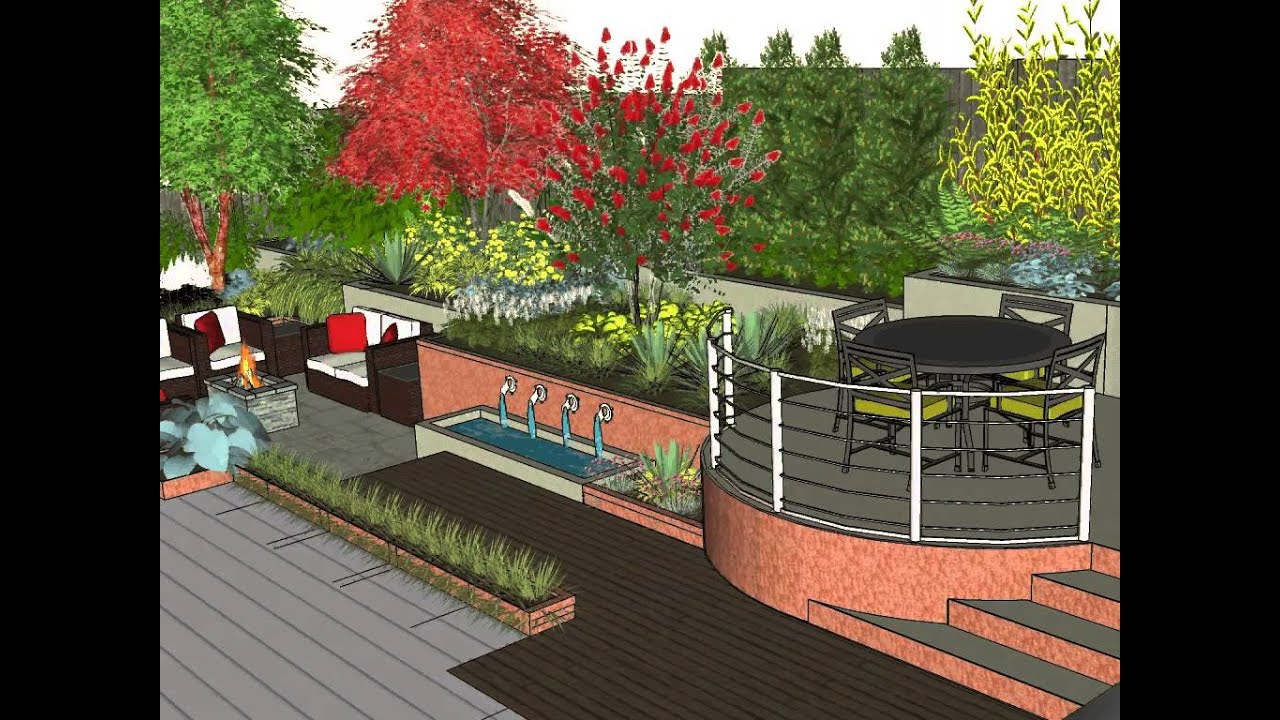
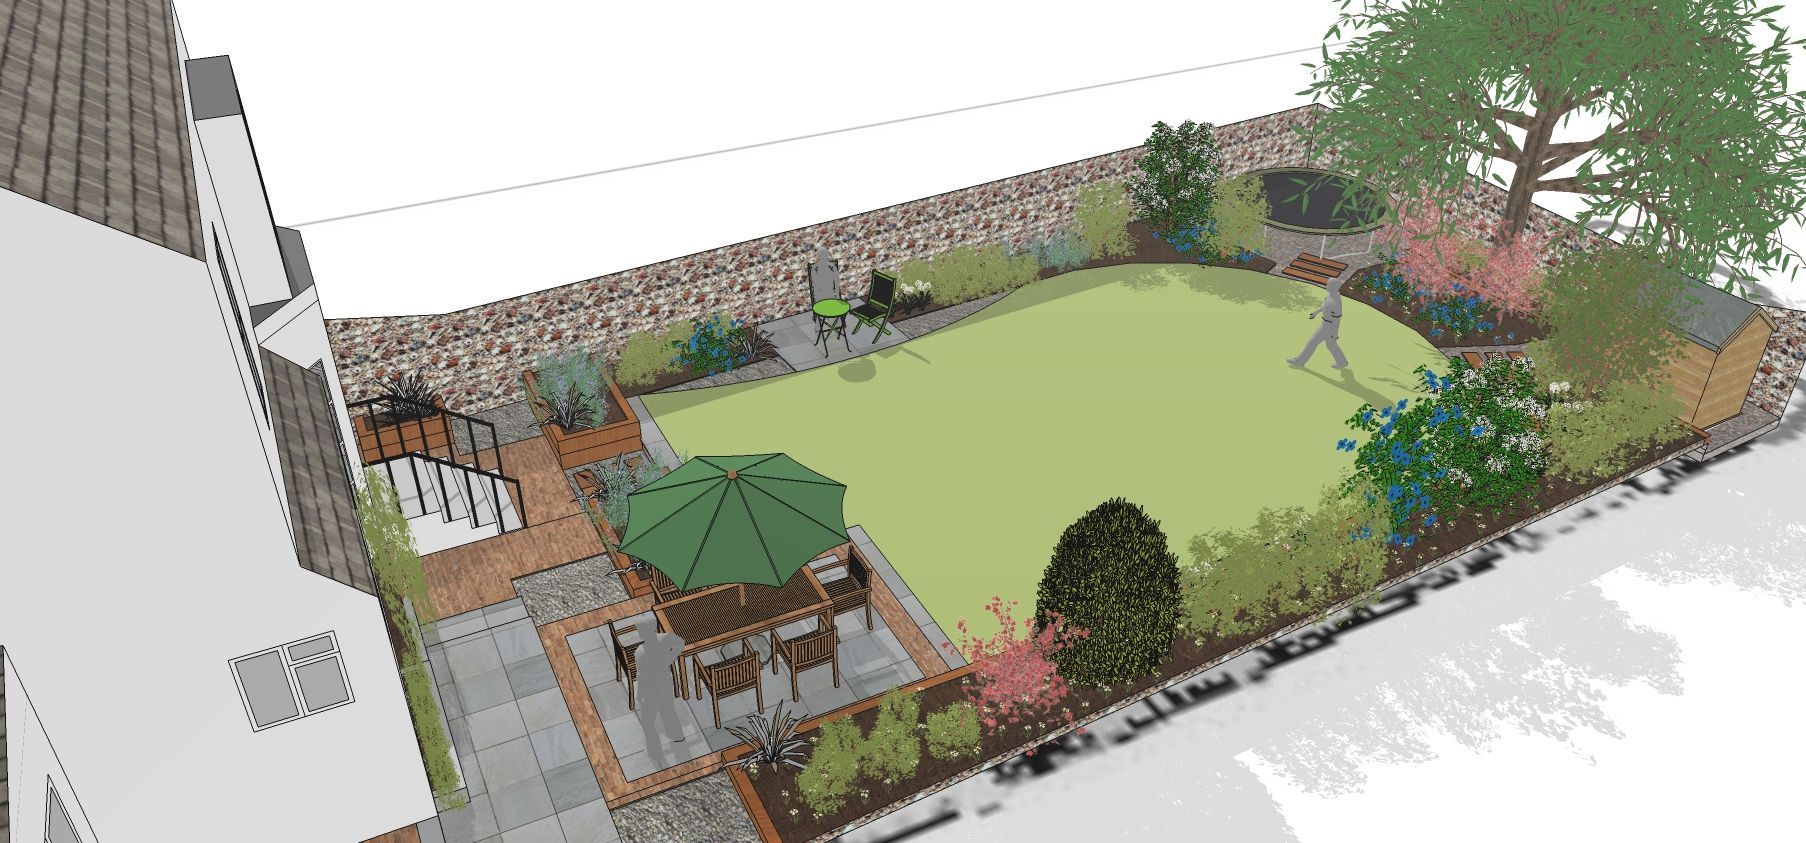
Now you can test your V-Ray installation by opening up any project, perhaps a 3D studio project you’re working on, and choose the basic V-Ray render settings to reduce the render time. If all is well it’ll render a superb quality image for you.
V-Ray and SketchUp Pro - Plans and Pricing
Now you know you can use V-Ray on a Mac machine, understand the system requirements your machine needs, and know how to install V-Ray for SketchUp on Mac. Which kind of SketchUp licence will suit your needs best? Take a look at the choices here. There’s something for everyone. How to buy SketchUp Pro? Click here to claim your 7 day free Pro trial, or subscribe to it, and check out the differences between the free and Pro versions here.
There are several licensing options to choose from, each giving you the functionality you need for use in schools, higher education, or for commercial purposes.
And your next task? Here’s where the real enjoyment starts. Dive in, play with it, and have the time of your design life. If you need tutorials and learning resources there are stacks of them to enjoy, including brilliant video tutorials on YouTube.