SketchUp Studio: Built for Building

We’ve been busy evolving the Studio offering to make it [even] more robust for Architecture, Engineering, and Construction (AEC) professionals. With that in mind, we are excited to announce two new features that will have your workflow more enriched and streamlined than ever before. Welcome to the Studio family, V-Ray and Scan Essentials!

Import point cloud data with Scan Essentials (Windows-only)

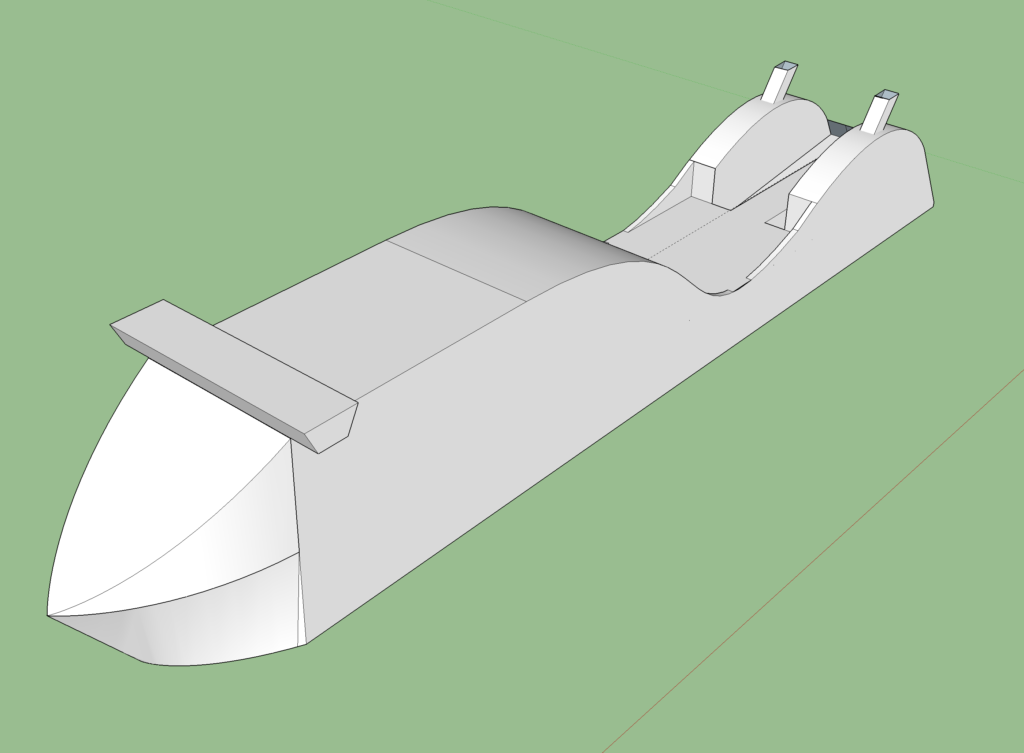
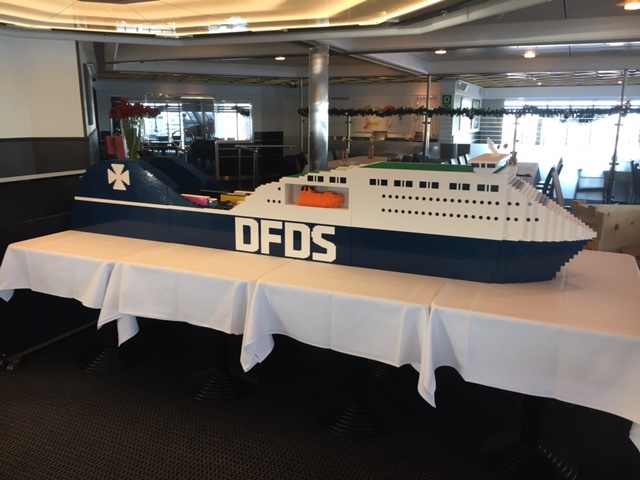
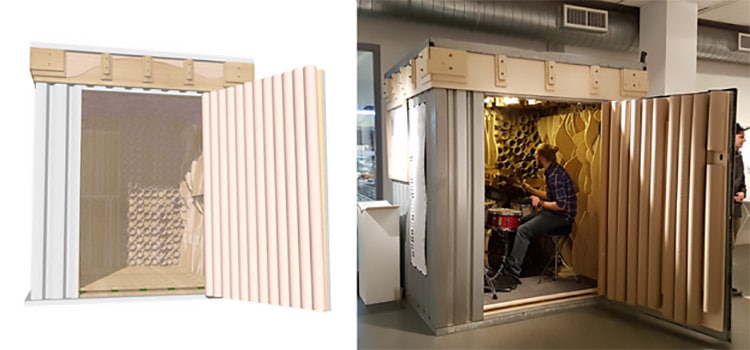
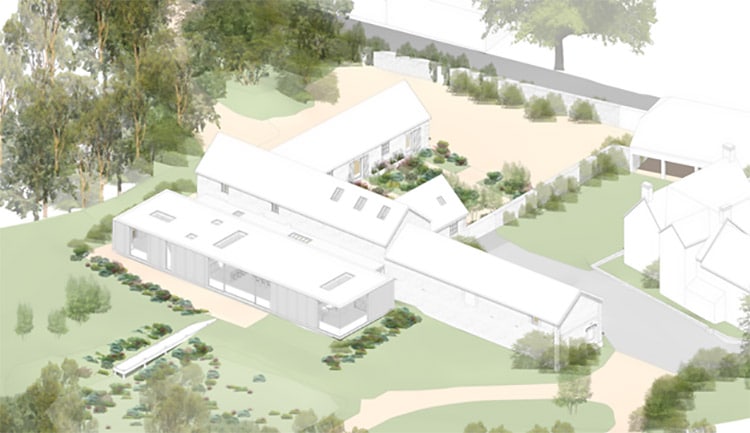
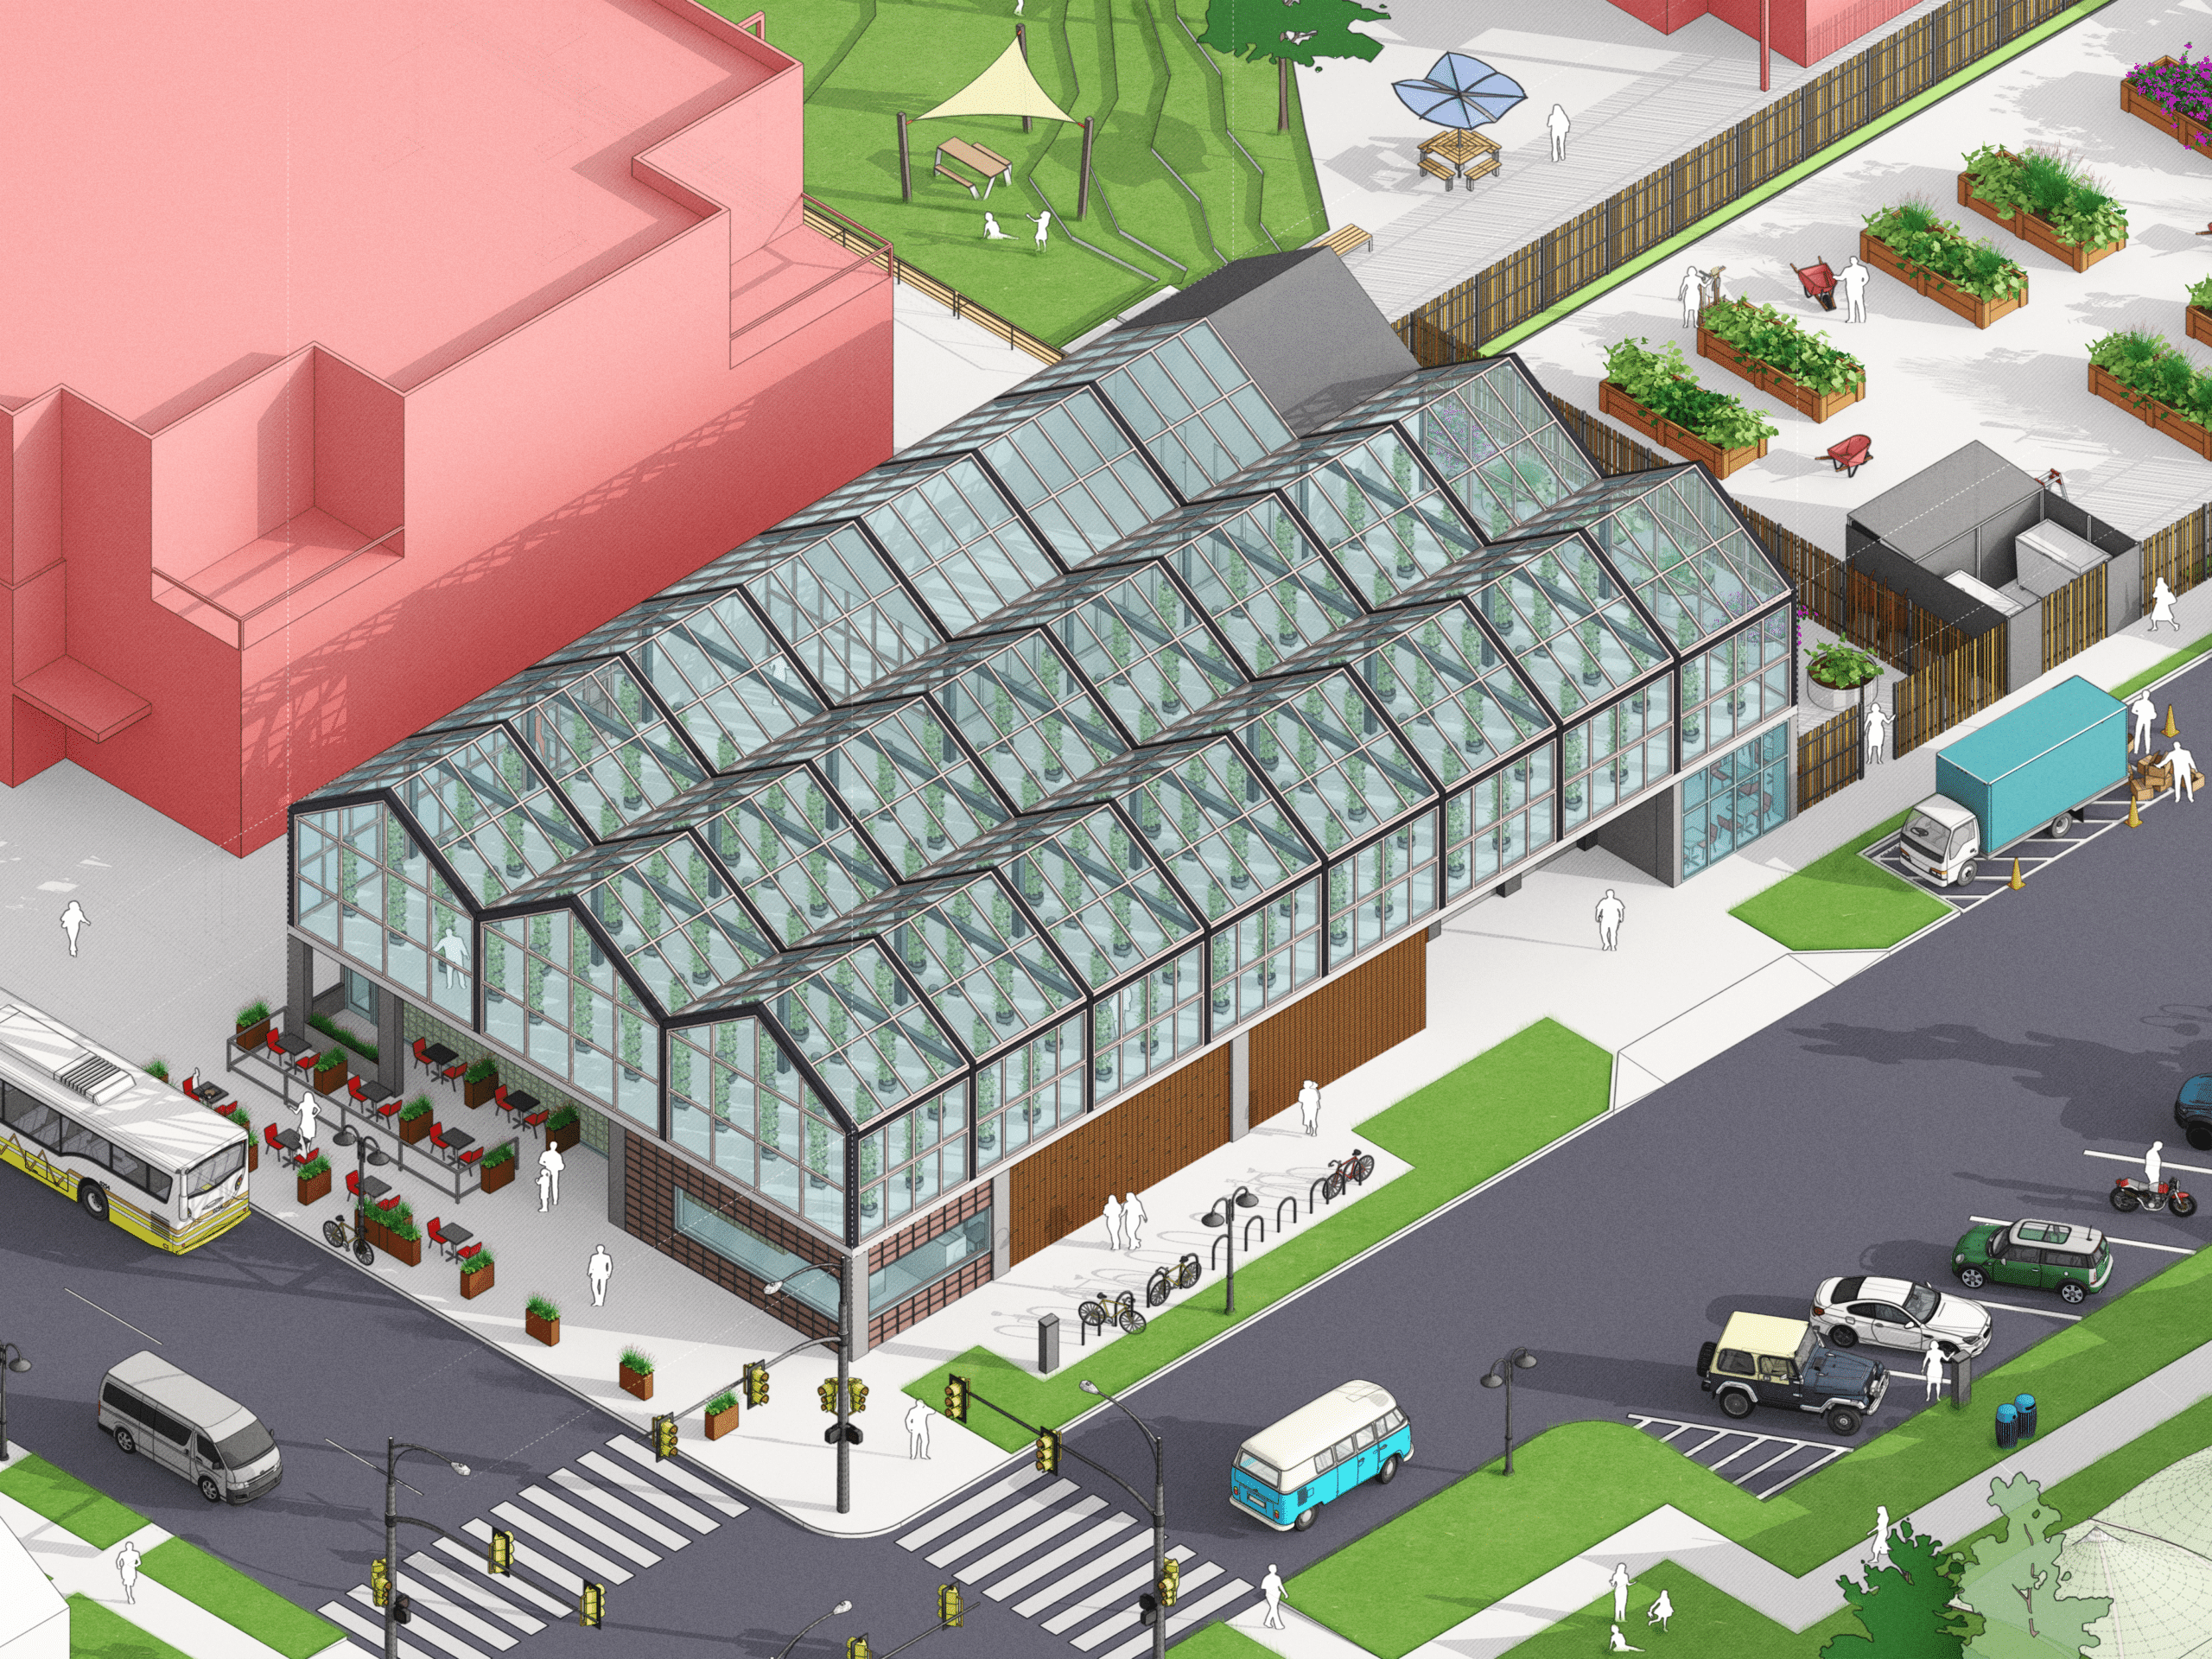
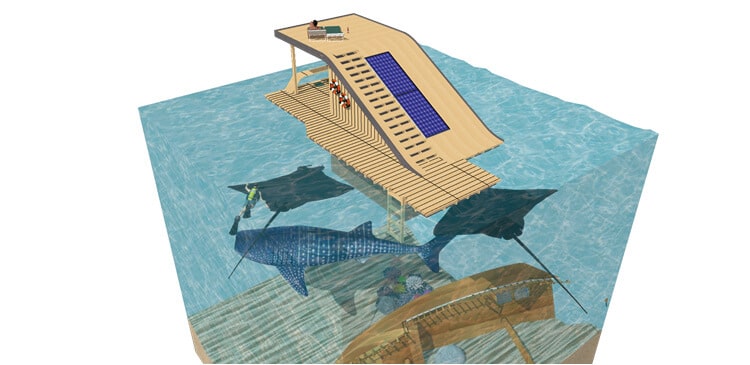
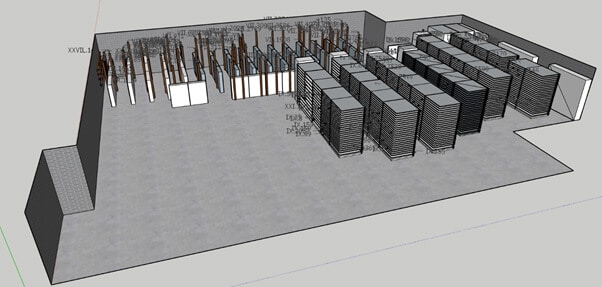
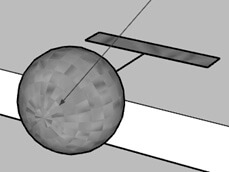
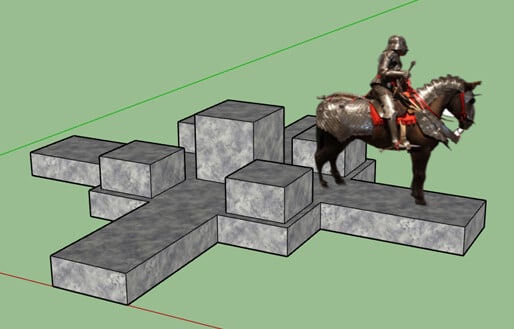
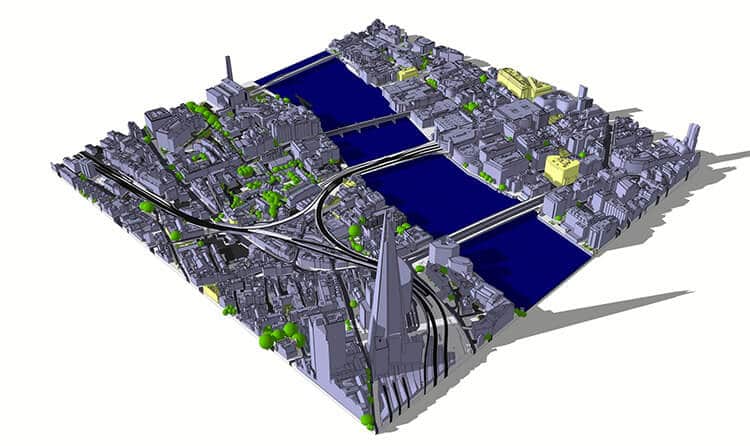
Similar to PreDesign and Add Location, Scan Essentials is, well, essential from the very start of your workflow. By giving you the tools to import, view, and model directly on point cloud data in SketchUp, it serves as a blueprint for a solid 3D foundation. Whether you’re retrofitting or delivering a new build, you don’t need to start from scratch. Some features to help support your workflow include importing point clouds from drones, terrestrial scans, photogrammetry, lidar sensors, and mobile mapping; modelling directly on point clouds; comparison functionality to ensure your model is aligned with your point cloud; alternate views; as well as the ability to zoom on specific sections, and alter colours and transparency. Your context is ready for 3D primetime! Once you’re done with your 3D model, it’s time to go to 2D with a direct LayOut integration. Save modelling time by exporting contextual scan data directly into LayOut for professional documentation.

Ultimately, the point cloud visual is the richest data of all, but the benefits it brings to your entire workflow are invaluable; for example, increasing modelling accuracy and efficiency. With Scan Essentials, you can better integrate project stages, from site surveys to design, construction, and then post-construction, supporting greater success on complex projects.

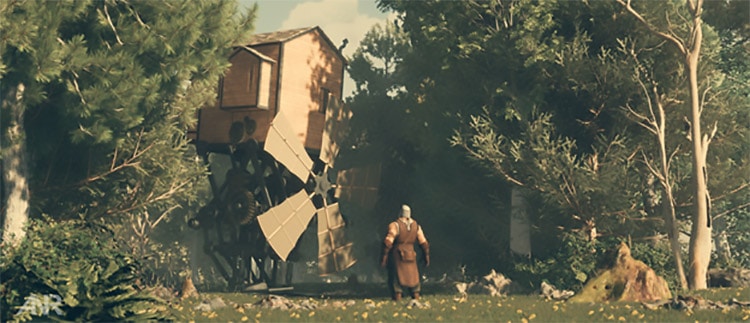
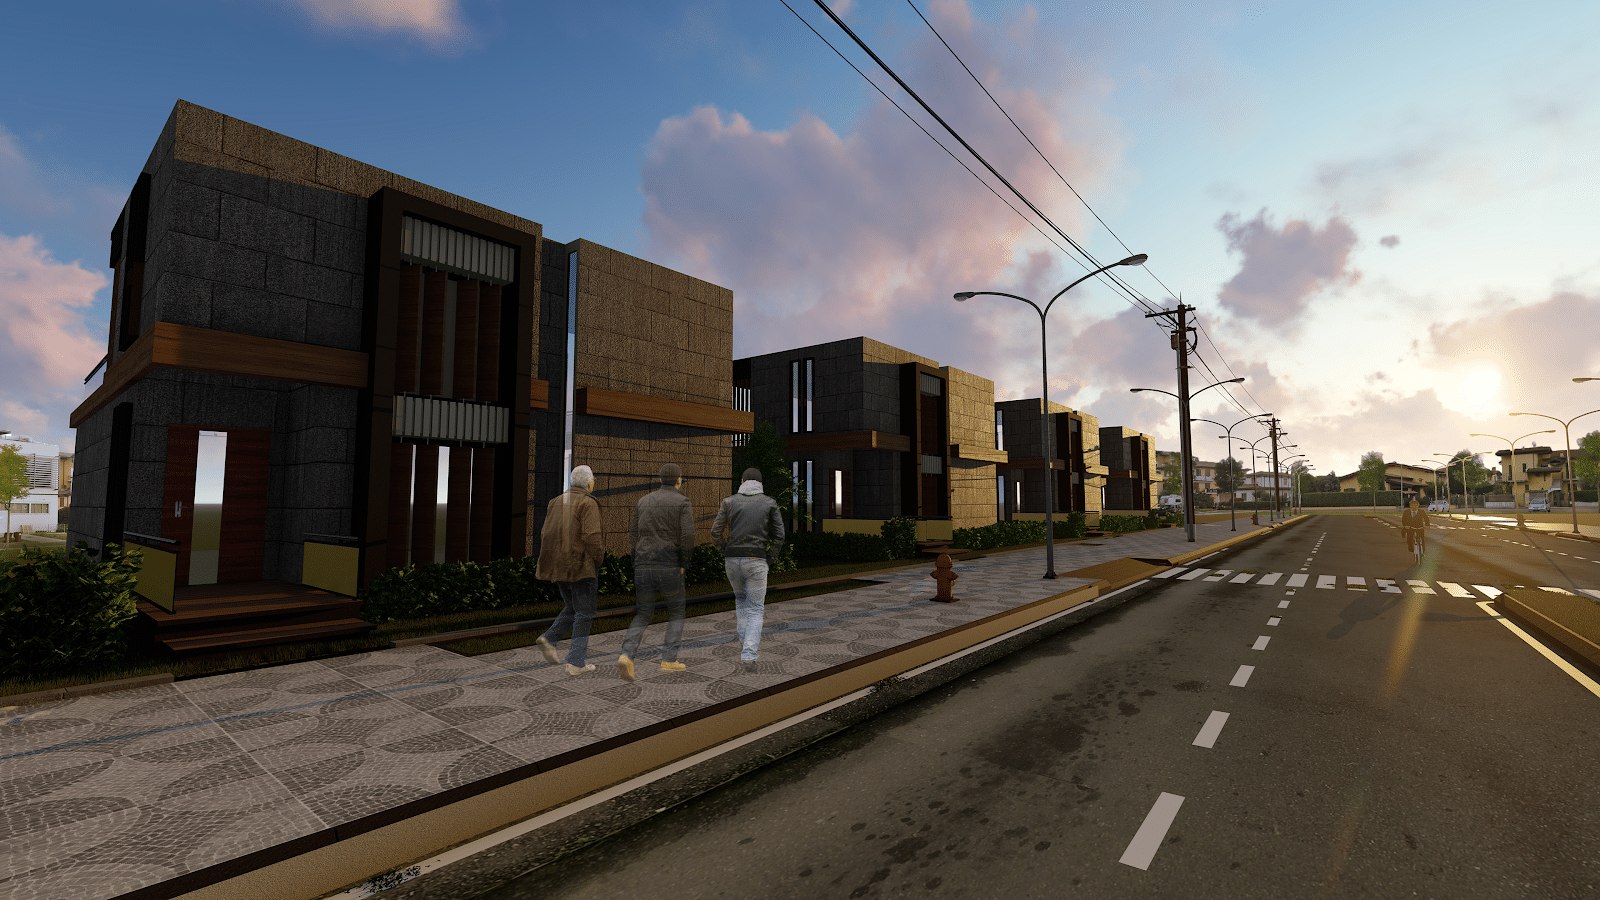
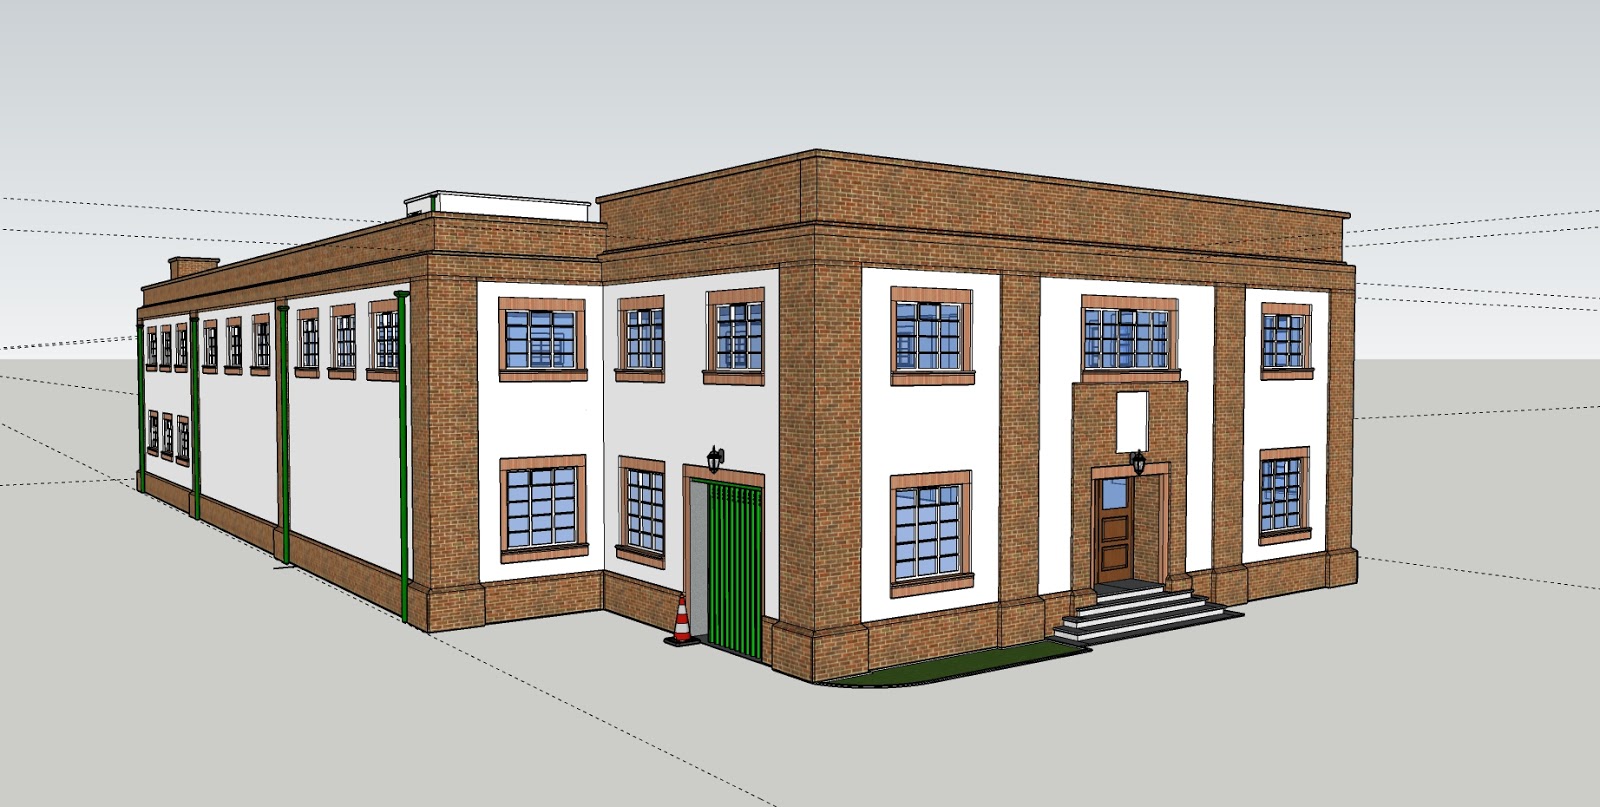
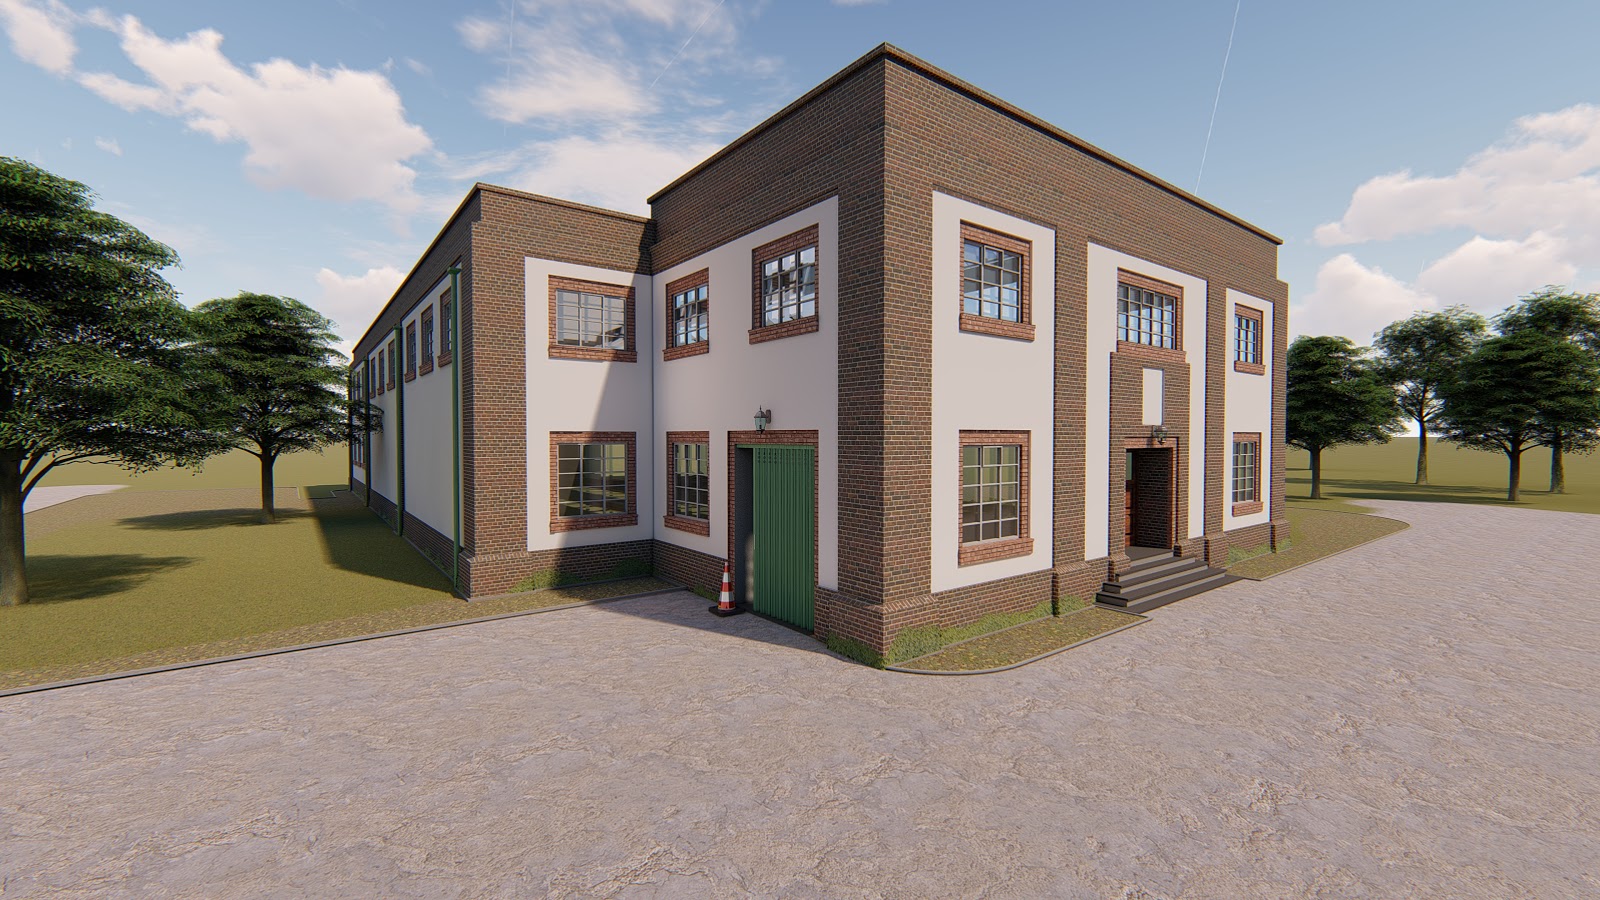
Real-time and photorealistic rendering with V-Ray 5

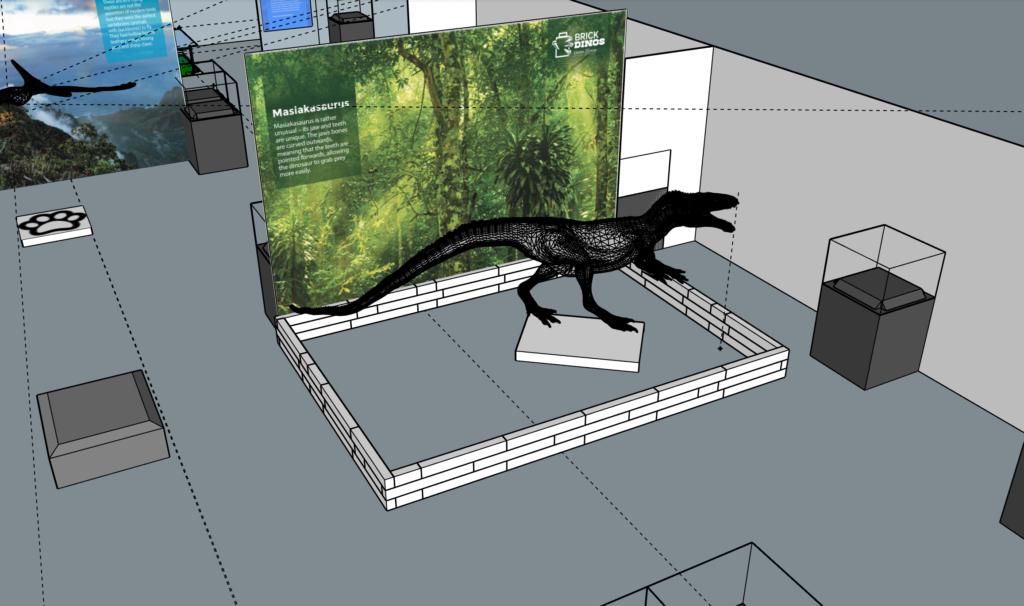
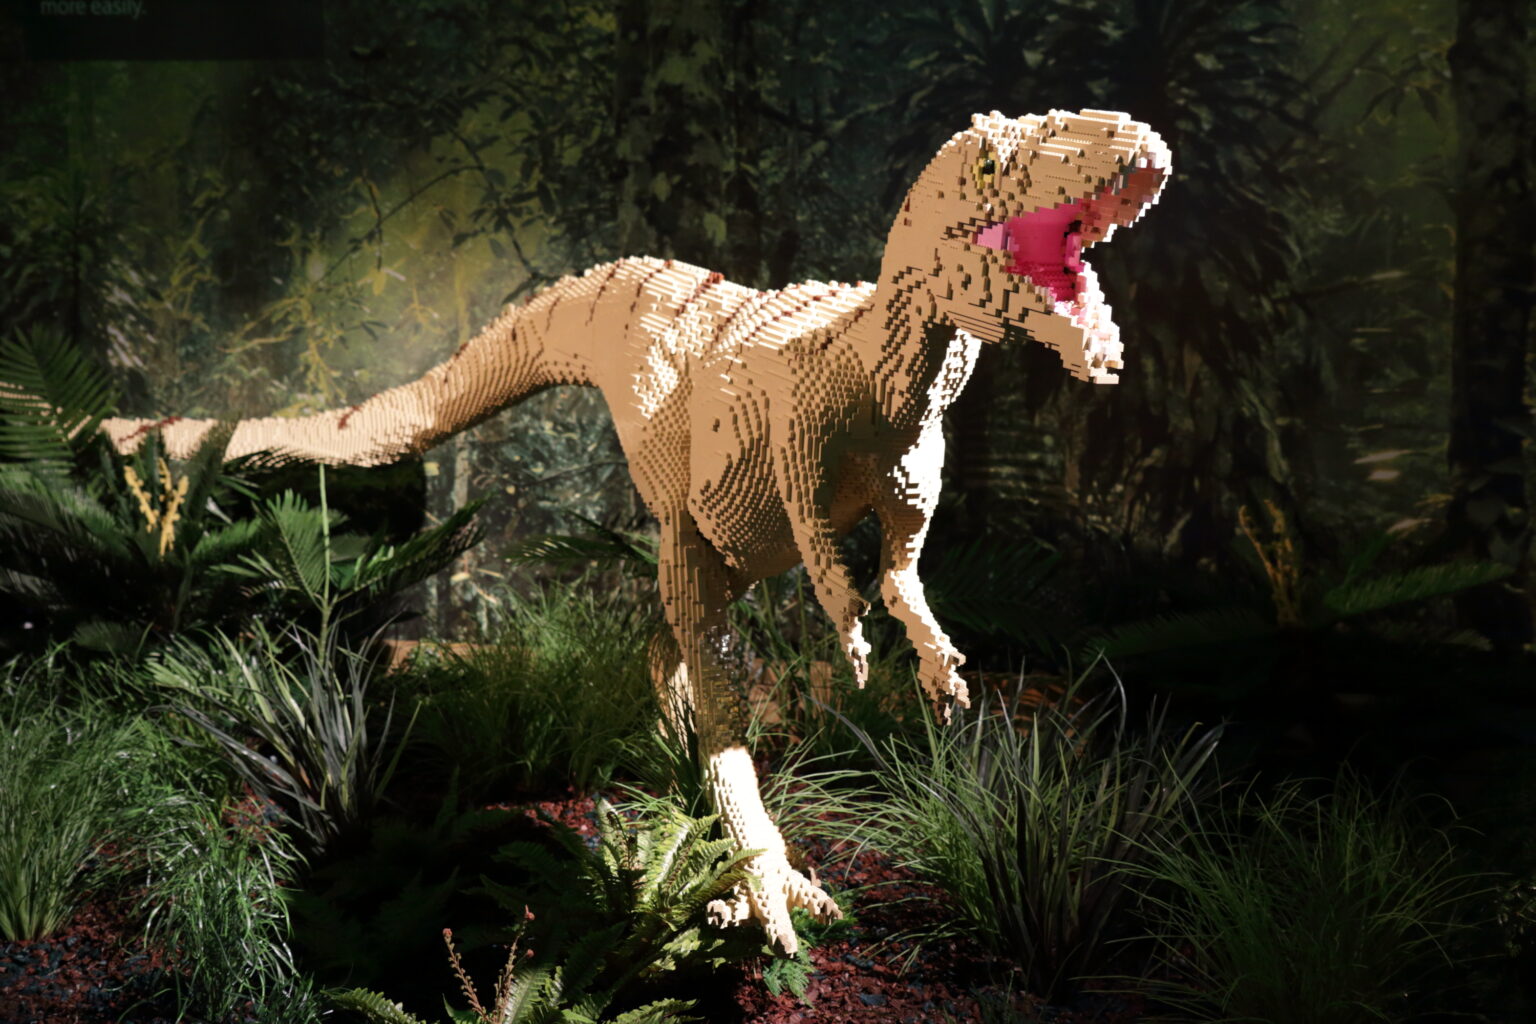
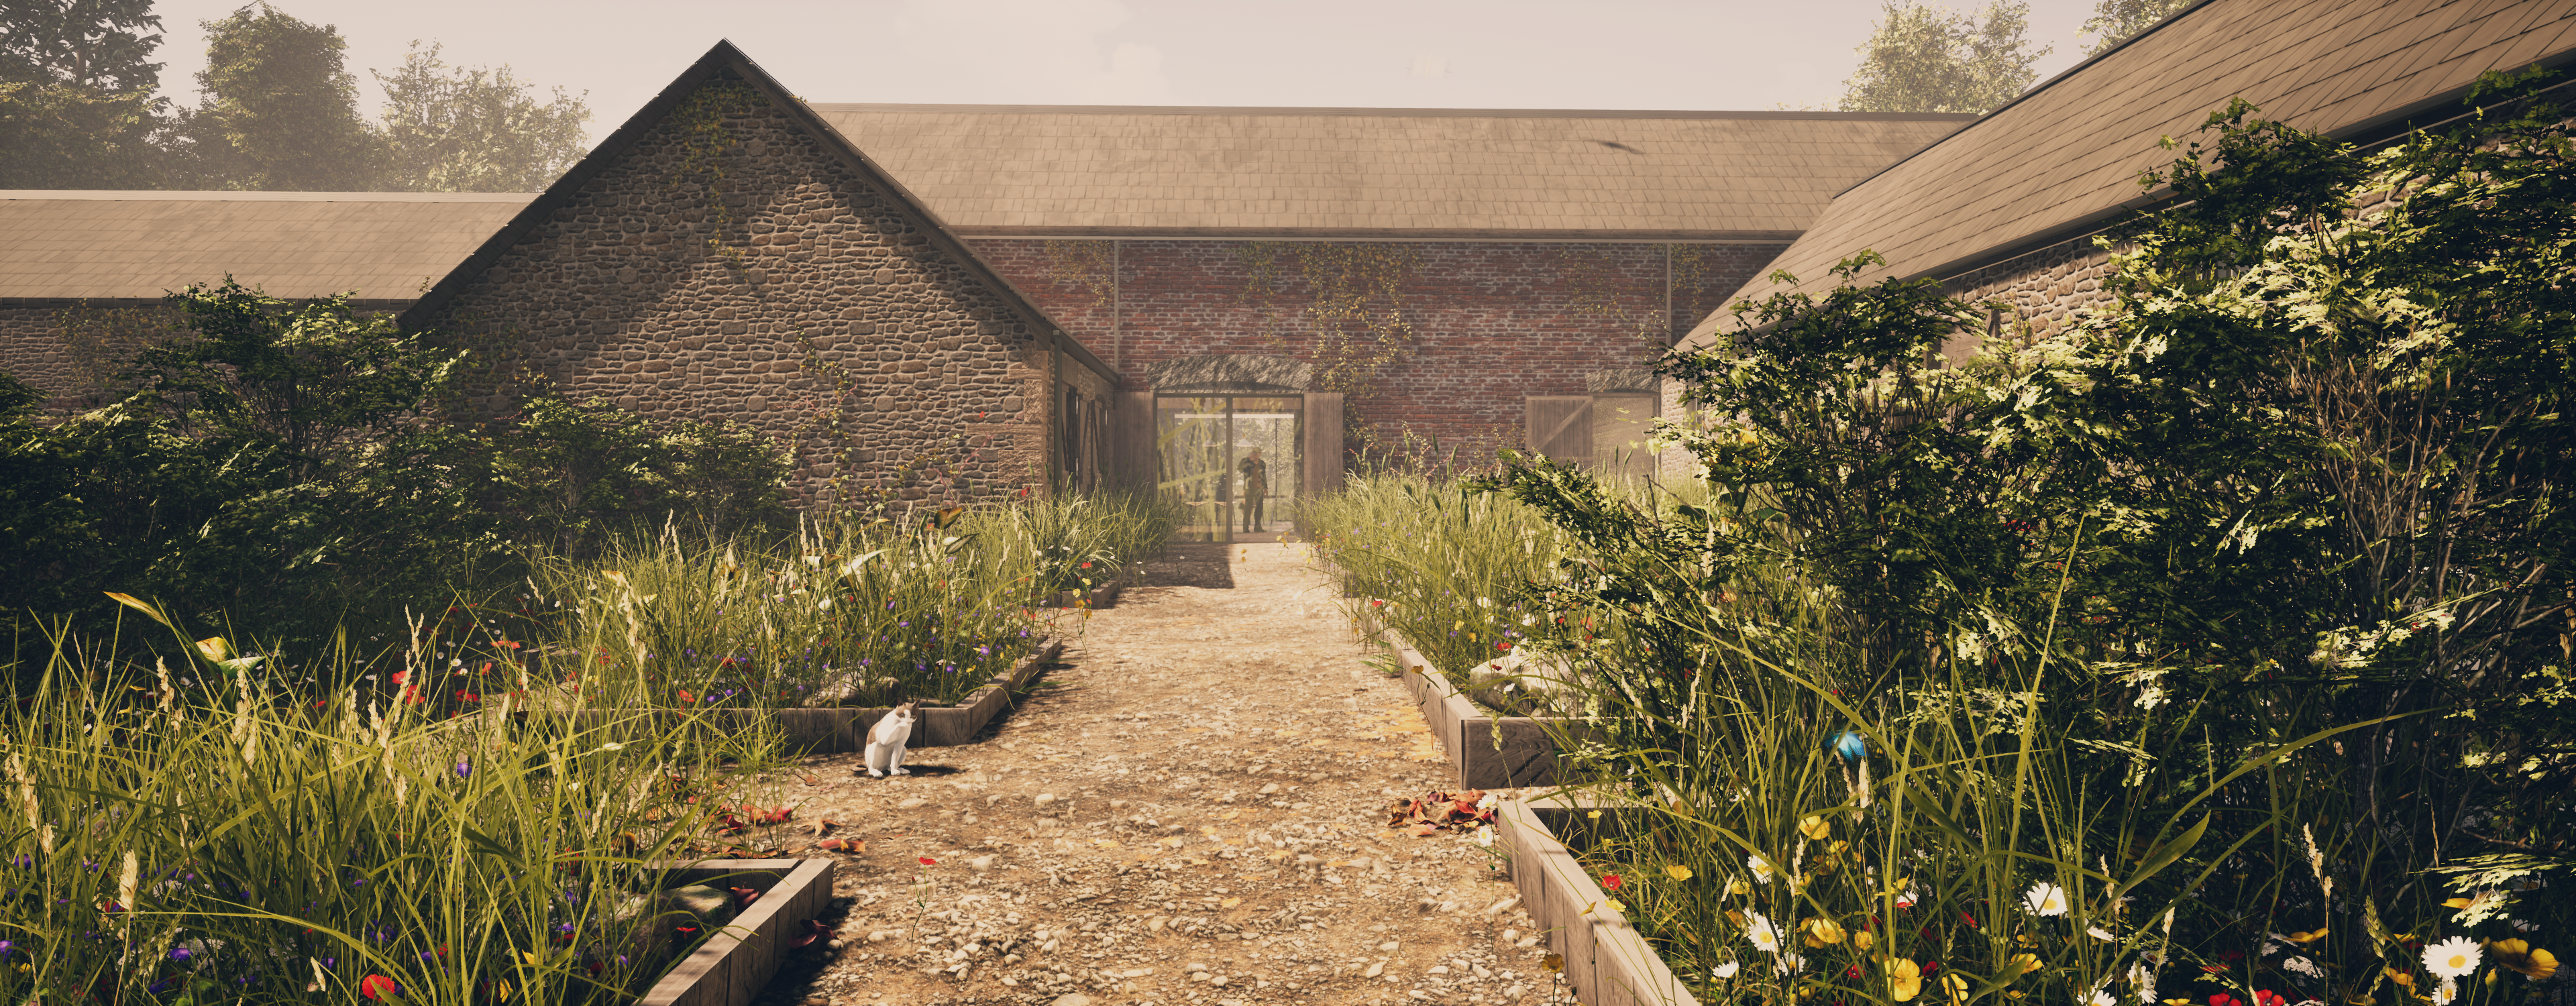
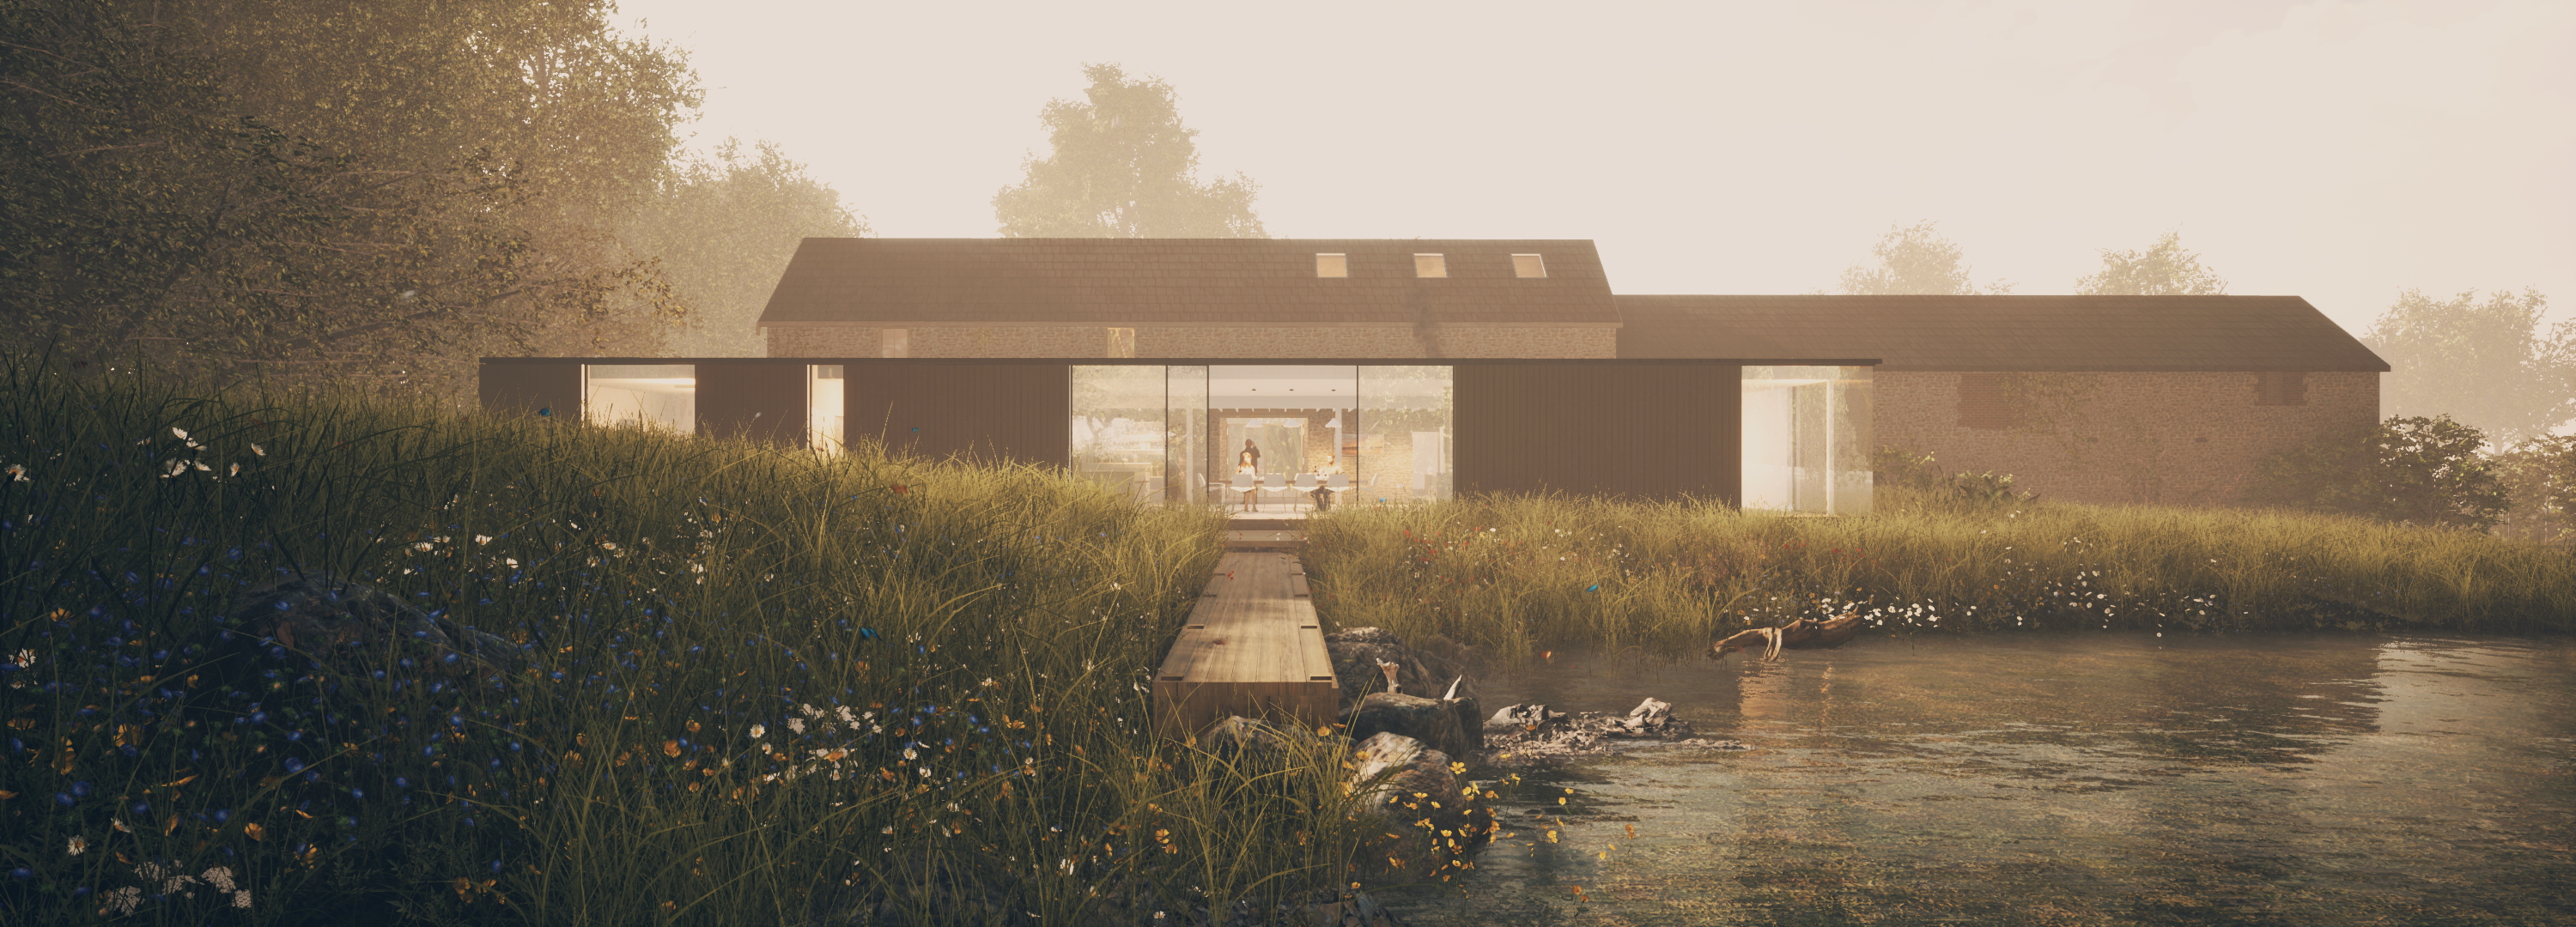
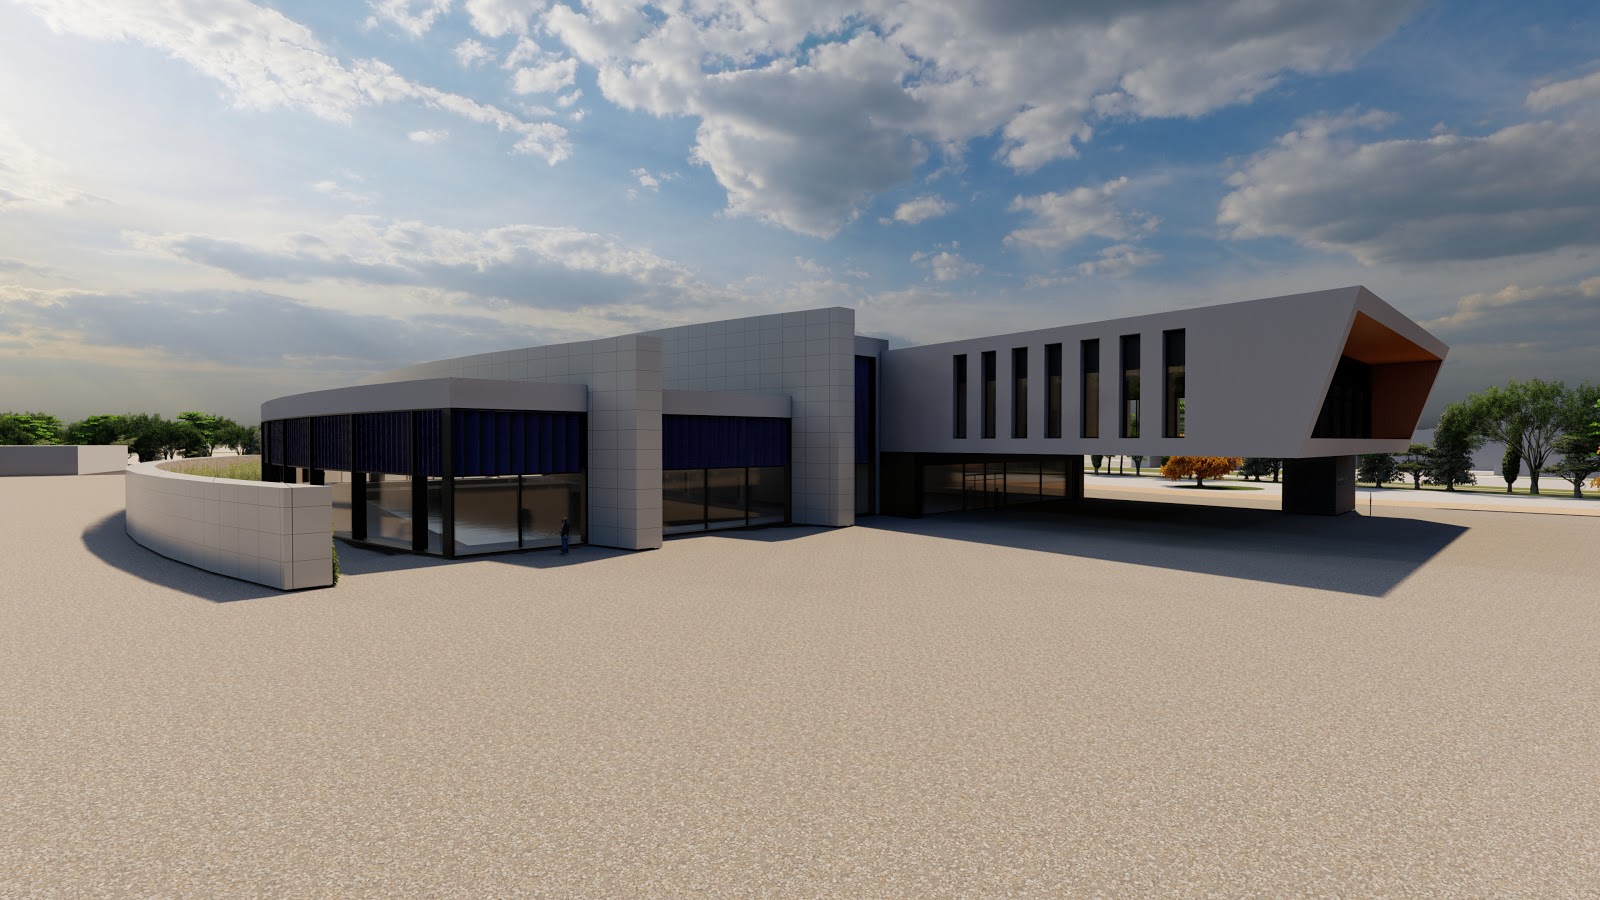
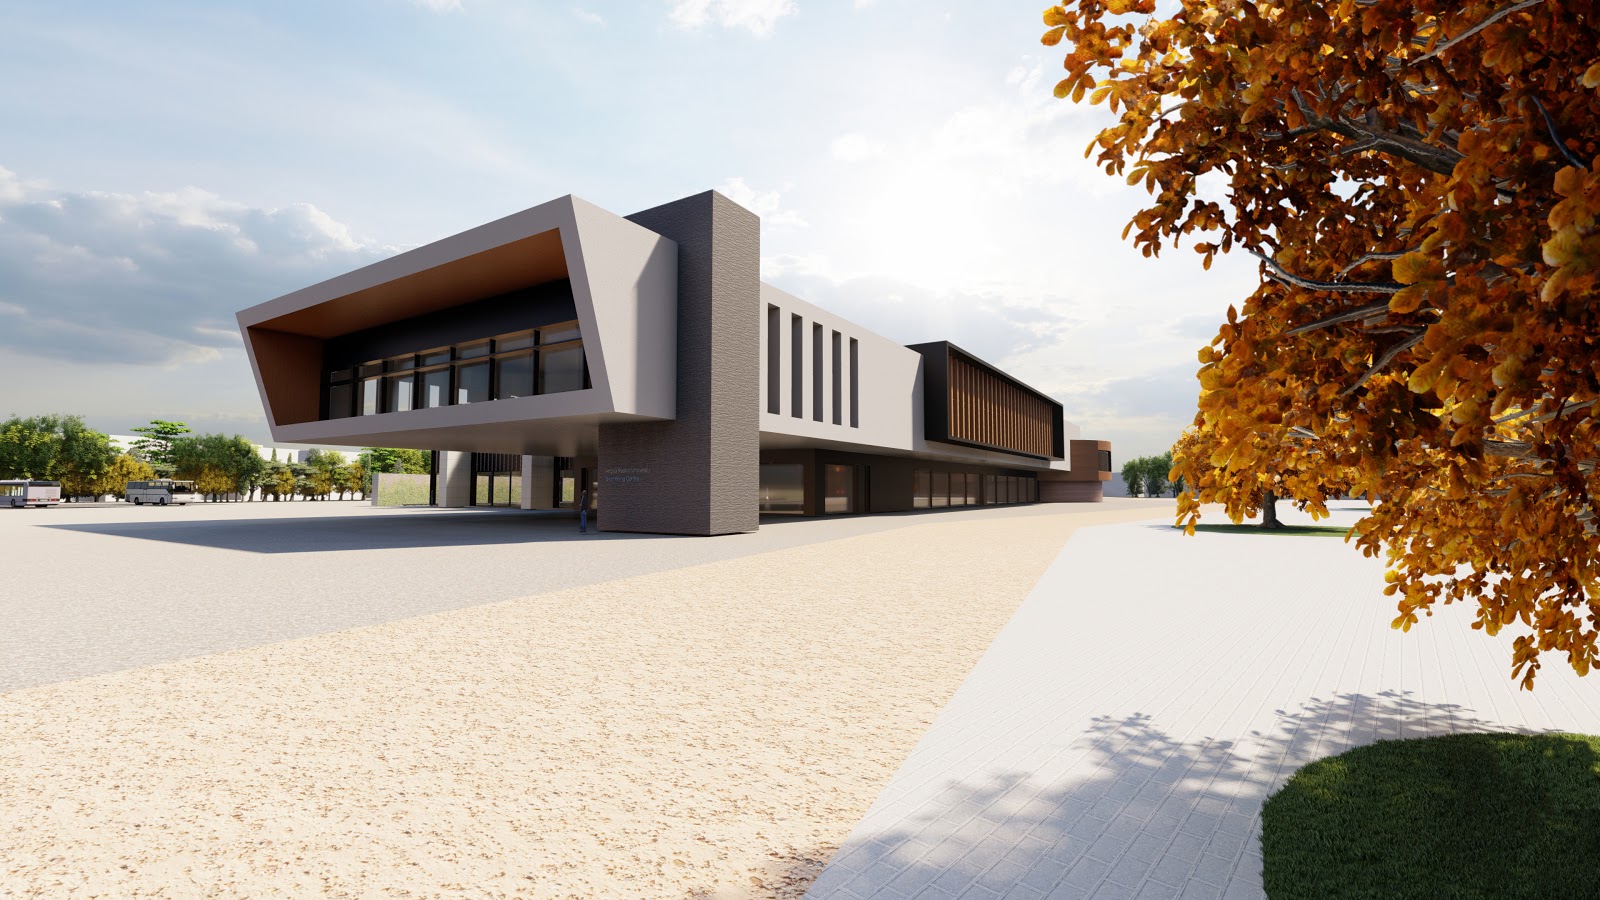
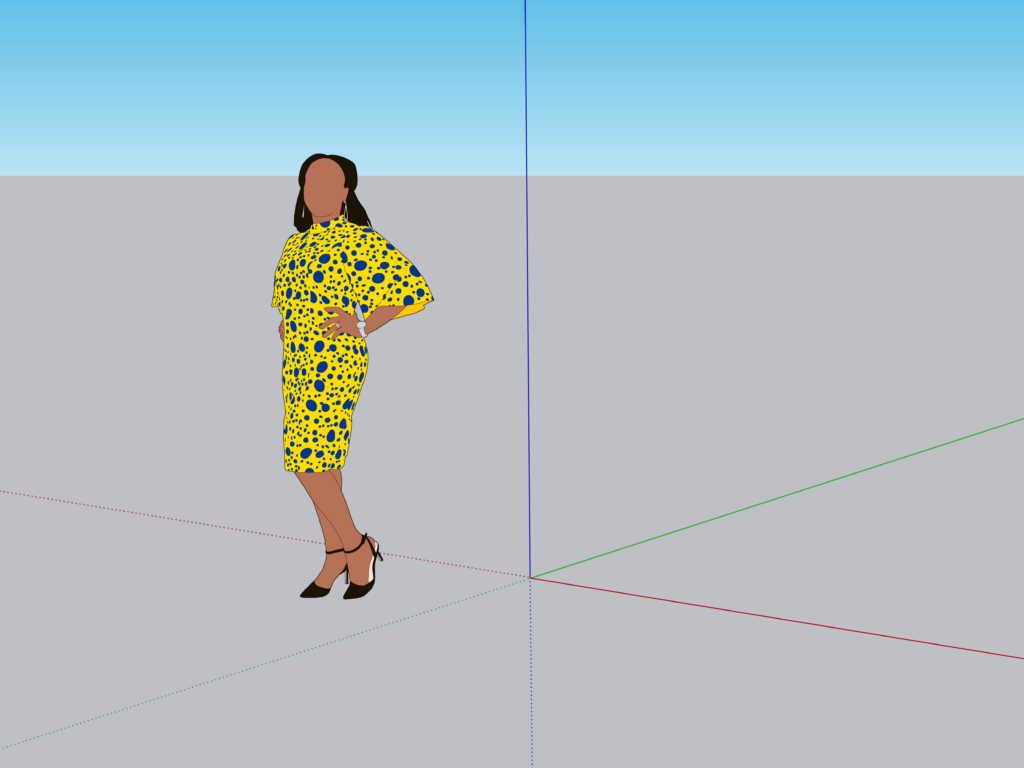
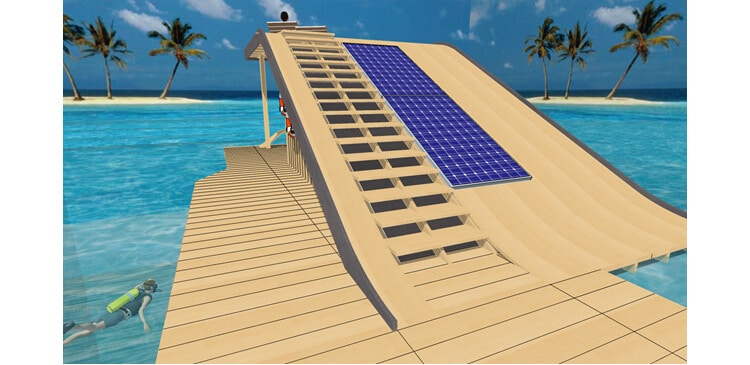
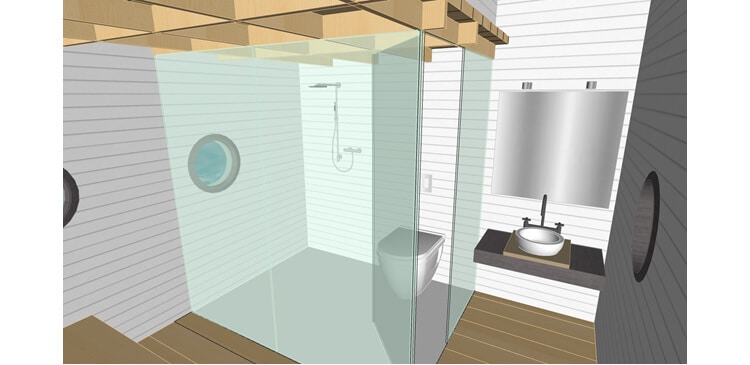
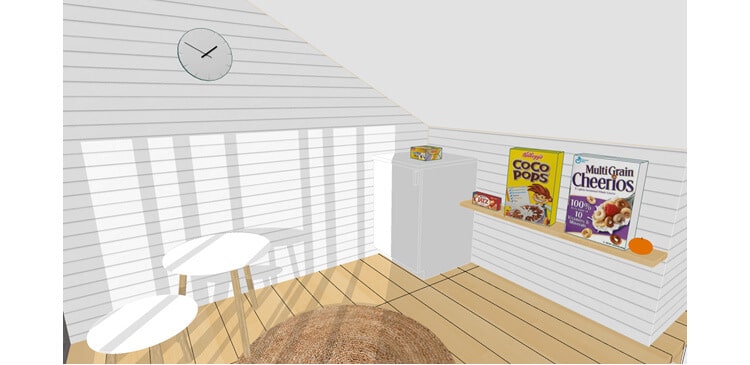
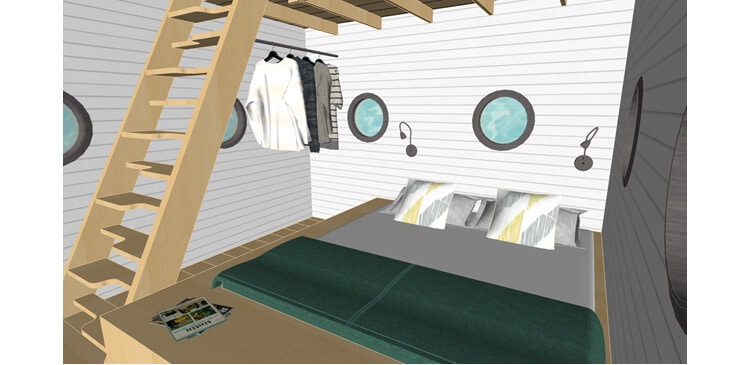
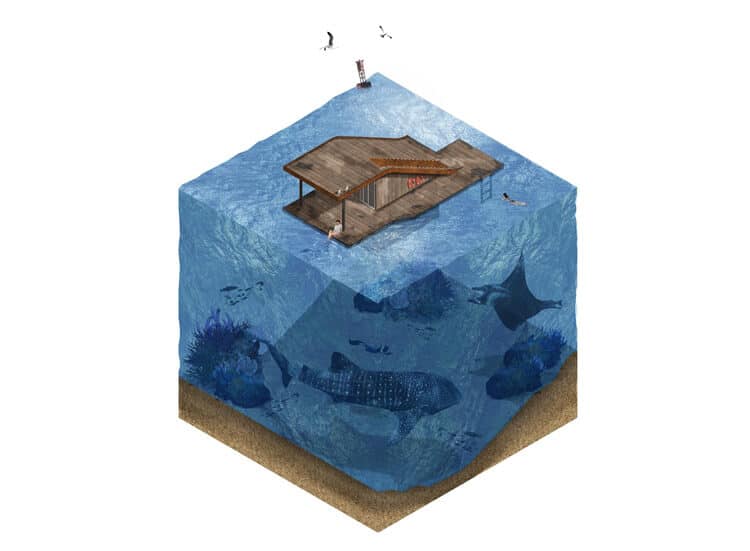
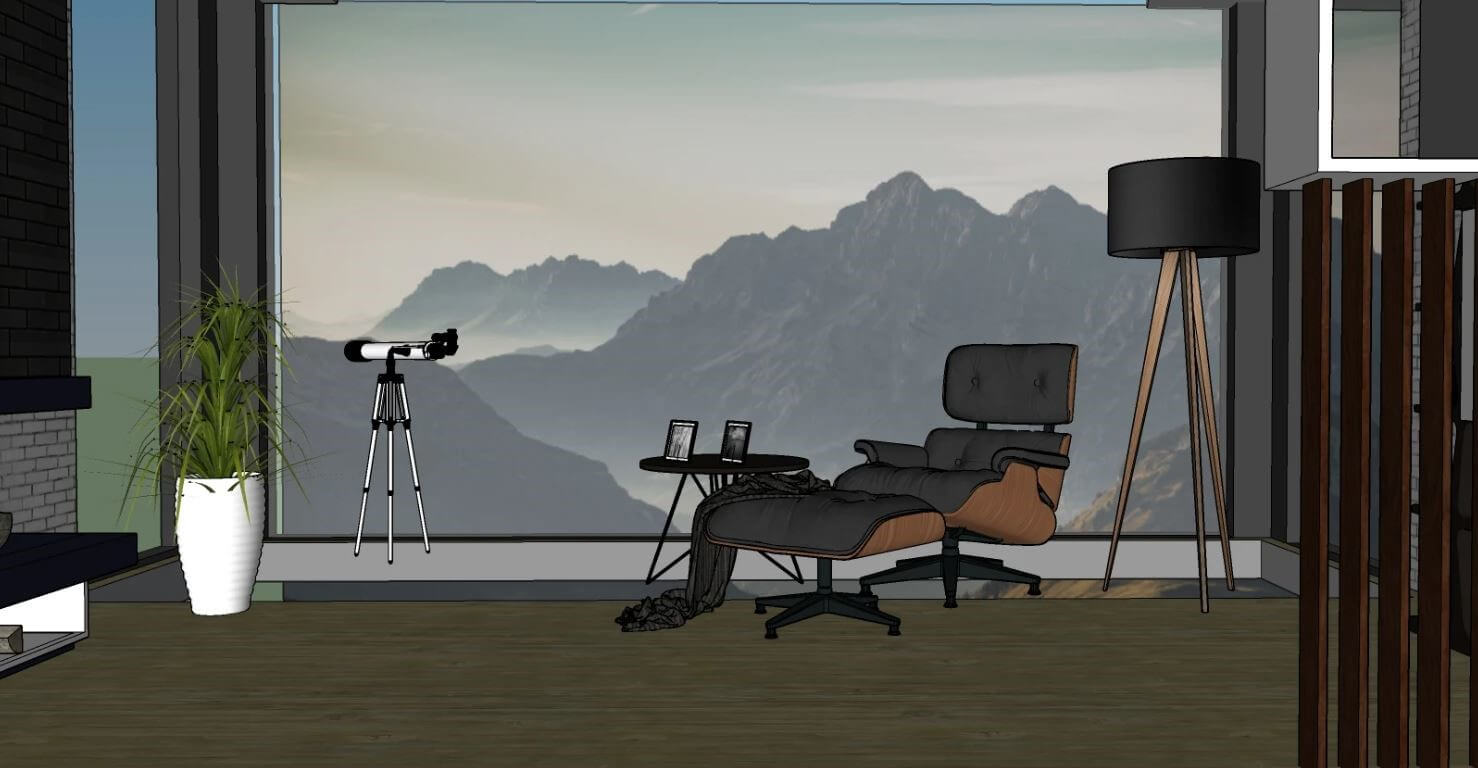
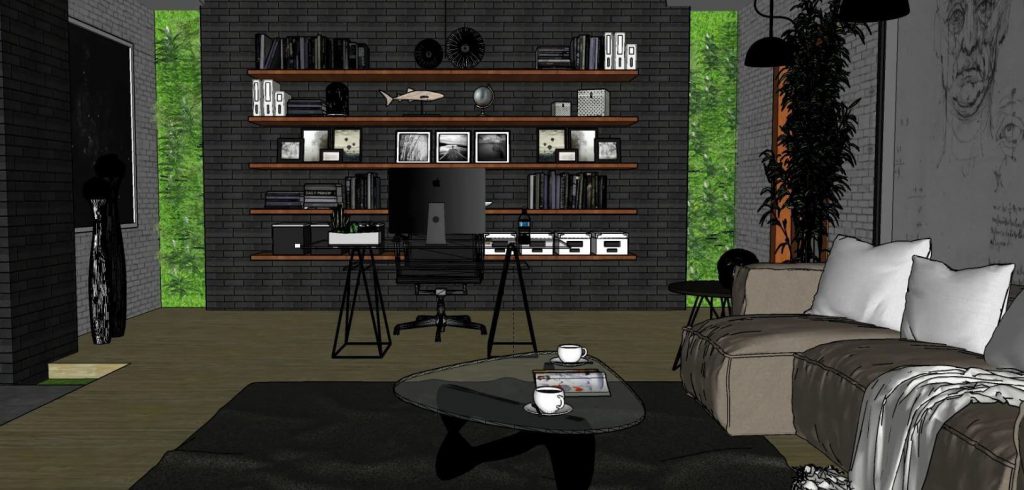
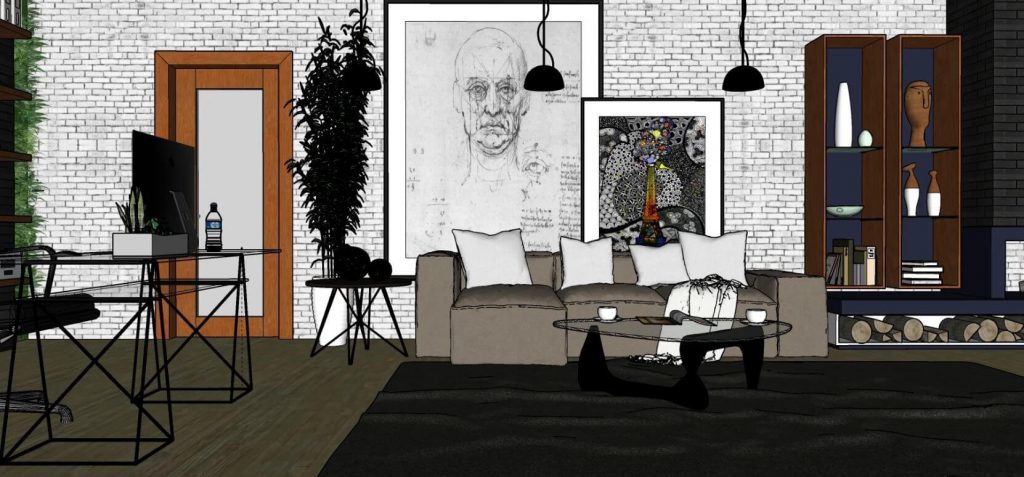
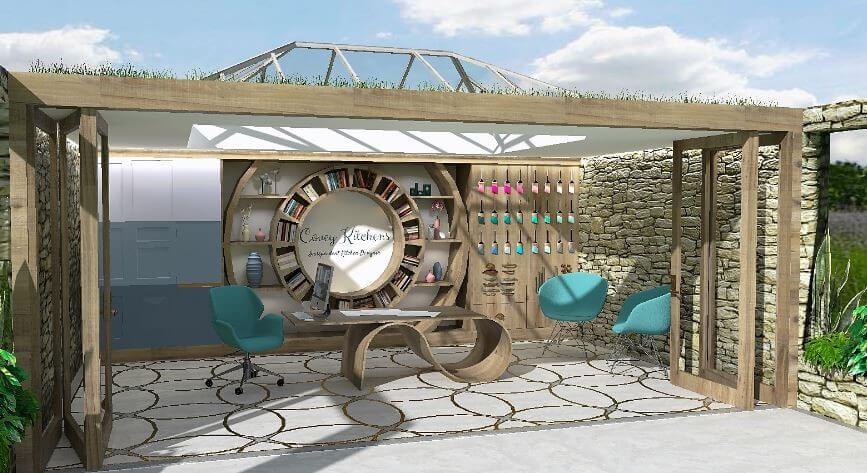
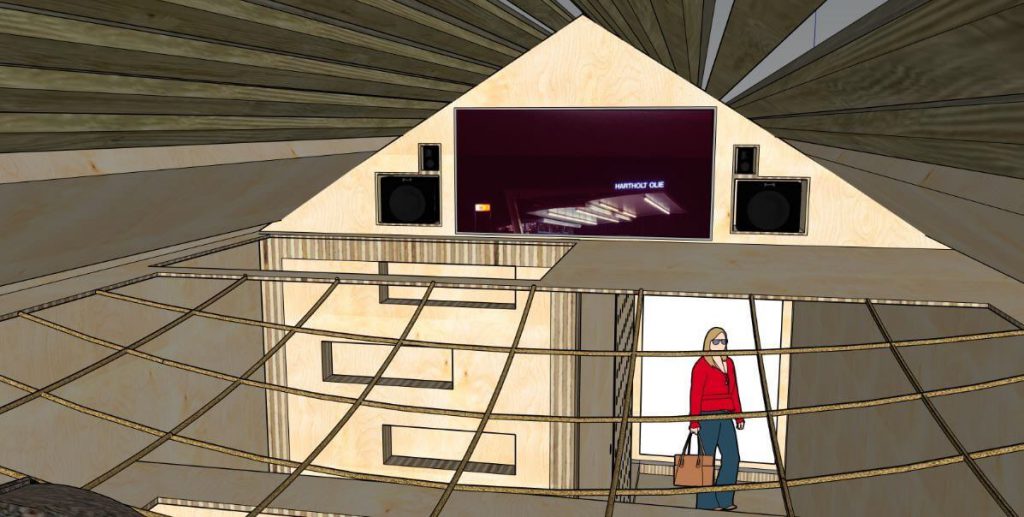
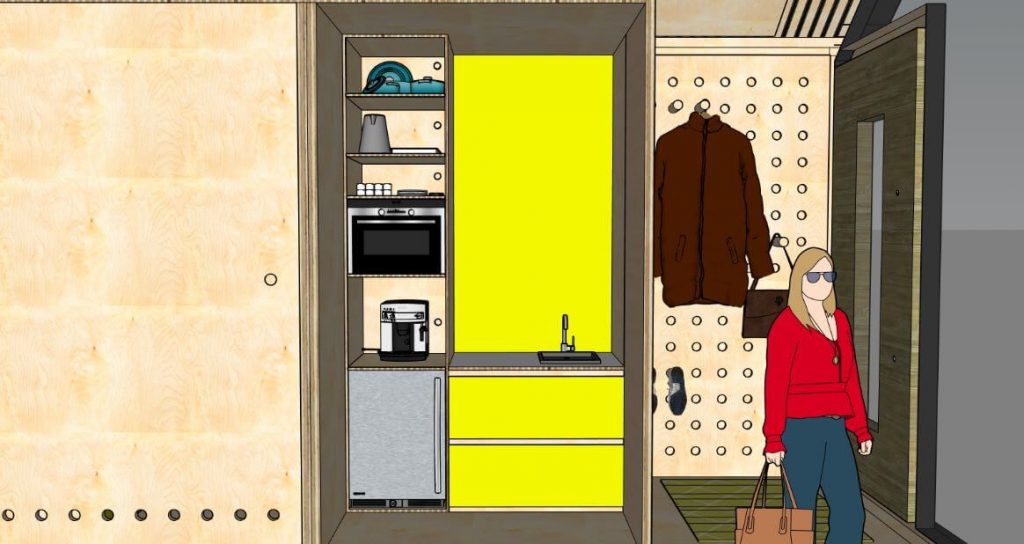
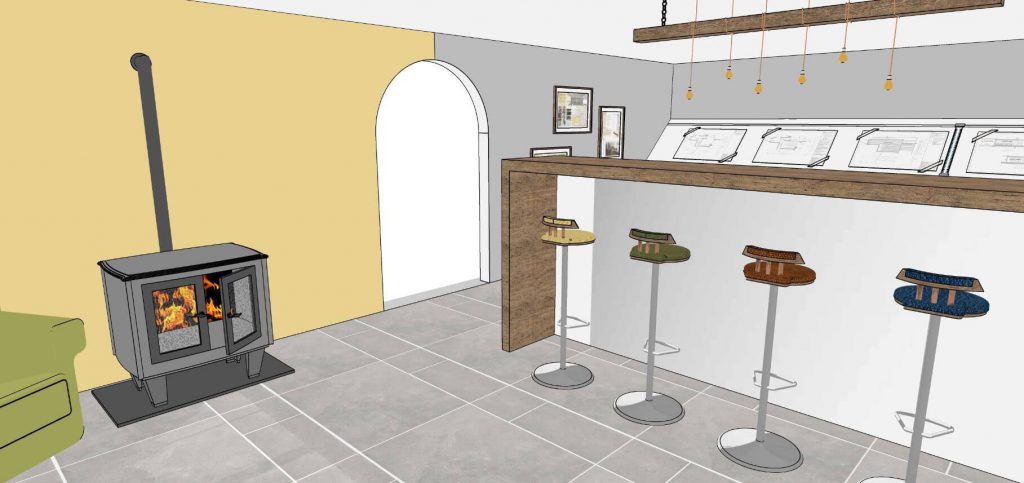
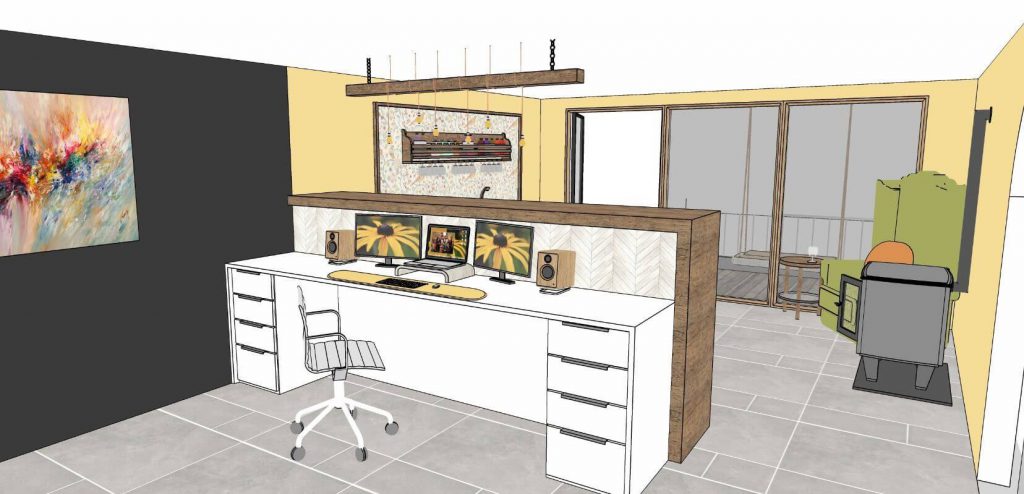
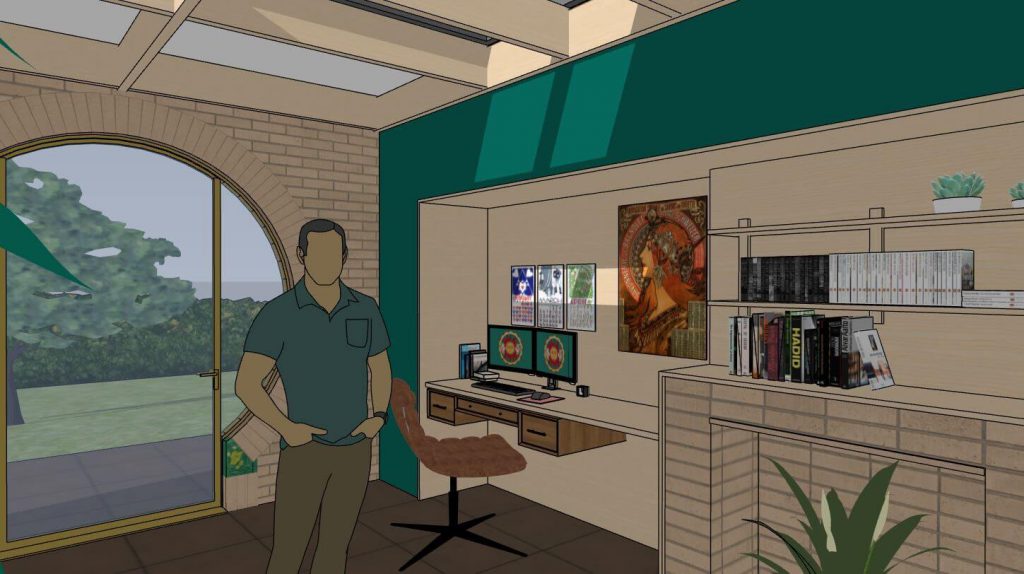
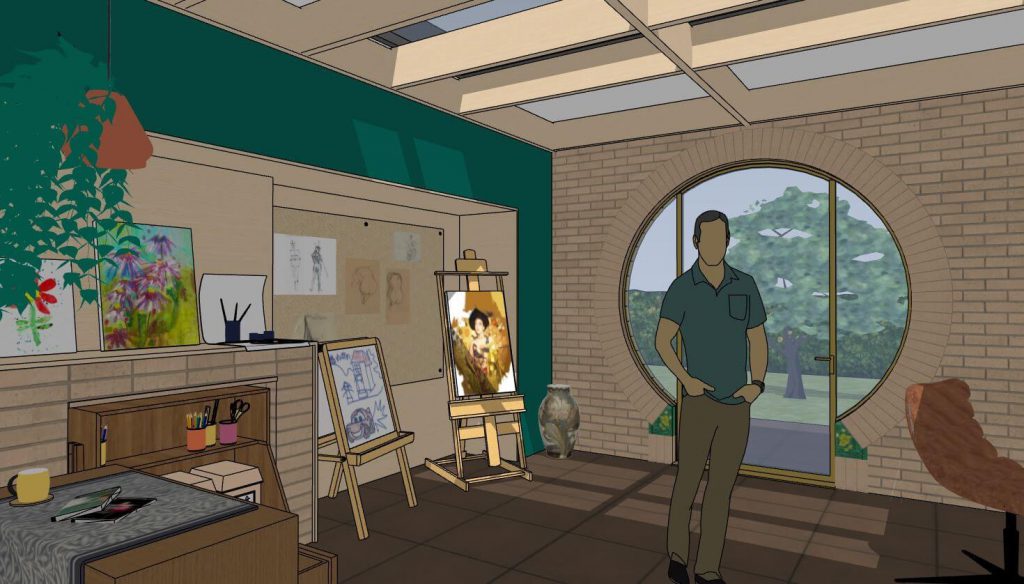
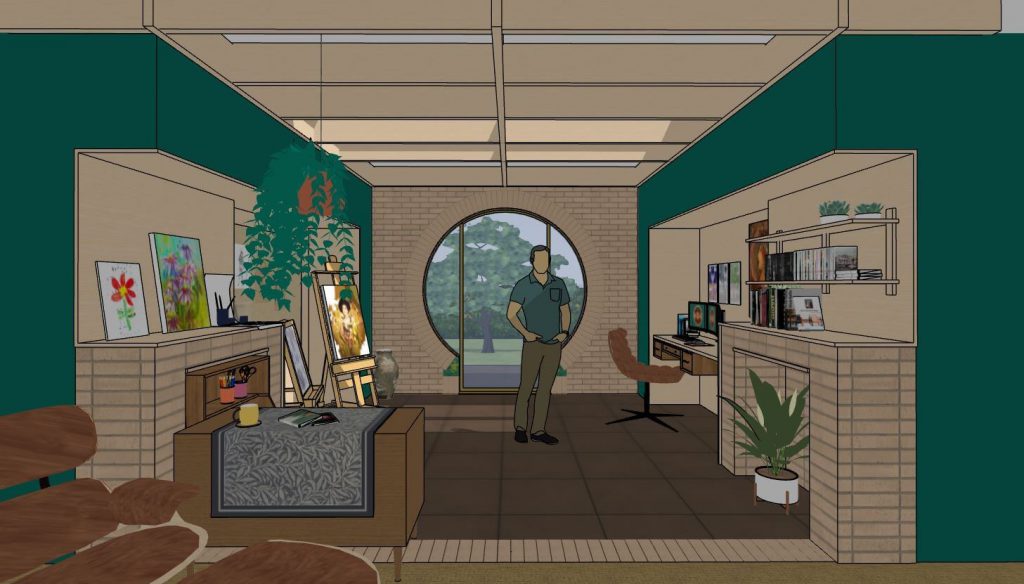
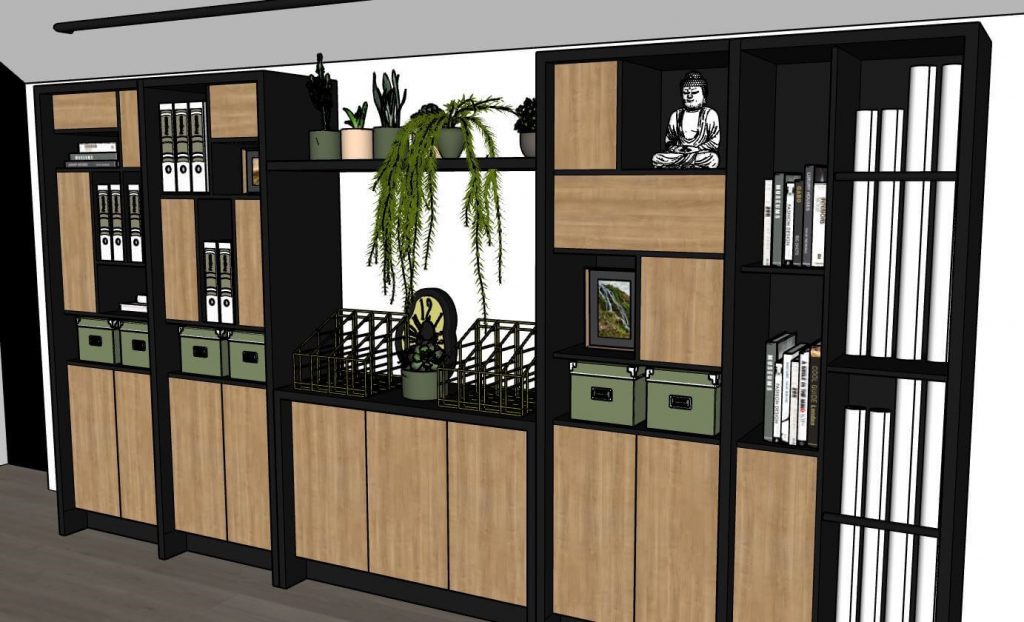
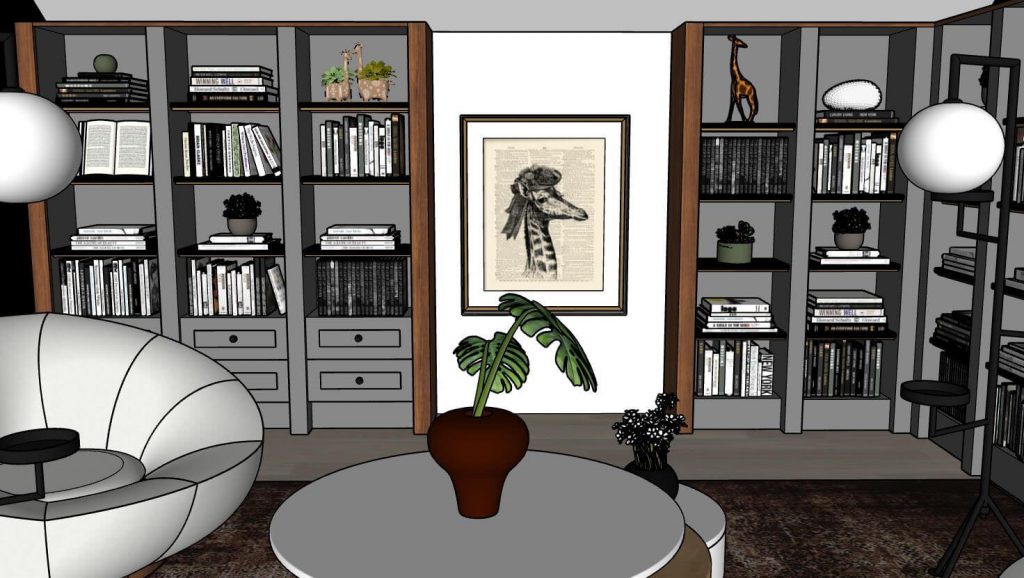
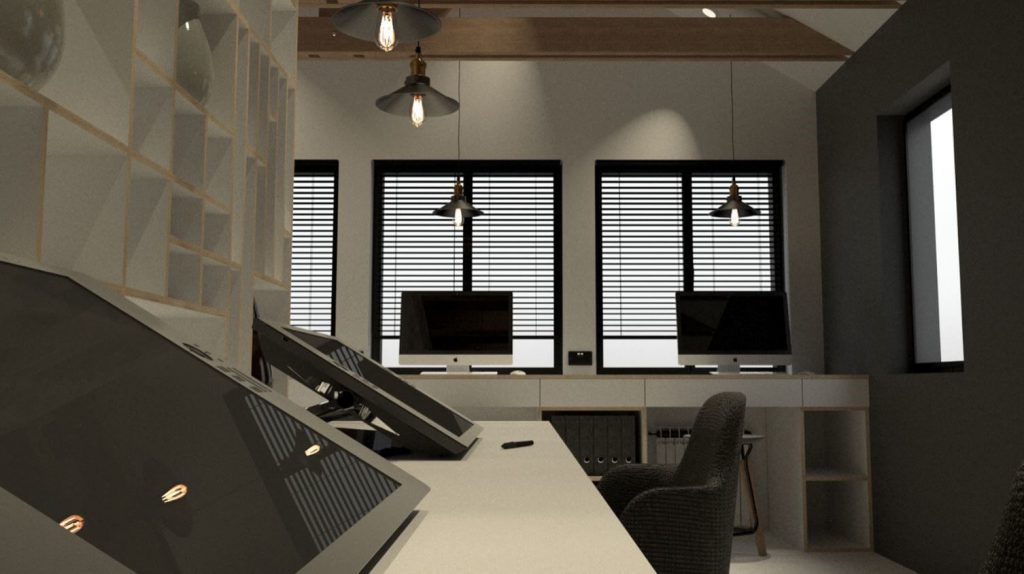
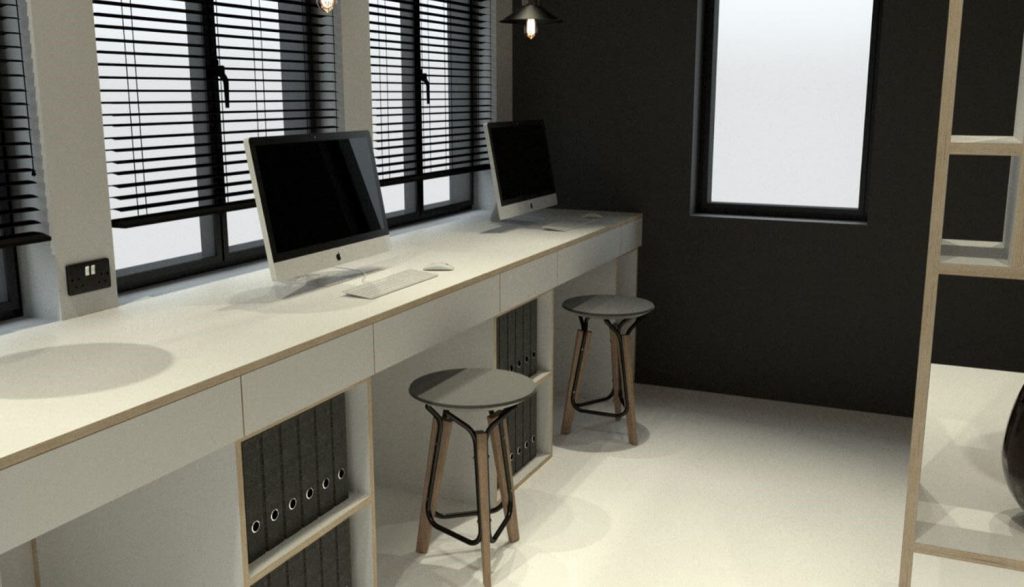
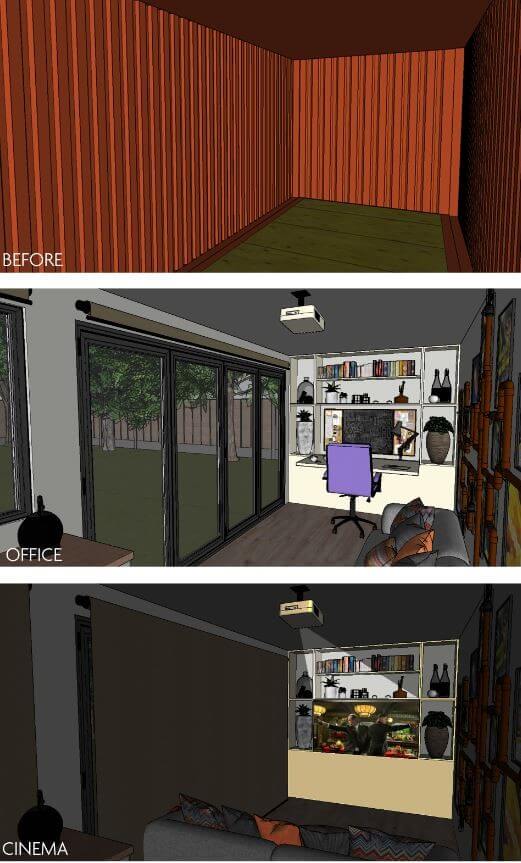
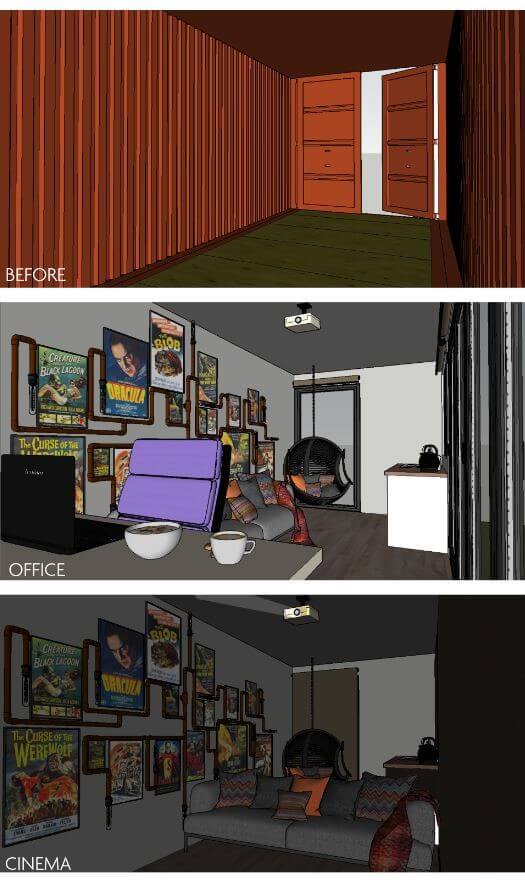
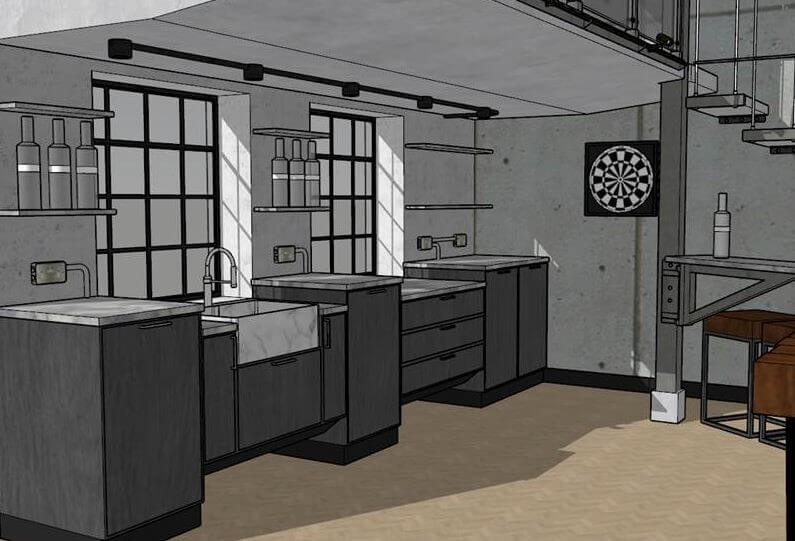
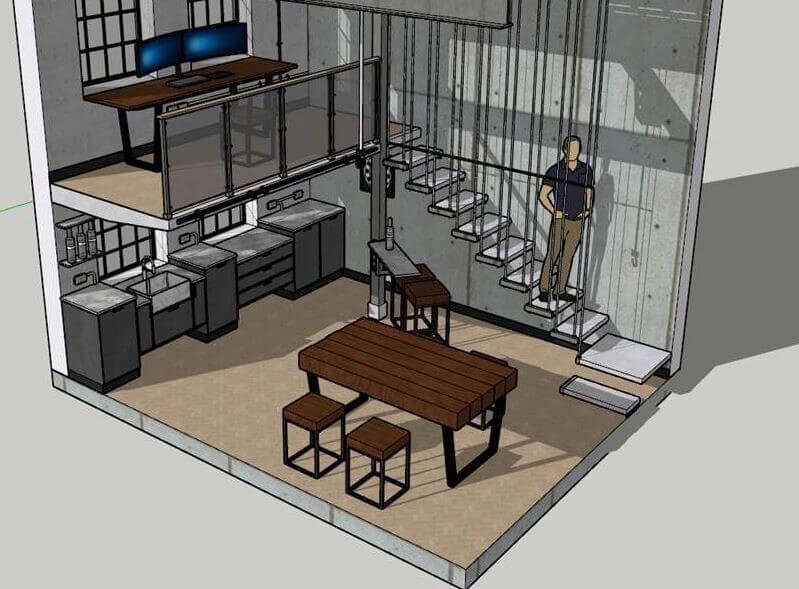
Visualisation is without question a huge part of the AEC professionals’ workflow whether that be during design reviews with your team or client, or when you are presenting your design for final approvals. With V-Ray 5 for SketchUp, you can now take your design from idea to photorealistic render by tweaking lighting, adding shadows, touching up reflective coatings, selecting global illumination settings and so much more. Get started by exploring Chaos Cosmos, V-Ray’s robust, smart 3D content library. Download render-ready content, such as vegetation and people, directly into your SketchUp design saving you time and modelling energy.

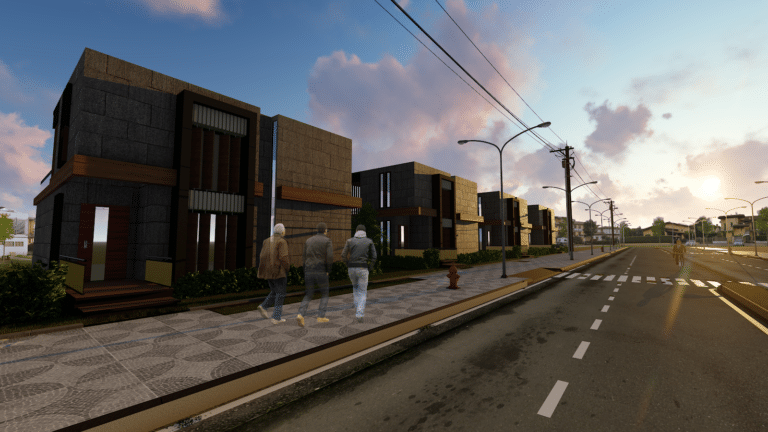
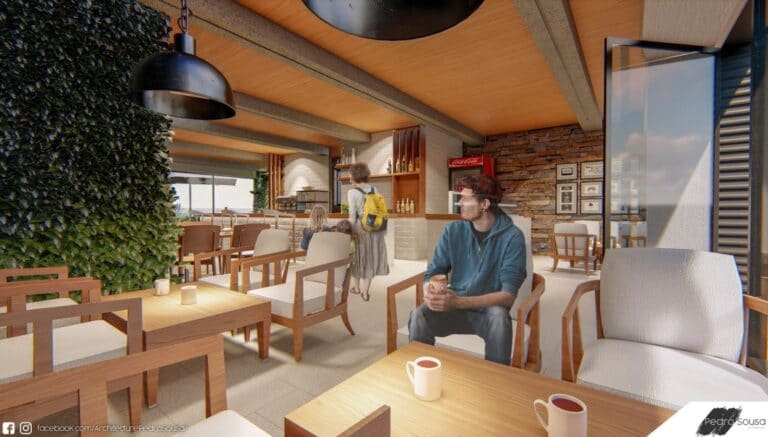
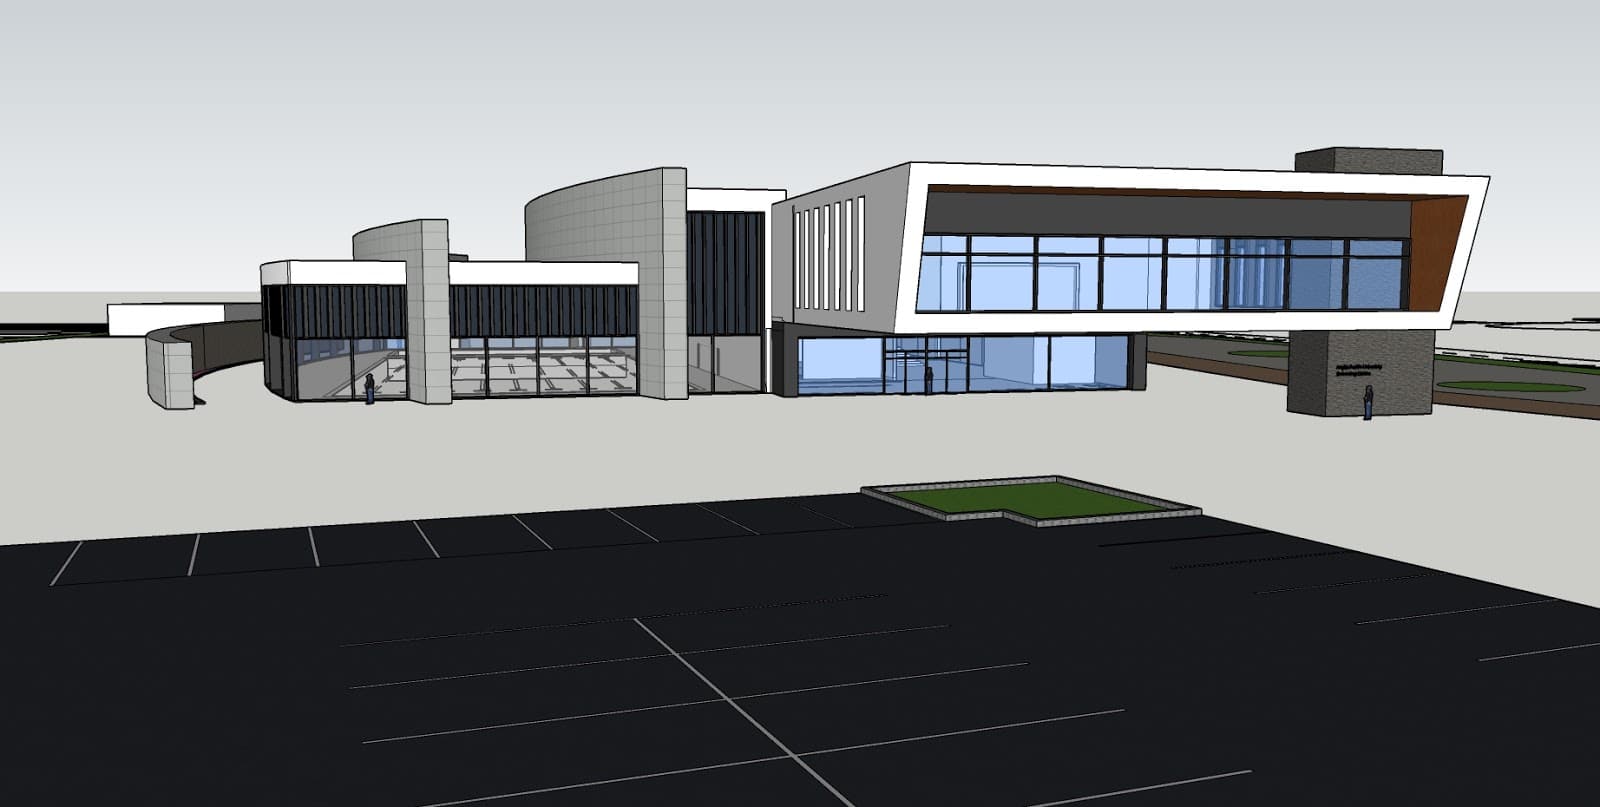
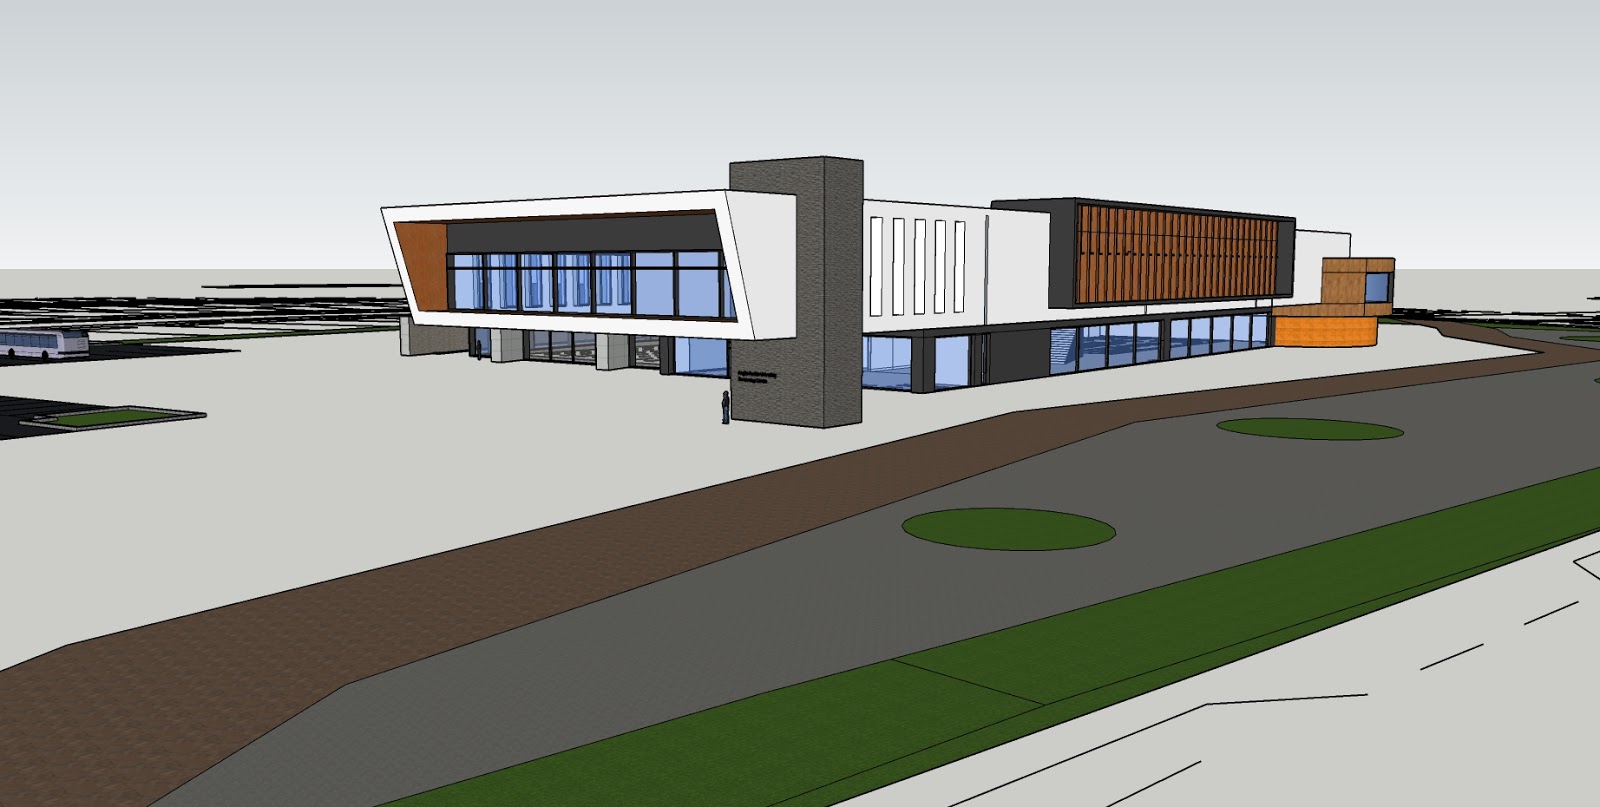
Even better, you can also take advantage of real-time rendering capabilities with V-Ray Vision. Compared to slower, traditional rendering processes, V-Ray Vision lets you quickly make edits on the fly while modelling in SketchUp. With instant rendering at your fingertips, you can quickly present ideas to clients and drastically shorten project timelines either in the office or completely remote. Flexibility at its finest. Once you’re done modelling, export screenshots, animations, and panoramic images for virtual reality viewing. Talk about elevating your design visualisation process!

Heads up: SketchUp offers V-Ray 5 as part of its Studio subscription, a windows-only offering.

All of this greatness comes wrapped [with a bow] in a Studio subscription at a killer price of £549 for your first year a 40% discount from the retail price (offer ends July 30, 2021)! That’s right, you get V-Ray, Scan Essentials, plus everything from SketchUp Pro for just £549! As our premier subscription offering, SketchUp Studio offers the tools you need to design better projects. Studio harnesses the power of SketchUp Pro with the addition of new features to enhance your professional workflows. 

Don’t take our word for it, see for yourself…

  • Take Studio for a spin and let us know what you think. Try it free for 30 days.
  • Need to upgrade your subscription to Studio? Contact Sales.
  • Already a Studio subscriber? Start using Scan Essentials and V-Ray 5 on your WindowsOS today!

As we continue to grow our Studio subscription offering, we’ve also decided to remove Sefaira from this subscription. But fear not! You can still purchase Sefaira separately and it will continue to work seamlessly with SketchUp Pro. 

Let us know what you think about the new Studio subscription in our forums.

Please note that SketchUp Studio is a Windows-only offering at this time, but is available for Bootcamp iOS.

SketchUp Studio for Higher Education subscriptions will continue to include Sefaira, but will not include V-Ray or Scan Essentials. For more information, contact us directly.

Terms & Conditions

SketchUp Studio offer valid until July 30, 2021 11:59 PM MST. Discount only applies to one term of a SketchUp Studio subscription. If you are a current SketchUp Studio subscriber, you can renew at this price for one term only. Not valid on subsequent terms. Offer not valid in Mainland China. Does not apply to previously placed orders. May not be combined with other offers. Other restrictions may apply.

Building blocks with LEGO Artist, Warren Elsmore

Warren Elsmore

Warren Elsmore

is a freelance artist and author, who creates unique, one-off, LEGO models for individuals and corporate companies. Based in Edinburgh in the UK he works worldwide for organisations including IBM, LEGO, Historic Scotland, DFDS, WPP, Visit Denmark and many more. Warren has been a LEGO fan since the age of 4 and has had ‘the best job in the world’ since 2012. Now 38, he is world renown for his creations.

We chatted with Warren to learn more about how he uses SketchUp as an artist in LEGO bricks.

Hi Warren - Can you introduce yourself and the team to the SketchUp community?

I usually get introduced is as the ‘LEGO man’, but my real name is Warren Elsmore. I’m an artist/model maker/author/events co-ordinator working entirely in LEGO bricks. I run a very small team but we work worldwide – either designing and building models for clients, touring LEGO exhibitions or facilitating events and activations using LEGO bricks. Basically, if you have a wacky idea that you think might work with in LEGO bricks – we’re the people to make it happen.

Over the last 10 years, we’ve broken two Guinness world records for our LEGO builds as well as releasing 12 books on LEGO models. My books range from topics as diverse as Dinosaurs to Cars, or Martin Luther King to the Statue of Liberty. Five of our books have been turned into touring LEGO exhibitions which travel the world attracting thousands of visitors wherever they go. As LEGO models are something of a niche product – my team are heavily involved in the logistics of transport and installation too. Something that comes in handy when we’re asked to create a huge commissioned piece and deliver it! It’s not uncommon to see us at Edinburgh airport with huge amounts of LEGO bricks, flying off to work with a customer or be on their trade stand at an exhibition.

SketchUp is used across a wide range of projects
Dinosoaur LEGO brick model

Lego is such an iconic and beloved brand – talk us through your love for the little plastic bricks! How did you end up as an artist in LEGO?

I’m told that my love for LEGO started young – my parents can’t actually remember when I got my first LEGO set. What I can remember is always being interested in it. Before the internet came into its’ own – I used to pick up a LEGO catalog from my local toy shop and spend hours looking through it. I would decide which sets I wanted the most, which I would ask Santa for and which I might ask my aunts and uncles to buy me for my birthday. I was lucky at least some of the time!

Like most people my age (mid 40’s now), when I got to my teenage years, LEGO took a bit of a back seat. It certainly wasn’t cool to still be playing with LEGO at that time. So, my attention waned until I was gifted a large LEGO set for my 20th birthday by a girlfriend. Little did she know what she would set in motion! There was a growing adult fan scene at that time, so I joined the UK club which at the time only numbered a hundred of so.

Fast forwarding to 2012, I was lucky to be involved in two projects at the same time. Firstly, I’d recently finished a LEGO model of St Pancras station in London which used around 180,000 pieces. An editor had seen the model and wondered if it was possible to create a book with “maybe 20 such creations”. Having spent 2 years on the model as a hobby, we compromised on a few larger models and lots of small, buildable, models. These would have instructions that I would write for people to follow.

At the same time, I had been talking to LEGO about celebrating the London Olympics in 2012. There is somewhat of a tradition for the LEGO fans in each host country to create something special to celebrate the Olympics. In the end, working with the Danish tourist board, I created a model of the London Olympic park which I delivered to their Olympic hospitality area. This, of course, created a huge amount of press interest around the world. As I was already very busy writing the first book, it was becoming difficult to balance an IT consultancy career with LEGO building. Something had to go and 2012 was the best opportunity I’d ever get to be making LEGO models for a living! Thankfully, it seems to have paid off!

How does SketchUp help with your design process?

SketchUp is important to our design process as it enables us to turn our ideas into something we can show to a customer and they can understand. Almost everything we do is bespoke in some way or another so there aren’t any existing images to show someone or get a message across.

As an example, lots of our LEGO models are built into display cases that we produce specifically for them. As LEGO can be quite a fragile medium, if a model is going to go on tour, we will usually design it to be built into its’ case for rigidity. We do have a specific piece of CAD software for modelling LEGO bricks – but I will import the final model from that into SketchUp to start designing the case. We have a fantastic carpenter who I can then send a SketchUp model to, in order for him to work out how to build it in real life! Very large models will also have a steel frame inside that we design. LEGO works to very tight tolerances, so it’s vital that we can create a steel framework that will work to support the model properly. Working with structural engineers, we design these in SketchUp as it allows us to quickly see how it will interact with the case and model.

Our touring exhibitions use SketchUp every single time we go to a venue. We now have all of our exhibitions drawn in SketchUp so that we can create a virtual version of the installation first. This means that we can install a 400sqm exhibition in only a couple of days. As well as helping us sell the idea to a venue – it also means that the installation is as quick and easy as possible. Essential when I have to send staff to do the installation, often a long way away!

We also use SketchUp models as the starting design for some LEGO models themselves. When we’re working with a very complex shape – or a shape that has to be extremely exact, we’ll often design the LEGO build from a 3D model. A good example of this are models that we produced called the ‘Kelpies’. These are enormous works of art produced by a local sculptor – 30 meters high! As they are extremely unique in their construction we actually found that there was no 3D model available of them at all. We ended up working with the wind tunnel models which had been created by hand. They were 3D scanned, then imported into SketchUp to tidy up and simplify the model. Once we were happy with it, we used some software that we’ve had written in order to turn the design into LEGO bricks. This sort of build would be fantastically time consuming to do ‘by eye’, so SketchUp saves us hundreds of hours.

DFDS prototype ship model

Whilst to many, LEGO bricks are ‘just a toy’, to an ever growing army of fans they provide a challenging and enjoyable modelling medium. These fans call themselves ‘AFOLs’, or Adult Fans of LEGO. You’ve written entire books on the subject. Can you talk us through a few of them?

Most of my books are around a specific topic, ‘Brick City’, ‘Brick Wonders’, ‘Brick Dinos’ etc. They all share some similarities though. Around half of the models shown in the book will simply be photographic. Coffee Table images, so to speak. The other half of the models will be ‘buildable’. That means that I’ve written instructions for each of the models and you can build them at home.

There is quite a difference between the two types of models. Creating a model with instructions places quite a lot of restrictions on what I can do. Obviously, any model that we produce with LEGO bricks will ‘work’ properly and the bricks will stay together. However, there are lots of techniques that are either too delicate to ask someone else to replicate – or too complex to do given the number of pages allowed! The buildable models are great fun, but it’s the other models where we can really go to town with our model making.  

Do you ever have anything like a ‘typical’ work day?

Rarely! I have found though, that it often helps me to have a ‘work’ day, rather than a ‘build’ day.

If I’ve got a large or complex build to do, I will often go into the studio and not even open my laptop. We all have two desks in the studio – one for desk work and one for building. It can really help my creativity to separate the two sometimes. If the project is more defined though, those lines will often blur. Some of our best projects have been almost 50/50 design and build. Any large scale work that we do almost always exists in a digital form first, so a laptop goes hand in hand with LEGO bricks.

Original prototype ship

What kind of projects interest or excite you the most?

Having spent nearly 20 years working in IT, it’s still the most complex projects that excite me, or ones that combine multiple medias. We have models with inbuilt programmable lighting or some with digital advertising screens and blending the two together seamlessly really interests me.

I’m also a fan of problem solving in general. Sometimes we’ve booked our exhibitions into very small spaces – so advance planning is essential. I’ve been known to spend an entire day working out how to organise exhibits in a single room. It’s always worth it though when we come to deliver the real thing. This has actually become essential in 2020. As well as all of our normal planning, we’ve had to take social distancing into account as well. Being able to show a venue a well thought out floor plan has helped us to minimise risk to both the public and staff when planning an exhibition.

Do you use any essential plugin or extensions with SketchUp to help with your work?

We don’t have any essential plugins or extensions yet – though I’ll often install one to help accomplish a specific task. As all our work changes, it’s hard to know what to expect! What is really essential for us is the 3D warehouse. Exhibition planning often involves really common items – such as IKEA furniture! So it’s really handy to be able to look into the warehouse and see if there is a quick model we can put into our plans for a client. Of course, what we deliver will certainly change before the show opens, but the speed of being able to turn around ideas often wins us business.

You’re based in beautiful Edinburgh; what are the benefits of purchasing SketchUp via local reseller, SEE-IT-3D?

I guess I’m lucky in that my IT experience has meant that I’m pretty quick to learn new software. We’ve not needed any real training to use Sketchup at all. However, it’s really great to know that support is there if we need it and SEE-IT-3D have always made sure that we’re kept up to date with software releases and features.

The DFDS project fully realised

What’s been your proudest work so far/career highlight?

We’ve had a lot of highlights, but the one project that stands out for us was a collaboration with the Danish shipping company, DFDS. In 2016, they celebrated their 150th anniversary as a company and decided that they wanted a way for the whole company to celebrate. That included 9000 staff across the whole of Europe on and off shore!

Although DFDS had decided on a LEGO project of some sort (LEGO being a Danish company as well and building being well known as a family activity in Denmark), they weren’t exactly sure what – or how – the project should look like. After a long period of consultancy with myself, they decided to build the worlds’ largest LEGO ship. It would, of course, be a DFDS ferry, and they wanted to go as large as possible. We settled on 14 meters – about as long as we could build inside the back of one of their lorries. We showed them how we could construct the ferry as a ‘BIG build’. Each DFDS staff member would build 40 small bricks into one, BIG, brick. Their logistics expertise would then ship those bricks from all over Europe to our studio in Edinburgh. We’d build these ‘BIG bricks into their ship, 4 times larger than a ‘small’ prototype that we had designed from the Sketchup model. That small prototype being only 3.5m long!

DFDS created an original design for the ferry that they though would work well and passed it back to us. We then created a 3D model of this ship design in SketchUp showing them how it would look inside a lorry. I think it’s that visual that convinced their board we really were serious! Once we got the green light, 1.2 million bricks were ordered from LEGO, and we started to work on the design of both the LEGO model and the steel framework. As the DFDS staff would be constructing the large bricks for us – there was no option to glue them together. The ship also had to survive a planned 3 month trip around Europe by road and sea. These two constraints meant that we had to devise a special framework to hold the bricks in place no matter what. It is probably the only LEGO model ever to come with a manual that mentions torque settings!

After a lot of planning and testing, we could finally put everything into production. The Sketchup model we had used before had the steel framework added to it which meant we could send it to our fabricators. They could use the model (tagged with the different materials) to see where support was necessary and where they would need to be more precise. We could also work out where the trailer was likely to flex as it was moved around. Important, because LEGO doesn’t bend!

DFDS ran a company wide publicity scheme and all of their staff were involved in helping the build the bricks for the ship. We even got video messages back from ships’ bridges and a real DFDS flag as a gift! As quickly as the bricks arrived – we added them into the ship. In the end, it took a team of 6 people 16 days to assemble the BIG bricks into a really BIG ship. It was unveiled at their head offices in Copenhagen as the Guinness World Record ‘Largest LEGO Brick ship (supported)’. We even had a LEGO champagne bottle to christen her!

After her initial 3 month tour the ‘Jubilee Seaways’, as DFDS had christened her, went on to visit almost all of their offices right around Europe. My team helped take her into Trafalgar square (with a LEGO Christmas tree on board), as well as the European parliament, numerous ports – she even made it to Turkey! The project eventually went on to win a European marketing award for the programme that their communications department had delivered. The ship was eventually decommissioned in 2019, when the LEGO bricks she was made from were sold to LEGO fans in aid of charity.

Learn more about Warren Elsmore’s work:

Website

YouTube

Facebook

Instagram

To read more about the LEGO ship and Guinness World Record, visit here.

Chaos Cosmos Library: A V-Ray 5 Update

In its latest update, V-Ray 5 for SketchUp offers an essential collection of free ready-to-render assets with the Chaos Cosmos Library and HDRI skies. Plus, take advantage of boosted CPU denoising with Intel Open Image Denoise support and more functionality in V-Ray Vision and the VFB Compositor.

Let’s take a closer look at these latest features.

New features and functions in V-Ray 5 update

Chaos Cosmos Library

Chaos Cosmos is a universe of smart V-Ray content, organized into 7 categories: Furniture, Accessories, Lighting, Vegetation, Vehicles, People, and HDRI skies.  The new curated 3D content library, Chaos Cosmos, brings essential entourage. Searchable through the new Cosmos browser, the assets can easily be placed anywhere in your SketchUp scene and will be visible through any viewport. 

There’s also no need to spend any time on geometry optimization or material setup—the Cosmos assets are always render-ready and deliver high-quality results.

Take a look at the Cosmos Library here!

Chaos Cosmos Library
Chaos Cosmos Library; your universe for smart V-Ray content!

More precision in post

Any mask render element from V-Ray can be used to select and colour correct specific areas of the rendered image directly in the VFB.  

Faster denoising for CPU

The new Open Image Denoise engine is perfect for interactive rendering and because it runs on any CPU configuration, you are not constrained to specific hardware. 

New possibilities in V-Ray Vision

Transparent material reflections

Surfaces such as glass or water now reflect other scene objects in screen space. 

Improved anti-aliasing

Finer texture details and small geometric elements like plants or facade ornaments are presented with better clarity with the new Temporal Anti-aliasing method.

Triplanar textures and randomization support

You can now take advantage of the Triplanar texture projection  and Stochastic texture randomization features in Vision.

Soft Sun shadows

Objects cast soft shadows depending on the Sun Light size multiplier when the new high quality shadows mode is enabled.

Soft Sun shadows
V-Ray 5 for SketchUp Update 1 is out now

Ready to start using Chaos Cosmos or buy V-Ray 5 for SketchUp?

Frquently Asked Questions On Chaos Cosmos

What is chaos cosmos?

Chaos Cosmos is a content system that enables Chaos to deliver consistent, smart, high-quality 3D content across the Chaos ecosystem. Users can access this content through the new integrated Chaos Cosmos library.

How do you activate chaos cosmos?

Using Chaos Cosmos To open the Chaos Cosmos library, click on the Chaos Cosmos icon in the host platform you use. It can be found in the V-Ray toolbar. For more information regarding the available host platforms, see Chaos Cosmos in Host Platforms section below.

What is V-Ray cosmos?

Unparalleled Integration — The Cosmos library is built into V-Ray 5 for 3ds Max, SketchUp, Rhino, Revit, Cinema 4D, Chaos Vantage, and Corona 8. Users can easily reuse the assets across platforms and Chaos render engines (V-Ray, Corona, V-Ray GPU, V-Ray Vision, Chaos Vantage) without wasting time and energy on conversions.

Using VR/AR and SketchUp for Sustainable Design

We caught up with Adam Radwanski, runner up in the Elmtec SketchUp UK competition to Design the Dream Holiday Home, to discuss his varied and intriguing uses for SketchUp, plus his inability to resist turning any free resource into a new project.

Hi Adam! Can you introduce yourself to the SketchUp UK community?​

Hi, sure thing. I am currently a student at the Arts University Bournemouth studying my second year of Masters of Architecture. I'm also a freelance designer working in architecture, digital visualisation and furniture design. I have been using SketchUp for almost a decade, which surprises me every time I think about it! I use it almost every day now.

An acoustic chamber designed in SketchUp, built during the final year of Adam’s undergrad degree - made entirely from waste materials from a local business.
Adam’s design for the Dream Holiday Home

Tell us about your recent projects.

Having only just gone freelance, jobs have been varied. With the recent lockdown, work has been sporadic, however this has kept me on my toes and been quite fun, providing some very enjoyable experiences in different aspects of design.

I have been working alongside DMW Architects, the firm I did my practice experience with after my undergrad, working on a variety of projects from private residential, an extension to Richard Rogers’ Thames Reach, a large scale barn conversion as well as the reproduction of a 17th century bell tower. The variety of the projects has provided a broad spectrum of experience which has also led to me developing the use of Virtual Reality within the practice to assist in design methodology.

In addition to this I have been working with a local start-up business Sapphire Swan in producing designs for bespoke pieces of furniture, something which was unexpected at the time but proved to be a welcome test of applying the software to a different purpose and has provided the initial uses of Augmented Reality.

On a more personal level I have been working on my 1989 VW T25 campervan, something much more hands on but also making use of SketchUp to help plan and develop the interior cabinetry and upholstery, putting my mechanic and carpentry skills to the test

Overview of a barn conversion project undertaken with DMW Architects acting as the origin point for the integration of VR into Adam’s workflow direct from the SketchUp model.

What inspires you and what are your core principles that help in your approach to a design problem?

A lot of my design methodology revolves around a practical approach to problems. At the time that I first picked up SketchUp I was studying for my GCSE’s and I was studying Woodworking and Engineering. I was thinking about things in a very practical sense whilst also learning how to represent these elements digitally. I think because of the timing of this I continue to try and think about a design problem in the real world and how something may behave or appear in real materials.

This has recently been assisted hugely through the addition of Virtual Reality. However, sometimes I find that you really don’t understand something until you have actually made it, so the use of models are integral to developing a project for me. 

They allow the client and designer, as well as anyone who happens to walk by, to be able to understand a design. I have been quite fortunate in having access to a garage, so a workshop has slowly developed at home allowing a practical approach to be taken much more easily, allowing for models and crafting to occur more regularly to enhance my design approach.

Construction drawings for a listed bell tower reconstruction project, acting as a catalogue of the remains of the original. Made using LayOut.

How do you interpret sustainability in your work?

I am a sucker for anything free. I apparently have quite the reputation for it amongst my friends. A pallet on the side of the road, straight in the van, a random piece of old furniture, again, straight in the van and it’s coming home with me. Nearly everything in my workshop has either been donated to me, rescued from a skip or found very cheap online. This is mostly because I don’t like waste. I very much follow the approach to reuse and repair and hate throwing things in the bin.

A project completed in my undergrad focused also on sustainability where I converted a shipping container into a mobile music room. This made use of waste materials from local industries. This was perhaps the cornerstone project which allowed me to prove to myself that this approach to material waste could produce tangible results. This continued into a more recent project I completed at uni, a telescopic roof extension for my greenhouse and was made entirely from ‘waste’ timber and other ‘waste’ materials from neighbours, this again acted as an argument that these materials were not waste and proved surprisingly successful.

I also love taking old things apart to find components that may prove useful in a current or future project, to prevent them from ending up in landfill. This approach to waste and material sourcing is going to continue through my current thesis project at uni and I wish to take it further afterwards to continue testing how ‘waste’ materials can be repurposed and reused on hopefully a larger scale.

Renders commissioned by DMW Architects for various projects using SketchUp and experienced real time in VR.
Bespoke, carved kitchen island designed for Sapphire Swan Interiors, the project which initiated the integration of Augmented Reality into the workflow.
Renders commissioned by DMW Architects.

What’s your workflow in SketchUp?

Unless I am working from pre-existing plans and elevations that have been brought into SketchUp, I tend to approach a model similarly to how I would in the real world if I were making it in the workshop.

This ends up being more of a removal of parts of materials than an additive process. Perhaps starting with a block of something that is roughly the right size and shape and then slowly taking bits away from it. This was very much how I have been approaching the recent furniture designs. 

Similarly when modelling buildings, without predetermined drawings, there is something very therapeutic about slowly removing, pushing and pulling material and watching the design appear in front of you in a very organic process. This generally ends up in a whole manner of groups and components to stop everything sticking together, but allows everything to be easily removed, added and moved. I find this approach also allows quite a free reign to be taken, allowing the model to constantly adapt and evolve.

A LayOut file is usually working alongside the model to allow a constant update of how elevations and certain perspectives are developing and means all of these drawings are ready to go at any time of the design stage, which is incredibly good at calming nerves especially when deadlines are approaching.

Early stage concept looking at adaptable architecture exploring the principles of the workshop and the role of craftsmanship in architecture.

How does VR/AR and 3D scanning come into play into your design work?

I have been working with Virtual Reality for nearly a year now and it has been possibly THE most invaluable tool for designing. I use the Oculus Rift S.

To be able to just put on a pair of goggles and be instantaneously stood in your design is like nothing else I have ever experienced. Through the use of the VR plugins you are able to just click a button and there you are, standing in the model. This tool is now being used more frequently throughout the design process, from initial conception to understand overall scale, and most effectively during client presentations. The model becomes so much more comprehensible to everyone, removing any confusion from just looking at 2D drawings on a page. A client becomes much more immersed and interactive with the project and their feedback becomes much more detailed as they can approach their project as though it were built. 

This can have some drawbacks as it does mean that all aspects, no matter how small, have to be considered in the model and there has to be a very careful check of the model for errors or accidents before presentation, however this is much easier when you can just walk through it and check visually in real time and provides you with a much clearer detailed idea of your design.

Now with the addition of working in Twinmotion I can take the designs and provide them with some deeper realism to really allow the client to become immersed in their project and see a truer representation of the work. This is something overlapping considerably with current university work also.

Augmented Reality is something which I have only just begun to integrate into my workflow. With working on smaller scale designs such as the furniture and my van, the use of this technology is more beneficial. I can now project the objects into the space and test their relationship with the rest of the space to get a very clear idea of how components interact. Like I say, this addition to my workflow has only just begun, but is already providing promising results, and the fact that it all works from my phone is so convenient for meetings and discussions, plus it never fails to excite the client.

Much like AR, 3D Scanning is something I have been playing with recently and is now finding its way into the workflow. For my current university project I have been able to produce items in my workshop and spend time working hands on with materials to then scan them and have them digitally to assist in developing the design and can reference a real world object. This has been quite a unique process and has especially made producing complex and organically shaped items a more productive process. 

My love of giving things a second life came into play for this process too. I found an Xbox 360 Kinect sensor in a charity shop for £3 and from previous research instantly knew the 3D scanning possibility this could provide to my design process, it was a very exciting day.

I guess it’s a lot going on but all of these technologies are really helping to bridge the gap between hands on practical crafting and making with the digital designing world and its all being done through SketchUp, something I am so familiar with and so it is almost effortless now.

Construction animation produced for the extension proposal to Richard Rogers’ Thames Reach – a project from working with DMW Architects.

Favourite SketchUp trick or tip?

I wouldn’t say that I have any one particular favourite thing, I guess it’s the sheer flexibility of the tool that continues to surprise me. The fact that it can be integrated across all of these varied platforms and peripherals is phenomenal and allows one piece of software to be used across it all. However, if I had to pick one it would be the way components behave, the number of times I have dozens of the same part and knowing that I can change them all simultaneously is very comforting.

The concept of the Walking Workshop allowing for the incorporation of real-time visuals, VR and AR, as well as allowing the production of scale CNC models, all directly from the same model.

What’s coming up next for you?

The current focus is my project at uni which is focusing on the use of hands on crafting and making in the profession of architecture, something which is perhaps becoming less common with the amount of digital tools that are available these days. Although I personally use a lot of these digital tools, I feel that they are just that, tools. They function just like the hammers and saws I have in my workshop, so I am trying to highlight this connection further. This has now led to the conceptual Walking Workshop that I am developing, based around the work of the Strandbeest by Theo Jansen. This is now expanding my skill set to explore mechanical relationships and how they can be incorporated into architectural interventions. The project is very conceptual at this stage but I am really enjoying these new explorations to enhance the use of these digital processes and the fact it is broadening my tool set further.

In addition to this I have been developing as a freelancer to produce visualisations and animations, again with the help of SketchUp, all the while trying to keep flexible to see what next challenges present themselves.

Find more of Adam’s work:

Building a career in Architecture with SketchUp

Photo Of Pedro

This year has seen more of us than ever reaching out and connecting virtually. At Elmtec, the home of SketchUp in the UK and Ireland, we asked our SketchUp community to dream up their ideal home office in the spirit of keeping us all connecting and creative in the most challenging of times. There were a raft of incredible entries, but were particularly impressed by Pedro Sousa’s winning concept. We caught up with him to delve a little deeper into his design process.

Hi Pedro! Can you introduce yourself to the SketchUp UK community?

I would say I was probably 14 years old when I started using SketchUp. Since that age I wanted to become an architect, and I wanted to develop my creativity design and planning houses, so slowly I started to design my parents house, everything was still new for me. How do I draw this way, or how do I measure etc etc. Until I get familiar with the software and after I finish my parents house, I start designing more and more houses with different shapes and sizes.
This was probably my hobby when I was a teenager on summer vacancies.
Few years later (I was 18 years old), I was doing some work for interior designers, nothing major, but it was extra cash.
I was 19 when I came to the UK to study architecture, and even now I’ve been using SketchUp on my projects. 

3D rendered image of a building
My dream house. Slowly I’m designing my dream house with my girlfriend, until the age I can afford it.

How does SketchUp help with your design process?

SketchUp is a simple and quick way to represent my ideas in 3D. Some projects take longer than others, but SketchUp is such a dynamic software enabling as many agile changes as I need to to form a solid project in a short amount of time. Creating the concept, I sketch first on the iPad, and then I start modelling in SketchUp, for an easy understanding of space.

Concept design of a Skyscraper, in London, for the new TESLA head office in Uk. Uni Project.
Concept render  of  Residentials
Concept render of Residentials
Concept of a new cafe/bar proposal from a conversion of an inhabited house.

Previous
Next

What’s the one functionality you’re glad SketchUp has?

Simplicity.

The functionality I’m glad SketchUp has is the very software itself! Everyone can easily start to learn 3D just using SketchUp, the basic tools from sketch line by line gives you the freedom to design anything, and by the time you are mastering the program, you can come away with such a great result on your projects, with the same quality as any other architectural software. Another feature that helps me a lot with my design is the ease of ability to link with other software. This improves my projects even further.

What kind of projects interest or excite you the most?

I would say the residential ones, either we are designing for a client or for ourselves, it’s interesting and a pleasure to see a client’s reaction when we present the homes of their dreams for something they imagine themselves living in, in 3D.
A house is probably the most expensive investment a family will make in their life and now with the VR technology, it’s even easier to choose the features they like the most, experiencing this virtual reality. Part of architecture is to expect challenges through the projects and that’s what excites me the most: every project is different, purely because every client is different.
Water mill, based in Chelmsford, Essex. Project to develop a conversion of the building for a new use. Uni Project.Water mill, based in Chelmsford, Essex. Project to develop a conversion of the building for a new use. Render of the project. Uni Project.

Water mill, based in Chelmsford, Essex. Project to develop a conversion of the building for a new use. (University project).

Are there any essential extensions you use with SketchUp that help with your workflow?

I do use some plugins which help speed up the workflow of the projects, and also the quality of them. For example, Skin_Bubble, V-Ray, RoundCorner, Lumion LiveSync, and a few others. I believe plugins are absolutely essential for any project. In contemporary architecture the demand for creating something unique, functional, and sustainable is paramount – it’s imperative to employ productivity and functionality via these plugins.

Swimming Pool Centre, Initial concept in SketchUp. University Project.
Swimming Pool Centre, Initial concept in SketchUp

Previous
Next

Swimming Pool Centre, Initial concept on SketchUp. University project.

What’s next for you in your career?

I’m completing a BA (Hons) Architecture this year, and I am looking to apply my expertise and knowledge in a role that will allow me to develop and continue to progress. I expect to start my Master’s degree in Architecture next year and then a Ph.D. also in architecture. I also plan to work in Japan for one year, gaining experience and learning different architecture techniques which will allow me to expand my knowledge and hopefully design greater sustainable buildings in the future.
For a long term goal, I hope one day start my own architectural firm and make a difference in people’s lives and to help the sustainability of this planet a bit more through architecture. I hope to become one of the most inspirational architects of the world and win the Pritzker Architecture Prize one day. Let this journey begin.

wewwwr_1 - Photo
wewwwr_2 - Photo

Previous
Next
Render work of the swimming pool concept

To view more of Pedro Sousa’s work:

SketchUp 2021: Building a Foundation for Success

This unprecedented year has changed the way we live and work as the pandemic shut down our lives and forced us to stay at home. Like many of you around the world, we used this time to tackle projects we’ve been meaning to do for months (or years?) and were reminded of the importance of setting yourself up for success at the start of a project with a solid foundation.

Today, we are pleased to introduce a major update to SketchUp Pro with a number of improvements to help you tackle complicated projects, work efficiently, get more done, and succeed in new forms of creation. This major update of SketchUp Pro includes new tools and features, innovations, improvements, and time-savers that help you with all the unique challenges of this past year and beyond.

To start, SketchUp’s full suite of products have a fresh new look. The best part? You can finally model the logos in 3D. Get to know the new SketchUp logos!

Speaking of a new look, this new version introduces an architecturally-trained, Nigerian mother of twins as the scale figure to SketchUp Pro 2021: Sumele Aruofor. A Strategic Marketing Manager at Trimble, she knows a thing or two about the importance of starting a complicated project on a strong foundation. Say hi to Sumele when you open the new version, and get to know her a little better.

Now that we’ve settled into SketchUp’s new and improved exterior, it’s time to get to know the new features. SketchUp 2021 brings you a brand new, climate-savvy way to start designs, better model organization, and smart, configurable objects. The latest SketchUp version solidifies the groundwork of your most complicated AEC projects. Let’s get to know all the SketchUp 2021 updates.

A new way to start SketchUp

As AEC professionals we strive for a reality where every addition to the built environment works in harmony with the natural surroundings. This synergy requires a comprehensive understanding of a site’s context before plans are drawn. That’s where PreDesign comes in. This brand new climate research tool helps you to understand the local environment surrounding your project before you start modelling in 3D.

“Although SketchUp is a fantastic way to develop ideas in 3D, we are continuously exploring new capabilities and see tremendous value in making it easy for our users to include design research in their pre-design workflows,” said Andrew Corney, PE, M.CIBSE, M.ASHRAE, Product Director at Trimble. “With PreDesign, we’re providing designers with the insights they need to take a truly holistic approach to creating suitable design strategies and communicating value to their clients.” 

Pulling site-specific weather data, PreDesign suggesting appropriate architectural responses for your project. Intuitive sun path diagrams show you the areas of your site that need to be shielded from overheating sun. And it doesn’t just flag the issues; PreDesign suggests effective glazing, shading, and top-lighting strategies for each face of your building. Talk about getting things right from the start.

Top lighting Strategies in SketchUp

“PreDesign provides useful information that we need to position our projects for better design outcomes from the very start,” said Adam Osterhoff, principal architect at HeartwoodStudio. “Its compelling visual outputs and intelligent talking points also help us clearly communicate the value of our proposals to clients.“

PreDesign is here to enhance your design narrative with meaningful climate observations while alleviating some of the heavy-lifting from your workflow. By getting things right at the start, you’ll avoid wasting your precious design time and resources, and avoid costly rework. The forecast is sunny with PreDesign, see for yourself.

Improved Tag Management

We know managing long lists of tags and scenes can be overwhelming—particularly with complex models. That’s why we’re helping you stay organized with Tag Folders in SketchUp Pro and LayOut. Whether you use tags to set up models for design scenarios, documentation, reporting, or visualization, we think you’ll find it a lot easier to locate and work with tags when you start grouping them in folders. You can also control the visibility of all tags in a folder at once to turn on and off large chunks of your model.

We didn’t stop there. Filtering tags is finally possible in SketchUp! You can now quickly zero in on a specific tag. And if your tags are organized with a naming convention, you can quickly filter on your prefixes to select similar tags and organize them in a folder. 


Ultimately, we want to ensure that your workflow is operating at peak performance with the utmost control and agility. Which brings us to our next exciting announcement for SketchUp’s 2021 updates…

Introducing Live Components in SketchUp

Do you dream of building models that are robust and flexible enough to react to design changes? We do! There’s no doubt that a successful model is one that can easily accommodate iterations and allow for rapid change. In SketchUp 2021, SketchUp is introducing parametric objects that do just this; they’re called Live Components.https://elmtec-sketchup.co.uk/wp-content/uploads/2020/11/livecomponentsracking.webmProgrammed with modeling logic that controls their geometry, Live Components are configurable objects that re-draw themselves in real-time. What does this actually mean? Using Live Components with the 2021 SketchUp update allows for greater project scalability and benefits a wide range of use cases including architectural configuration, interior design, as-built modeling, space planning, and rapid iterations of concept or aesthetic. https://elmtec-sketchup.co.uk/wp-content/uploads/2020/11/livecomponentstable.webm

Live Components can be found in 3D Warehouse and are now available for you to download and configure right in SketchUp with SketchUp’s latest version. For detailed steps on finding Live Components in 3D Warehouse from inside the SketchUp application, click here.

Once you’ve selected a Live Component, you can insert it directly into your model where you can control the component’s parameters in the ‘Configure Live Component’ dialog. As you adjust parameters, the Live Component will redraw itself to fit your needs. Check out our Skill Builder showing you all the steps you need to bring Live Components into your workflow. 

Let SketchUp’s new Live Components do some heavy lifting for you: customize dimensions and sizes for repeated object use; quickly add rich context and make adjustments in real-time to produce more detailed designs in less time; or rapidly iterate large sets of components all at once as project requirements change. 

Behind the scenes, Live Components are driven by a new computational design platform called Materia. Going forward, Materia and Live Components will unlock whole new ways of working in SketchUp and across Trimble products. This launch is only the beginning for Live Components. We are still actively working on improving their performance and usability, as well as developing more objects for you to use in modeling.

A new way to launch work-in-progress features with the latest SketchUp version

SketchUp is launching Live Components early as part of a new program called SketchUp Labs, so that  your feedback can be incorporated into the product development process. We encourage you to join us in the forums for discussions on the future direction of Live Components, or provide feedback if you encounter issues.

Here’s to a solid start for 2021 with new SketchUp updates

Download the latest version to see everything that’s new in your favourite apps.

Designing the Dream Holiday Home

This year may not be remembered as the most opportune one for far flung holiday destinations. Perhaps that was why we were inundated with hundreds of incredible entries asking you to design your dream holiday home in SketchUp. It was a real struggle selecting a winner but we’re happy to announce the winner, Aulia Syamsir, and runner-up, Adam Radwanski.

Take a holiday below. No passport or plane required.

Aulia Syamsir – Winner

Hi, I’m Aulia. I’m a MSc student at the University of Bath and currently undertaking an industrial placement in Galliard Homes, London. I’ve been using SketchUp in my entire architectural journey as it is an extremely helpful tool to effectively communicate my design ideas.

I’m always longing for the ocean as the result of being born and raised in an archipelagic country. My attachment to sea water carves my definition of leisure to be a restful vacation at the beach. Inspired by the Manta Resort in Tanzania, I created this floating cabin for people to have a retreat, far away from civilization. It is a hybrid of offshore suite and underwater resort. The idea is to have a submerged bedroom that allows you to gaze at marine life, and a deck where you can chill while sunbathing.

Instagram : auliasyaffitri
LinkedIn : Aulia Syaffitri Syamsir

Adam Radwanski – Runner Up

I am a student currently studying my second year Masters of Architecture at Arts University Bournemouth alongside freelance digital modelmaking and visualisation work. In my first year of study, a yew handled wood axe was produced for a project, in reflection of my time spent in Iceland, which has informed and developed a craft driven design process through my current work. This axe has now informed the dream holiday home, a retreat that could be hand crafted using only such a tool, reminiscent also of the Icelandic cabin that informed the conception of the axe in the original project.

Instagram: a.radwanski

Visualising a Virtual Museum with The Royal Armouries

The Royal Armouries are custodians of the United Kingdom’s national collection of arms and armour, comprising the national collection of arms and armour, national artillery collection, and national firearms collection. It is one of the largest collections of historic arms and armour in the world and is also the keeper of Tower of London history. There are three sites: Royal Armouries Museum in Leeds, White Tower in the Tower of London, and Fort Nelson, Fareham near Portsmouth.

Horse armour (1480) Of Waldemar VI, Duke of Anhalt-Koethen
Place: Germany
Location:Leeds, War Gallery

Object Number: VI.379 A-E © Royal Armouries Museum
Horse armour (1480) Of Waldemar VI, Duke of Anhalt-Koethen
Place: Germany
Location:Leeds, War Gallery

Object Number: VI.379 A-E © Royal Armouries Museum

On 30 March 1996, the Royal Armouries Museum in Leeds opened to the public. The new building, designed by architect Derek Walker, is the headquarters of the Royal Armouries complex of museums, and houses the majority of the museum’s collections. The project formed part of Strategy 2000, a scheme produced in 1990 to provide the national museum of arms and armour with a suitable infrastructure to preserve, display and interpret its collections.

Field armour (1550)
with decorated and gilt bands, possibly for Roger, 2nd Baron North
Place: England, Greenwich
Location: Leeds, War Gallery
Object Number: II.82 © Royal Armouries Museum

The Leeds museum is built not only to display the national collection, but to tell the story of the development of arms and armour through the objects, a wide range of audio-visual presentations, computer interactives and interpretations to bring the subject to life.

Ensuring that the collection is preserved for future generations is the responsibility of conservators. It is their job to prevent irreversible damage and deterioration through the use of interventive and preventive methods. Audits are conducted frequently as a method of monitoring the condition of objects and highlighting those that require treatment. It also provides the opportunity to identify common factors that might be contributing to an object’s deterioration.

With no prior experience or knowledge, Preventive Conservator Rebecca Hayton, used SketchUp Pro to create scale models of the stores and plot the exact position of objects requiring treatment for easier access (Fig 1). Rebecca learnt the basic functions by watching videos and consulting forums, allowing her to create an accurate representation of the store room from measurements and plans available. Rebecca even made a basic pommel to show that these objects were swords (Fig 2).

Fig 1: Scale model of store recreated in SketchUp
© Royal Armouries Museum

Fig 2: Image showing basic pommel created in SketchUp to illustrate a sword
© Royal Armouries Museum

Following the positive feedback received from colleagues, Rebecca went on to identify other ways in which SketchUp could be used throughout the museum.

Ideas such as plotting where pest and environmental monitoring equipment is located were suggested – as well as experimenting with exhibition design and layout. Another idea proposed was to use SketchUp to create an accurate representation of the gallery spaces, allowing virtual galleries complete with images of real objects to be visualised. This is currently a work in progress but it is hoped that the final result will allow a full virtual version of the museum to be created. This could then be used in the event of a salvage situation to highlight priority objects requiring removal or protection and the safest routes to/from them. For accuracy, photographs of ‘starred objects’ were converted to PNG files allowing them to be imported into a SketchUp model (Fig 3). A step up from this, if possible, would be to import a 3D scanned image of an object allowing for 360° accuracy making walking through the virtual gallery more realistic and allowing conservators to point out hazards and areas of concern to firefighters for example.

Figure 3: SketchUp model of the Cruciform display at Royal Armouries Museum, Leeds with photographic image of Gothic Armour in-situ
© Royal Armouries Museum

You can find out more about Royal Armouries by visiting their website 

To find out more about non-profit SketchUp licenses and how they could benefit you, drop us an email or give us a call: sales@elmtec.co.uk / 01844 263750.

Home Office concepts in SketchUp

We were bowled over by the response to our competition asking you to design your personal dream home office in SketchUp. Working from home has definitely not tempered those creative and technical skills! Sadly, there could only be one winner so it’s a huge congratulations to Pedro Sousa, an architecture student at Anglia Ruskin University. SketchUp swag, a 3D Connexion SpaceMouse Wireless, £250 Voucher Express vouchers, plus unlimited bragging rights are winging their way to you soon, Pedro!

We wanted to showcase as much of your talent as possible so we’ve also selected some other fantastic entries we really enjoyed and have included the corresponding designer’s descriptions.

So, settle down in your own home office, grab a cup of coffee, and enjoy a break in dream home office land!

Winning entry

Pedro Sousa

Facebook Page
Instagram

Commendable Mentions

Emily Covey

I loved your competition idea and I have had ideas buzzing around since so please find my attached entry image rendered with Twilight and with no further processing.

My Kitchen Design Office is at the end of the garden in a south facing, stone building with sedum roof, roof lantern and full width oak sliding doors for an inside/outside living feel.

The continuous stone walls link the indoor and outdoor spaces together and although the style is contemporary, the natural materials of oak, stone and granite, gives a relaxing feel to it. Planting in the exterior walls provides a calming view as well as protection from the wind when I am sitting in the sunshine on my breaks. The flooring materials run throughout the two spaces with the inside having a bespoke brass inlay within the dark granite border.

The studio is lit with a wash of light from the three sided recessed lighting channel to compliment the natural light and it highlights the strong texture of the wall contrasted with the sleek and modern feel. I hope to inspire both fans of modern and traditional kitchen styles within this space.

The back wall has two large cupboards either side, one made with different kitchen doors to showcase the different styles available, the other displaying the colours and handles. Inside one of the cupboards is a hot tap and small sink and fridge for all the tea I drink but all my mess is hidden away here. The main focal point is my beautiful steam bent, spiral display case for my design books and brochures as well as downlit ornaments.

In the middle of my office is another bespoke, steam bent cantilever table with space for my computer as well lots of flat open space for presenting to my clients who will be queuing up to visit me in my sunny studio!

I’d love to see all the other entries by the end of the competition and see what people are dreaming about as we sit at our kitchen tables, watching pixels multiply as they render!

Instagram
Website
Facebook

Thomas Jolley

My name is Thomas Jolley and I am an Industrial Designer from Malton, North Yorkshire who has a passion for Scandinavian furniture and minimalist design cues which has featured heavily in my entry.

I have created an office which is an external property at the end of the garden. Away from household distractions, this minimalist space is an office for creativity and tranquility. The construction of the office features an external spruce cladding, glass fronted windows front and back, zinc panelled roof, with spruce cladding, glass & solar panelling which provides an off grid electricity system for the office and can be used for the main household.

As you enter, you are greeted by a full length mirror and a peg board storage rack for coats, bags and shoes. As you walk along the corridor you walk past two pegboard doors, which then lead to the main work area. The office has two desks, one for computing/ music and one for 3d printing and model making. They are floating desks, connected by a central construction which undulates the overhead space. In between these desks is a floating cast iron wood burning fireplace, providing a snug environment during the colder months. The window behind has a seating area, which is the first chill out area for reading and listening to music. The office also has a water closet which consists of a toilet, sink and mirror as well a kitchen which consists of a fridge, single oven, plug in domino hob and kettle. The tall unit has storage for plates and a sink has a multi drawer for utensils and cleaning products. Above the work area is a netted space which can be accessed by a climbing wall. In this above space is the second chill out area for after work and quiet space acting as a cinema/ screening area. It has a screen with a projector & speakers. The interior itself consists mainly of spruce plywood, which is used for the walls, flooring, doors & furniture such as the desk, vanity unit and kitchen units. The frontals of the units and worktop have a formica lamination for water tightness and colour. Overall this space is affordable, cosy & environmentally friendly. It can be erected from a flat pack and transported to any location, primarily used as an office with potential to be used for temporary accommodation and off grid living.

Materials: Spruce Cladding, Spruce Plywood, Glass, Zinc Metal Roof Panelling, Zinc Front Door Surround
Design: Barn style architecture with wooden cladding.

Instagram

Chloe Webb

My name is Chloe Webb, I’m an Interior Design Student at the University of Derby.

It is a ‘Modern meets Rustic’ design, with the office area being a modern and sleek set up and the snug area being a more cozy, colourful design. The office area consists of a bespoke drawing table stretching the full length of the back wall with storage underneath and a desk set up including a laptop, two screens and speakers. There’s some of my own design presentations framed on the wall as well. The desk is part of a two tier unit that doubles as a bar counter on the other side, with four bar stools next to the wall mounted gin bar. There’s also a cozy armchair and log burner. The full height windows double as a door to the balcony with a swing to enjoy the summer sunshine.

As an aspiring interior designer, something I feel very strongly about is a comfortable work environment, and having the facilities to move around and sit in different areas throughout the working day to break up the day and experience different comforts, to not feel stuck in one place all day long.

Sam Marner

Twitter: @Marnerbanana
Facebook: Marner Design / @MarnerMade

Gintare Sidaraviciute

My Dream Home Office is a 3 floor home office. The ground floor contains an office space, the first floor has a library and the second floor has a meeting room.

The office contains a space to work in with a beautifully curved desk and a comfortable chair to work in. The desk is placed by the window to have the most natural light. On the left-hand side you can see a selection of my 3D work and a place to relax which is separated by the decorative panels. On the right-hand side there is a large shelf unit which contains interior samples, project information and different accessories.

The library contains a large shelving unit on each side of the area. In the middle it has comfortable seating to relax and read the book with a floor lamp which also contains a few shelves for beverages. The library is complemented by the large chandelier and two large pieces of art.

Meeting room contains a large table with beautiful chairs and a TV wall for presentations and zoom calls. On the left-hand side it has a relaxing area with a fireplace and three armchairs. The meeting room is a round shape structure with panoramic views.

The structure itself is supported by metal beams and has a gorgeous floating staircase. I imagine this structure is placed near the lake in a gorgeous woodland area and the meeting room would be just above three height to be able to enjoy breaking panoramic views. And the ground floor office would have a direct path to the bridge where you can come and place your feet in the water. Since it is a separate structure it would have direct access to the house and all its amenities.

Instagram@gs.interiors
Twitter@gsinteriors

Aaron Davies

Hi there, my name is Aaron and I’m a third year BA student studying Artist Designer Maker at CSAD (Cardiff School of Art and Design). I have been using Sketchup since I can remember and use it to visualise all my projects before making. This is my design for my ideal office, with two desktop computers, two graphics tablets, plenty of shelving for the display of items and a comfortable seating area with a hanging daybed. This is designed by my partner and I who is also a third year student at CSAD studying Illustration.

Website
Instagram

Timothy MacKenzie

My name is Timothy MacKenzie and I am an Architecture graduate from the University of Reading in the UK.

I have opted for the conversion of a shipping container to a garden office that doubles as a home cinema using a fold-out desk.

Instagram

Louis Quarendon

Instagram

3D City Modelling with AccuCities

Capturing a 3D city model is an inherently complex project. Who is the final user of the 3D city model? How is the model going to be used and updated? What is the most suitable source data, available technology to capture, display and exploit the data, what are the expected production times, costs and investment returns? There are hundreds of crucial decisions on variables like these that can greatly alter the scope, usability and cost of the project. Over the last 3 years AccuCities have worked with over 180 customers on 1,400 small and medium-size 3D context models for sites all over the United Kingdom. We spoke with Milo Spisz and Brais Brenlla Ramos to find out how SketchUp helps them with all of the above!

Tell us about your background and talk us through what AccuCities does

Milo: Howdy! I am Milo, the 3D Modelling Lead at AccuCities. I have been in this industry for the past 6 years, and spent the majority of my degree working with SketchUp. 

Brais: Hi I am Brais, the Lead UE4 Developer. Accucities specialises in highly accurate 3D modelling of cities primarily in the UK from the use of advanced remote sensing technology in order to obtain high detail imagery. Our models are used by clients in a wide variety of fields such as architecture, gaming and film industries. We focus on the built environment – cities, neighbourhoods, development sites and other key areas. The end results we can produce benefit from that same degree of accuracy and end up serving a multitude of purposes. These range from helping construction companies visualise the built environment, or letting consultancies run precise analyses of their area of study. Furthermore, we also put our products together in an interactive app to let our users play around with the model and explore multiple different tools – from data overlays to real-time tools, all with the goal of empowering our clients.  

What do you love most about your job and the industry you work in?

Milo: It would have to be the idea of scale, speed and accuracy that we can produce our models, how we put it together, how everything fits so well and looks the way it should be. It’s also great to see how we can help our clients by providing them with our data. I would also say we are one of those small gears in the process that helps to build and improve the cities we live in.

Brais: This job is a great opportunity to stay up to date with the latest trends in technology, so I’d say that’s one of the things I love the most. Staying fresh in this industry also means learning something new every day, as each new technology that appears on the horizon brings benefits and challenges that we must tackle. The industry itself is great because of that – the thrill of learning something new every day, and the fulfilment that comes after achieving goals that were just impossible a bit further back.

What are your favourite kinds of projects to work on?

Milo: The favourite projects I love the most are high detail models that we produce which we call Level 4 such as Here East model as well as working on the future proposed developments of buildings – with these you get a small glimpse of what is to come in the city.  Our Level 4 models share the same high accuracy as our standard Level 3 but they are much richer in detail on the facades, working on these details can be very therapeutic for me because it takes a keen eye to make sure all the details are in the right place, size and proportion. 

Brais: Those would need to be the ones that challenge me by just the right amount – neither too daunting nor overly simplistic. It’s easy for a tech company to either fall into routine work or face insurmountable tasks, and while that is something that inevitably happens every now and then, projects that strike just the right balance have an easy time to outshine the others.

How does SketchUp fit into your workflow?

Milo: We use SketchUp to deliver the final model to our clients. Many of our clients work with SketchUp already and we provide them with our data in SKP format which enables them to use the model to further aid on their design/environmental analysis.

Talk us through the Here East project!

Milo: Here East Level 4 was a fun model to work with! So, it all starts with the references of the building – part of my job is to source all the reference material such as plans and photos of the model so that we can ensure the accuracy is on point. We then use our Level 3 high detail model which helps us initially with positioning and the proportions of the details. Then the fun part starts which is all the detail – This obviously is time consuming but with experience it becomes easier and you can plan the entire model in such a way where you can save time without sacrificing quality.

As a company your focus is on cities – London, in particular. What are the future challenges involved for the built environment for a city like London? 

Brais: London is always under construction and evolving, there is always a new development happening, where a building is being demolished and that area is being used for a new building or landscape area for the city. So, the challenge would be to keep up with these changes and we at Accucities are always updating our data to make sure our clients can get the most up to date model of London.

In regards to working on cities, the client’s requests can be for scientific research and so we need to take into consideration what the end user is and what type of data the end user will need to gather from our 3D Models. This is ever so in demand due to the environmental concerns and sustainability with increased demand of space. More clients are needing 3d Models to gather science research to deploy better methods on construction or refurb on both existing and proposed buildings within the city.

Any must have SketchUp extensions that make your life easier?

Milo: Our native London model is always geo-referenced so it’s located within the National Grid which is a universal standard within the UK for us and our clients. However, this can sometimes be problematic because the model can live very far from the 0,0,0 coordinate and this can cause some issues within some software. To solve this, we use an extension within SketchUp that “zero’s” the axis back to the model and prevents any issues with the geometries that might otherwise happen.To learn more about Accucities, visit their website.
To download a sample tile. Link: https://www.accucities.com/new-3d-london-samples-cover-full-square-kilometer/

About Elmtec

Elmtec have been the UK distribution partner for SketchUp since 2010, and service a network of UK and Irish resellers. We have over 22 years’ experience within the digital design community.

Contact Us

T: 01844 263 750
E: sales@elmtec.co.uk
W: www.elmtec.co.uk/sketchup