




Why Buy SketchUp Pro from Elmtec

Do you or don’t you? If you’re researching why to buy SketchUp Pro, this article is for you. Our comprehensive guide reveals everything about why it’s such a cool tool, and delves into why it’s an even better idea to buy it from Elmtec. We’ll cover the cost of SketchUp pro and how to buy a SketchUp licence with confidence. By the end you’ll be raring to go – or we hope so! This really is one of the best, most fun and feature-rich 3D drawing tools out there, used by a huge variety of professions and other design-focused people. It’ll change your design life.

Why Buy SketchUp Pro

You can buy SketchUp in all sorts of formats, for commercial use, higher education, and primary and secondary schools. Each plan has been carefully crafted to provide everything needed to make the most of the tool in the way that’s most relevant. First, let’s explore the different packages available and what they’ll do for you. Then we’ll look into why the Pro version is such a good buy.

Commercial Plans for SketchUp

For commercial use you’ve got SketchUp Go, which lets you design and collaborate anywhere you like. It costs £95 a year. Buy SketchUp Go to: 

  • Model on a browser or iPad
  • Access more than 4 million pre-built 3D models
  • Admire your work via the integral augmented reality viewer
  • Get unlimited cloud storage

SketchUp for higher education

SketchUp Studio for Students and SketchUp Studio for Educators both cost £xx a year, and there’s a version for Universities that comes with a tiered price plan. You can make accurate 3D models in an education context, and the package supports you in teaching SketchUp skills to learners.  

SketchUp Pro

SketchUp Pro is the most popular commercial version. The cost of SketchUp Pro is £245 a year and the perfect way to create professional outcomes. Buy SketchUp Pro to:

  • Model on a desktop, web browser, Chromebook or iPad
  • 2D design documentation
  • Quick insights for design research
  • Experience reality (XR) headset viewing

Access to plugins for extending SketchUp Pro Desktop functionality

SketchUp Studio


SketchUp Studio is for Windows only and costs £549 a year, ideal for professional workflows. Buy SketchUp Studio to:

  • Model on a desktop, web browser, Chromebook or iPad
  • Import and model onto point cloud data with native tools
  • Export to LayOut and document point cloud data in 2D
  • Interactive, real-time visualisations as you work
  • Create and export photorealistic images
  • Export fully rendered animations and 360° panoramas

SketchUp for higher education

SketchUp Studio for Students and SketchUp Studio for Educators both cost £xx a year, and there’s a version for Universities that comes with a tiered price plan depending on your exact needs. They let you and your students make accurate 3D models in an education context, and support you in teaching SketchUp skills to learners.    

SketchUp for primary and secondary schools

SketchUp for Schools is a great choice for primary and secondary education. It comes free with a G Suite or Microsoft Education account.

  • Works on Chromebooks or any internet connected computer
  • In-app lesson plans
  • Print in 3D
  • Online community support
  • Store files on Google Drive or Microsoft OneDrive

SketchUp free

SketchUp Pro FREE costs nothing. So how does it differ from the paid-for Pro version?

For a start they both give you access to masses of excellent SketchUp tutorials, for a start. Both contain the same Large Tool Set tools, and the modelling environments are the same too. Pro comes with more 3D export options including various CAD formats, 3D Studio, and Object. You can use Dynamic Components in both versions, but you can only author them as a Pro user. The Pro version of SketchUp also comes with Layout 2, the presentation package that integrates with SketchUp models, and Style Builder, an application to create your own unique styles.

As you can tell the free version is full of fantastic features. But the Pro version provides many advanced tools and modelling capabilities. Everything is just as easy to use as it is in the free version, and it’s surprisingly affordable considering how powerful, exciting, fun and easy to use it is. All this makes it definitely worth buying as a current user of the free and educational packages.

The answer to the question ‘is SketchUp Pro worth buying?’ is a definite yes! The high number of people and organisations transferring to the Pro version from the free or educational packages speaks for itself.  The cost of SketchUp pro, bearing in mind all the extra features and benefits, is well worth the investment.

There are several ways to buy SketchUp Pro. Elmtec is one of the most popular providers. Next, we’ll take a look at why Elmtec rates so high with buyers.  

Why Buy SketchUp Pro From Elmtec

There are plenty of good reasons to buy SketchUp Pro via Elmtec. For a start, Elmtec has extensive experience in the digital design space, where they’ve been working successfully for a quarter of a century. And that makes them a recognised leading distributor of professional hardware and software. Because they employ such highly qualified specialists, Elmtec’s in-depth product knowledge and industry experience is second to none. And they’re the official UK SketchUp distributor, which counts for a lot when downloading from sources you can’t 100% trust can cause all sorts of problems.

Being based here in the UK means Elmtec can give you excellent support locally, and the people delivering that support are seriously responsive. Help is yours 7 days a week and the team will always get back to you within 24 hours.

It’s good to know Elmtec support comes from real human beings, not bots, whether you get it by telephone or email. It’s so much better than fiddling about with bot-led help when you really want a fast, accurate answer from a person who knows exactly what they’re talking about. This even includes technical support directly from the official UK supplier, a valuable benefit. The simple fact that we’re in the same time zone makes a big difference.


Maybe you need some product training. Many SketchUp Pro adopters do. If so you’ll want it to be great training worth having. At Elmtec we provide popular monthly onboarding webinars where you’ll learn the basics of SketchUp alongside a SketchUp expert who guides you every step of the way.


There’s more on the learning front. Elmtec provides superb personalised training programs, which can be created specifically for large accounts with multiple users. And that means your people get the exact training they need, expertly delivered every time.


When you buy SketchUp Pro from Elmtec you can get your hands on a collection of exciting offers and generous discounts from authorised training centres across the UK, giving you in depth support and knowledge throughout your SketchUp journey.


Now you know the cost of SketchUp Pro and understand the best place to buy a SketchUp licence, all you need to do is purchase one of the world’s best-loved 3D drawing tools and you’re off. Enjoy the ride! 

Understanding SketchUp System Requirements and Workflow Enhancement With Scott Whittaker

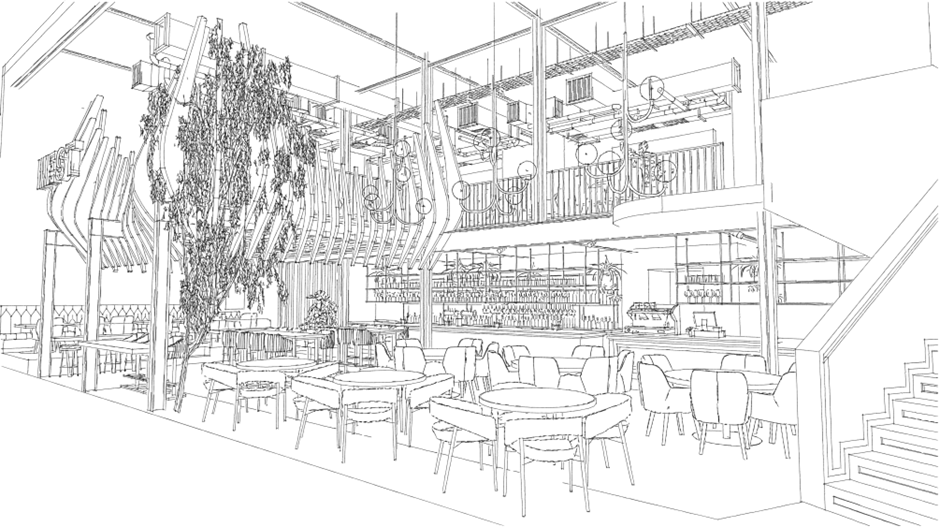
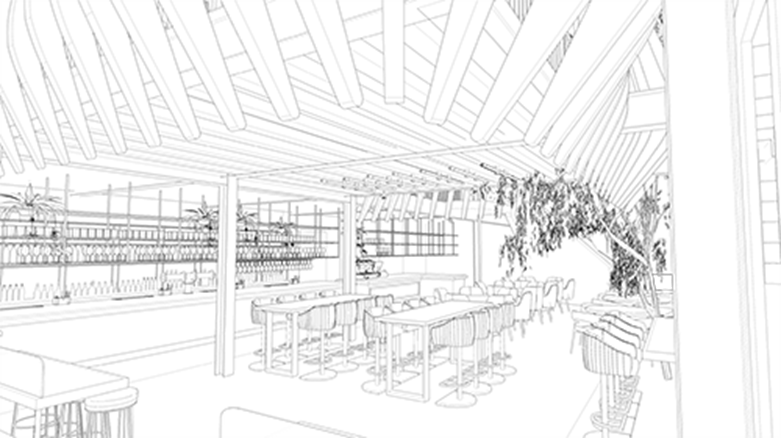
In 2015 Scott, owner and director of WithPencils decided to dispose of his pub group and, alongside his wife Ruby (who had been designing for hospitality as a sole trader and agency side), to create WithPencils. Primarily focusing on marketing a design for the hospitality industry they design logos, POS and signage for pubs and restaurants, eventually leading to requests to visualise building signing and redevelopment interiors.  

Scott has agreed to come along and speak to us today about his workflows and projects over the last 12 months and share his requirements used to create one of his latest completions, Nest, Bishopsgate.

With V-Ray renders, I add lighting and upgrade textures before rendering within SketchUp, using V-Ray swarm rendering (does calculations on other computers to speed up the  process). To utilize other iMacs we have.

Scott began working on SketchUp when it was a Google product (Hands up if you remember that!) and has since been experimenting with sign visuals, press releases and working with some of the most exclusive and quirky bars, pubs and clubs in London. He decided to begin with SketchUp due to its ease in 3D modelling, clear visualisation and simple plugin options that help speed up workflow and reduce file sizes, alongside this the support technically and online from a large community of other SketchUp users has been instrumental to his SketchUp growth.

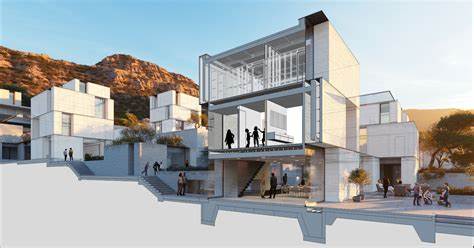
He also started with SketchUp after convincing his business partner (and wife) to purchase SketchUp on the promise that he would draw out their loft conversion, thankfully he held his promise in lockdown and they very quickly begin to design larger exterior and interior projects for new developments, which alongside pubs and bars signage visuals now make up around 90% of their business, doubling turnover compared to pre-lockdown.

We’re grateful  to see business owners striving post lockdown and are extremely happy to see SketchUp and it’s features playing a part in this!

The main challenges with this project was to show the “nest” structure, which could only be achieved by viewing the interior for the exterior and just suggesting the windows. 

Scott also opened up a little about his own requirements and his own personal workflow to get the most out of the SketchUp software. You can check out our page here to give you the minimum requirements to use SketchUp on your workstation.

(Please note, Scott’s experience is only giving his personal requirements for his projects/workflow and may not reflect the same for all SketchUp users)

So Scott, take it away!

I work on iMac  27” 3.6GHz 10-Core Intel CorI9  128GBram AMD Radeon Pro 570 XT 16GB.

  • 3d Connexion space mouse is the most useful I can’t imagine working without it.
  • V-ray  – swarm rendering over 5 iMacs
  • S4u export scenes
  • Path copy – and repeated component
  • Fredo round corners – great for soft furnishings
  • Sandbox tools – for landscape and organic items
  • Solar north to play with the sun location for visuals

For sketch images :

  • I build models from Photos, DWG. or PDF (or a combination of them all)
  • I populate models from the 3d Warehouse and build custom items as needed.
  • I make 3 scenes for each viewpoint
  • A customer line style
  • Just shadow
  • Colour layer
  • Then I export all layers using S4u export scenes
  • In photoshop I add so hand effects, hand colour with custom brushes and lighting effects

With V-ray renders, I add lighting and upgrade textures before rendering within SketchUp Pro, using V-Ray swarm rendering (does calculations on other computers to speed up the process). To utilize the other iMac we have.

With a degree in Fine Art in the early 90’s Scott had a job in a bar and ending up hospitality industry operating Bars Club and restaurant groups.

How to Buy SketchUp Pro from Elmtec

You’d like to buy SketchUp Pro. Good move! You’re about to enter the magical world of 3D drawing made simple and fun. It’s a professional-level CAD package used by all sorts of professional designers across interior and exterior design, architecture, construction and more. It’s equally popular with educators and students, the most feature-rich version of SketchUp. So how to buy SketchUp Pro? Where do you go to purchase SketchUp?


You want to buy from a source you can trust, a place where downloading is safe and secure. You need a supplier who doesn’t just sell you a product then leave you to get on with it. In our world the question of how to buy a SketchUp licence has just one answer. Buy it from Elmtec for service you can rely on, superb UK-based support, and unbeatable expertise. If you’re asking where to buy SketchUp software, read this. Then download it, relax and enjoy one of the world’s best-loved 3D design packages.

SketchUp Purchasing Options

So what are your choices to purchase SketchUp? SketchUp is available in various flavours including SketchUp Pro, SketchUp Go, and SketchUp Studio. There are several pricing options to buy SketchUp Pro including a FREE version. SketchUp Pro itself is sold on a subscription basis, and you’ll have to connect to the internet to maintain your subscription plan. Your SketchUp Pro licensing options are:


  • Single user: Assigned to one individual, use it on as many as 2 devices
  • Network Licence: Installed on as many computers as you want. The machines all need to be internet-connected for the licence to be verified


There are also some great enterprise level options.

SketchUp Commercial Plans

  • SketchUp Go lets you design and collaborate anywhere you like. It costs £95 a year. You can model on a browser or iPad, access more than 4 million pre-built 3D models, and enjoy your designs in impressive 3D via the integral augmented reality viewer. You also get unlimited cloud storage
  • SketchUp Pro is the most popular commercial version at £245 a year, the ideal way to generate professional work. You can model on a desktop, web browser, Chromebook or iPad. There’s 2D design documentation, quick insights for design research, reality (XR) headset viewing, plus access to plugins to extend SketchUp Pro Desktop functionality
  • SketchUp Studio is for Windows only and costs £549 a year, ideal for professional workflows. You can model on a desktop, web browser, Chromebook or iPad and import and model onto point cloud data with native tools. Export to LayOut and document point cloud data in 2D. See interactive, real-time visualisations as you work. Create and export photorealistic images, and export fully rendered animations and 360° panoramas.

SketchUp for higher education

SketchUp Studio for Students and SketchUp Studio for Educators both cost £xx a year, and there’s a version for Universities that comes with a tiered price plan. You can make accurate 3D models in an education context, and the package supports you in teaching SketchUp skills to learners.  

SketchUp for primary and secondary schools

SketchUp for Schools is a great choice for primary and secondary education. It comes free with a G Suite or Microsoft Education account. It works on Chromebooks or any internet connected computer. You get In-app lesson plans and can print in 3D, all with online community support, and you store files on Google Drive or Microsoft OneDrive

SketchUp free

SketchUp Pro FREE costs nothing. Like the Pro version you get access to excellent SketchUp tutorials, The free version is full of fantastic features but the Pro version comes with lots more advanced tools and modelling capabilities. 

Plenty of people ask the question ‘where can I buy SketchUp Pro?’. You can buy the software and licence directly from Trimble. But there are real benefits to using local, official distributors and resellers, which we cover in our article about Why buy SketchUp Pro from Elmtec.

Now let’s look at how to buy SketchUp Pro from Elmtec. As you’ll see, it’s super-simple.

How to Buy SketchUp Pro from Elmtec

Elmtec has been the official distributor for SketchUp Pro since 2010. And that means we know the product inside out from every angle. In 3D, you might say! So how do you go about buying the software and licence from us? It only takes three steps to get where you want to be.


  • Go to the UK SketchUp reseller page
  • Search for your location using the location box, identifying an authorised reseller near you
  • Follow the link to visit the reseller’s website
  • Follow their onsite link to submit your purchase order for SketchUp 

Now you know how to buy a SketchUp licence from Elmtec, and exactly where to buy SketchUp software online.  Remember this is a digital subscription purchase that renews every year. You might not get your product serial number through straight away. They can take 2 working days to email the information over to you – but don’t worry, it’ll arrive. Now you know what to do to Buy SketchUp pro from a supplier you can trust. We wish you an awesome time designing ‘amazing’!

Enscape 3.3 Now Available for SketchUp

You want awesome lighting. You want equally awe-inspiring rendering.  Enscape 3.3 for SketchUp delivers the magic in real time, and it’s stunning. Enscape lighting SketchUp and Enscape rendering SketchUp have changed the way designers create. Version 3.3 of Enscape for SketchUp is waiting for you. By the end of this article you’ll know what Enscape for SketchUp is, why you’ll fall head over heels in love with it, how to create a SketchUp rendering in Enscape, and all about lighting in SketchUp with Enscape.

What is Enscape for SketchUp?

What is Enscape for SketchUp? A popular commercial real-time rendering and virtual reality plugin, Enscape is the darling of the architecture, engineering, and construction sectors. Both the Real-Time Rendering and Virtual Reality empower your designs, enable a smoother workflow, and bring your imagination to vibrant life. Because you can use it directly in your modeling tools, you can concentrate on the important things: the creating, the designing, and the building. Enscape version 3.3 works with the latest version of SketchUp, so let’s dive in.

Why Use Enscape for SketchUp

Why use Enscape for SketchUp? There are so many reasons why, once you discover it, you’ll want to use it again and again. For a start, Enscape simplifies rendering and the creation of walkthroughs, flythroughs, animations, and virtually experiences. It’s invaluable for that reason alone, since it’s this kind of experience that convinces clients, inspires the right decisions, and pushes approvals through faster. Easy to export models also make it really easy for other people to review your designs, speeding up the workflow dramatically.

A huge asset library of more than 1900 items comes with a cool materials editor and brilliant lighting options. In fact the latest Enscape version, 3.3, has a long list of desirable key features.

Real-time technology means your work is visualised as a fully rendered 3D walkthrough for people to experience from every angle, at any time of day, with any sort of lighting. The live link between the programme and your CAD tool updates things instantly. And the amazing NVIDIA Deep Learning Super Sampling improves walkthrough performance significantly.  

Virtual reality lets you and others explore designs via inspirational realism. All you need to do is hook up to a VR headset like the Oculus Rift S or HTC Vive to walk or fly through your project, enjoying spectacular visuals.

The broad range of export options means you can easily collaborate with other people, whether it’s designers, clients or someone else. It’s easy for them to grasp and there’s no need for special software or tech. And the amazing choice of atmosphere settings makes it a dream to create atmosphere and character using hyper-realistic lighting. The cloud cover, the time of day, it’s endlessly configurable.

Enscape 3.3 even offers a suite of workflow tools for collaborative annotation, where people can make changes, suggest materials, highlight an issue, and do whatever’s needed to get the project completed. When you can share your progress, keep the context clear and communicate perfectly with everyone involved like this, so easily and fluidly, your design life is so much more fulfilling.

Isn’t it good to know there’s even more fabulous Enscape functionality on the way for spring 2023?

How to Create a SketchUp Rendering in Enscape

So how do you go about Enscape rendering SketchUp style? First, install Enscape. It’ll turn up under the SketchUp Extensions tab. Now you can start using the Enscape toolbar. Open up a project by clicking the Start Enscape button. To create a beautiful rendering in SketchUp, click on the Take Screenshot or Batch Rendering button inside the Extensions tab. While this is a summary of the process, it clearly shows you how wonderfully simple the tool is to use.

Lighting in SketchUp with Enscape

Enscape lighting SketchUp style is just as amazing. Because SketchUp has no lights of its own, Enscape provides lights accessed via the Enscape Objects window. You can get there either using the Extensions menu option in SketchUp, or the Enscape ribbon.


Here’s how to add light sources to models. As you’ll see, it’s very simple, which means it’s totally inspiring! From SketchUp, just go to Extensions > Enscape > Enscape Objects. Once you’re in there, you’ll find five different light sources to choose from: Sphere light, Spot light, Rectangular (Rect) light, Disk Light and Line Light.  

Sphere Light

  •         An omni, or point light – the light sends out rays from a single point equally in all directions . Do it in two clicks, first selecting the surface or axis the light source is based from, then placing the light with a second click. You can then adjust the intensity of the light.

Spot Light

  •         A spot light is placed with four clicks, the first two fixing the end point and the second two the direction of the light cone. To place a spotlight, click to select the surface or axis the light source is based from. Move the mouse to define the axis or face you want the light to run along or go, then click again to define the light source.

Rect (Rectangular) Light and Disk Light

  •         These behave almost the same way, only the beam shape differs. The Spot light source is a single point, the Rect and Disk lights are the same shape at each end. Place them with four clicks, just like the Spot Light. The Rect light has one pink control point. You can do the same thing with the sliders in Enscape Objects. The Disc light has fewer parameters. Adjust intensity of both using the Luminous Power slide.

Line Lights

  •         Line lights are linear lights representing tube fluorescent lights. They go up to 3m long and you can change the length. Again, use the two click method to place them, then you can define and rotate them as you like. You rotate using the control points, or native SketchUp controls for rotation.

Colouring lights

  •         Colour lights in the SketchUp Paint Bucket tool. Pick a colour from the Material Editor, apply it, then adjust it directly in the Enscape window.

For Self-Illumination, not available in the Enscape Objects window, use self-illuminated materials. Either add the keyword ‘Emissive’ to the material name, or go through the Material Editor where there’s more control over  the material’s luminance, intensity, and colour. This is where you change the object material type to Self-illuminated.

Enscape 3.3 a wrap-up

Last but not least, Enscape supports optimising and cleaning models by removing unnecessary geometry and materials, leaving you with a lovely clean design. And that’s that – will you give it a test-drive soon, enhancing your work with stunning Enscape lighting SketchUp and dramatically real rendering SketchUp? Don’t forget there’s a plethora of exciting SketchUp tutorials and learning resources to help you get where you want to be.

Get Speedy with SketchUp: Our Top 5 Tips

You’re fired up, inspired, full of ideas. You’re designing in SketchUp and you’re loving it. Does the way you work let you keep up with a flow of bright ideas? Or is the way you use the programme slowing you down? If you want to get really speedy at SketchUp, work faster, finish projects faster, and keep up with your creative brain, you need some SketchUp tips to enhance your workflow.

This is your guide to five top tips designed to speed up your SketchUp workflow. Make it more intuitive, smooth, simple and fast with our SketchUp tips. By the end of this article you’ll be flying along, working at a satisfying speed that leaves lots of room for creativity.

Groups and Components

The first of our SketchUp tips: get familiar with groups and components. Designers use groups and components in SketchUp for faster results. They’re very different but equally useful. Once you start using them, you’ll wonder how you managed without them. So what are the key differences between groups and components in SketchUp?


  •         Groups are used for sets of objects you don’t want to duplicate or make copies of, making a group a single instance of a collection of geometry


  •         Components are used for sets of objects you will be duplicating or using multiple times in your model, making a component is a named collection of geometry existing in multiple locations within your model


As you can imagine, not having to draw the same component time and time again will make a dramatic difference to your workflow. As will having a group of objects to use and move around in one go, rather than moving each object in the group separately.

Help Tools

SketchUp’s Help Tools are the second of our top SketchUp workflow tips. They give you fast, efficient insight into exactly what to do when you’re baffled.

The instructor panel in SketchUp makes design life so much easier. It provides valuable help with understanding how to use all SketchUp’s tools, and it’s very easy to use. All you do is click on a tool with the instructor panel open to see a clear description of the tool, plus a step-by-step guide about how to use it. It’s a powerful way to get to grips with SketchUp quickly, and because it helps you speed up the learning curve, your creative flow isn’t interrupted.

There’s more. The SketchUp Help Centre is an outstanding community of experts happy to answer your questions, thanks to Get Answers Positioning-centric information. You can also dive into a huge repository of excellent videos and other tutorials revealing how to do a wide range of things quickly, efficiently, and beautifully.

Shortcuts

SketchUp Shortcuts are another reliable way to boost your workflow and get more done, faster. SketchUp comes with a load of useful predefined shortcuts assigned to various hotkeys. All you need to do is learn them, something that takes most designers no time at all. The hotkey shortcuts speed the design workflow considerably.


It’s good practice to assign your favourite hotkeys at the beginning of a project, so they’re ready and waiting to make your workflow faster. Here are some examples of SketchUp’s default keyboard shortcuts:


  •         Select (space bar)
  •         Line (L key)
  •         Eraser (E key)
  •         Rectangle (R key)
  •         Circle (C key)

Guidelines

Another of our favourite SketchUp tips, SketchUp Guidelines, also called Rulers,  makes it easier to visualise 3D on a 2D monitor, and that makes it absolutely vital to fast, seamless workflows. Use the Tape Measure tool to create an infinite guide line in SketchUp. Now you can use the power of the Inference System to snap to it. No wonder people rely on guides for super-accurate modelling.

You can also create your own custom guide geometry to place things that are hard to infer. Use the Tape Measure tool to make a few guidelines to position the object, then simply delete them as soon as you’re finished.

You can also leave your guides in the model, only selecting Edit > Delete guides to get rid of them once you’re sure you don’t need them any more. You can see how snapping objects to guidelines speeds the 3D design workflow dramatically.

Layers

SketchUp layers are a fast and easy way to control entities on your document pages, either shared or not. While the regular layers don’t share entities between pages, shared layers do. The draw order means the entities on a top layer are displayed over entities on a lower layer. And a layer can be either visible or hidden. The locked or unlocked state feature means you can neither accidentally nor intentionally edit a layer’s entities when the layer is locked.

Create, navigate, and manage layers on the Layers panel. Open it by clicking the right name in the panel tray or, if off-screen, choose Window > Layers. In the far right column you’ll see a single page icon showing a regular layer. The four-page icon means a shared layer.

In Layout, regular layers – AKA nonshared layers, control the visibility of the document’s content. You might want to separate text from model entities, in which case simply put each kind of entity  on its own layer.  Just remember to create or move each type of entity to the right layer on every page.

Shared layers show content on every page, perfect for logos, titles, and other design elements needed on every page. Just put it on a shared layer to place it just once. Can you see how turning layers on and off supports a faster, more efficient design process? 

As SketchUp workflow tips go, it’s pretty amazing. Group first, layer later is the way to do it. As SketchUp’s Help files say, “Layering in SketchUp is for display only. Think of them as light switches that illuminate something or turn it off.”

Join Jasmine Feeling Freaky Deaky With TwinMotion At New Designers 2022

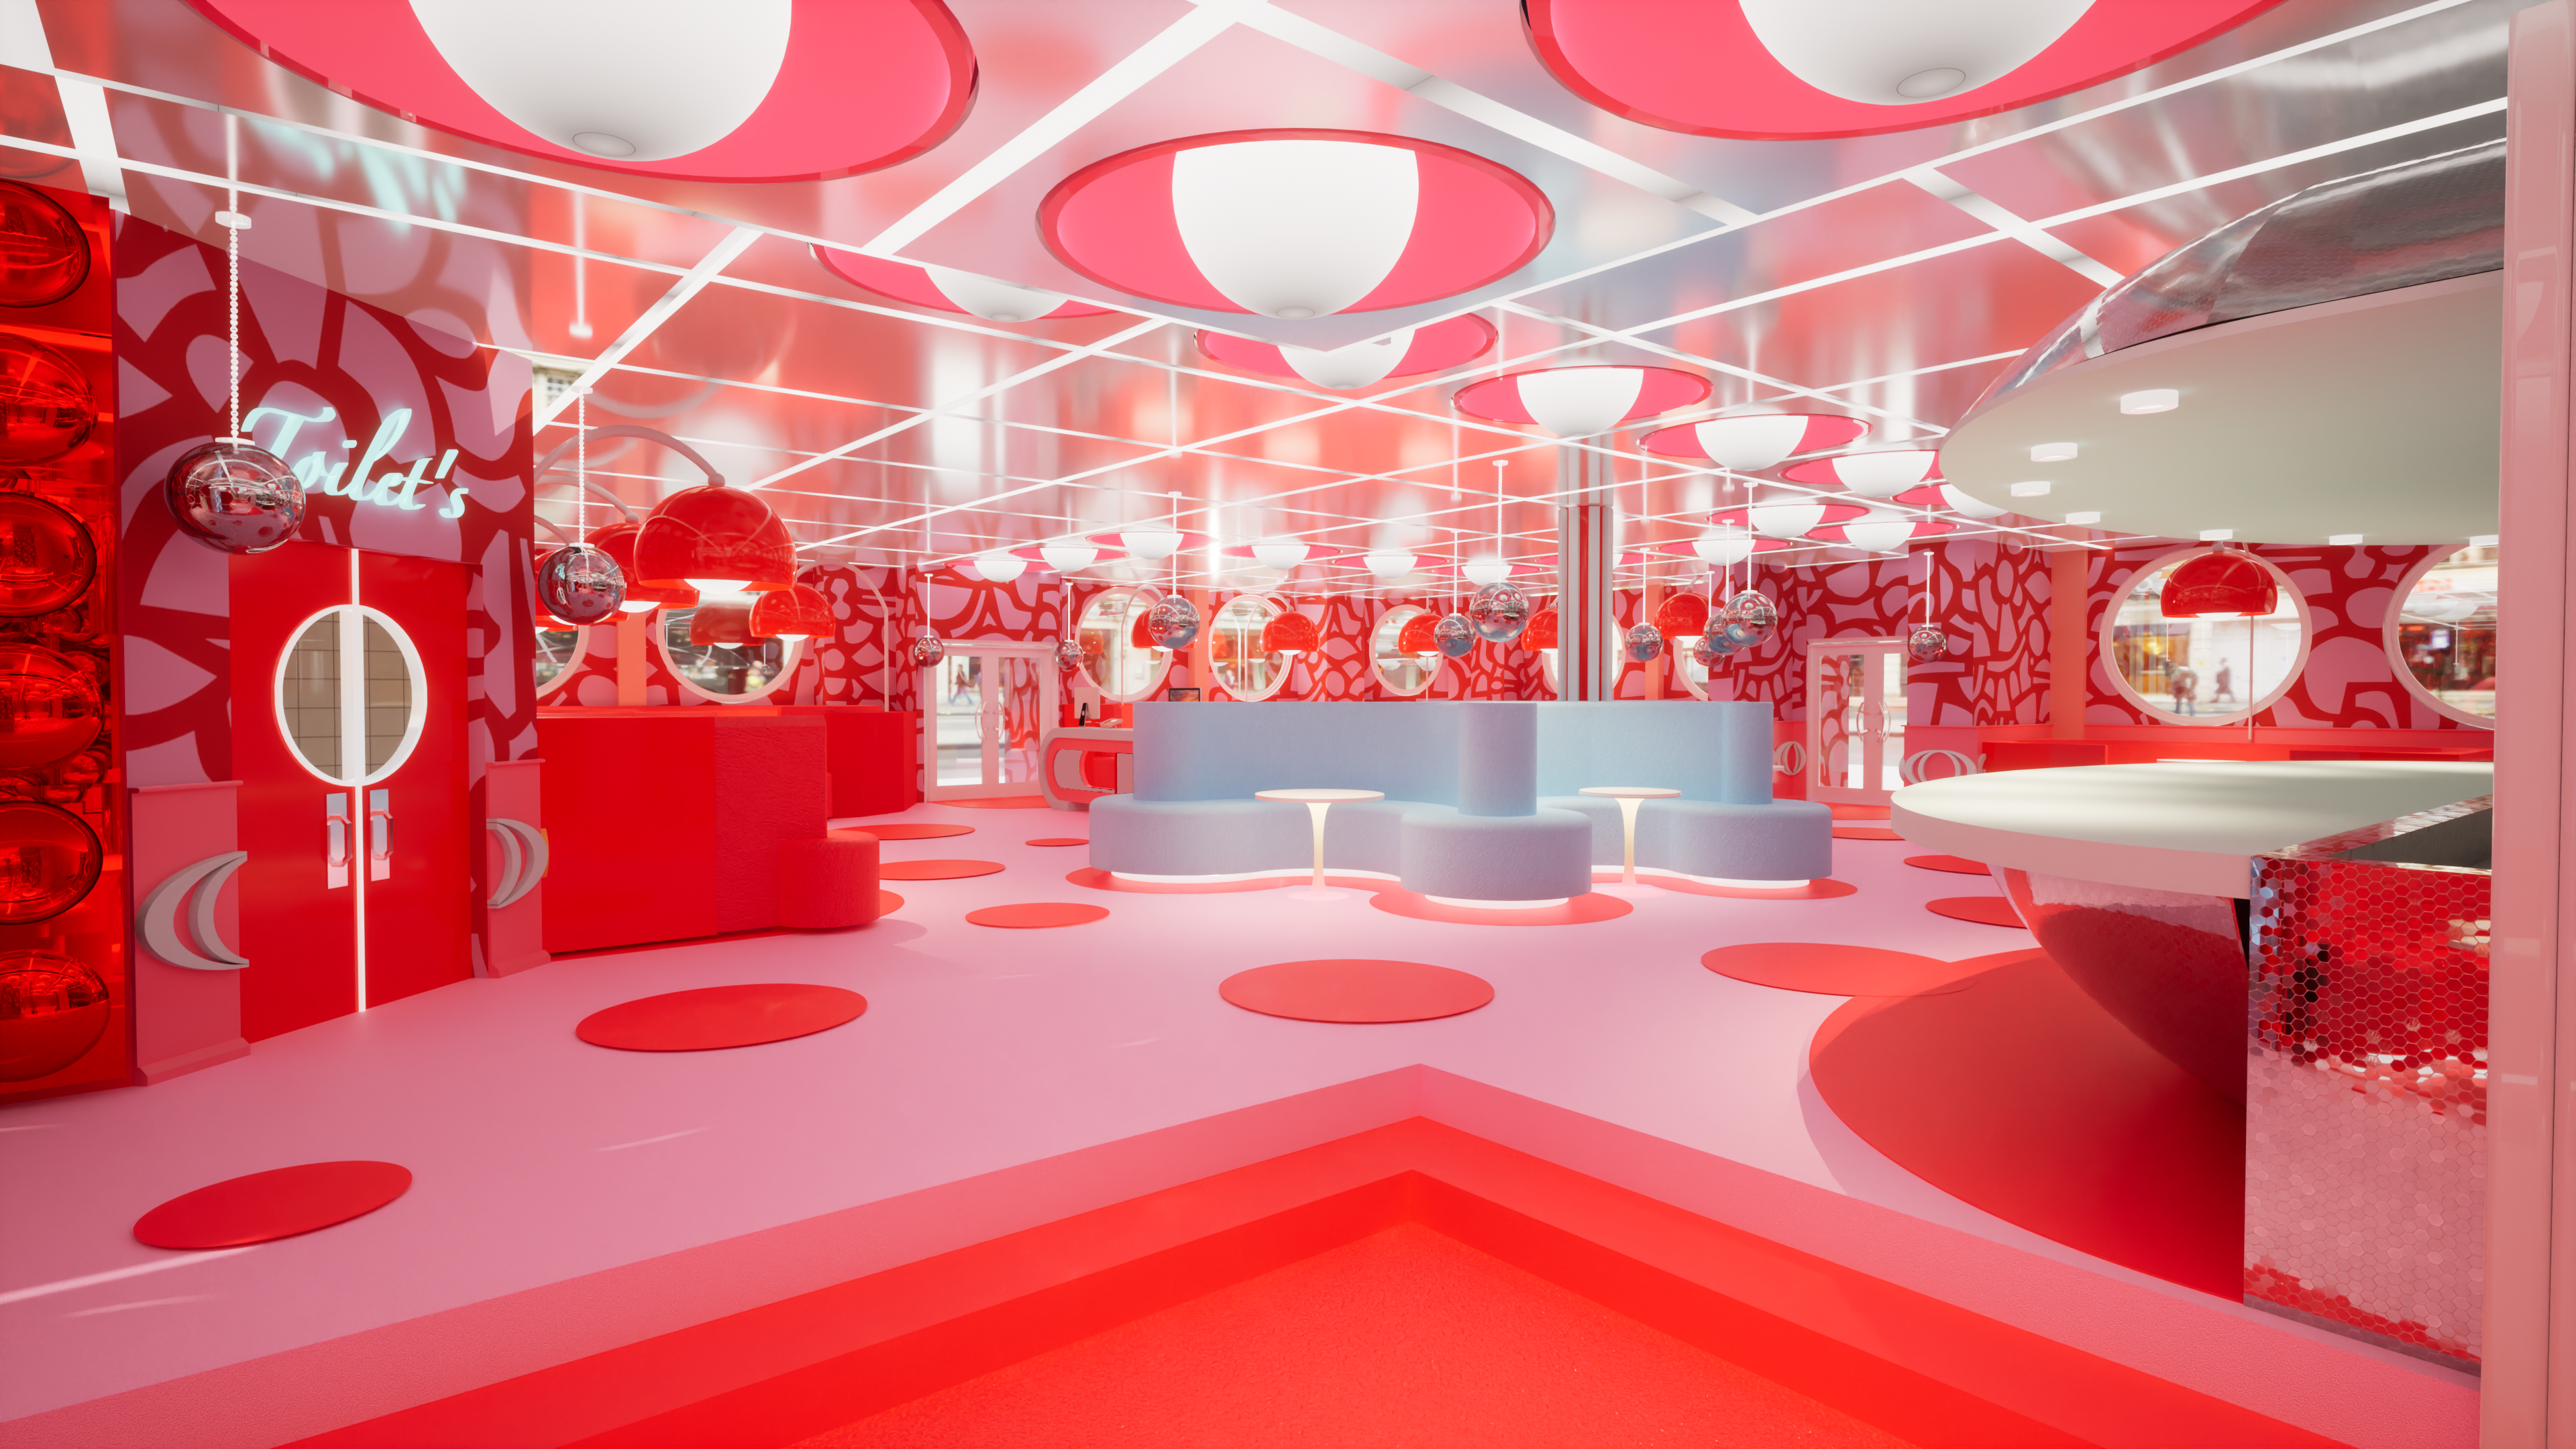
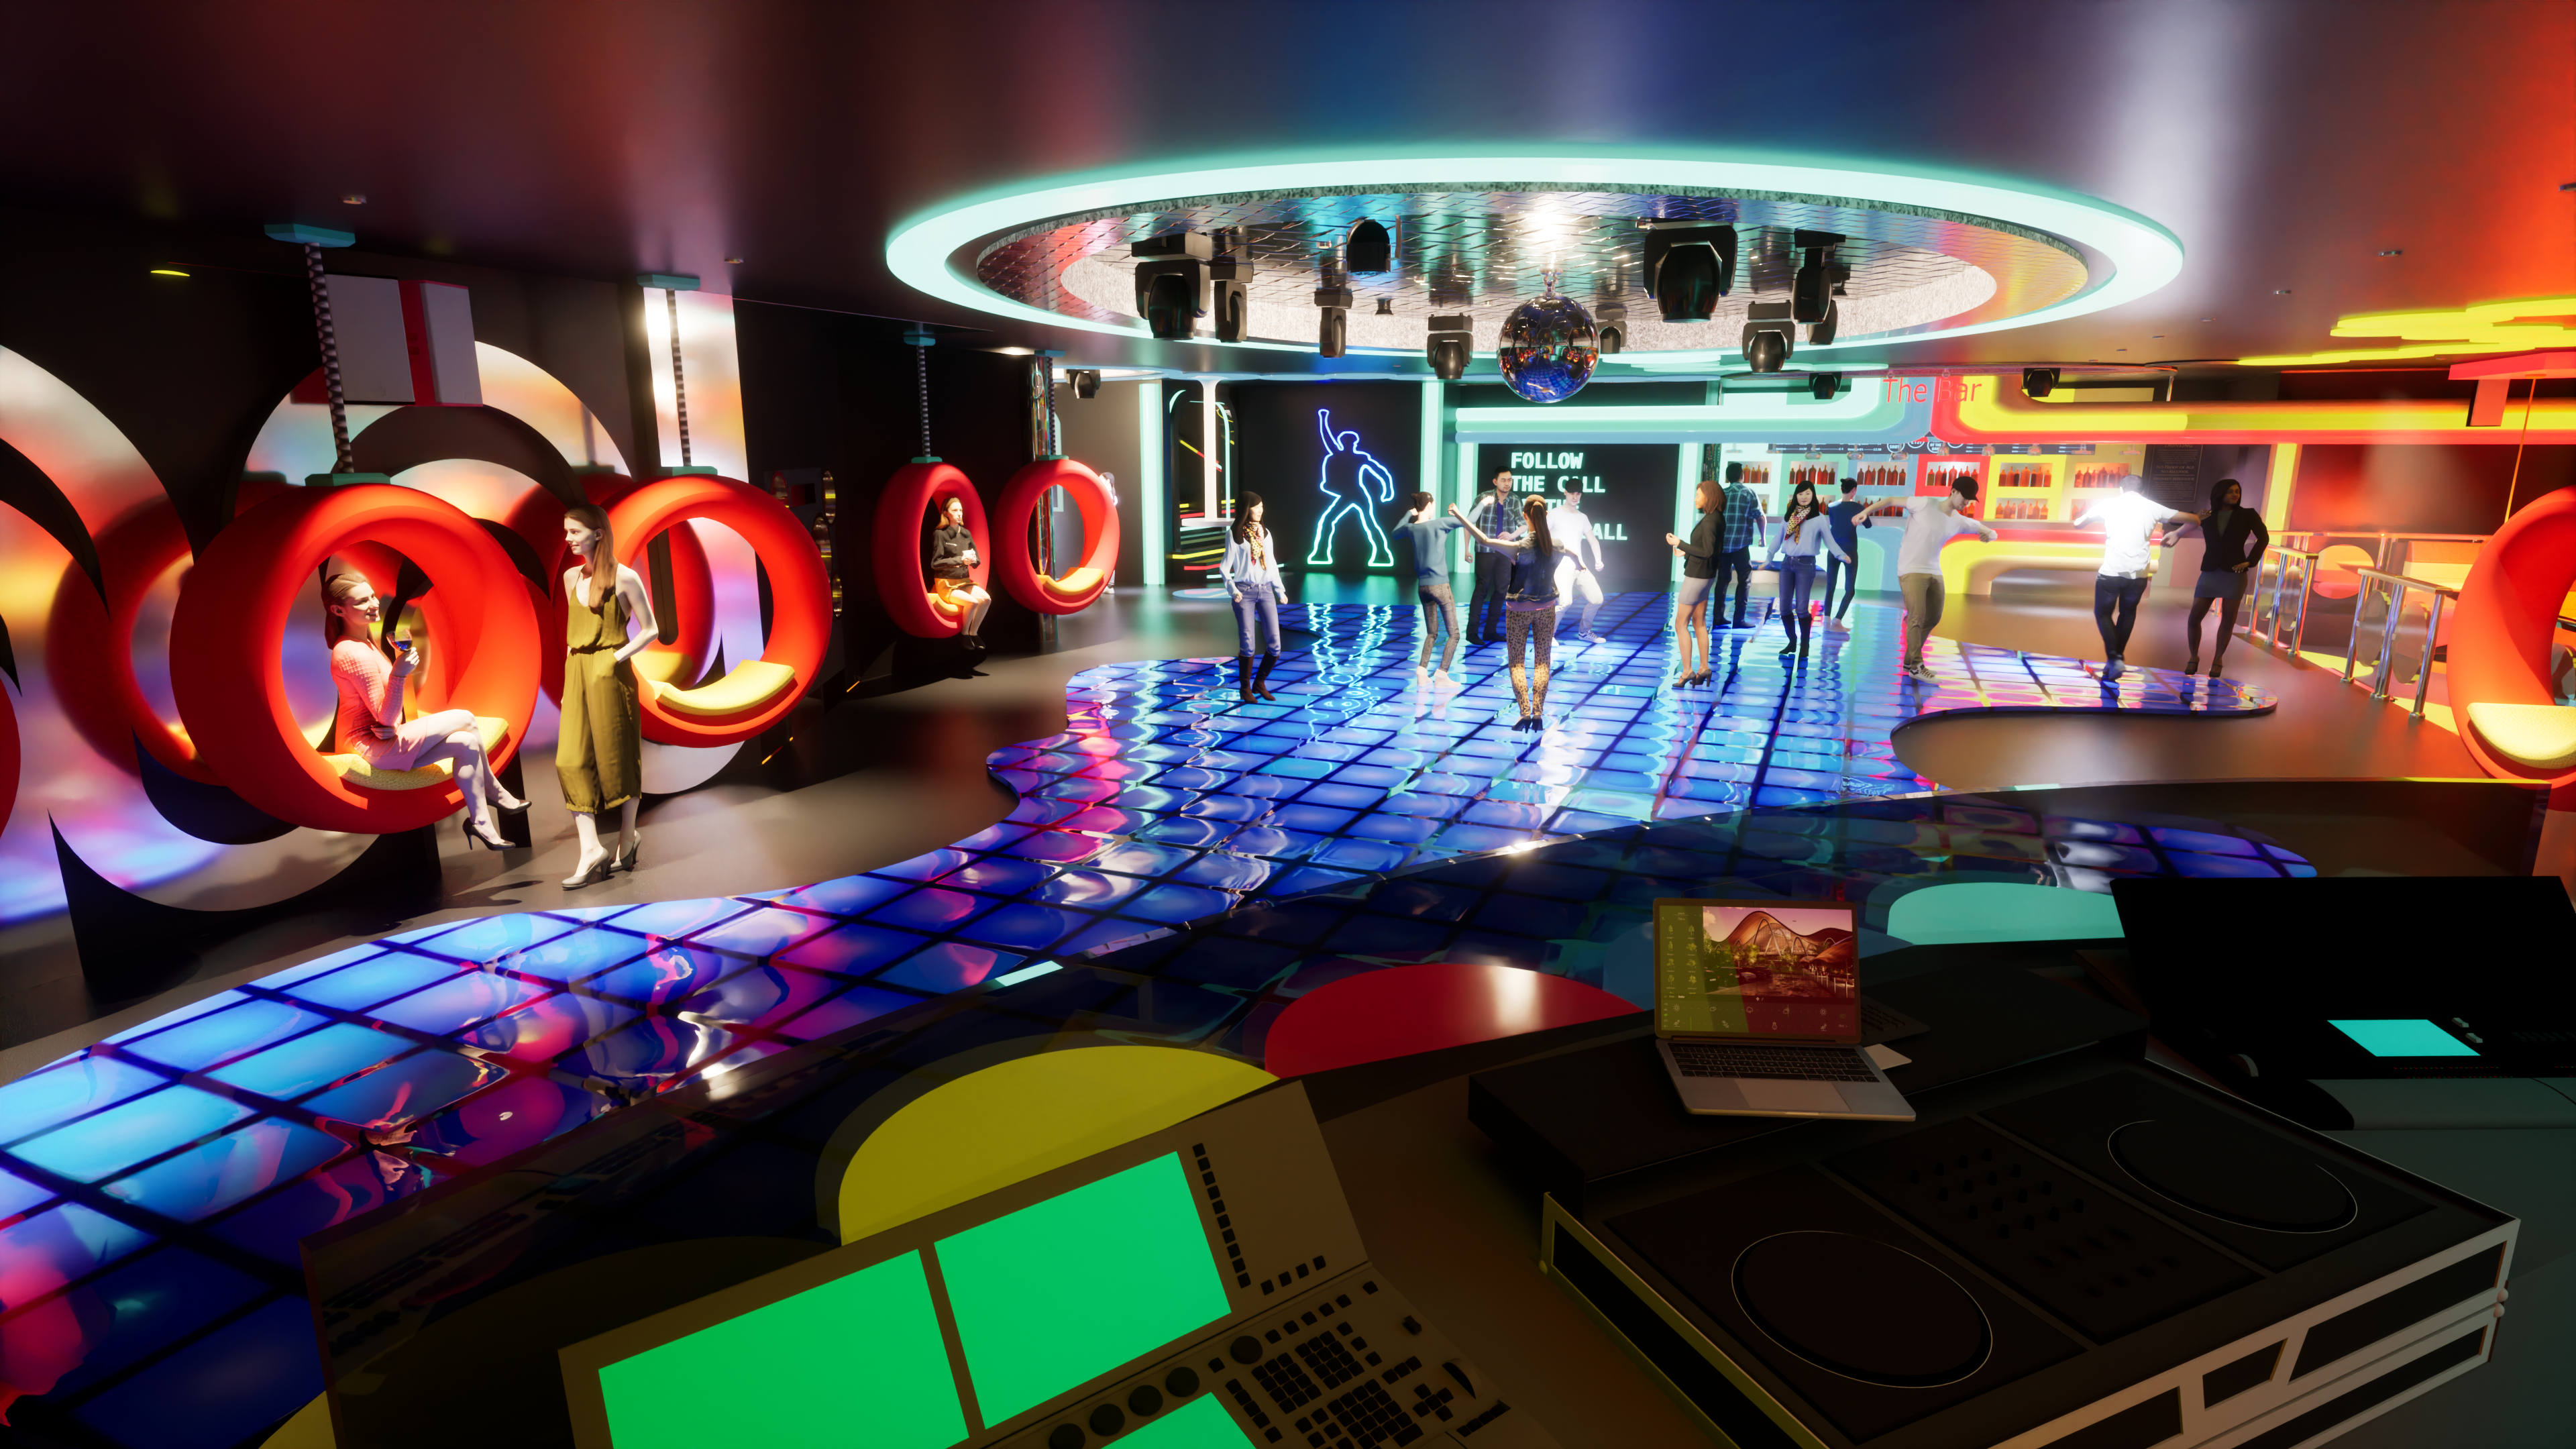
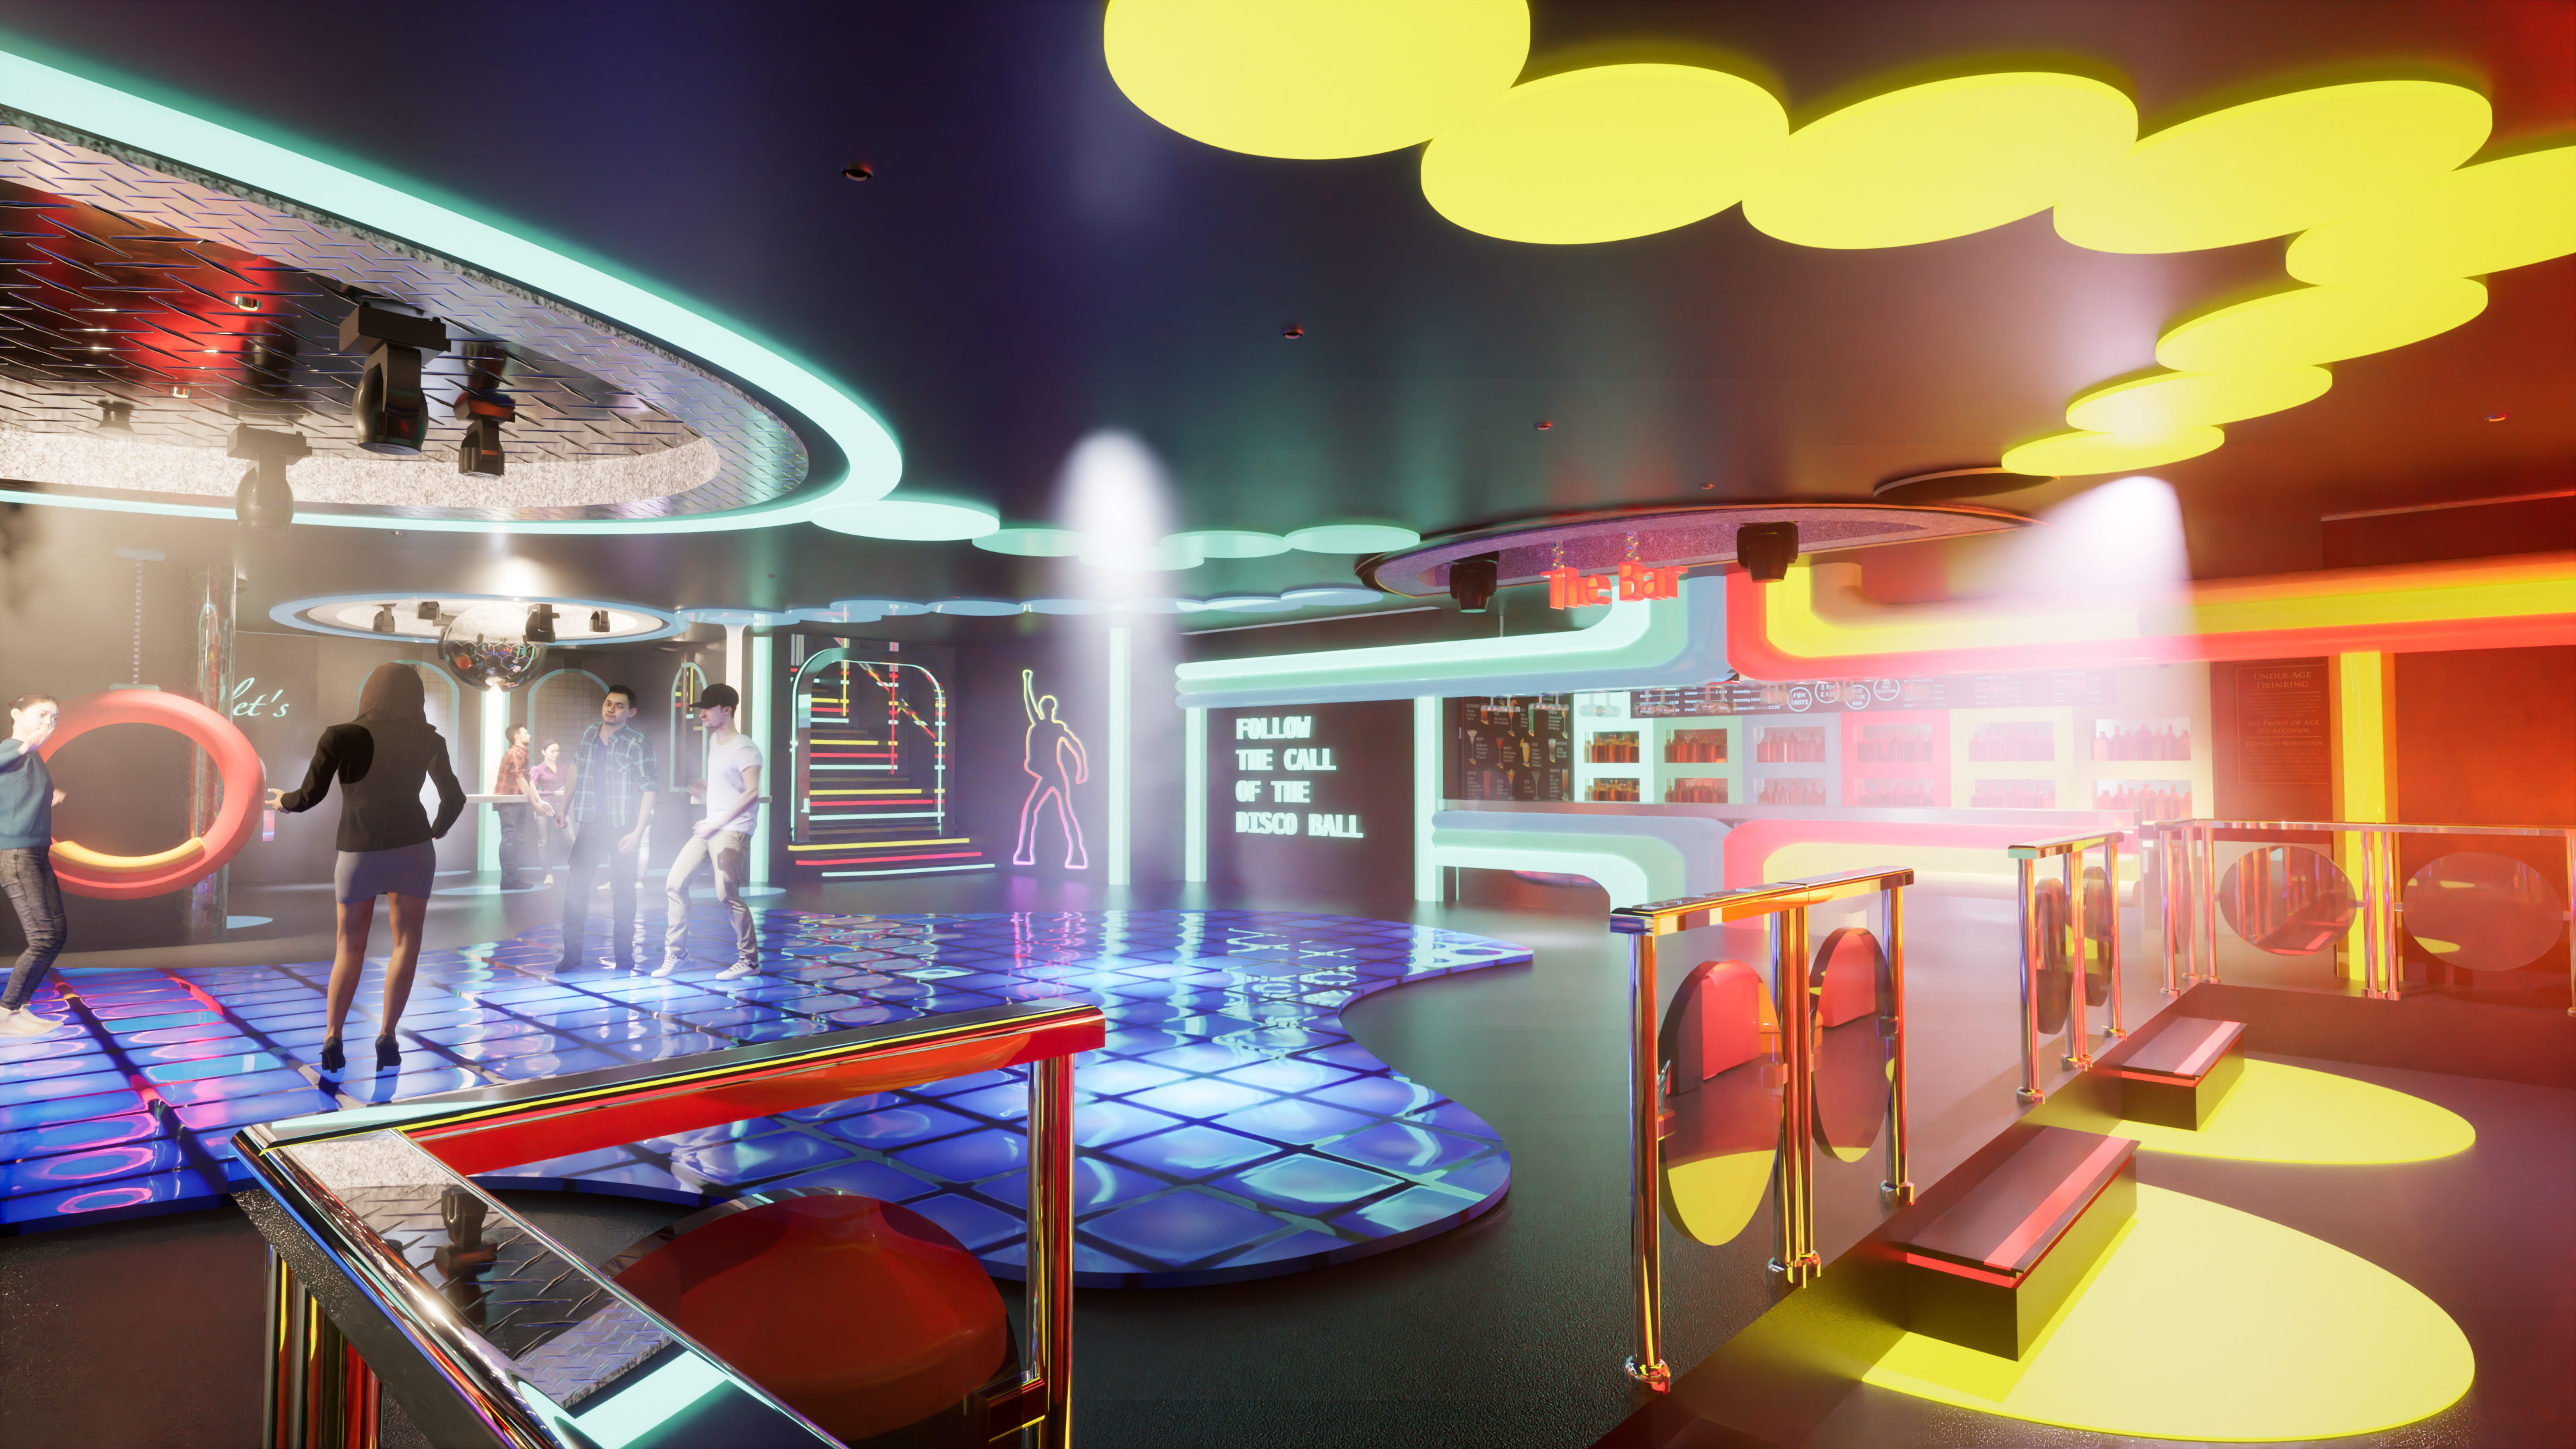
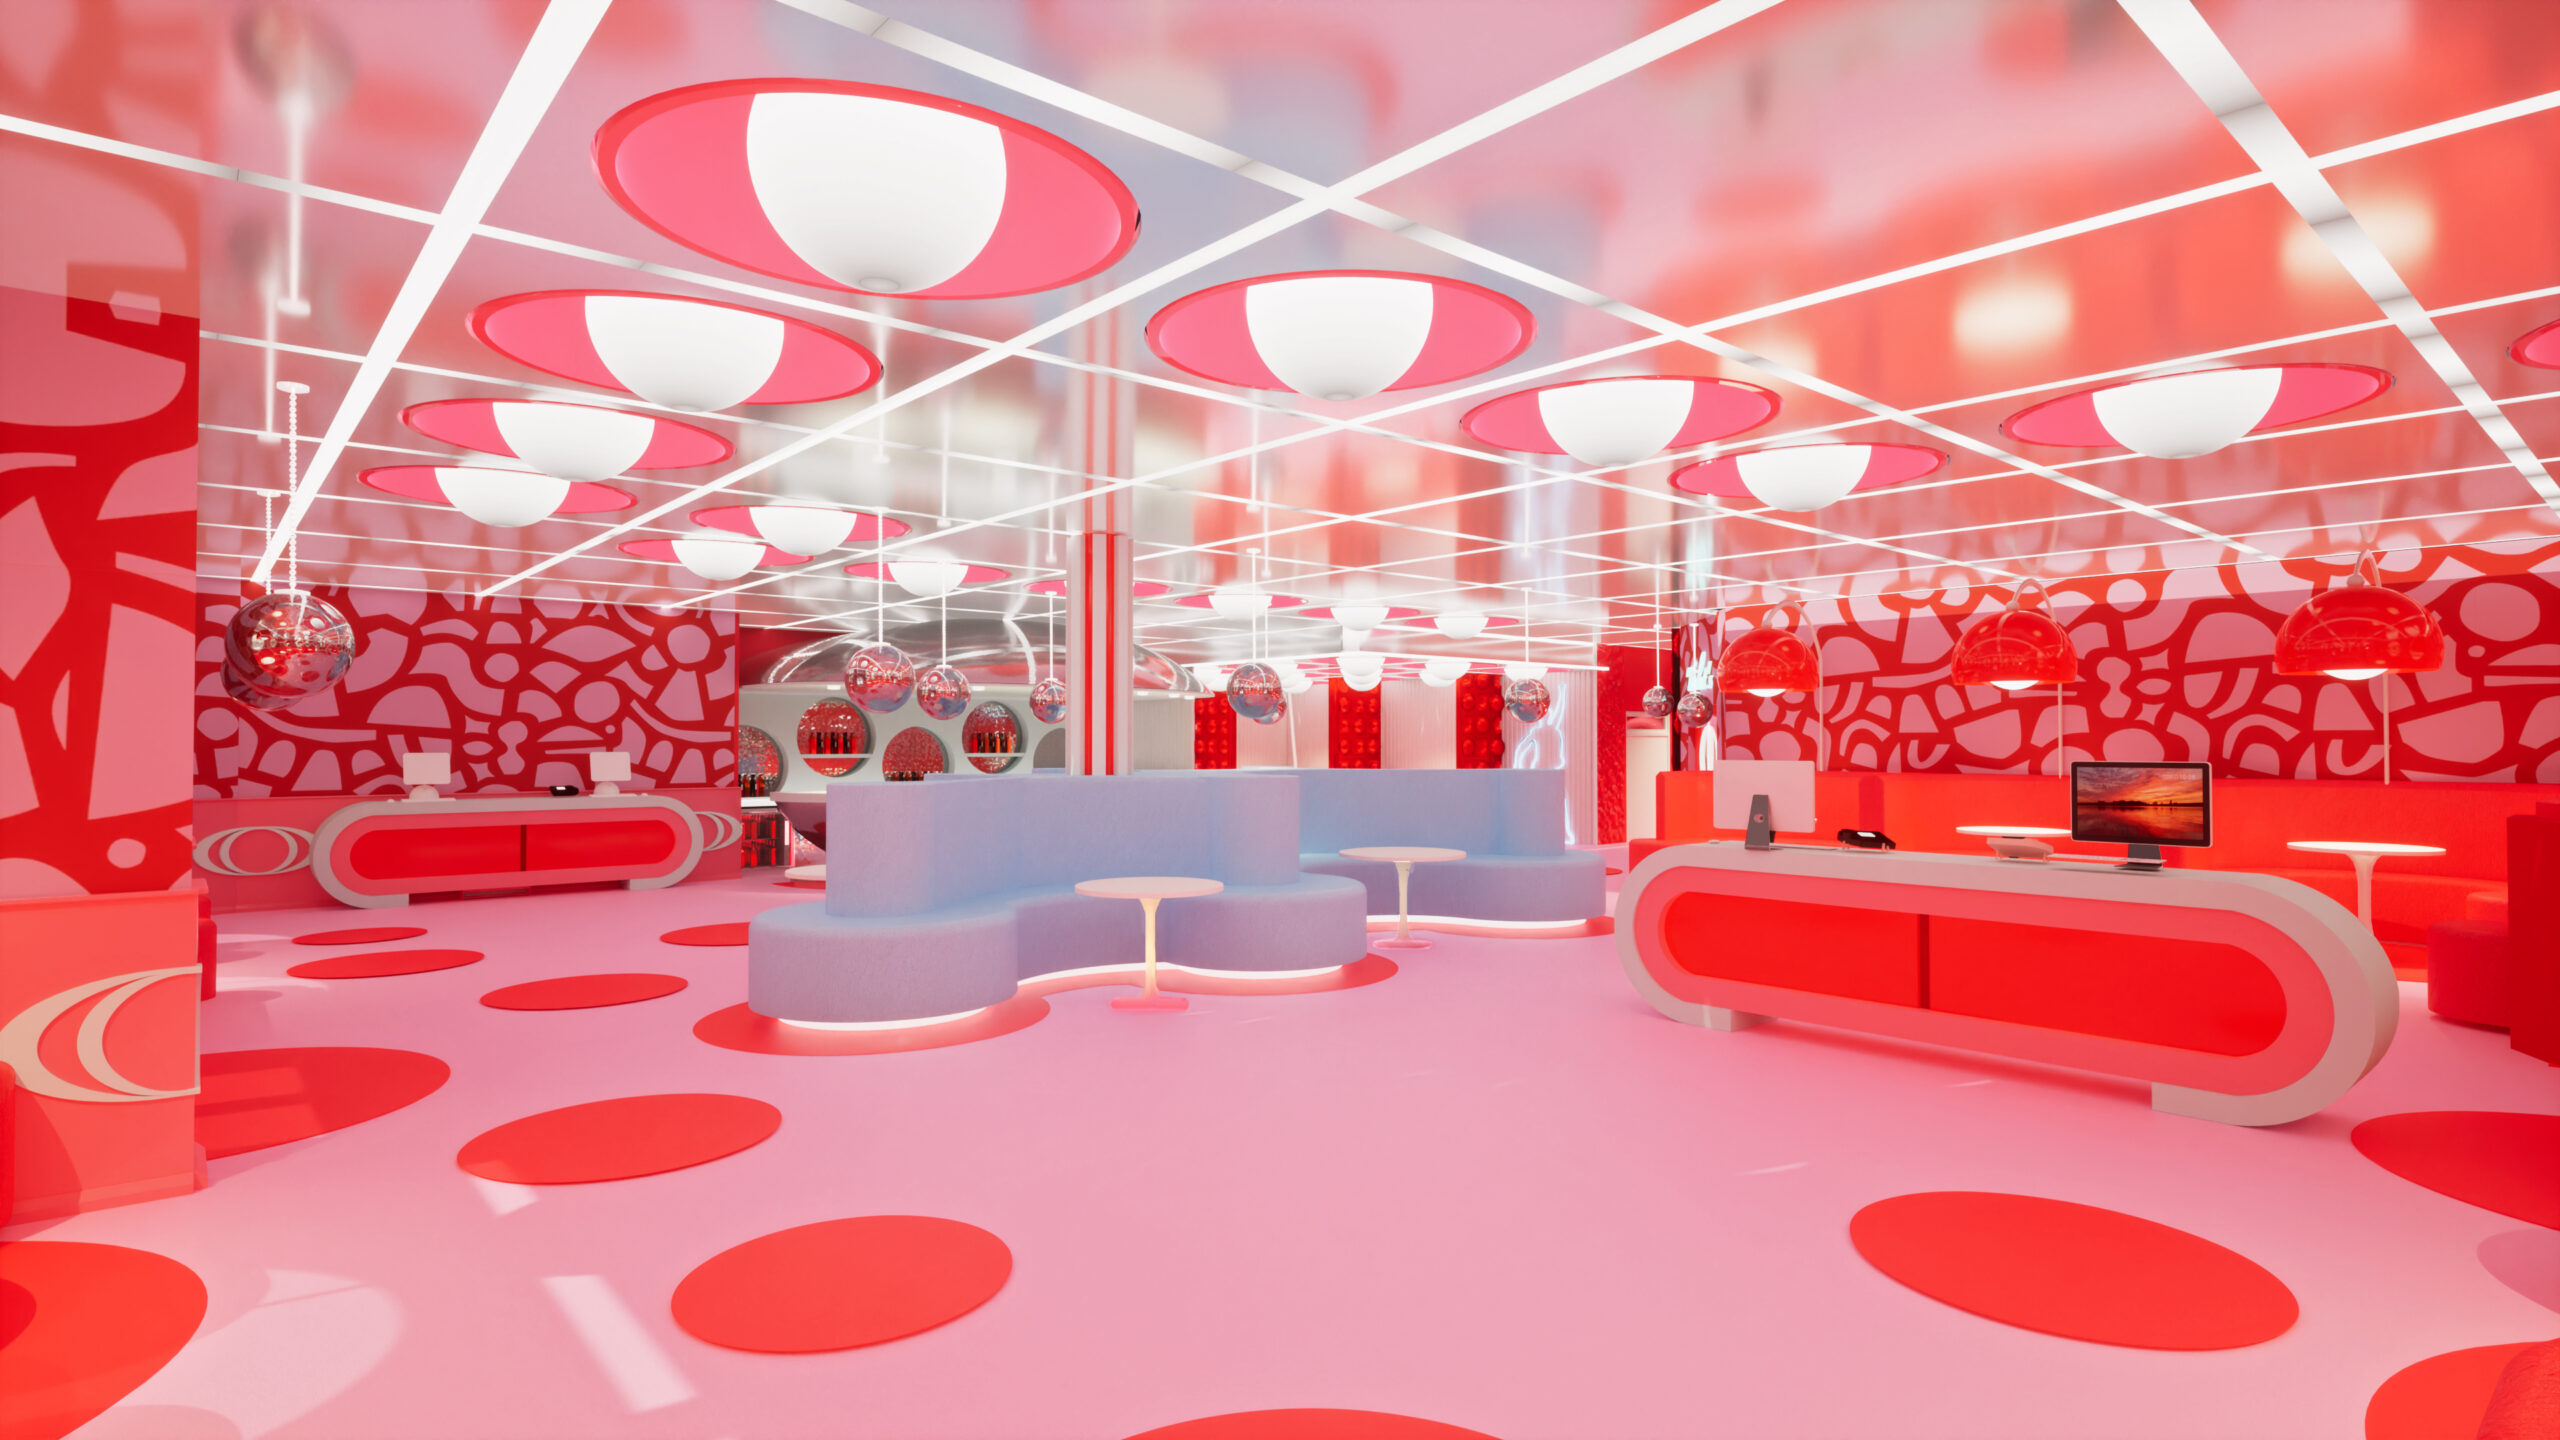
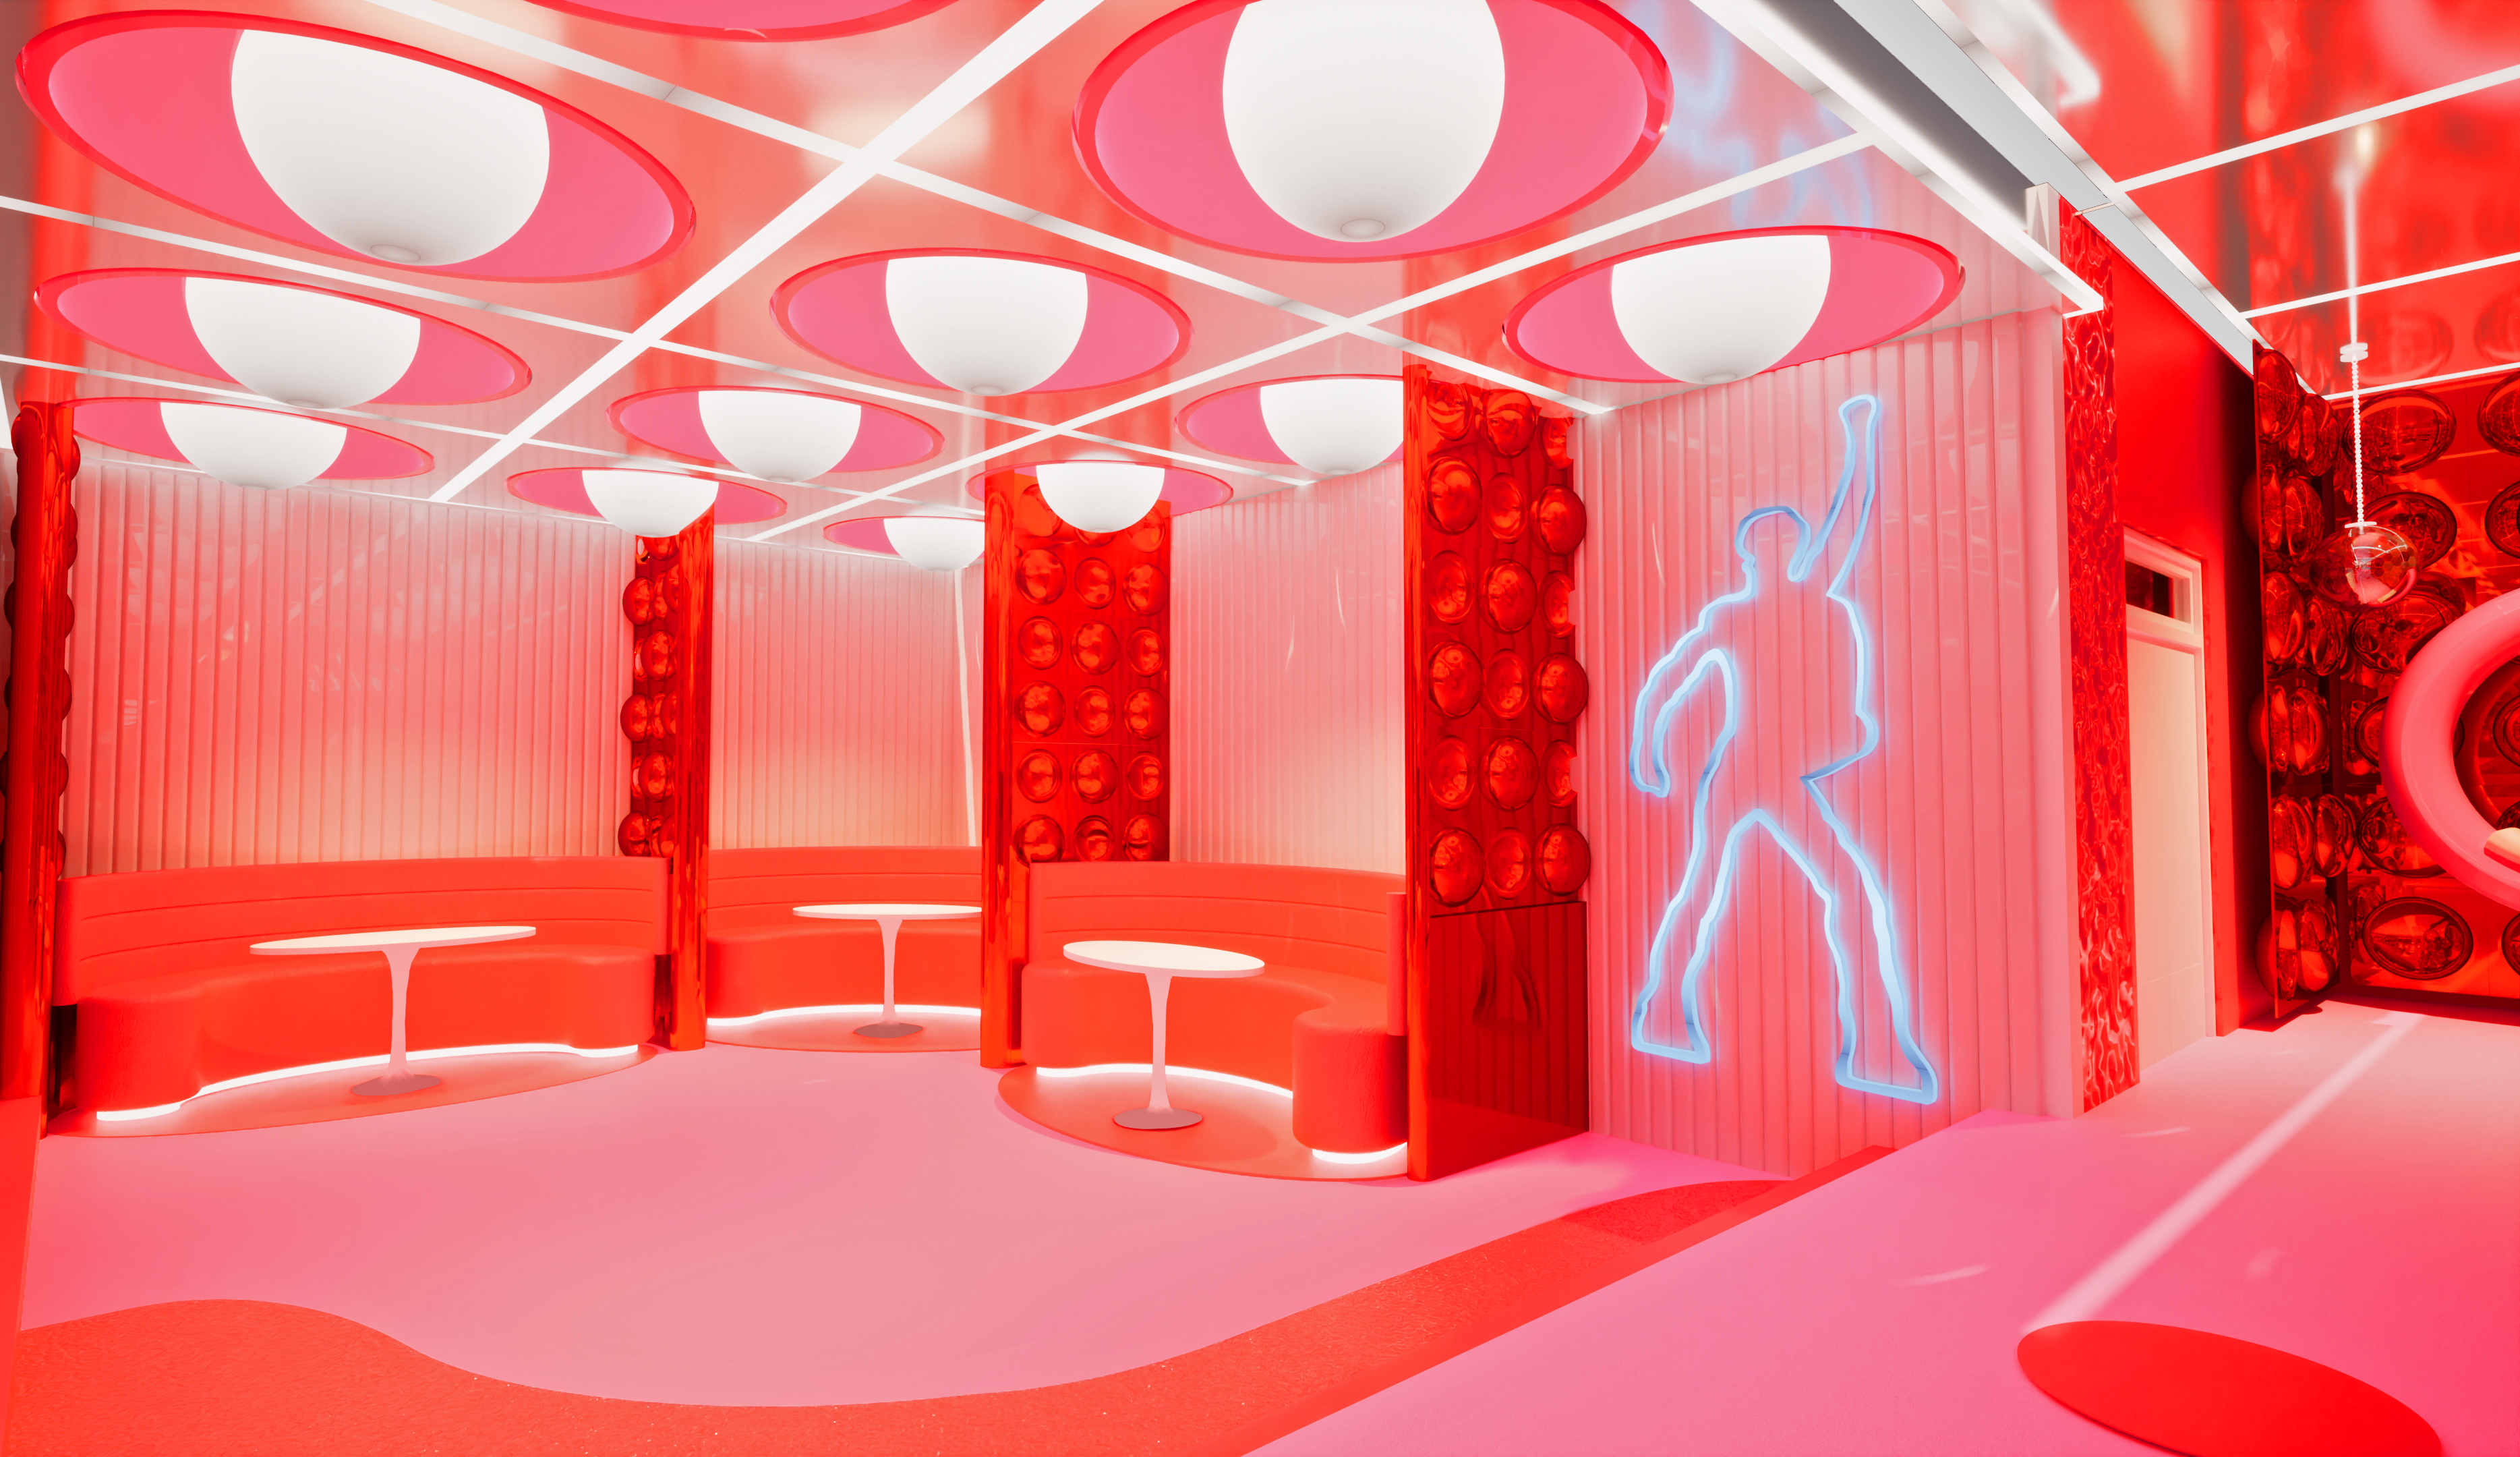
Jasmine uses TwinMotion to create her qwerky designs such as Freaky Deaky, a night club space created for New Designers 2022. 

If you have managed to get to here without being put off by the slightly strange title, congratulations on being so brave! Although it may suggest a provocative case study on today’s agenda, looks can be deceiving.

As a matter of fact, we are joined today by Jasmine Baldock, an interior designer with an eye for the freaky and funky, with her latest design, ‘Freaky Deaky’.

After studying Interior Design at Solent University and graduating with a first class degree Jasmine specialises in commercial design with a particular interest in hospitality design. Combine this with her side passion for marketing and the love of creating concepts for branding and social media campaigns and the end result creates some beautiful ‘instagrammable designs‘.

“I’d love to get to know the community more and the scale of the community itself, after recently attending New Designers in London this week I found that quite a few industry bodies either used or at least knew of Twinmotion and were incredibly impressed with the quality of the render.”

So, What is 'Freaky Deaky'

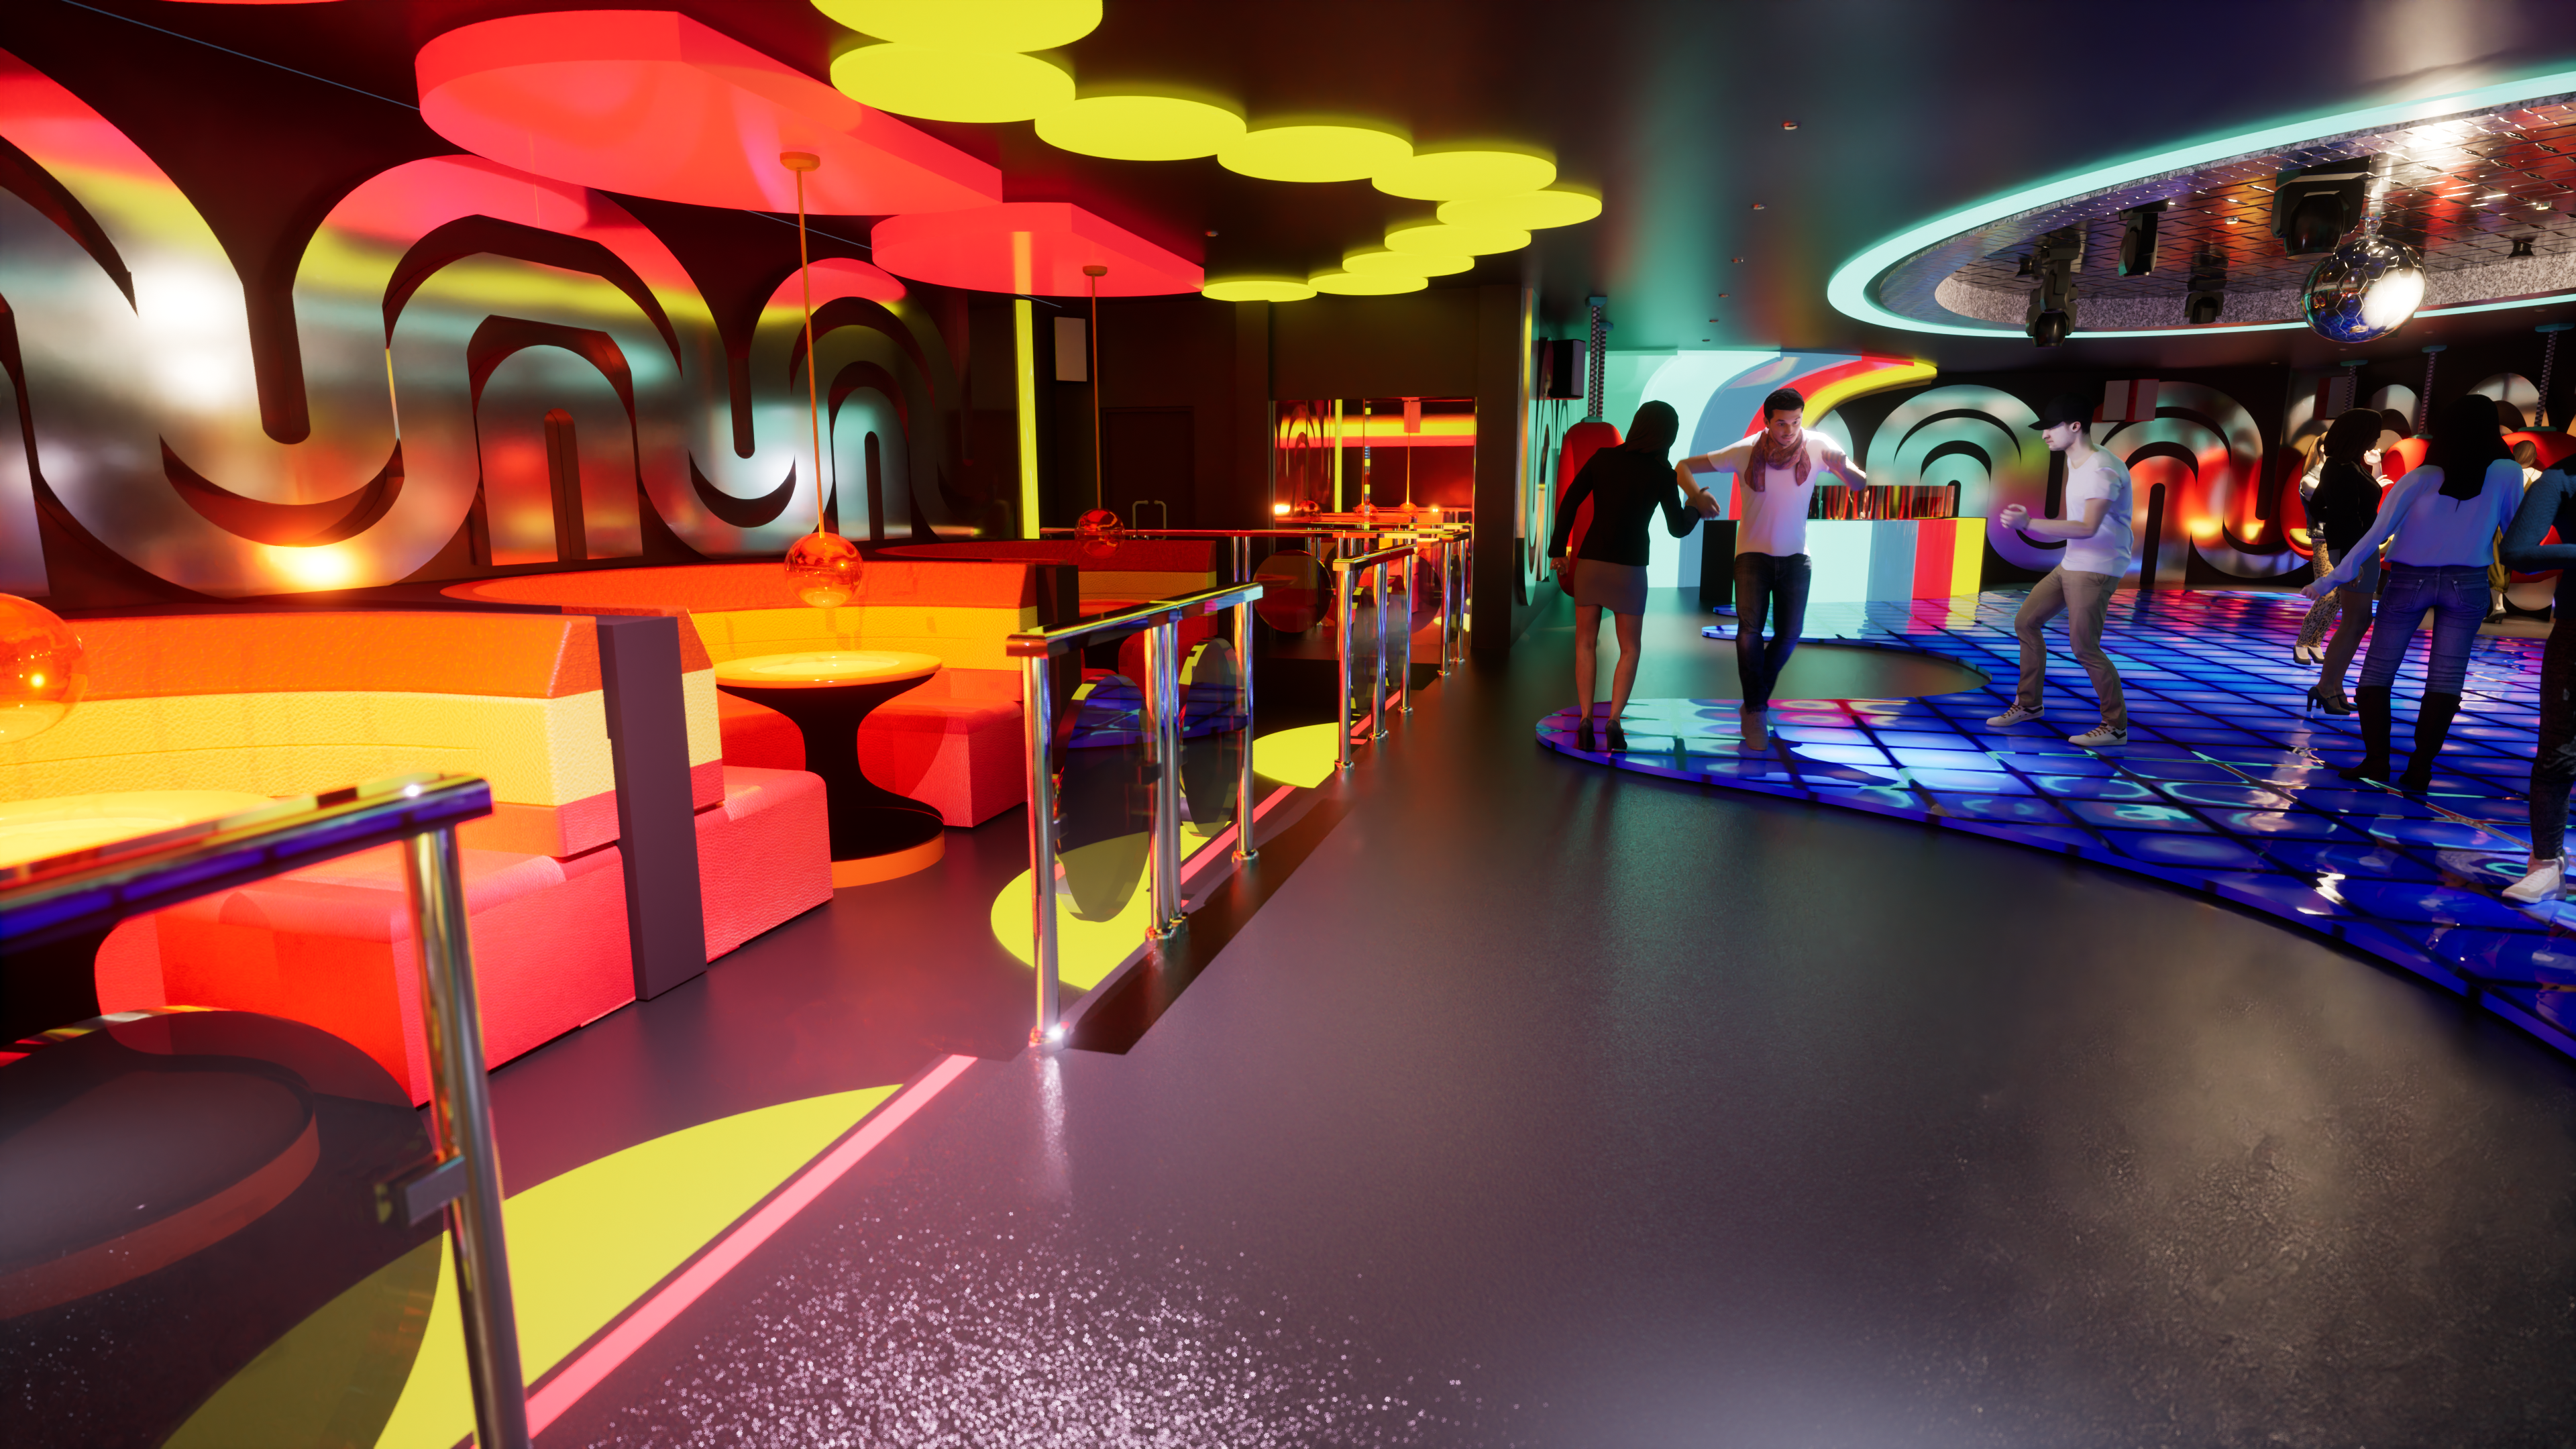
Freaky Deaky is a restaurant/bar nightclub set over two floors and over 1000Sqm between the two floors. The overarching concept behind the space was Disco, which developed itself into many mini concepts within the Disco concept, many of which can be seen here.

It includes a large restaurant seating around 80 customers on the ground floor, whilst the underground floor features a nightclub with a bar, VIP seating and an Instagrammable booth alongside a separate exclusive luxurious bar, referred to as The Sunken Bar due to its sunken seating design. 

Throughout this case study you’ll see plenty of rendered images of Freaky Deaky. These have been rendered in Twinmotion using various tools within the platform and spending some time playing around with the lighting to get the club effect.

Jasmine explained her workflow from concept to finished design rendered in Twinmotion

Usually it takes several weeks to develop a concept, with research and feedback – in this case it was disco which split into multiple concepts including artists from the disco era, typography, advertisement and iconic furniture.

From there it develops into sketches and 3D design where 99% of my 3D model is drawn out and built up myself. Once that is complete and my materials are all finalised I’ll then take the model into Twinmotion. The most important transformations are the material finishes and reflections and ensuring the lighting is realistic. 

“Twinmotion came into the end of my FMP project at university due to the quality of the renders, particularly the material finishes.”

Twinmotion 2022.2 is here!

This case study was created to celebrate what incredible things can be done with Twinmotion, and now there is much much more…

With the ability to render images and videos at very high resolutions (up to 64K), a new HDRI backdrop feature, and Sketchfab integration—giving you drag-and-drop access to over 660,000 free 3D models from the leading web platform—plus hundreds of new native assets, Twinmotion 2022.2 offers even more possibilities for high-quality visualization. 

There are also a range of productivity, interoperability, and performance enhancements, and better support for working with small-scale objects, such as consumer products. Meanwhile, Twinmotion Cloud continues to receive new features, including the ability to host much more complex Presentations and Panorama Sets. 

This upgrade is free to existing users. You can install it from the Epic Games launcher: log in with your Epic account, select the Twinmotion page in the Unreal Engine tab, and click Install above Twinmotion 2022.2, then follow the prompts to complete the process.

We hope you enjoy Twinmotion 2022.2! For more information, click here!

Create a SketchUp Floor Plan in Under 10 minutes

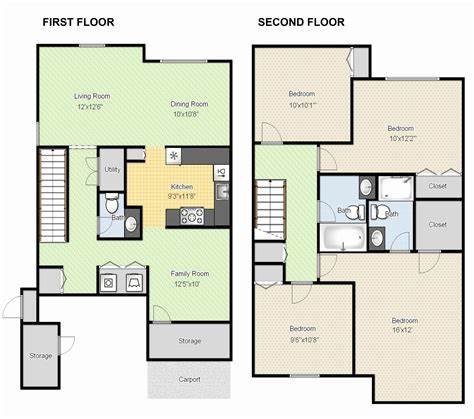
How cool is that! It has just taken you ten minutes to create a SketchUp 2d floor plan, and it’s perfect. SketchUp’s free floor plan software is quite something. It makes short work of drawing accurate floor plans to inspire fantastic interiors, and help you hit the right notes in your client brief. If you’re on a SketchUp learning curve, you can expect it all to be as easy, fast and exciting as this.

Get the basics right first time, every time. Design like a pro. Get the job done. Read on to find out how to make a SketchUp floor plan in less time it takes to make a hot drink. By the end of this article, and thanks to this very cool floor plan software, you’ll be fluent in 2d floor plans. Here we go.  

Creating 2D Floor Plans in SketchUp

Imagine there’s a project you’re keen to get going on. You want to get the essential bare bones of the plan, the 2D floor plan, drawn quickly and simply, then dive into the detail. You want the 2d drawing to reflect your vision exactly, with the right proportions and relationships. The drawing has to meet creative needs, and be practical too. When the thing you’re designing is going to be built in the real world, you need a solid foundation to build it on.


SketchUp is a powerful 3D modelling tool, a brilliant way to create fast and beautiful designs. It’s just as good at creating 2D plans. You’ll find every aspect of the software quick and easy, a professional-looking way to draw 2d floor plans, elevations, and every other two-dimensional element. Because it’s famously user-friendly, you’ll be making perfect 2D drawings in almost no time. Add the fact that SketchUp Layout converts 3D models into 2D plans and you can see why it’s such a cool tool.

A quick word about the free version. SketchUp floor plan free software has all the basics you need to find out about the way the programme works. You can create all sorts of things and enjoy a great choice of features and capabilities. SketchUp Pro gives you loads more. It’s packed with extras, a one-stop-shop for almost everything you want to do in 2d or 3d.  


Next we’ll give you step by step instructions on how to create basic 2D floor plans in SketchUp.

How to Create a SketchUp Floor Plan

Here’s our simple step by step 2D floor plan creation guide.

First, open a 2D template. You’ll want to use the plan / top down view from the SketchUp dropdown list of predefined 2D templates. Once you’re in the top down plan view, you can draw the floor. Your floor might be based on measurements you’ve made or been given, or taken from an existing drawing.

Next, use SketchUp’s floor plan software basic drawing tools to draw the floor. You’ll want to use the rectangle and line tools, both great for fast, easy floor plans. It’s really easy to define the dimensions, and you can zoom in and out of your floor plan using the mouse wheel.

Now, draw the exterior walls. This is your chance to get familiar with the offset tool, a really easy way to make realistic walls fast.  

Then create the doorway openings. You can either use the tape measure tool to set-up guidelines and dimensions / locations of the doorways, or add doorways to your exterior walls on the top down plan.

TIP: Use grouping to help you with the ongoing design. Groups in LayOut keep related elements of a design organised inside your drawing area. Grouping things together makes it so much easier to choose and copy multiple design elements at the same time. If you know you always want to use a shape and text box together, for example, make them into a group to save time moving them around. For the same reason, it’s also a good idea to give the exterior walls their own layer.

Next, draw the interior walls. Again, use the tape measure tool to create the right guides and dimensions. Use the rectangle tool to draw wall sections, and the erase tool to rub out unnecessary edges, for example interior doorways. Remember to collect all your interior walls into one group once you’ve finished them, and give this group its own layer to help you work even more efficiently.

Here’s when you can make a 3D model based on what you’ve drafted so far. It’s always an exciting moment bringing even the simplest drawing to 3d life.

Next, add the windows and doors. Either make your own custom components or use premade door and window components. Since this is a guide to creating a floor plan, you might want to focus on pre-made components for now.  

Once the room is complete, you can add furniture and fixtures components. The popular SketchUp 3D warehouse is a brilliant source of everything from chairs and tables to lamps and floor coverings, house plants and TVs. It’s also stacked with great 2D components to play with.

Now you’re ready to style your 2D layout before importing it into Layout, where you use it as the basis of an exciting 3D model design.

Can you see how easy it is to finish a simple 2D floor plan within ten minutes with SketchUp floor plan software? Now you’ve got the basics under your belt, you can start to get really creative. For more tutorials, click here


You can also see how to turn your 2D floor plans into 3D models here!

Getting Started with SketchUp

You’ve maybe heard about it on the grapevine. Perhaps it’s completely new to you. What is Sketchup? Are you researching sketchup for beginners? It’s a totally brilliant way to draw almost anything you like in 3D, loved by professionals and amateurs alike and popular in schools as a cool way to learn CAD.


It looks like you’re in for a treat with a Sketchup download. So how do you go about a   

Sketchup download of the free version or a Sketchup pro download? How do you use the Sketchup installer? What about troubleshooting Sketchup, and what do you need to know about Sketchup previous versions? Read on to find out. By the end of this article you’ll know exactly how to get the right version, install it, and troubleshoot your way out of any issues.

Downloading Sketchup

Let’s tackle the most important things first – here are the links to the Sketchup for Windows download and Sketchup for Mac download. Click on the link to start your download.


Sketchup installer is all you need. It works for all the available languages and downloads in the language you choose.


The free web version of Sketchup is another great resource, perfect when you want to test-drive the magic for yourself before downloading the full version. And as far as the remaining essentials go, here’s what you need.

Essential system files for Sketchup download 2022

If you’re going to download SketchUp 2022 for Windows you’ll need Visual C++ Redistributable for Visual Studio 2015 and Microsoft .NET Framework 4.5.2 on your machine. They might already be there. If not, SketchUp Installer will try to install them for you. You must be online for it to work.


If you’re on a Mac, you’ll need an internet connection to authorise SketchUp and use all the features. You must have QuickTime 5.0 installed, and the Safari web browser for multimedia tutorials.

What graphic cards do I need for Sketchup?

For Mac and PC we recommend you have the most up to date current drivers installed for your graphics card or cards. It’s also important to check your machine has the right hardware for Sketchup.

What hardware do I need for Sketchup?

Recommended hardware for Windows machines:


  •         A 2+ GHz processor
  •         A Discrete Graphics card, for example the latest generation AMD or NVIDIA
  •         8+ GB RAM
  •         2GB available hard-disk space
  •         3D class video card with 1 GB of memory or higher and support for hardware acceleration
  •         Your video card driver must support OpenGL 3.1 or higher, and be up to date
  •         You can test your graphics card’s compatibility by running the SketchUp Checkup application, free to download
  •         A 3 button, scroll-wheel mouse

The minimum hardware to run Sketchup pro download on a Windows PC:


  •         1 GHz processor
  •         4GB RAM
  •         1GB free hard-disk space
  •         3D class video card with 512 MB of memory or more, plus support for hardware acceleration
  •         Your video card driver must support OpenGL 3.1 or higher, and up to date


Recommended hardware for Macs:


  •         2.1+ GHz processor or current Apple M1 processor
  •         8GB RAM
  •         2GB available hard-disk space
  •         3D class video card with 1 GB of memory or more, plus support for hardware acceleration
  •         Make sure the video card driver supports OpenGL version 3.1 or higher, and is up to date
  •         A 3-button, scroll-wheel mouse


The minimum hardware to run Sketchup pro download on a Mac:


  •         2.1+ GHz Intel™ processor
  •         4GB RAM
  •         1GB available hard-disk space
  •         3D class video card with 512 MB of memory or more, plus support for hardware acceleration
  •         Make sure the video card driver supports OpenGL version 3.1 or higher, and is up to date.
  •         3-button, scroll-wheel mouse

How many devices can Sketchup be activated on?

A single-user licence or subscription is designed for one registered or assigned user, but they can activate their licence or sign in on two different computers.

How do I download Sketchup without the internet?

There are two versions of the SketchUp installer. One requires an internet connection, the other lets you install Sketchup without an Internet connection.

Installing Sketchup

It’s very easy to install Sketchup, a quick process you’ll probably be familiar with. Here’s how to install Sketchup on a Windows PC:

  •         Log in as an Administrator to open the Installer file you’ve downloaded
  •         Click Install to begin
  •         The Installer will show you a progress bar
  •         Click ‘Finish’ when it’s completed the job – this closes the installer
  •         It’s a good idea to reboot your computer after the installation is finished

It’s just as simple to install Sketchup on a  Mac:


  •         Make sure you’re logged into your computer as a user with Administrative powers
  •         Close down any existing application versions on your machine
  •         Double-click the Installer file
  •         Drag and drop the SketchUp icon into the Applications folder
  •         The progress bar reveals the install’s progress
  •         Go to the SketchUp folder and Double Click the SketchUp icon
  •         You might get a security message – if so, open it
  •         Close the Installer window
  •         Delete the Disk Image drive icon


How to install Sketchup updates:

You’ll need to update SketchUp regularly to get new features, bug fixes and more, and SketchUp does it all for you.  SketchUp regularly checks its servers during launch to make sure you’re always up to date. If there’s a new version available you’ll be notified. Most of the time all you need to do is download and install the update. But you can also check out the release notes first, skip individual updates if you like, and even avoid future notifications for a specific part of an update. And you can delay the option to update by asking for a future reminder.

Clicking ‘download and install’ kicks things off. You can monitor the download process and can also read the release notes at this stage, or set up a reminder. Once the download is finished, just click ‘continue’ and the latest version will download to your machine.

Activating Sketchup Pro

You’ve downloaded Sketchup Pro. Now you have to Open and Activate your Subscription Plan before opening Layout or StyleBuilder for the first time, simply so you can agree to the Licence Agreement. Once you’ve completed that, it’s time to open Sketchup.

Here’s how to do it on a Windows machine:

  •         SketchUp creates shortcuts on your desktop. You can also open it from C:\Program Files\SketchUp\SketchUp 2022 (or whichever version you have) by double-clicking on the program file

Here’s how to open Sketchup on a Mac:


  •         Go to the Applications folder
  •         Open the SketchUp folder of the version you want (2021, 2022 or whatever)
  •         Open the SketchUp or Layout application you find in the folder

Remember, to activate your Sketchup pro subscription you’ll need to be online. A single license can be used on a maximum of two computers. If you don’t see a welcome dialogue box, choose the help option.


You might opt for an annual subscription. This lets you pay once when you start, and use all the features in the subscription you choose for a full year. Sketchup is currently looking for cool ways to improve their choice of subscriptions, so keep an eye open for announcements.

Migrating from a Previous Version

What happens when you need to migrate to a new version of Sketchup?

Let’s explore Sketchup migrating for Windows first.

Migrating Materials & Components in SketchUp Windows

 Navigate to the root folder in SketchUp 8 and older. This is usually C:\Program Files\SketchUp\SketchUp 2013\Materials (or Components)

  •         Select the files in the Plugins folder
  •         Ctrl+C to copy the items
  •         Go to C:\Program Files\SketchUp\SketchUp #\Materials (or Components)
  •         Press Ctrl+V to paste the files
  •         If you’re asked to Merge the folders and Confirm Folder Replace, click yes
  •         The next choice is copy or paste. Choose Don’t Copy to keep the original file names  
  •         New content files are simply copied  
  •         You can choose Do this for the next ### conflicts to avoid having to approve loads of files one by one
  •         Open SketchUp and your new materials should be in the Materials dialogue box – and your new components will be in the Components dialogue box

Migrating Plugins in SketchUp Windows

First, migrate the extensions from Extension Warehouse:


  •         Open your newly-installed SketchUp
  •         Open Extension Warehouse and sign in
  •         Go to My Extensions by hovering over your username in the top right corner and selecting My Extensions
  •         The My Extensions page lists your installed extensions on other versions and installations of SketchUp
  •         Scroll through the list and install the extensions you want to bring to your new version

Next, migrate all your other extensions:

  • Figure out which extensions you use that aren’t in the Extension Warehouse
  • Find out where to download the current version of them, and reinstall them – usually from the  extension developer’s website
  • These files are usually things like renderers and hardware extensions you use for Sketchup, for example special mouse controllers

If a plugin needs a custom installer, you’ll have to contact the plugin developer for specific instructions on updating it to support the latest version of SketchUp. If you’ve ever copied and pasted .RB, .RBS, or .RBZ files into the SketchUp plugins folder, this is what to do:

  •         Open a new Windows Explorer window.
  •         Navigate to the root folder of the older version of SketchUp, for example C:\Users\USERNAME\AppData\Roaming\SketchUp\SketchUp 2021\SketchUp\Plugins
  •         Select the files in the Plugins folder
  •         Press Ctrl+C to copy them
  •         Navigate to C:\Users\USERNAME\AppData\Roaming\SketchUp\SketchUp 2022\SketchUp\Plugins
  •         Press Ctrl+V to paste the files
  •         Open SketchUp 2022 or newer
  •         Access the plugins the way you usually do it
  •         You might see older plugins that are not compatible with your current version of SketchUp. If so you’ll need to contact the plugin developer to find out what to do
  •         Remember some SketchUp plugins are not compatible with the current version of SketchUp – again, contact the plugin developer for help

What hardware do I need for Sketchup?

Recommended hardware for Windows machines:


  •         A 2+ GHz processor
  •         A Discrete Graphics card, for example the latest generation AMD or NVIDIA
  •         8+ GB RAM
  •         2GB available hard-disk space
  •         3D class video card with 1 GB of memory or higher and support for hardware acceleration
  •         Your video card driver must support OpenGL 3.1 or higher, and be up to date
  •         You can test your graphics card’s compatibility by running the SketchUp Checkup application, free to download
  •         A 3 button, scroll-wheel mouse

The minimum hardware to run Sketchup pro download on a Windows PC:


  •         1 GHz processor
  •         4GB RAM
  •         1GB free hard-disk space
  •         3D class video card with 512 MB of memory or more, plus support for hardware acceleration
  •         Your video card driver must support OpenGL 3.1 or higher, and up to date


Recommended hardware for Macs:


  •         2.1+ GHz processor or current Apple M1 processor
  •         8GB RAM
  •         2GB available hard-disk space
  •         3D class video card with 1 GB of memory or more, plus support for hardware acceleration
  •         Make sure the video card driver supports OpenGL version 3.1 or higher, and is up to date
  •         A 3-button, scroll-wheel mouse


The minimum hardware to run Sketchup pro download on a Mac:


  •         2.1+ GHz Intel™ processor
  •         4GB RAM
  •         1GB available hard-disk space
  •         3D class video card with 512 MB of memory or more, plus support for hardware acceleration
  •         Make sure the video card driver supports OpenGL version 3.1 or higher, and is up to date.
  •         3-button, scroll-wheel mouse

Migrating LayOut in Sketchup Windows

You can define the location where Templates, Scrapbooks and Pattern-Fills are stored with each version of LayOut in the Preferences dialogue box, which you’ll find under the Folders section.

Sketchup stores new Templates and Scrapbooks by default in the paths below. When you’re upgrading from an older version of SketchUp all you do is find the right folder, copy the contents and paste them into the new folder. Alternatively you can make a new folder anywhere you like, for example your Documents folder, and simply point LayOut to the location in the Preferences box.

  •         Templates – LayOut 2022 C:\Users\USERNAME\AppData\Roaming\SketchUp\SketchUp 2022\LayOut\Templates
  •         Scrapbooks – LayOut 2022 C:\Users\USERNAME\AppData\Roaming\SketchUp\SketchUp 2022\LayOut\Scrapbooks
  •         Pattern-Fill Images – There Is No User Folder

Now we’ll look into Sketchup migrating for Mac:

Migrating Materials & Components in SketchUp Mac

 Open a new Finder window

  •         Open the Go menu and click Go to Folder
  •         Enter the following and click Go: ~/Library/Application Support/SketchUp 2022/SketchUp, using the file for the version you have installed – 2020, 2021, 2022 and so on
  •         Select the files in the Materials folder and press Command+C to copy them
  •         Open the Go menu and click Go to Folder
  •         Enter the following and click Go: ~/Library/Application Support/SketchUp 2022/SketchUp – change the year if you’re using a different version
  •         If there’s no Materials folder, create one
  •         Press Command+V to paste the files

Migrating Plugins in SketchUp Mac

First, Migrate extensions from the Extension Warehouse:

  •         Open your new version of SketchUp
  •         Open the Extension Warehouse Window and sign in
  •         Navigate to My Extensions by hovering over your username in the top right corner, and selecting My Extensions
  •         The page lists the extensions you’ve installed in the past on other versions of SketchUp
  •         Install the extensions you still want to use

Second, Migrate all the other Extensions:

  • Figure out which extensions you use that aren’t in the Extension Warehouse
  • Find out where to download the current version of them, and reinstall them – usually from the  extension developer’s website
  • These files are usually things like renderers and hardware extensions you use for Sketchup, for example special mouse controllers

If a plugin needs a custom installer, you’ll have to contact the plugin developer for specific instructions on updating it to support the latest version of SketchUp. If you’ve ever copied and pasted .RB, .RBS, or .RBZ files into the SketchUp plugins folder, this is what to do:

  •         Open a new Finder window.
  •         Open the Go menu
  •         Choose Go to Folder
  •         Enter the following and click Go: ~/Library/Application Support/SketchUp 2021/SketchUp/
  •         Select the files in the Plugins folder – if you’re using a different version, change the year
  •         Click Command+C to copy them
  •         Open the Go menu
  •         Click Go to Folder
  •         Enter the following and click Go: ~/Library/Application Support/SketchUp 2022/SketchUp
  •         Press Command+V on your keyboard to paste the files.

Open SketchUp 2022 or newer and access the plugins as you have in the past. Note that there may be some older plugins that are not compatible with your current version of SketchUp. In this case, please contact the plugin developer for help.

Not all SketchUp plugins are compatible with the current version of SketchUp. Please contact the plugin developer if you need help.

Migrating LayOut in Sketchup Mac

The tilde sign or ~ at the beginning of each path means it’s a User Level folder, often laid out like this:  Users/USERNAME/. If a Templates or Scrapbooks folder doesn’t already exist you might need to manually make one.

You can define the location where Templates, Scrapbooks and Pattern-Fills are stored with each version of LayOut in the Preferences dialogue box, which you’ll find under the Folders section.

Sketchup stores new Templates and Scrapbooks by default in the paths below. When you’re upgrading from an older version of SketchUp all you do is find the right folder, copy the contents and paste them into the new folder. Alternatively you can make a new folder anywhere you like, for example your Documents folder, and simply point LayOut to the location in the Preferences box.

Templates

  •         LayOut 2022 ~/Library/Application Support/SketchUp/SketchUp 2022/LayOut/Templates

Scrapbooks

  •         LayOut 2022 ~/Library/Application Support/SketchUp/SketchUp 2022/LayOut/Scrapbooks

Pattern-Fill Images

  •         There Is No User Folder

You might notice, when creating your storage location under Preferences, every item is also stored in ‘Contents’. This is a System level storage location, not recommended for this context.

Here’s how to do it on a Windows machine:

  •         SketchUp creates shortcuts on your desktop. You can also open it from C:\Program Files\SketchUp\SketchUp 2022 (or whichever version you have) by double-clicking on the program file

Here’s how to open Sketchup on a Mac:


  •         Go to the Applications folder
  •         Open the SketchUp folder of the version you want (2021, 2022 or whatever)
  •         Open the SketchUp or Layout application you find in the folder

Remember, to activate your Sketchup pro subscription you’ll need to be online. A single license can be used on a maximum of two computers. If you don’t see a welcome dialogue box, choose the help option.


You might opt for an annual subscription. This lets you pay once when you start, and use all the features in the subscription you choose for a full year. Sketchup is currently looking for cool ways to improve their choice of subscriptions, so keep an eye open for announcements.

Troubleshooting a Trial Message After Buying Sketchup

So what about troubleshooting Sketchup Pro? There are two pro packages. The first is a classic licence with a serial number and authorization code. The second is a yearly subscription plan with no serial number or authorization code. Instead, it activates SketchUp with a sign-in.

How to troubleshoot your pro subscription? Check this:


  •         Is the end-user’s email address properly assigned or spelled wrongly?
  •         Did the end-user sign in with the wrong email address?
  •         Is the end-user having a sign-in issue?


How to troubleshoot a classic licence? That’s easy. All you do is enter your serial number and authorisation cod

Administrator: Performing a Silent Install

As the Administrator, you might want to perform a silent install. What is it, and why would you want to do that? SketchUp can be run silently for distributed installations but you won’t need to worry about it unless you’re deploying SketchUp on a large scale, when working with larger installations and a network licence.

A silent install is a procedure for the experts, a job for your network administrator. It describes what happens when an application is uploaded to a user’s computer without any dialogues or user input after it starts. This means once the installation begins the user can’t change or edit the installation process. You’d make a silent install because it’s the best way to update multiple machines at once without bothering users or users getting in the way of the process.

How would you install without an internet connection? You need to install these, which will automatically install if there’s an internet connection:

  •         Microsoft Visual C++ 2015-2019 Redistributable (x64) – 14.23.27820
  •         KB2999226 – Windows 7 Only
  •         Microsoft .NET Framework 4.5.2


You can also run the silent installer with default options: English as the language, C:\Program Files\SketchUp\SketchUp 2022 as the install directory.


  •         Download a SketchUp 2022 installer – the full installer includes all of the language packs
  •         From an elevated command line or script run: SketchUpPro-2022-0.exe /silent
  •         If using Windows 10, you can use the search box inside the Start menu. Type cmd then press CTRL + SHIFT + ENTER to launch the command prompt elevated
  •         No windows open while the install is running
  •         Give it a couple of minutes and SketchUp will be installed


How to run a custom installer? For customised installs, feel free to specify the language and/or the install destination path. Use FEATURES= to add languages and INSTALLDIR= for specifying your install destination.

Downloading Older Versions

What is Sketchup? It’s sheer brilliance at your fingertips whatever version you use. Plenty of you will be using the latest version of Sketchup. If you want to download Sketchup previous versions, here’s a list of links to older versions of Sketchup:


Download SketchUp Pro 2021


Download SketchUp Pro 2020


Download SketchUp Make 2017


A Look at SU Podium

It’s a lot like magic. Seeing the amazing su podium v2.6 plus rendering plug in doing its thing is inspiring. It’s just one of a load of exceptional plug-ins and extensions designed to boost creativity, speed up your workflow, and let you design ‘fantastic’ every time with ease and confidence. It’s ideal when you want to turn your SketchUp model into a stunning photo-real image with totally convincing lighting, material properties, reflection, and refraction.

So what’s it like in the wonderful world of SU Podium? What is SU Podium, and why will you love it? What are the features? If you’re researching the Podium Sketchup plugin, by the end of this guide you’ll know exactly how exciting it is. Improve your designs, love 3D design more, free your creative spirit… 

What is the SU Podium SketchUp Plugin?

What is SU Podium? Our philosophy is to simplify a dazzlingly good rendering process as much as we can. SU Podium is one of the ways we do it. It’s a dream when you want to transform your SketchUp scene into a beautiful photorealistic image efficiently. ‘Amazing’ is a pretty good word for the effect. 

The SU podium v2.6 plus rendering plug in uses a high-end, biassed raytracing engine. The software blends this with a physical sky system plus calibrated presets. The impressive level of care that’s gone into the plugin means SketchUp rendering is very easy, as well as fun. 

There’s SketchUp SU Podium plugin for both Mac and Windows machines. It’s not just a pleasure to learn. It’ll bring your drawings to sparkling life faster than ever. Rendering has never been so straightforward, or this convincing. Clients will see exactly what you’re proposing, lit realistically, either ambient or directionally. Breathtaking is the word.  

Why Use SU Podium

Why use the SU Podium SketchUp plugin? You’ll love the SU podium v2.6 plus plug in because it thrills your clients with its realism, adding real-world accents and character to every kind of design. You’ll have a great time learning to use it. All the clever code is under the hood so you don’t have to think – just build. There’s nothing like seeing a design in vivid 3d life, lit from any angle via multiple sources with absolute realism. When you achieve it in a short time, your creativity takes off.    

Give it a bit of experimentation and literally everyone can create beautiful, photo-realistic renders from SketchUp models without the frustrations you sometimes get with a new tool. SU Podium runs completely inside SketchUp, so you use the simple SketchUp features you’re already familiar with.

The whole process supports better creativity, saving time as well as well as giving you impressive results. SU Podium is intuitive to people who already use SketchUp.  As a beginner you’ll be amazed how easy it is. The interface and versatile presets cut your learning curve from months to hours. This is the way 3D design should be.

Doesn’t it sound great? Next we’ll detail the SU podium v2.6 plus rendering plug in features. Prepare to be inspired.

SU Podium Features

Together, the Su Podium features list gives you infinite lighting design choices, all with super-fast rendering across platforms. The latest version, SU Podium 2.6 version, comes with all this.

Raytracing and Global Illumination: SU Podium uses a photon mapping algorithm to give you the accurate raytracing and global illumination you need to impress clients, learn more, and inspire you onwards.

The impressive photo-realistic images you get give vibrant life to your work, letting others picture exactly what’s in your mind. The tech behind the magic doesn’t matter. As a user you just dive in and get going. Realistic reflection and lighting is yours in no time.

Lighting up exteriors and interiors: A drawing with flat lighting lacks life. Maybe you want to showcase your design by moonlight, in full sun, or at sunrise. The tool lets you design life-like lighting indoors and out, quickly.   


Artificial Lights: The sun and artificial lighting come with very different effects. One size never fits all. When you add artificial light to a design in the right way it adds context, deepening the experience for the people who see your work.

Podium Browser: Podium Browser is a huge component library with more than 30,000 high quality models and photo-realistic Podium materials. They’re render-ready in SketchUp using SU Podium. You get Podium Browser with SU Podium V2.6, or buy separately. Save time, save hassle, fire up your imagination.


Post Processing with Podium Image Editor: Podium Image Editor is a comprehensive, feature-rich 2D image editor that works inside SketchUp. You make fast, easy edits to SU Podium generated images including lighting, adding background, blending with other images, cropping, overlays, and more. The result is stunning images designed to make an impact.


Panoramic Rendering: The SU Podium Panorama feature creates awesome 360° X 180° panoramic sphere images of rendered equi-rectangular images. It means you and your clients can experience your finished panorama VR in a powerful virtual 360 spherical environment, on any device. Go the extra mile like this and your designs are even more convincing.   

Multi-Threading: SU Podium’s multi-threading feature takes advantage of CPU cores and threads by doing multiple things at once, saving resources. It isn’t a hybrid render-engine. If you’d like a GPU based solution, we recommend ProWalker GPU powered by NVIDIA Iray.

Cross-platform accessibility: SU Podium V2.6 supports Windows and Macs. We provide support for SketchUp 2017 (Windows only) 2018, 2019, 2020, 2021, and 2022. If you use an older SketchUp version, install SU Podium V2.5, backward compatible to SketchUp 2014.


For loads of tutorials in SketchUp and SketchUp plugins, go here. To find out about SketchUp Pro, click here.

SU Podium Free Trial

Do you want to experience it for yourself? Great! There’s a SU Podium free trial available. Here’s how to test-drive the plug-in for a full 7 days, for nothing.  Go here to download our free, 7 day free trial version of SU Podium.

As an existing SU Podium user, you can download the Trial version and activate your licence using your SU Podium licence code.

It’s easy. Just enter your name and e-mail address. We’ll add your email address to the SU Plugins What’s New e-news database, sending you a newsletter twice a month.

Our What’s New emails announce news and updates for SU Podium, Podium Browser, and Podium Walker, plus tips and tutorials for photo-realistic rendering in SU Podium. You can opt out and unsubscribe from the e-news database any time you like.

Architextures is a fantastic way to make custom textures, and visualise scenes with textures. Another of the best SketchUp plugins. It’s free. You’ll find it in the Extension Warehouse, developed by Architextures in collaboration with KG-dev. The pro version costs $70.

This is how you make and edit a multitude of seamless textures, bump maps, and hatches. It’s perfect for Interior Design, Architecture, and Landscape Architecture projects. You create your textures using the Architextures web app directly in SketchUp.

Import materials instantly. Test material options for your design without downloading. No need to import and scale materials manually. Edit the textures you’ve imported later, simply right-clicking on a face with the material assigned then selecting ‘Edit with Architextures’.

10 Awesome SketchUp Plugins That Will Up Your Modelling Game

Your SketchUp designs are already pretty awesome. Now you’re going in search of the best SketchUp modeling plugins, those tasty extras that make designing more enjoyable, more creative, even faster and even easier. There’s an enormous choice, so how do you pick the most awesome of all? Here are the very best free SketchUp plugins, each created to support stunning renditions of the real world in digital form.

You’ll be able to model simple and complex curved surfaces with confidence, and use SketchUp native tools on them. You’ll bend groups and components, and slice models into specified pieces before preparing them for cutting. You’ll find it easier to create geometry, easier to make fantastic render-ready assets like plants, grass, rocks, 3D people, homewares, lighting, art and furniture.

Custom textures, visualising scenes with textures, creating rails, stairs, columns, walls, doors, or windows, it’s all simple with SketchUp modeling plugins. You’ll be fluent in making roofs, beams, rafters, roof tiles, shingles, rooftops and their parts. And you’ll optimise models in SketchUp like a pro. Read on to find out the best plugins in SketchUp.

Best SketchUp Plugins

SketchUp plugins, also called extensions, are simply tools to help make SketchUp even easier, more flexible, faster and more fun. They boost productivity, deliver cool short-cuts, and add extra functionality. The best SketchUp plugins have a variety of powers and capabilities, but they’re all intended to free your creative spirit by doing most or all of the work for you.   

We know the enormous choice can be a bit bewildering. Where do you start? A good spread of functionalities will help most designers, new and experienced, do more. Here are ten of the best free SketchUp modeling plugins, all available to play with for nothing. Fire up your imagination with these cool extensions.  

Soap & Skin Bubble

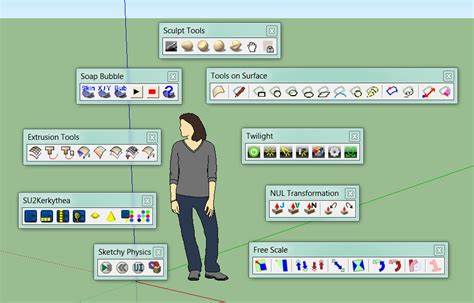
Soap & Skin Bubble is brilliant for modelling curved surfaces in no time, beautifully. It’s free, which makes it even more desirable. Available on the Extension Warehouse, as well as via the SketchUp Extension Manager plugin, it has been developed by Josef L.

The free plugin lets modellers like you make a multi-faceted face inside a closed group of three or more lines easily and fast. All you do is choose the lines, start the plugin, tell it how many faces you want, then watch it happen. You can also inflate and deflate the finished new face. Soap & Skin Bubble is especially good for organic-shaped models.  No wonder it’s one of the best free SketchUp plugins.

Tools On Surface

Tools on Surface does what you expect quickly and perfectly, as well as free. It lets you use SketchUp native tools on curved surfaces, giving you a wealth of options and flexibility to morph curves in extraordinary ways. Find it at Sketchucation.com, developed by Fredo 6.

A suite of clever little tools for drawing on curved surfaces, you can draw using lines, various shapes, offset, and freehand / polyline. There’s a nifty inference mechanism, a nice Contour Editor, and the plugin’s own dedicated Eraser. Version 2.5 comes with a performance contextual menu.  

Flowify

Flowify is one of the best SketchUp plugins. It lets you bend any group or component created in SketchUp in a multitude of ways, enriching the creative experience by opening up a whole new way to draw groups of objects. Another freebie, you’ll find it on Sketchucation.com. The developer is Anders L.

Flowify is the SketchUp equivalent of Rhino’s command FlowAlongSrf, created for work on rectangular quad grids. Inputs to the extension are groups or components of source geometry. The support group is laid out like this:

  • Group with projection plane – Your projection plane is either an empty rectangular face or a flat custom-made quad grid, with the same topology as the target surface.

  • Group with target surface – The target surface is a rectangular quad grid with four distinct corners.
  • Group with connection edges – The connection edges (or when they intersect, the construction lines) connect two adjacent corners on the projection plane with two on the target surface

Slicer

Another of the best SketchUp plugins, QuadFace Tools makes it really simple to create geometry, however complex the project. A plugin that saves an enormous amount of time and effort, this collection of tools harnesses pseudo-quad modeling in SketchUp. It’s available free on both Extension Warehouse and Sketchucation.com, and it has been developed by ThomThom.

QuadFace Tools

3D Bazaar lets you make brilliant render-ready assets like plants, grass, rocks, 3D people, housewares, lights, artwork and furniture. It’s free to use and offers a choice of paid-for assets costing anything from $5 to $180. You’ll find it in the Extension Warehouse, developed by Lindalë.

Basically it’s a large SketchUp model repository full of top quality render-ready assets for SketchUp. Think plants, furniture, 3D people and masses more. You save time and effort finding models online, then setting them up in SketchUp. It’s all done for you, and the collection is updated monthly.  

This is high-quality render-ready with no setup. Every single 3D Bazaar Marketplace asset has been developed with care and attention to detail. They’re all render-ready out of the box. All you do is decide on proxies or standard geometry, then click Import.

One of the very best free SketchUp modeling plugins, it supports the big three V-Ray, Enscape, and Thea renderers, and most of the assets are renderer-compatible. You can render in parallel with a single import. 3D Bazaar finds and re-links every map and proxy for you. Just drag, drop, and begin rendering, whether it’s assets downloaded from the Marketplace or files on your machine.

The advanced search engine organises your local library and finds the asset you’re looking for quickly. Your entire collection is indexed for search by model name, description, and more.

Architextures

Architextures is a fantastic way to make custom textures, and visualise scenes with textures. Another of the best SketchUp plugins. It’s free. You’ll find it in the Extension Warehouse, developed by Architextures in collaboration with KG-dev. The pro version costs $70.

This is how you make and edit a multitude of seamless textures, bump maps, and hatches. It’s perfect for Interior Design, Architecture, and Landscape Architecture projects. You create your textures using the Architextures web app directly in SketchUp.

Import materials instantly. Test material options for your design without downloading. No need to import and scale materials manually. Edit the textures you’ve imported later, simply right-clicking on a face with the material assigned then selecting ‘Edit with Architextures’.

MAJ Rail & Column

MAJ Rail and MAJ Column are some of the Best free SketchUp plugins for creating rails and columns. They’re free to use and you’ll find them in the Extension Warehouse, developed by Majid M.

The MAJ collection of plugins helps designers create quickly and efficiently. It comes with an impressive free plugins list:

  •         MAJ Beam for beams
  •         MAJ Column to make columns quickly and efficiently
  •         MAJ Wall for drawing walls with 3 different layers
  •         MAJ Door to make doors to go in your MAJ walls
  •         MAJ Window to make windows for your MAJ walls
  •         MAJ FollowMe for making 3D shapes simply, choosing a face that follows the mouse pointer
  •         MAJ Rail to make three different types of rail
  •         MAJ Stair for 4 different thicknesses of stairs

There’s also a collection of paid extras for making Cornice, Wall Interiors, Baseboards, and Floors in one click. You can make amazing halogen lamps on Knauf. The paid version lets you enjoy unlimited face list and face rotation, and it also comes with six different types of rails.

MAJ Column creates square and rectangular concrete columns including rebars, stirrups, and material information, making it a great choice for 3D Printing and Architecture in particular. Create columns and column components quickly and easily.

The plugin asks you for information about the column: Column length, width, or height. You can also specify Column to Zero, Rebar Size, Rebar Number, Stirrup Size, Stirrup Distance, Neck Top and Neck Bottom. And it saves the information so your ‘last column’ is always there for you.

Once you’ve confirmed your specification, select the first and second points for the column. The first point gives you a view of the column body. Columns, rebars, and stirrups are made in the Foundation Tag. Look in the Info tag for Concrete Volume, Rebars Length, Rebars Volume, Stirrups Length, and Stirrups Volume. If you don’t need rebars or stirrups, all you do is select ‘zero’ size.

MAJ rails is just as simple to use, allowing designs of a multitude of rails for all sorts of projects.

CleanUp

CleanUp is what you need to optimise your models in SketchUp. It’s free, available at the Extension Warehouse and developed by ThomThom.


The plugin quickly fixes duplicate component definition names when in model scope. It’ll purge the items you haven’t used, and get rid of hidden geometry. It erases duplicate faces, gets rid of lonely edges unless they’re on a cut plane, and removes edge material.

Use the tool to repair split edges, smooth and soften edges, put edges and faces to Layer0, merge identical materials, and merge connected co-planar faces.

Instant Roof

The Instant Roof plugin is used to create roofs, beams, rafters, roof tiles, and shingles, basically every sort of rooftop as well as rooftop parts. It’s free, available at the Extension Warehouse, developed by Chuck Vali. It’s a fabulous way to create roofs, beams, rafters, roof tiles, shingles and more, particularly handy for Architecture and Landscape Architecture projects.

You can achieve such a lot with Instant Roof:


  •         Create gable, Hip, Shed, Mansard, Dutch Gable, Split-Pitch and more roof types – Choose from many preset options or create your own custom library including custom roof style images
  •         Make Boxed-in, Exposed, and Soffited eaves – it supports multiple eave heights
  •         Create Hips, Rafters, and Beams and decorative trusses with decorative end profiles from lines or faces
  •         Make corbels for flat soffits
  •         Includes a dormer component maker tool and Cornice Mouldings for flat soffits
  •         Comes with 14 presets – or make your own profile Beam Ends at Gables and Dutch Gables
  •         Optional Underside of Roof Greek Returns and Queen Returns at Gables Bird Blocks: Add angled or plumb (for eave rafter tails, not for full roof framing)
  •         Dutch Gable Styles: Choose from many preset styles or create custom user style library including custom style images
  •         Choose from many predefined Beam, Hip, and Rafter end profiles
  •         Align Material Textures on Eaves, Rafters, Beams, and Hips
  •         Roofing Gutters: Choose from predefined gutter profiles
  •         Use Mission Tile, Roman tile, Flat tiles, Shingles, Standing seams, and more
  •         Make Mission Tile bird stops and Ridge Closures
  •         Apply Variegated colour roof tiles and Shingles
  •         Reapply, Change or Delete Materials as a separate operation from creating your roof or roof detail Supports all SketchUp units, Metric, and Imperial
  •         Take offs and a take-off log

·         Cad Fixer included