
LayOut is one of the most underrated features in SketchUp, and we’ve always wondered why. If you’re not using LayOut, you’re missing out on a lot of potential!
2D drawings do get the job done when it comes to presenting work to clients. However, LayOut can make your design come to life by transforming SketchUp models into impressive diagrams, scaled prints, CD sets, and more.
Better yet, LayOut makes the presentation itself less nerve-wracking. This nifty tool even has intuitive presentation features so you can focus on your material, not on the logistics.
We want more people to see the value in LayOut, so we’re showing it some love in this post! Read on to find out what LayOut is, what it can do, and why it deserves a place in your design workflow.
What is LayOut
SketchUp is one of the best tools out there when it comes to creating 3D models. Still, creating an outstanding design is one thing. Having the collateral to show it off is another.
That’s where LayOut comes in – this brilliant tool was developed to help designers, architects, and other creatives communicate their work through detailed and beautiful 2D architectural documents. In other words, it takes your SketchUp models and turns them into presentation-ready 2D drawings, diagrams, prints, and more.
LayOut is built into SketchUp Pro, so you can’t use it without SketchUp. There’s no separate LayOut app, extension, or plugin.
That’s because they’re a team – SketchUp models and LayOut drawings work together to create stunning, comprehensive design documents.
LayOut Features
Once you start using LayOut in SketchUp, your days of wrestling with 3D models and trying to get them to look right in a 2D document are behind you.
Here are some of the features that make LayOut such an incredible design tool:
1. Automatic and dynamic updating
Every page you create in LayOut is connected in real-time to your SketchUp model.
So, if you make a change to your SketchUp file, it’ll automatically update in LayOut – no need to go in and make changes manually. It’s a massive time-saver, and you don’t have to worry that your LayOut documents are ever out-of-date.
2. Vector drawing tools
LayOut comes with a handy set of vector drawing tools. This means you can add text, dimensions, arrows, and other markups to your LayOut documents – all without having to leave the program.
This is also convenient during a presentation, when clients and other stakeholders might have questions or suggestions about your design.
3. Print and export HD documents
Once you’re done putting together your LayOut document, you can print it out in high resolution or export it as a PDF, image, or CAD file.
Every single detail in your design will be captured, so you can be confident that everyone who sees your documents will be seeing your best work.
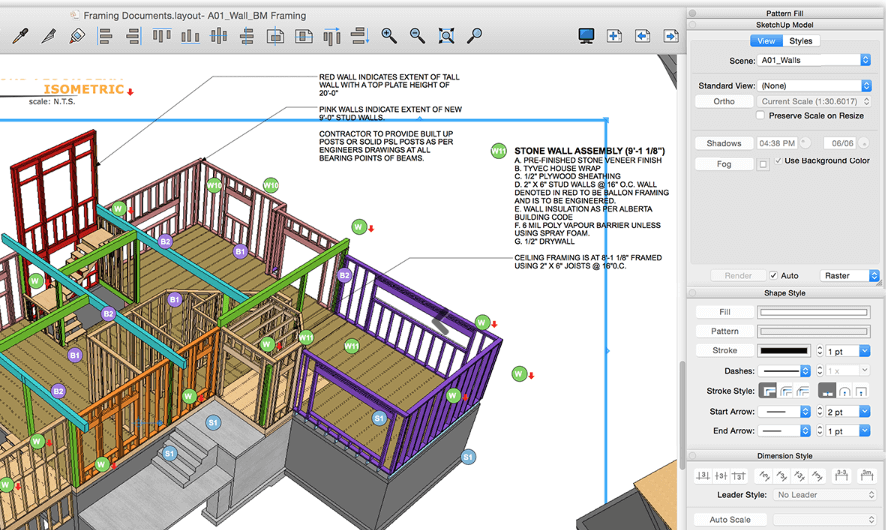
4. Annotate and explain in real time
LayOut for SketchUp empowers you to present your work as dynamically as you design it. In addition, you can annotate it with whatever you need – materials, lineweights, dimensions, callouts, and more – to ensure that your designs are clear and easy to understand.
5. Produce construction docs
If you’re an architect or construction professional, LayOut was made for you. With its powerful tools and dynamic updating, you can easily create construction documents at each stage of the design process. No more missed details or out-of-date drawings – just accurate, reliable construction docs that everyone can understand.
As you can see, LayOut doesn’t just complement SketchUp. Instead, it amplifies its capabilities and creates a better experience for both you and your clients.
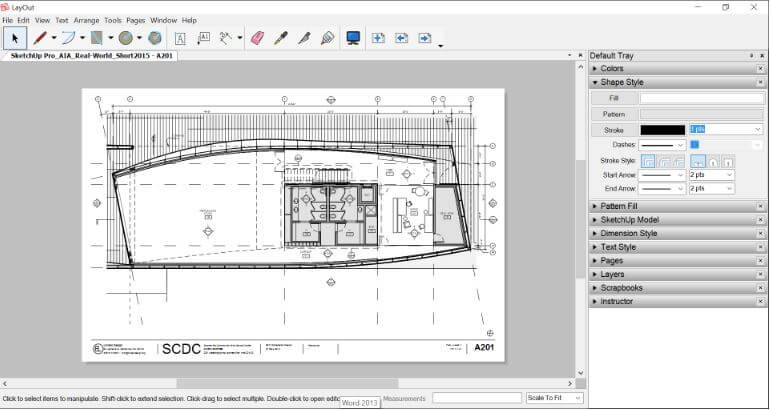
The LayOut SketchUp Interface
Aside from being helpful, LayOut also happens to be easy on the eyes. The interface is designed for intuitive use, so you can focus on your work and not worry about how to use the program.
Here’s a quick tour of the LayOut interface:
- The Menu bar: This is where you’ll find most of LayOut’s available commands, including those for adding and arranging elements, navigating pages, and more.
- The Default toolbar: You’ll find the most common design tools here, such as Select, Line, Text, Label, Erase, Style, Join, and Start Presentation.
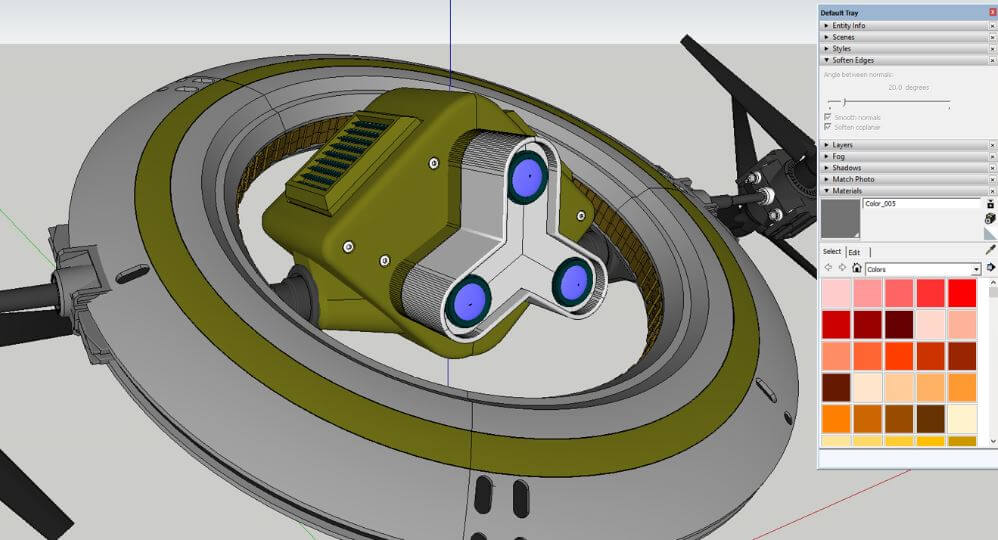
- The Document area: This part is where the magic happens – the Document area is where you SketchUp images and models go. After inserting them, you can then add dimensions, text, shapes, and anything else you need to create your final design.
- Tray and Panels: If you look at the right side of LayOut’s screen, you’ll see panels that appear to be stacked on top of each other. These panels are how you access various options for fill, text and dimension styles, etc.
- Status bar: At the bottom of LayOut’s window, you’ll see a gray box. This is the Status bar. On the bar’s left side are helpful tips for the tool you’re currently using. On the right, you’ll find the Zoom menu and the Measurements box. We recommend making a habit to glance at the Status bar every so often – it lets you know every time your document is autosaved by LayOut.
- The Zoom Menu: Being able to zoom in and out is important when you’re working with detailed designs. The Zoom menu is how you do it in LayOut. Select your preferred zoom value from the menu or use one of the other zoom options, such as Zoom To Page, Zoom Selection, and more.
- The Measurements Box: The Measurements box displays the coordinates for the current position of your mouse cursor, as well as the dimensions of any selected entity. You can also use the Measurements box to input specific values for entities, such as lines, rectangles, and polygons.
Those are the basics of the LayOut interface. To give you an even more personalized experience, LayOut developers even made it possible to customize the toolbar based on your workflow and preferences.
You can make the toolbar icons smaller or bigger, add your favorite commands to the LayOut toolbar, establish global preferences for backups, companion applications, startup templates, folder locations, and so much more!
Creating Documents in Layout
Are you ready to start creating in LayOut? Let’s take a quick look at how to create a new document in LayOut and how to insert a SketchUp model into the document you created:
To create a new LayOut document:
- First, open LayOut. You’ll see the Welcome dialog box.
- In the Welcome dialog box, you’ll be able to select a LayOut template.
- Next, adjust document settings like orientation and paper size.
- Once you’re happy with your settings, save your LayOut document.
To insert a SketchUp model into your LayOut document:
- First, go to the LayOut document where you want to insert the SketchUp model.
- Then, from the menu bar, select File > Insert.
- After that, an Open dialog box will appear. Navigate to the file for your SketchUp model and click Open.
- Next, after inserting the SketchUp model into your LayOut document, you can now start designing it to put the spotlight on the best features of your 3D models.
- Need to update or change the SketchUp model? Simply go back to SketchUp, make your changes, and then update the model in LayOut. All your changes will be synced automatically!
Finally, it’s time to show off your work to the world (aka your clients). This is perhaps one of our favorite things about LayOut – it makes giving presentations a breeze!
You can present the design right from LayOut itself. Access this feature by selecting View > Start Presentation. You can also use the default toolbar and click on the Start Presentation icon.
Clicking either of these options will take your LayOut document full screen. Now you’re ready!
Play animations, navigate seamlessly between pages, and change the view of inserted SketchUp models – all with just a few clicks. In addition, you can control every aspect of your design, from the camera angles to the annotations, so you can be sure that your audience is seeing exactly what you want them to see.
Wrapping It Up
We’re excited for you to see how much LayOut can do for you. With its user-friendly interface, brilliant tools, and customisation options, we’re confident that LayOut will help you work smarter and have fun while you’re doing it.
Still have questions about LayOut? Watch our tutorial on Getting Started with LayOut!

