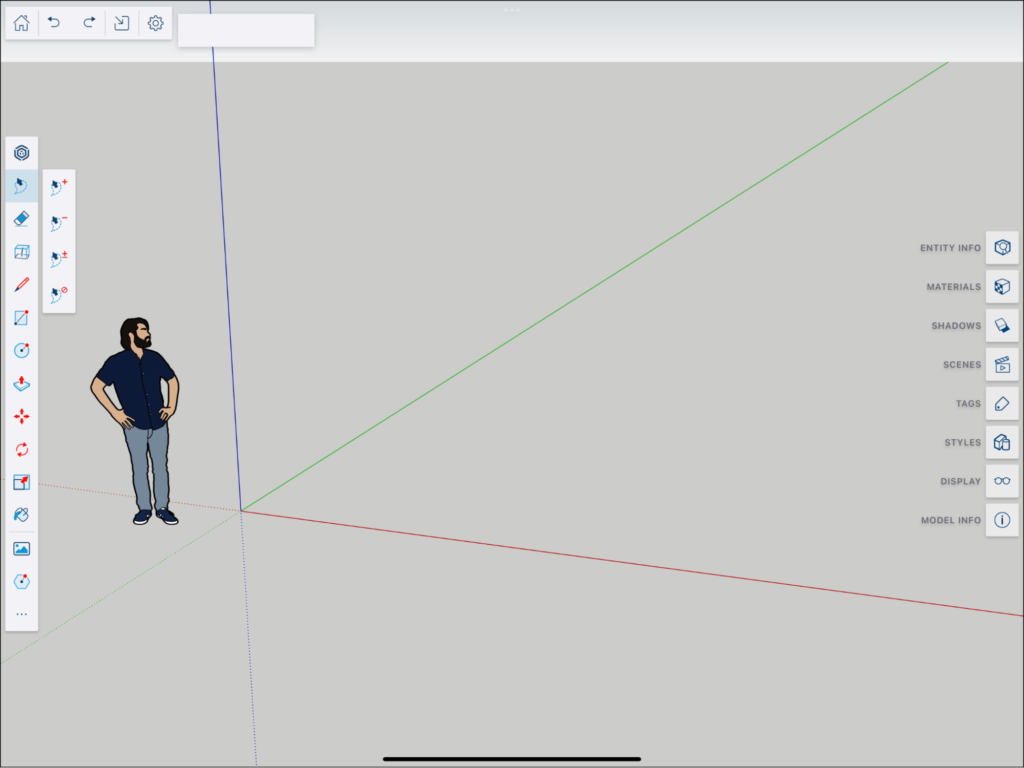
While SketchUp is a complete all-in-one 3D modelling solution, you will need to make a few tweaks here and there to help it run perfectly to suit your needs.
We all work in slightly different ways. And thanks to this software’s adaptable features, it’s possible to configure many aspects to fit with your style. Everything from software settings to performance—you are in control.
And after reading our guide to customising SketchUp, you’ll feel confident to head off and start making the necessary adjustments to increase your own performance and create the very best 3D models possible.
In this section, we’ll cover the following customisable areas:
- Setting software and file preferences
- Customising your keyboard and mouse
- Customising your workspace
- Setting up templates
- Improving performance
- Developing tools with the SketchUp Ruby API and console
Setting Software and File Preferences
In SketchUp, you can set a few preferences for how the software works overall and how files are saved.
SketchUp file preferences and software adjustments help keep everything running exactly how you want them to from the outset. Preparation is key, and that’s certainly true when it comes to getting the most out of your 3D modelling with SketchUp.
Setting software and file preferences can be done via Window > Preferences for Windows users. And SketchUp > Preferences for macOS.
How to set file recovery preferences
The main preferences for file recovery are creating auto backups of your work and auto-saving your designs as you go along.
Lorem ipsum dolor sit amet, consectetur adipiscing elit. Ut elit tellus, luctus nec ullamcorper mattis, pulvinar dapibus leo.
Creating backups
Backups are created by default with SketchUp. And this is great news as it means your work is stored in the event of a system failure or you need to revert to an earlier version. The backup version and the latest file that you’ve saved will have the same file name. Moreover, it will live in the same folder so you don’t have to go off in search of it when you need it.
Your model files are .skp and the backup is a .skb file.
Auto-saving
We’ve all been there. After working on something for what seems like an eternity, something happens and all your hard work disappears forever. Not with SketchUp’s default auto-save feature.
It will save your latest version every 5 minutes. But you can adjust this if you like.
How to automatically check models for problems - and provide notifications
You can check for any problems with a model through the General Preference pane. SketchUp will automatically check for issues when you save your work and fix them accordingly. Click on the notification box to receive an alert when this happens.
How to be warned of style changes when creating scenes
Editing styles and adding scenes results in SketchUp prompting you to decide if you would like to save the changes as a new style, update the style or neither.
You can turn off these prompts if desired.
How Sketchup is configured to check for software updates.
SketchUp will automatically check for software updates unless you tell it not to via the General Preferences.
How to define the default location for files
You can change the default file location for your model files easily on both macOS and Windows. Create your location file first and then you can begin to change your preferences.
Windows users need to head to Window > Preferences and select Files and then Change File Location Preference. Select your new folder and you’re done.
For macOS users, open the current folder by clicking the open folder icon. Next, you can change the preferences for the location for the following files:
- Models
- Components
- Materials
- Styles
- Texture images
- Watermarks
- Export models
- Classifications
- Templates
How to change Sketchup’s language
SketchUp is available in many languages. You can download your copy in English, French, Spanish, Japanese, Italian, Portuguese, Polish, Russian, German, Korean, Brazilian, Chinese and Simplified Chinese. The language will revert to your OS language if it is different.
How to turn off the welcome screen – if desired
It’s advisable to leave the Welcome Window on as it is where your recovered files go if there is an issue. However, you can go to Window > Preferences > General and uncheck the box if you want to turn it off.
Customising Your Keyboard and Mouse
Creating your models means getting your mouse and keyboard working in harmony. You’ll often be moving around the screen and inputting various commands and adjustments along the way.
Customising your keyboard and mouse is the best way to make the whole experience as seamless and smooth as possible.
How to create keyboard shortcuts
Customising SketchUp using shortcuts turns your keyboard into a control station that is configured to suit the way you work. Click on Window > Preferences > Shortcuts to start adding your personalised keystroke combos.
Use the function list to select the commands you want to use and which keys to assign those functions. If your keyboard ever gets too cluttered, you can simply remove the commands individually or use the Reset All option.
Remember that you can’t start a shortcut with a number, use modifier keys or those locked by the operating system.
How to invert the mouse scroll wheel
The mouse scroll wheel lets you zoom in and out of your image instantly. By default, going up zooms in and down zooms out.
But some users may prefer to invert that function.
Go to Window > Preferences > Compatibility and look for the Mouse Wheel Style. Click on Invert and then OK to save the change.
How to change the mouse buttons in SketchUp
Remapping your mouse can be done through your computer’s settings. Left and right click can take on different commands if you need them to. And this is particularly useful for those who use the mouse with their left hand, for example.
The SketchUp design process relies on the keystroke and mouse click combos. And changing how your mouse buttons work can have an effect on the outcome.
Making standard changes to your mouse through the system options on your computer shouldn’t have any detrimental effects. But using a mouse mapping tool to create additional functions could create problems.
How to customise the way the Line tool cursor responds to mouse clicks.
In the Drawing Preferences area, you can decide how the Line tool cursor reacts to your mouse clicks.
The Auto Detect option is set by default and it lets you click-drag-release or click-move-click as you prefer.
The Click-Move-Click option tells the Line tool to start drawing when you click to create the start point, then move the mouse to increase the line and click to end the line.
Click-Drag-Release sets the Line tool to draw only when you click and hold the mouse to find the start point. Then you can drag to draw the line. Finally, release the mouse button to stop drawing.
Continue Line Drawing is set by default whenever you have selected Auto Detect or Click-Move-Click. When Continue Line Drawing is on, the Line tool starts a new line when you finish the previous one without having to click again.
Customising Your Workspace
Your SketchUp workspace is where you’ll be spending your working day while perfecting your models. Much like the rest of your office, you need everything laid out just as you like it to make everything as comfortable as possible.
Customising your workspace is possible in a variety of ways.
How to run Sketchup from multiple displays
Your SketchUp workspace can be shown on multiple displays to let you focus on separate aspects of the design. It’s how many designers choose to work and makes the creative process much smoother.
While it is perfectly possible to achieve this multi-screen setup, you must bear in mind that SketchUp doesn’t officially support this function. Furthermore, Trimble doesn’t provide assistance if you have an issue.
How to set workspace preferences in Sketchup
Your first step is to head to Window > Preferences for Windows users and SketchUp > Preferences on macOS. Then select the preferences you need.
Here are the options you’ll have for customising SketchUp using workspace preferences.
- Set the Default Image editor through the Applications panel to show which image to open when editing a texture
- Display crosshairs via the Drawing panel
- Auto-activate the Paint Tool through the Drawing panel to open the Paint Bucket when you select a swatch
- Use the Pre-pick on the Push/Pull tool in the Drawing panel to click on a face and push/pull when it isn’t in view
- Display a component bounding box and edges in various colours through the Compatibility panel
- Change toolbar button size in the Workspace panel
- Select cascading windows on macOS with the Workspace panel
- See toolbars and panels after closing through the Workspace panel
How to import and export Sketchup preferences
Exporting your preference from one computer to another lets you move between 2 computers and maintain the same settings.
Windows users can export file location and shortcut settings. While macOS can export only the shortcuts settings.
To export file location preference select Windows > Preferences > Files > Export. Find the folder where you’re saving the preferences file. Preferences.dat is the default file. Click Export to save the new file location.
To import your preferences, go to Windows > Preferences > Files > Import. Go to the place where you saved the file and click Import.
How to set up SketchUpo custom toolbars
For Windows users, it is possible to organise the toolbars that show on your SketchUp workspace.
Click View > Toolbars to choose the toolbars you wish to view.
For macOS, there’s a main toolbar and various tool palettes. You can edit the main toolbar to show how the icons should appear and which tools you wish to include. You can also show and hide certain toolbars.
Click View > Tool Palettes to make your adjustments.
SketchUp Pro
For Pro users working in SketchUp, customise the toolbar with extra options including solid tools, advanced camera tools and dynamic components.
How to arrange dialog boxes (macOS and Windows)
You’ll usually have several dialog boxes open at the same time when working on your models. This allows you to easily access them when you need them as they’re relevant to what you’ve been working on.
However, you can move them out of the way quickly.
There are several ways to arrange these modeless dialog boxes. This includes stacking them, shrinking, snap them to the outer edge and shuffling.
Arranging the dialog boxes in a tray is also simple. Try the Expand or Open setting, Collapse or Close, Add/Remove and Shuffle or Move.
To arrange your dialog boxes within the trays, head to Window > New Tray. You can now keep everything in a place that’s easy for you to find later.
How to change the colours of onscreen aids (e.g. selected items, guides etc.)
SketchUp custom colours let you change the colour of selected items. This is particularly useful when working on items that appear very similar to you.
These are the items you can change:
- The Selected item
- Any locked geometry
- Guides
- Section cuts & fills
- Inactive and active section planes
To customise these items, go to the Styles dialog box. Choose Edit and then Modelling Settings. Now you can select the colours you require for the various items mentioned above.
