
New to the world of 3D design? One of the first skills you need to know is how to use V-Ray for SketchUp.
Both software complement each other perfectly. On one hand, SketchUp lets you draw in 3D, create 3D models interactively, and develop complex structures. On the other hand, V-Ray is a powerful 3D rendering engine that breathes life into SketchUp models. This includes infusing them with photorealistic material surfaces, lighting, textures, and other dimensions.
Despite all of its incredible features, learning V-Ray for SketchUp can be a bit confusing at first.
To help you get started, we’ve created an overview of how to use V-Ray for SketchUp. We’ll discuss what it is, how to install it in SketchUp and share examples of the many creative ways you can use it to make your 3D creations look exceptional.
What is V-Ray for SketchUp?
V-Ray is a powerful rendering software developed by Chaos Group, a leading provider of professional 3D graphics technologies.
Originally designed as a rendering plugin for 3D modelling software, V-Ray has since become a full suite of tools for creating stunningly realistic images across a number of industries.
V-Ray offers a range of features that make it an ideal choice for SketchUp users. Some of these features include the ability to create accurate lighting, realistic materials, and realistic reflections. On top of all that, it also offers a range of powerful post-processing tools, such as the ability to adjust shadows, textures, and colours.
In addition, V-Ray for SketchUp allows users to render scenes in multiple passes, adding to the outstanding realism and complexity of their renders.
The software is compatible with SketchUp Pro, SketchUp Studio, and SketchUp Viewer, and it’s incredibly easy to install and use.
Compared to similar 3D rendering software, V-Ray for SketchUp offers the following benefits:
- Intuitive interface: V-Ray’s beginner-friendly facilities, like the “Quick Settings” feature for materials and lighting, make it easy for new users to get up and running quickly.
- Fast rendering times: Unlike other 3D rendering tools, V-Ray for SketchUp offers quick rendering speeds, which means you can spend less time waiting and more time creating.
- Interactive render previews: With V-Ray for SketchUp, you can preview your renders in real time and make adjustments as you go.
- Compatibility with SketchUp: V-Ray is designed to work seamlessly with SketchUp, so you can easily integrate it into your existing 3D workflow.
- Massive community and online resources: Countless professionals and novices use V-Ray for SketchUp, which means there’s no shortage of tutorials, guides, and resources available for users of all levels. For instance, need special V-Ray materials for your 3D model? A quick search will yield downloadable packs with dozens of realistic textures and materials.
These are just a few of the many benefits that V-Ray for SketchUp has to offer. Next, let’s look at how to install and use the software.
How to Install V-Ray for SketchUp
To install V-Ray for SketchUp, both your computer and SketchUp version must meet V-Ray’s system requirements.
As of December 2022, here’s what you’ll need:
- RAM: 8GB RAM minimum, but 16GB RAM is recommended for optimal performance
- Processor: 1st Gen Intel® Core™ or an equivalent processor with SSE4.2 support
- Hard disk space: Minimum 2GB, but 12GB is recommended because V-Ray for SketchUp usually involves downloading additional content
- Operating system: You’ll need one of the following: Windows 8.1, Windows 10, Windows 11
- GPU support: To run V-Ray, you’ll need NVIDIA card(s) that are Pascal-based (or higher) with the latest video driver installed
- TCP/IP: Only IPv4 is supported by V-Ray for SketchUp, and IPv6 is currently not supported
Note: If you’re interested in running the V-Ray Vision version, you’ll need a graphics card with Shader Model 5.0 plus DirectX 11 or DirectX 12.
For the SketchUp version, you’ll need SketchUp 2021, as V-Ray 5 for SketchUp can only be used with the latest SketchUp version. Once your computer meets these requirements, you can start the installation process.
To install V-Ray for SketchUp, simply follow the steps below:
- First, download the V-Ray installer. This is an executable (.exe) installation file.
- Open the .exe file, then agree to the Licence agreement.
- Next, click ‘Install.
- Optional: If you’re a Windows user, you’ll be asked if you’d like to share anonymous usage data. We recommend opting in as it helps V-Ray improve its software and services.
Once the installation process is finished, you’ll need to sign in to your Trimble account to authorise the software.
Now all that’s left is to fire up V-Ray for SketchUp and start creating stunning 3D scenes!
How V-Ray is Used
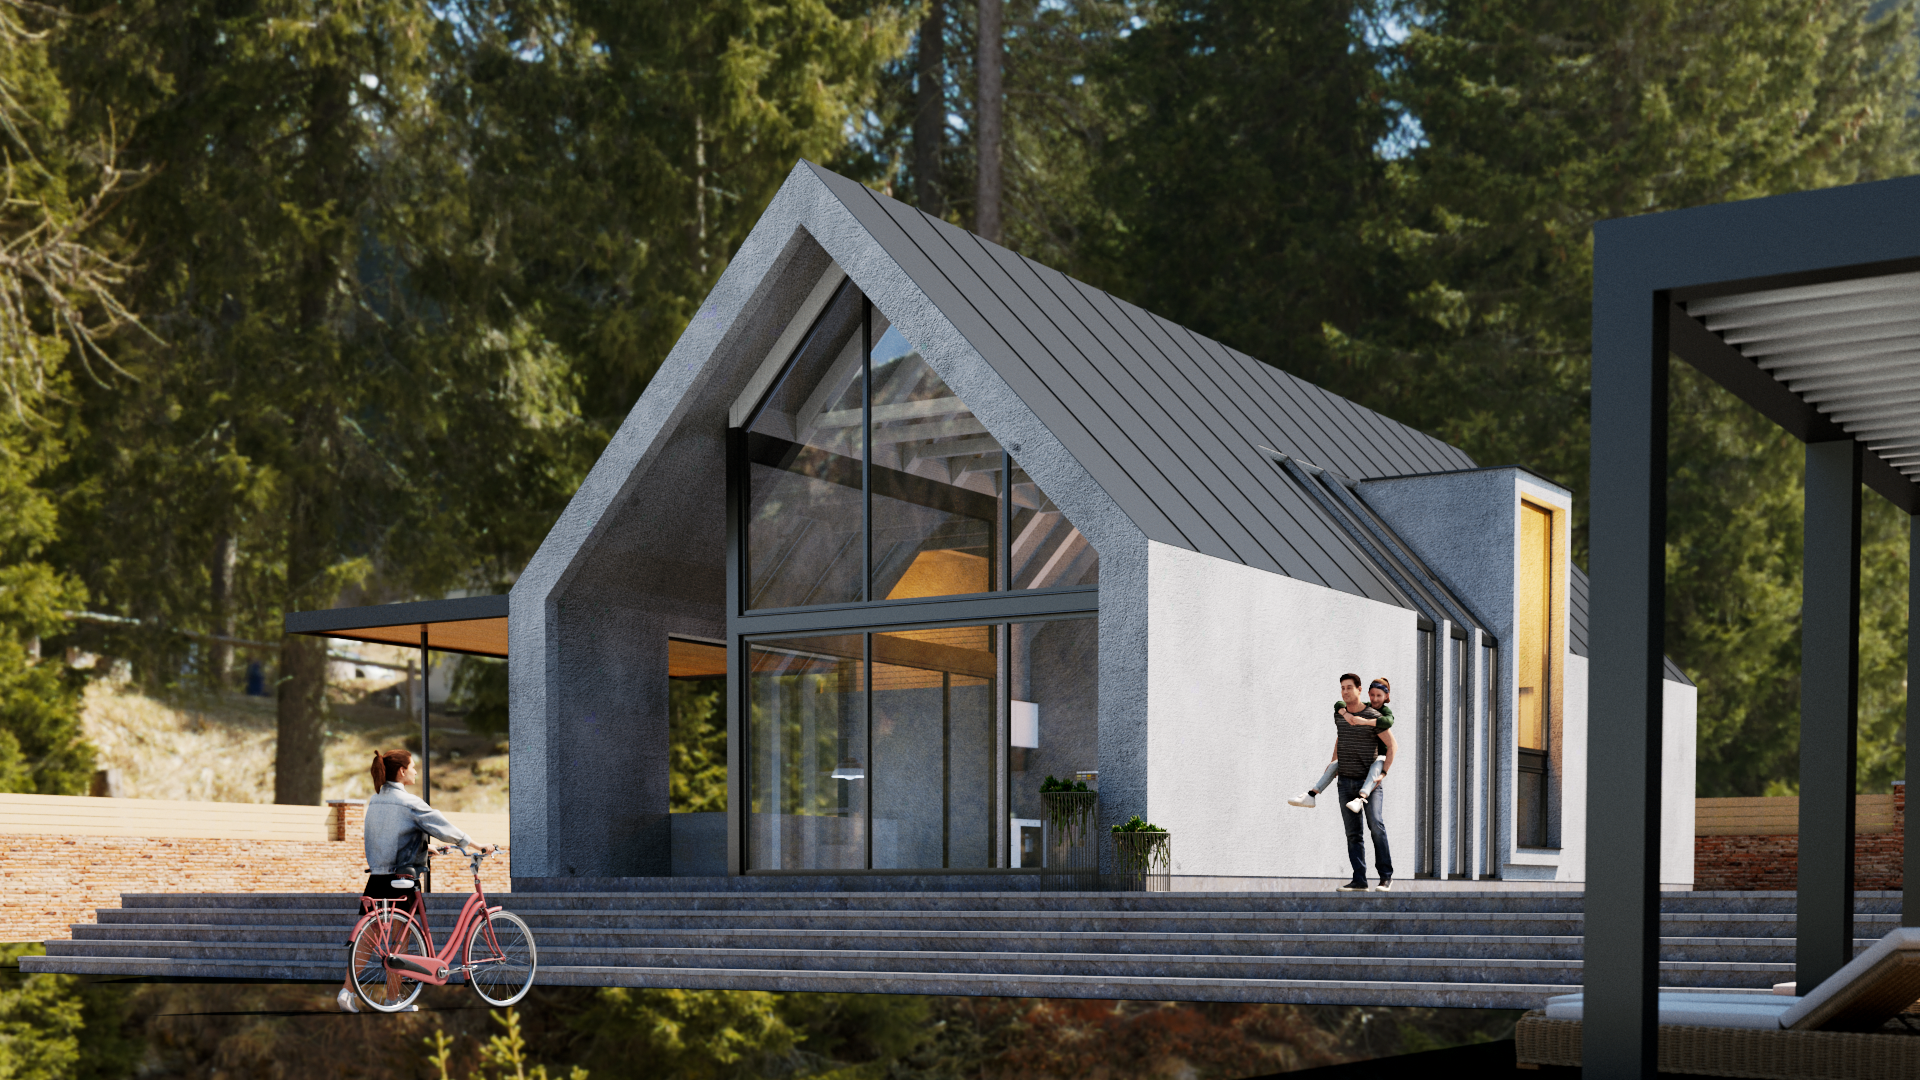
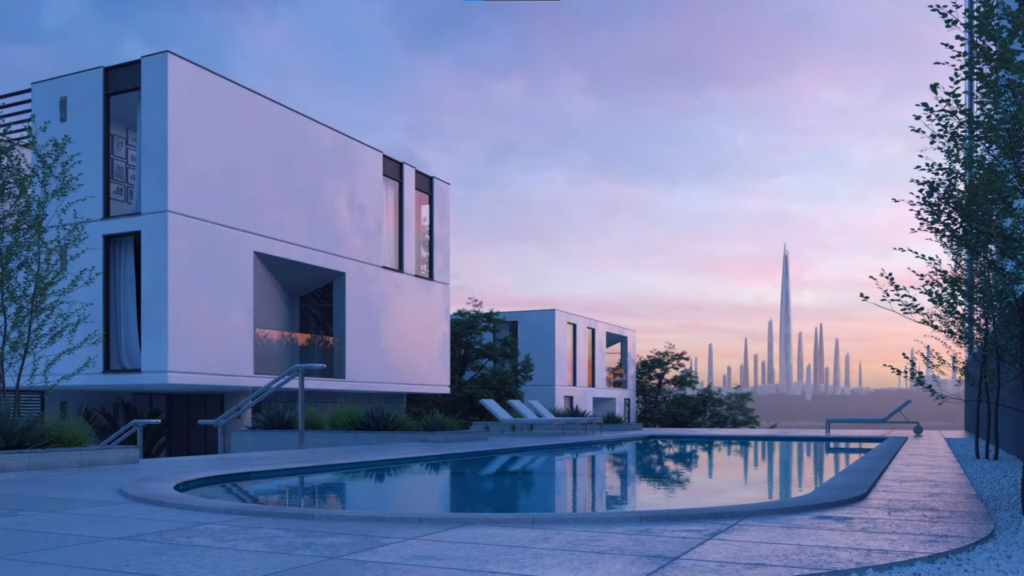
You can use V-Ray to transform any SketchUp 3D model – from simple objects to complex landscapes – into photorealistic versions of the original model.
To do this, V-Rays rendering engine emulates various light sources such as light bulbs, neon lighting and the sun so you can see how your model will look in different lighting conditions. What’s more, you can also adjust the intensity and colour of the different light sources to create stunning visuals.
Aside from emulating light sources, V-Ray’s materials facility takes realism to another level. You can add texture and surface detail to materials like stone, wood, fabric and even grass, making your 3D models look as true to life as possible.
When it comes to what you can use V-Ray for SketchUp for, there’s virtually no limit! Here are some examples:
- Architectural design: V-Ray for SketchUp is one of the most popular 3D rendering tools in the architectural field. It’s used to create everything from floor layouts to 3D walkthroughs, turning ordinary buildings into works of art.
- Product design: From consumer electronics to furniture designs, V-Ray can turn 3D product models into samples that leap off the screen.
- Interior design: The ability to adjust the lighting and materials of your model makes V-Ray a fantastic tool for interior designers. It’s used to create photorealistic images of rooms, giving potential clients an accurate idea of what their space could look like.
- Landscape design: When you’re creating a 3D landscape, there’s no better tool than V-Ray. You can create realistic trees and plants that look almost identical to the real thing and use the light emulating feature to create dreamy landscape scenes.
These are just a few examples of how V-Ray is used. It’s one of the most versatile 3D rendering programs available, so no matter what kind of project you’re working on, mastering the basics of V-Ray will enhance your workflow.
V-Ray Basics
V-Ray for SketchUp is highly intuitive, but having a basic understanding of its key features and functions can speed up the learning process.
First, you’ll find lots of free tutorials no matter what kind of learner you are. For instance, you’ll find many YouTube channels with content like this, all dedicated to V-Ray for SketchUp and its various features, making it easy to get a basic overview of the program.
Chaos, the company behind V-Ray, also offers informative and detailed tutorials that can help you with the specifics of rendering in V-Ray.
Lastly, being successful at V-Ray rendering requires having a good grasp of making 3D models in SketchUp.
Below are some of our top tips for getting your SketchUp models ready for rendering with V-Ray:
- Model orientation: Realistic lighting depends on the accuracy of the model’s orientation. Make sure your models are properly aligned and that you have the correct light source set up in SketchUp.
- Model optimisation: While V-Ray is one of the fastest 3D rendering tools out there, unnecessary details can slow down the process. Every part of your 3D model should serve a purpose – remove any elements that don’t add anything meaningful to the overall function or aesthetic.
- Material naming: Name your materials sensibly in SketchUp, or you may end up confused when trying to assign materials in V-Ray. As an example, be as specific as possible – instead of “blue fabric,” use something like “blue polyester fabric.”
- Level of detail: When making 3D models, don’t forget the small details, such as gaps between bricks or boards. V-Ray is a powerful tool that can render even the tiniest details, so while you should omit unnecessary details, feel free to include all the important ones, no matter how small they are.
Lastly, this is our best tip of all: have fun with exploring V-Ray for SketchUp!
You don’t need to be an expert 3D designer to enjoy the capabilities of V-Ray, and it’s perfectly okay to start with some basic shapes and models while you familiarise yourself with V-Ray for SketchUp.
Get started with V-Ray
V-Ray for SketchUp lets you unleash your imagination and explore levels of realistic rendering not possible before.
Take your time and don’t be afraid to experiment with the tools and features available on both platforms.
Download and install V-Ray today and discover all the possibilities for yourself!
You can also get a FREE 7-day trial of SketchUp Pro here – we’d love to give you more helpful advice and tips for using V-Ray for SketchUp, so contact us now!


