SketchUp allows you to explore your 3D models in granular detail, but to do so, you must learn how to Orbit in SketchUp.
This important skill gives you multiple design angles and adds depth to your models.
In this article, we’ll look at how to Orbit in SketchUp effectively and bring your projects to life.
Understanding the Orbit Tool in SketchUp
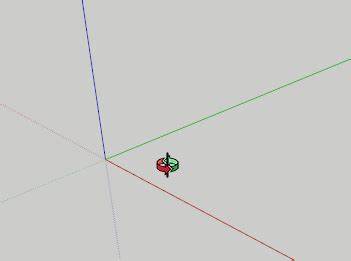
The Orbit tool in SketchUp enables you to rotate, tilt, and pan the camera view within the SketchUp workspace.
This flexibility delivers a much more interactive and immersive experience, which helps your viewers understand the overall composition of your design and the spatial element arrangements.
You can use a mouse, on-screen controls, or keyboard shortcuts to activate and control the Orbit tool. Have a play around with the different methods to see which feels the most natural to you.
Mouse
The most intuitive way to activate the Orbit tool is by clicking and dragging your mouse. Click and hold the middle mouse button (the scroll wheel) while moving your mouse. The camera view will rotate as you drag.
Keyboard shortcuts
Use the “Orbit” shortcut key ‘O’ to instantly activate the Orbit tool.
You can also temporarily switch to the Orbit tool by holding down the Ctrl (Cmd) key on your keyboard; releasing the key when you want to return to your previous tool.
On-screen controls
The “Orbit” icon is located on the toolbar at the top of the SketchUp interface.
Navigating and Manipulating 3D Views with Orbit
To navigate around 3D views using the Orbit tool in SketchUp, you need to orbit around the specific points of interest in your models.
Once you’ve activated the Orbit tool via your chosen method, click on the object or point you want to orbit around – this is your pivot point. Try out different angles as you orbit by circling around your pivot point to view it from all sides. Use the scroll wheel to zoom in and out of the point for a closer look or a wider view. This method gives you a seamless way to move about in the 3D environment.
Choosing to switch your pivot point while orbiting is simple – just click on a new point of interest to look at the different elements in your design. If you need to look at an object in more detail, simply adjust the orbit speed by dragging your mouse more slowly. A slow movement provides a gradual rotation – and a quicker one equals a quicker orbit.
To gain greater accuracy, use the Shift key while using the mouse scroll wheel on your keyboard for vertical orbiting. Hold the Alt key down with the middle mouse button to both orbit and pan at the same time. This trick lets you adjust your view whilst keeping your pivot point intact.
Here are some more ways to explore the various orbiting techniques:
Orbiting along specific axes
Experiment with orbiting around individual axes to gain a targeted view of your model.
Arcing orbits
- Arcing up and down: Gain an arching effect by combining both vertical and horizontal orbits to demonstrate curved structures.
Custom camera views
- Orbit to your desired angle
- Select “Camera” > “Standard Views” > “Add Scene.”
Revisit this saved scene whenever you like.
Advanced Orbit Techniques for Enhanced Workflow
Time for some more advanced Orbit techniques. These will help you improve your design workflows for more flexibility.
Using Orbit for walkthroughs
Produce a virtual tour of your designs – especially useful if you need to present concepts like interior spaces. Add animations by combining orbiting with scene transitions to showcase the various design viewpoints. Your designs will instantly become interactive and more compelling for your audience. Experiment with arcing orbits to uncover design elements during interesting presentations.
Complex designs
To zoom in on complex design elements, use slow and steady orbits to focus closely on small details. Use the Orbit tool with the “Focus on Selection” feature by selecting an object, right-clicking, and selecting “Focus on Selection.” Your view will centre on the chosen element for further exploration.
Creating custom camera views
Switch between viewpoints to look at different perspectives by creating custom camera views. This is ideal for presenting different design options or showcasing specific design details to clients or collaborators.
To do this:
- Use Orbit, Pan, and Zoom tools to navigate to your desired viewpoint.
- Frame your scene.
- Choose “Camera”> “Standard Views” > “Add Scene” from the top toolbar.
- Add a descriptive name for your custom view in the “Add Scene” box > “Ok”.
Access your custom views via the “Scenes” panel. Select the name of your custom view to switch to a different specific camera perspective.
The Orbit tool has a variety of use cases. From residence redesigns and machinery prototypes to landscape architecture, the tool can capture the atmosphere of each situation.
Looking at the machinery prototype example, by using the Focus on Selection feature together with precise orbits, engineers can isolate certain elements for detailed examination. Closely inspecting intricate parts enables them to check for correct alignment – resulting in optimisation of machine designs and improved component integrations.
Deploying custom camera views help architects to explain contextual scenarios such as landscape architecture. Immersive 3D presentations with different angles paint the scene much better than a static model and allow audiences to understand how the intended architecture will fit into the existing environment.
Take the time to experiment with these advanced techniques, and when you’re confident, look to gradually incorporate them into your workflow. Mastering orbiting techniques is beneficial in many ways – increased productivity, improved design iterations, and enhanced client communications.
Optimising Performance for Smooth Orbiting
To ensure you’re optimising your orbiting performance, check out the following best practices:
Adjusting model complexity
You can experience lag if you’re handling large models, as these cause computer resource strain. To eliminate this, reduce unnecessary detail for walkthroughs and presentations if you can.
Simplifying geometry
Complex geometry such as excessive horizontals can cause lag, glitching, and presentation delays. Avoid this by converting curved surfaces into basic polygons to reduce the number of segments.
Hiding unnecessary components
If some components are not required for your task, you can temporarily hide them. This enhances the performance by reducing the load on your computer.
Remember – efficient modelling always helps you to provide a smoother experience. Minimise the use of components where you can and regularly “Purge Unused” elements to reduce file sizes.
Hardware specifications and system requirements also play an essential role in achieving optimal orbiting performance. Upgrading computer hardware, such as increasing RAM capacity, utilising graphics cards with better performance, or using solid-state drives (SSDs) enables faster data access.
You can also optimise SketchUp settings to improve orbiting performance. Reviewing settings such as anti-aliasing settings and graphics card drivers, as well as enabling hardware acceleration helps with smoother navigation and reduces lag.
Be sure to regularly review and optimise your SketchUp settings and hardware configuration to ensure peak performance. A well-optimised system delivers a more enjoyable and productive SketchUp design experience.
SketchUp is best explored with Elmtec. As your trusted digital distribution partner, we have more than a quarter of a century’s experience serving the digital design community, and we’re known and loved for being one of the leading distributors of professional hardware and software.
Compare the free vs pro versions of SketchUp here.


