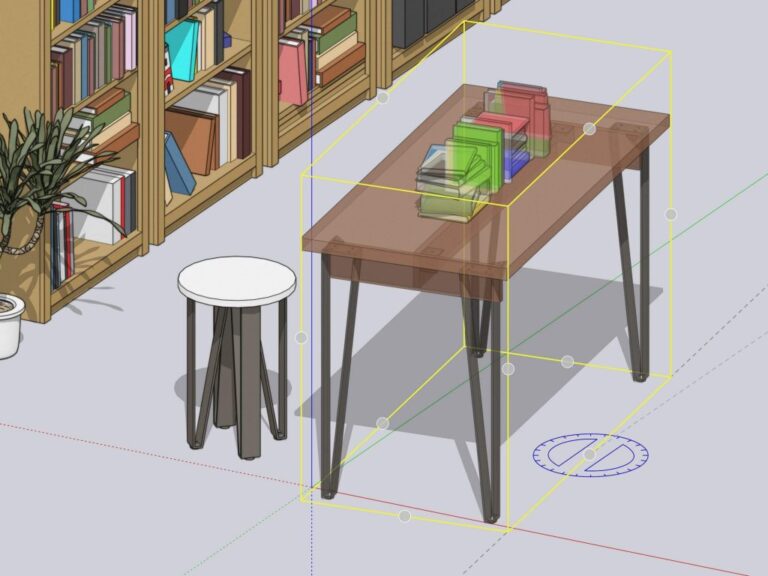
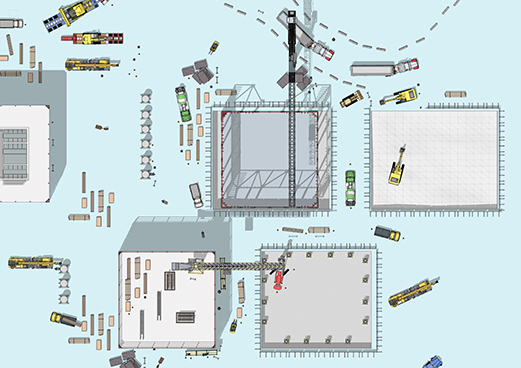
Guide to Realistic Interior Rendering in SketchUp

Interior rendering has witnessed a dramatic evolution transcending the digital age, which has, in turn, revolutionised the design industry. 

The exponential improvements in computer graphics and powerful rendering software suites have allowed designers to generate realistic, immersive visualisations. Software suites such as SketchUp have enabled better visual communication and aided workflow and efficiency.

As SketchUp progresses, client expectations rise in unison. Clients have ever-increasing expectations regarding what realistic visualisations should deliver. 

Perfecting interior design rendering in SketchUp provides designers and architects a competitive advantage by delivering realistic representations of interior designs, enhancing concept presentation, and meeting the demands for immersive experiences in the design industry.

The blog aims to empower designers with practical insights and techniques, enabling them to create stunning, lifelike interior designs.
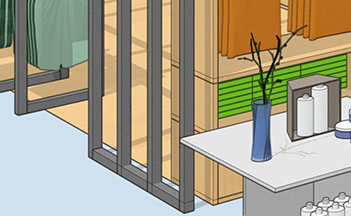
Understanding the Basics of SketchUp Interior Design Rendering

Realistic interior renders created in SketchUp play a pivotal role in conveying design concepts that facilitate decision-making and increase the number of projects approved.

SketchUp’s advanced rendering features comprise:

  • Global illumination.

Global illumination can be used to create realistic lighting, whether the source is natural or artificial. Light diffuses throughout spaces, as it would in reality.

  • Reflections.

Reflections take into consideration the texture of materials and lighting.

  • The 3D Warehouse.

The 3D Warehouse is a SketchUp plugin. It comprises an extensive catalogue of peer-created models that can be downloaded and positioned within your interior renders. You will be able to find almost anything you are looking for. Alternatively, you can use the 3D warehouse as a source of inspiration.

  • Dynamic Shadows.

Dynamic shadows add extra layers of depth, increasing realism.

If you can’t find what you are looking for in the 3D warehouse you can, of course, create custom furniture, incorporating joinery, and cabinetry for bespoke pieces.

These features, amongst others, culminate in lifelike renders.

Plugins like V-Ray offer further advanced rendering capabilities, whereas Enscape enables live visualisation.

Setting the Stage: Preparing Your SketchUp Model

SketchUp’s advanced rendering power incorporates;

  • Proxy Objects:

Designers can take advantage of proxy objects or simplified versions of more complicated components to improve computation in larger, intricate models.

  • Section Planes:

Section planes allow designers to reveal or hide parts of the model as and when required. This helps with navigation and presentation.

Improve your material selection and employment with techniques such as texture wrapping, UV mapping, and by utilising high-dynamic-range images (HDRI) for realistic reflections. Designers can separate themselves from the pack by learning to create bespoke textures, unique fittings and furniture, ensuring designs are not only aesthetic but authentic.

Mastering Lighting Techniques for Realism

Natural lighting boosts well-being and offers a host of psychological benefits, through the provision of vitamin D. Artificial lighting can have the opposite effect. In disrupting circadian rhythms and reducing the production of melatonin, it has a depressive effect and reduces energy levels. Knowing this, designers can design optimal environments. Advanced devices in SketchUp, such as softbox lighting, allow for even, diffused illumination. Whereas area lights and spotlights illuminate specific areas. Well-considered lighting choices add drama and atmosphere to an interior, improving occupant feeling and therefore experience.

More advanced SketchUp lighting effects breathe life into interior designs;

  • Caustics lighting.

Caustic lighting manages light patterns, refractions and reflections. Reflective surfaces react to light from the other surfaces in the space, increasing realism.

  • Volumetric lighting.

Volumetric lighting enhances atmosphere and realism by replicating how light interacts with particles such as dust and pollen, creating mesmerising spaces.

Enhancing Realism Through Textures and Detailing

SketchUp plays host to a vast array of high-quality textures that can be accessed through platforms such as;

  • SketchUp Texture Club.

SketchUp Texture Club is effectively a 3D art gallery, through which the designer community can contribute and share textures.

  • Texture Haven.

Texture Haven offers 100% free textures for all.

  • The 3D Warehouse.

The 3D warehouse in particular is vast. It is a comprehensive catalogue of textures, fixtures, fittings and materials.

Designers and Architects can utilise advanced detailing techniques, such as displacement mapping for intricate surface details, and plugins like Skatter for life-like vegetation placement. Designers should be careful to maintain scale accuracy when placing any component into 3D models to ensure a realistic design.

Post-Processing and Final Touches

There are a multitude of advanced post-processing options available in SketchUp rendering to learn and perfect your renders. Colour grading enhances the atmosphere. Designers can change contrast, saturation, and colour balance for a realistic effect.

Depth enhancement can enhance your renders, balancing foreground and background components to create an atmosphere. You can experiment with lens effects, like bloom or vignetting, to place focus on a particular aspect of a model.

There are also a lot of post-rendering options available in Adobe Photoshop. Export your SketchUp images, and fine-tune through blending, refining lighting and contrast.

You can control SketchUp as if you were setting parameters in a camera before taking a photo. Designers take advantage of depth-of-field options to place focus (quite literally) and create an atmosphere. Through aperture settings, the background or foreground can be blurred to a level that you desire.

Troubleshooting and Common Challenges

Users will encounter challenges when getting to grips with SketchUp. However, they are ordinarily remedied with a little research or referring to Elmtect’s tutorial pages.

One common problem is that of noisy images, or shapes having uneven edges, contrary to the effect desired. This can be remedied by increasing samples or applying post-process filters. There are also denoising plugins, such as Twilight Render, that can be downloaded if the issue is a persistent one. Smoother edges can be achieved by adjusting anti-aliasing.

It’s important to strike a balance between the quality of interior renders and the speed of rendering to optimise workflows. Designers should take time to experiment with anti-aliasing, resolution, material choices and lighting to find a balance that suits them. Trial and error is key.

Conclusion: Elevating Interior Design with Realistic SketchUp Interior Design Rendering

Elmtec trusts that the explanations and tips provided in this blog have been useful in explaining to you how to make realistic interior render SketchUp.

Be conscious of the Plugins available to enhance your renders once you are proficient in the built-in features.

Feel free to refer to other blogs and case studies for inspiration or give us a call, on 01844 263 750, to discuss your ideas with our helpful consultants.

If you are completely new to SketchUp, Elmtec is now offering a free trial.

How To Make an Axonometric Drawing in SketchUp

Axonometric drawing, an important aspect of architecture and design, has a long and rich history. Since its arrival in the early 20th century, it has provided perspectives allowing the precise representation of spatial relationships. The incremental improvement of axonometric drawing has occurred in tandem with advancements in architectural visualisation, transforming the industry’s visual language.

Axonometric drawings interpret 3D objects in a manner that can be represented on a 2D plain. It’s crucial in industries that need to communicate concepts and plans visually. Their capacity to retain spatial precision facilitates effective communication of concepts in a variety of industries including architecture and design, improving visual representation and therefore the understanding of complex structures.

Mastering axonometric drawing in software suites such as SketchUp is useful for professionals and novices alike. Adeptness in these skills facilitates effective communication, and design conceptualisation, and negates confusion between stakeholders.

Understanding Axonometric Drawing SketchUp (Axonometric vs Isometric)

It is impossible to accurately represent a 3D object on a 2D plain, without distortion between any 3 points of reference. Axonometric drawings conserve parallel lines and uniform scale in all directions, while isometric drawings retain precise angles, however it’s required to vary the scale. Axonometric drawings work perfectly for architectural designs and technical drawings, whereas isometric projections are better suited for applications such as gaming, and presenting visually dynamic perspectives.

Two iterations of axonometry include dimetric and trimetric projections. They both offer different perspectives by changing the scale along the different axes. Dimetric balances two scales, whereas trimetric incorporates three. Designers opt for one or the other depending on the specific application, such as displaying asymmetrical objects or highlighting specific dimensions, improving their flexibility in illustrating various spatial complexities within a variety of designs.

Getting Started with Axonometric Drawing in SketchUp

The few simple steps, outlined below demonstrate how to set axonometric view in SketchUp;

  1. Select the “Camera” menu.
  2. Select “Parallel Projection.”
  3. Adjust the camera angle with the Orbit tool for isometric or manually adjust for dimetric/trimetric.
  4. Fine-tune the view with either the Zoom or Pan tools.

Leveraging SketchUp tools to create axonometric drawings demands the mastering of the Line and Rectangle tools for foundational shapes, thereafter designers should utilise the Push/Pull tool to create depth. The Offset tool helps represent complex shapes, while the Tape Measure guarantees accurate measurements. For precise intersections, designers can select the guidelines and inferencing system. 

Any change that needs to be made, or a mistake erased, can be remedied with the employment of the Eraser tool to refine details.

Advanced Techniques and Plugins

Eneroth Axonometric Projection is a SketchUp plugin designed for axonometric drawings. It is supported by SketchUp 14, SketchUp 15, as well as later versions. This Plugin can be used to deform a component, in addition to its obvious purpose in producing axonometric views.

For help with precision, designers can use grid snapping for exact placement. You can align components carefully, as well as lock inferences. This application is imperative in architectural designs and engineering diagrams for precise specifications.

Creating Realistic Axonometric Drawing SketchUp

Designers and architects can further improve upon their SketchUp designs by implementing advanced texture mapping. Advanced texture mapping can include UV mapping and seamless application. An extra element of professionalism can be demonstrated through comprehension of texture scale and consistent lighting for life-like axonometric drawings. Visual representation is improved through the quality of textures and life-like materials. Attention to detail is key.

The mastery of advanced lighting includes ambient occlusion and realistic shadows. The added layer of complexity attributed to realistic lighting conditions adds to the interest and understanding of your axonometric drawings. Well thought, intricate lighting conditions offer a comprehension of how light interacts and diffuses throughout spaces.

Tips for Troubleshooting and Common Mistakes

Although there might be pitfalls and niggles associated with axonometric drawings, they are typically easily remedied after conducting a little research.

Common problems might include;

  • Inaccurate or distorted proportions.

The solution to such is more of a workflow adaptation than a technical one. Make sure to scrutinise scaling adjustments, paying attention to be as accurate as possible. Once an inaccuracy is identified, incremental scaling adjustments can be made, or original measurements can be referred to.

  • Misaligned axes.

Misaligned axes should be precisely aligned, relative to the isometric grid.

  • Inconsistent perspectives. 

Inconsistent perspectives can be dealt with by maintaining a uniform viewpoint.

More examples of common problems encountered while using SketchUp can be found in Elmtec blogs, case studies and tutorials. Here you can find comprehensive troubleshooting guides for you to fix your errors and fine-tune your skills.

Regarding axonometric drawings specifically; in understanding the importance of accuracy, axes and perspective you will establish a solid foundation for aesthetic and impactful designs.

There is an abundance of plugins available to address other common problems associated with axonometric drawings;

  • Utilise the “Solid Inspector” plugin to find and fix issues within intricate 3D models, ensuring precise geometry.
  • Download the “CleanUp3” plugin to eradicate redundant entities, enhancing model efficiency.
  • Manage complicated structural headaches with the “JointPushPull” plugin, permitting precise manipulation of connected surfaces.

Practising these tools allows designers to handle complexities with ease, promoting a higher level of precision in axonometric drawings.

Conclusion: Mastering Axonometric Drawing in SketchUp

Elmtec hopes that this blog has been informative and has satisfied at least a few of your curiosities.

Mastering axonometric drawings is a required skill in the field of architecture and related industries. It facilitates effective communication of concepts.

We hope that through the techniques explained, along with the troubleshooting tips shared you feel comfortable in adding an extra layer of precision to your designs.

Take a moment to browse other Elmtec blog posts and case studies, to see how architects and designers are leveraging SketchUp to their advantage.

If you are completely new to SketchUp, Elmtec is now offering a free trial.

If you have any thoughts or queries that you want to discuss, please feel free to reach out to one of Elmtec’s helpful advisors on 01844 263 750.

About Elmtec

Elmtec have been the UK distribution partner for SketchUp since 2010, and service a network of UK and Irish resellers. We have over 22 years’ experience within the digital design community.

Contact Us

T: 01844 263 750
E: sales@elmtec.co.uk
W: www.elmtec.co.uk/sketchup