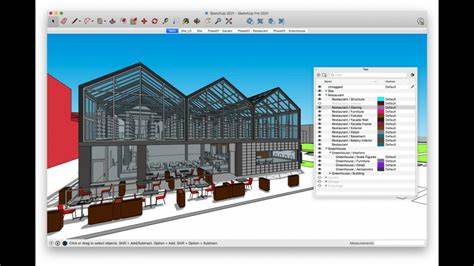
Realism is everything in 3D design. It brings your creations to vibrant life, leaves stakeholders feeling they understand your ideas clearly and makes presenting everything a dream. And that includes glass, a material that plays a starring role in so many buildings and other designs. So how, exactly, do you represent glass in SketchUp? You need V-Ray, one of the most popular SketchUp extensions and your route to visual brilliance. Read on to find out exactly how to create glass material in V-Ray, from start to finish, along with some handy FAQs.

Setting up Your Scene
Now here’s a thing – virtual glass created in V-Ray behaves exactly like real-life glass. This means there are some crucial aspects of your work to get right before you go ahead and add glass. It’s all about setting up the scene properly in the first place. Here’s the first stage in how to make glass in V-Ray.
- First, your lighting. As you know, glass reflects. In fact, it’s extremely reflective and refractive, reflecting and refracting the light in your scene. To show off these realistic properties, you’ll need to ensure the lighting in your scene is set up right.
- Second, your camera. Think hard about the camera’s angle and position, since the camera’s position profoundly affects glass refraction and reflection. Experiment first, and once it’s right you know for sure you’ll get the effects you want.
· Third, object placement. Where will your glass object look best in the scene? You’ll find putting it on a windowsill gives you a completely different effect than you get by standing it on a table in the room’s centre – just as it does in real life.
Adjusting Material Properties
Now your scene is perfectly set to showcase glass at its best advantage. Now you can play with the material’s properties, which involves four key things: The index of refraction, reflections, refraction itself, and absorption, all of which contribute to creating realistic glass in V-Ray.
- First, your Index of Refraction or IOR. This drives how much the glass object will bend light as the light shines through it. As you can imagine, different types of glass come with their own IOR values. They’ll be different for frosted glass, clear glass, thick glass, thin glass, coloured and plain glass, and so on. So pin down the type of glass you’re trying to make first, then move on to the next step.
- Reflection matters too. Because glass is so reflective, you’ll need to figure out the best reflection properties for the look you want. You can play with the reflection colour and glossiness to make the kind of effect you’re thinking about.
- Refraction is what makes glass transparent. You change the refraction colour and glossiness to make a glassy fine surface that light passes through.
- Finally, absorption. You can play with the glass’s colour and density until you get the perfect absorption level. For this stage, bear in mind the material’s thickness and density both affect the colour.
Tips and Tricks
It may take you a few goes and some experimentation to get there, but once you do you’ll be delighted. These tips will help you get where you want to be faster.
- A high-resolution texture map helps you create a more realistic glassy surface
- The Fresnel effect is adjustable too, again giving you a more realistic look because it drives the way the glass reflects and refracts light at different angles
- A slight bump map gives you a subtler subtle texture to add even more realism to your glass materials and objects
Introducing Elmtec
So now you know how to make glass in V-Ray with SketchUp. Get it right and the results are mind-blowingly good, contributing to dazzling presentations, faster customer approval of your ideas, and designs that are more than practical, they’re also beautiful and realistic. Like all things SketchUp, the V-Ray extension is fun to use and a delight to play with. Once you’ve got glass creation under your belt, your designs become even more exciting, inspiring, and professional.
Are you ready to give it a go? Elmtec is your trusted digital distribution partner. We have more than a quarter of a century’s experience serving the digital design community, and we’re known and loved for being one of the leading distributors of professional hardware and software. Your purchase is backed by highly qualified specialists whose product knowledge, industry experience and support are second to none. Take a look at the free vs pro versions of SketchUp here.


