You’re wondering how to add light in Sketchup. It’s a great way to add life, excitement and realism to your views. This guide tells you everything you need to know about lighting in Sketchup, your definitive reference point for everything to do with Sketchup lighting.
Lighting in Sketchup
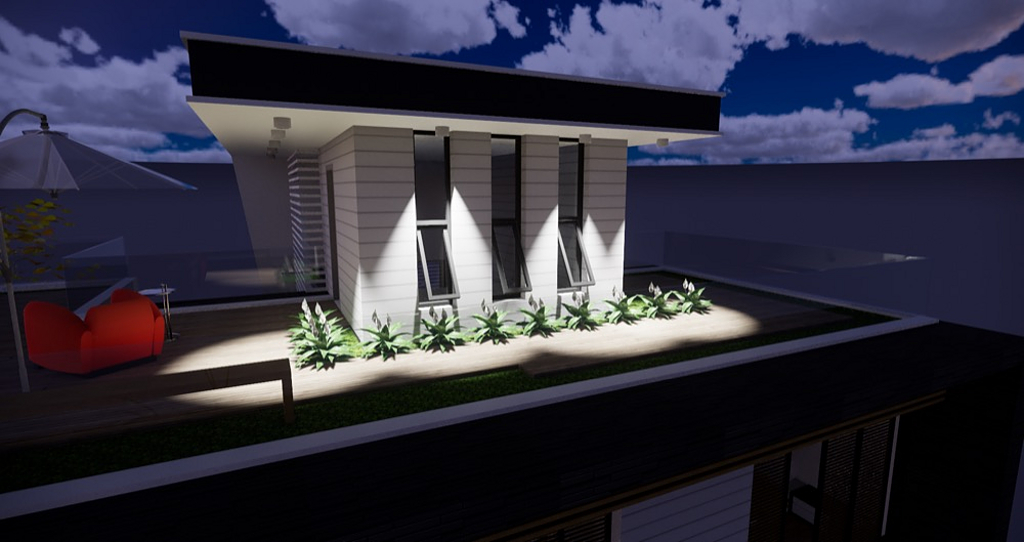
You can easily add lighting to your Sketchup models to create realistic interior and exterior views, and there’s so much variety. Interior light in Sketchup represents all sorts of interior lighting so accurately it’s completely natural-looking. You can light a drawing using different colours, and rendering lets you achieve the most amazing realistic shadows. The same goes for exterior Sketchup lighting, simulating a huge variety of light including sunlight. The shadows are realistic, the reflections look real, and the whole thing comes to sparkling life to the delight of your clients. So how does Sketchup achieve all this magic? There’s a variety of Sketchup Extensions that enable the modeling of light sources.
Sketchup Rendering Plugins
Superb lighting in Sketchup is yours thanks to many excellent rendering extensions and plugins for Sketchup. IRender nXt is an all-singing, all-dancing renderer that’s brilliant for creating all sorts of wonderfully photorealistic renderings. ArielVision does it without the hassle of complicated settings, great for fast work. Raylectron is quick, powerful and affordable. There’s ShaderLight and Thea, RENDERLights and Brighter3D, and that’s just for a start. When you render both the interior and exterior views of a model using light sources to create photorealistic images you easily achieve everything from stunningly real natural sunlight to spotlights, central lights, directional lights, and more. The potential is infinite.
Lighting an Exterior Day Scene with V-Ray
V-Ray is a very popular extension for lighting in sketchup. It’s perfect for creating a photo-realistic exterior daytime view of a model. Once you’ve installed it, simply use the V-Ray asset editor to adjust your render settings. The materials are initially overridden so the exterior lighting contribution is the focus. Open the ‘lights’ tab and you see that sunlight is added by default. When you click on the ‘sunlight’ source you get a menu where you choose various sun related parameters to set, things like colour, intensity, size, and more. These settings influence the blurriness of shadows as well as the sun’s appearance in your rendered reflections. When you disable the sunlight, it turns off.
You can pick an alternative light source, for example a dome light, to create the effect you want, and this also comes with a suite of parameters of its own. You might, for example, want to increase the light’s intensity to brighten up your rendered image. Then there’s HDRI or High Dynamic Range Imaging, used to create even more detail in both shadows and highlights. As you can imagine, experimenting with the various parameters along with dome light rotation produces remarkably realistic renderings, and that means your clients find the output you deliver truly inspiring.
Interior lighting in SketchUp – best practices
So what are the key best practices involved in modeling interior light in sketchup with the Enscape Sketchup extension? First, bear in mind how real-time rendering in Enscape won’t process unlimited light sources. The number and intensity of your chosen light sources will affect performance, especially if your lights overlap.
You can add all sorts of light types: spotlights and sphere lights, rectangular lights, disk lights and linear lights. And once you’ve added the Sketchup lighting attributes, you can play with and adjust them. It’s important not to put any of the light sources directly onto the surface of the geometry, but just before it. Setting it directly on the surface means your light could be obscured by the geometry.
With spotlights, changing the cone angle controls how much of the scene is illuminated. The cone’s width dictates the hardness or softness of the light. The sphere light sends light in all directions equally, giving you lighting that feels very like an ordinary incandescent bulb. Rectangular and disk lights are both area lights, emitting light across their surfaces uniformly to create soft, subtle lighting. Linear lights are like fluorescent tube lighting, scalable by length only and letting you choose the luminous intensity.
It’s also possible to copy and paste sources of light in sketchup. While the lights are always on in Enscape, it can look as though some of them have turned off during the day. But that’s not the case – the intensity of the sunlight has simply dimmed the other emitting lights. As you can see there are limitless ways to define and combine light sources with Enscape and the best thing of all is the fact that it’s so simple, which also means it’s fun. There’s no complexity involved.
Place lights just in front of your geometry using the super-simple 2-Click system. Duplicate identical lights by simply copying and pasting. Edit a light by double clicking it. If you don’t like what you’ve done, use the ESC key to reject it. You can use native SketchUp tools to rotate or move your lights, and the paint bucket tool is where you add colour. Simple!

Get Started with SketchUp
Lighting in Sketchup is a brilliant way to quickly, easily bring renders to life, adding realism and personality. Sketchup lighting is easy to experiment with, which makes it a real pleasure. Why not visit our downloads resource and grab yourself a free 7 day trial of SketchUp Pro? We also have a vast library of cool resources including tutorials and more.


